How to Install Window Tint at Home
To install window tint at home, thoroughly clean the glass surface, measure and cut the tint film to fit the window, spray the glass with a soapy water solution, apply the tint film to the wet glass, and use a squeegee to remove any air bubbles or excess water. Window tint can be a great way to enhance privacy, reduce heat and glare, and improve the energy efficiency of your windows.
By following these simple steps, you can successfully install window tint at home and enjoy the benefits it offers. However, it is important to note that laws regarding window tint vary from state to state, so be sure to check local regulations before proceeding.
Introduction To Window Tint Installation
Installing window tint at home is an effective way to enhance the comfort, energy efficiency, and aesthetics of your living space. Whether you want to reduce glare, protect your furniture from fading, increase privacy, or simply add a sleek and modern look to your windows, window tinting can be the perfect solution. In this blog post, we will walk you through the process of installing window tint at home, discussing the benefits it offers and how it can improve your overall living experience.Benefits of Window Tinting
Window tinting offers a wide range of benefits that go beyond just improving the look of your windows. Let’s explore some of the key advantages that come with window tint installation:- Cost savings and energy efficiency: Window tint acts as a barrier against the sun’s harmful UV rays and excessive heat. By blocking out a significant amount of heat, window tinting helps to keep your home cooler during hot summer months. This reduces the strain on your air conditioning system and ultimately results in lower energy consumption and cost savings. Additionally, window tinting prevents heat loss during colder seasons, helping to maintain a comfortable indoor temperature without relying heavily on heating devices.
- Privacy and security enhancement: With window tinting, you can enjoy enhanced privacy within your living space. With the right type and shade of tint, you can prevent prying eyes from peering into your home, while still maintaining a clear view of the outside world. Window tint also adds an extra layer of protection by making it more difficult for burglars to see valuables inside your home, therefore reducing the likelihood of break-ins.
Cost savings and energy efficiency
Installing window tint at home can lead to significant cost savings and enhance your energy efficiency. By blocking out a significant amount of heat, window tinting helps to keep your home cooler during hot summer months. This reduces the strain on your air conditioning system and ultimately results in lower energy consumption and cost savings. Additionally, window tinting prevents heat loss during colder seasons, helping to maintain a comfortable indoor temperature without relying heavily on heating devices.Privacy and security enhancement
One of the key benefits of window tinting is the enhanced privacy it provides. With the right type and shade of tint, you can prevent prying eyes from peering into your home, while still maintaining a clear view of the outside world. Window tint also adds an extra layer of protection by making it more difficult for burglars to see valuables inside your home, therefore reducing the likelihood of break-ins. Overall, window tinting not only improves privacy but also enhances the security of your living space.Gathering The Necessary Tools And Materials
Before you begin installing window tint at home, it’s important to gather all the necessary tools and materials. Having everything you need at hand will streamline the process and ensure a successful installation. Here is a list of the items you will need:
Window Tint Film
The most essential item for this project is the window tint film. Choose a high-quality film that suits your needs, such as one that provides UV protection or enhances privacy. Measure your windows beforehand to determine the size and quantity of film you’ll need.
Cutting Mat and Utility Knife
A cutting mat and utility knife are crucial for accurately cutting the window tint film to fit your windows. The cutting mat provides a smooth surface to work on, preventing scratches on your windows, while the utility knife allows for precise cuts.
Spray Bottle Filled with Soapy Water
Having a spray bottle filled with a mixture of soapy water will make the installation process much easier. The soapy water acts as a lubricant, allowing you to adjust the film for a perfect fit without it sticking to the window too early.
Squeegee or Window Film Applicator
To achieve a smooth and bubble-free installation, you’ll need a squeegee or window film applicator. These tools help remove any air bubbles and wrinkles, ensuring the film adheres properly to the window surface.
Heat Gun or Hairdryer
A heat gun or hairdryer is essential for activating the adhesive on the window tint film. By applying heat, you can make the film more pliable, allowing it to conform to the curves and contours of your windows.
Lint-Free Cloth
To achieve a flawless finish, it’s important to have a lint-free cloth on hand. This cloth will help you remove any moisture, fingerprints, or debris from the window tint film, ensuring a clean and professional-looking installation.
With all the necessary tools and materials gathered, you’ll be well-prepared to install window tint at home. The next steps will involve preparing the windows, applying the film, and ensuring proper adhesion. Stay tuned for our next blog post, where we will guide you through the installation process step by step.
Preparing The Windows And Workstation
Cleaning the windows thoroughly
Before installing window tint, it’s crucial to start with clean windows. Dirty surfaces can prevent the tint from adhering properly, leading to an unsatisfactory installation. To ensure a successful window tinting project, follow these steps:
- Start by gathering the necessary supplies, such as a cleaning solution, a microfiber cloth, and a squeegee.
- Prepare the cleaning solution by mixing a small amount of mild detergent with warm water.
- Moisten the microfiber cloth with the cleaning solution. Avoid using abrasive materials that could scratch the glass.
- Thoroughly wipe down the entire surface of the windows using gentle circular motions. Pay attention to any stubborn dirt or fingerprints.
- Once the windows are clean, use a squeegee to remove any excess cleaning solution and achieve a streak-free finish.
Creating a clean and organized workstation
An organized workstation is essential for a smooth window tint installation. Here’s how you can set up your workspace:
- Choose a well-lit area with ample space to maneuver around the windows comfortably.
- Cover your work surface with a clean and smooth cloth or plastic sheet to protect it from any potential damage.
- Make sure all the necessary tools and materials are within reach. This includes the window tint film, a measuring tape, a sharp utility knife, and a spray bottle filled with a mixture of water and a few drops of dish soap.
- Keep a waste bin nearby to discard any scraps or debris.
Measuring and cutting the window tint film accurately
Properly measuring and cutting the window tint film ensures a precise fit and a professional-looking finish. Follow these steps:
- Start by measuring the dimensions of each window using a measuring tape. Take into account the shape and any unique features of the window.
- Transfer the measurements onto the window tint film, marking the dimensions with a washable marker or a piece of tape.
- Carefully cut the film along the marked lines using a sharp utility knife or a specialized tint-cutting tool.
- Double-check the dimensions before proceeding to ensure the accuracy of the cut pieces.

Credit: www.allprotint.com
The Window Tint Installation Process
When it comes to installing window tint at home, understanding the process is crucial to ensure a seamless and professional finish. By following these steps, you can confidently tackle the window tint installation process and achieve the desired results. This section will walk you through each step of the installation process, from applying the soapy water solution to heat shrinking the film.
<h3>Applying the soapy water solution to the window</h3>
Before you begin installing the window tint film, it’s important to clean the window surface thoroughly. Start by mixing a solution of mild dish soap and water in a spray bottle. Spritz the soapy water solution onto the window, ensuring it covers the entire surface. This step helps the tint film adhere smoothly and minimizes the risk of air bubbles.
<h3>Placing and aligning the window tint film on the window surface</h3>
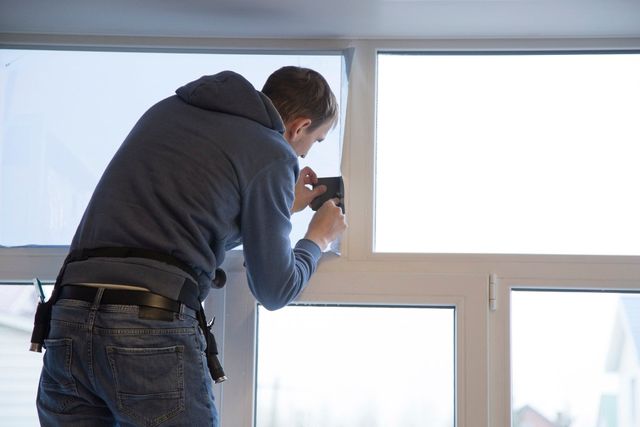
With the window surface prepared, carefully unroll the window tint film and align it with the top edge of the window. Gently press the film onto the wet window surface, allowing it to adhere lightly. Using a squeegee or a similar tool, start from the top and work your way down, smoothing the film as you go.
<h3>Removing air bubbles and smoothing out the film</h3>
As you apply the window tint film, air bubbles may form under the surface. To remove these bubbles and ensure a smooth finish, use the squeegee to slowly push them towards the nearest edge. Applying firm, even pressure, work from the center towards the edges, smoothing out any wrinkles or air pockets.
<h3>Trimming excess film and ensuring proper fit</h3>
Once the film is free of air bubbles and wrinkles, it’s time to trim the excess material. Using a sharp utility knife, carefully trim off the excess film along the edges of the window. Be sure to leave a small margin around the edges to ensure a proper fit and prevent the film from peeling or lifting over time.
<h3>Heat shrinking the film for a seamless finish</h3>
To achieve a seamless and professional finish, heat shrinking is a crucial step. Using a heat gun or hairdryer on a low heat setting, gently warm the film. This will cause it to shrink and adhere tightly to the window surface. Move the heat source in a sweeping motion, ensuring the film shrinks evenly. Remember to avoid excessive heat that could damage the film or the surrounding window frame.
In conclusion, the window tint installation process involves applying a soapy water solution, placing and aligning the tint film, removing air bubbles, trimming excess film, and heat shrinking for a seamless finish. By following these steps and taking your time, you can achieve professional-looking results from the comfort of your own home.
Troubleshooting Common Window Tinting Issues
If you’ve decided to install window tint at home, it can be a cost-effective and rewarding DIY project. However, like any home improvement task, there may be common issues that arise along the way. In this section, we will discuss some troubleshooting techniques for dealing with stubborn air bubbles, removing and repositioning the film, resolving film discoloration or cloudiness, and fixing uneven or patchy tint appearance.
Dealing with stubborn air bubbles
Air bubbles can be frustrating when installing window tint, but there are a few techniques you can try to eliminate them:
- Start by using a squeegee to push the air towards the edges of the film, gradually smoothing out any bubbles.
- If stubborn bubbles persist, use a pin or needle (be careful not to scratch the glass) to pierce the bubble and gently push out the air. Then, smooth the area with a squeegee.
- In some cases, if the bubbles are too large or numerous, you may need to remove the film completely and start over.
Removing and repositioning the film
If you realize that the film needs to be repositioned during the installation process, follow these steps:
- Gently lift the edge of the film using a razor blade or utility knife. Be cautious to avoid damaging the glass.
- Slowly peel off the film while spraying a mixture of water and soap on the adhesive side to prevent it from sticking to the glass surface.
- Once removed, clean the glass thoroughly before reinstalling the film in the desired position using a squeegee.
Resolving film discoloration or cloudiness
If you notice discoloration or cloudiness after installing window tint, there are a few potential solutions to consider:
- If the film was not dry when applied, give it more time to cure. Depending on the brand and type of film, this could take anywhere from a few days to a few weeks.
- If the issue persists, it is possible that the film may have been exposed to excessive heat or moisture during storage or transportation. In this case, it might be necessary to replace the film with a new one.
Fixing uneven or patchy tint appearance
If you notice an uneven or patchy tint appearance after installation, here are some steps to address the issue:
- First, check for any debris or contaminants trapped between the film and the glass. If you find any, carefully lift the affected area and clean it thoroughly before reapplying.
- If the problem persists, the tint may not have adhered properly. In this case, you may need to remove the film and try the installation process again, paying close attention to proper preparation and application techniques.
- Remember to follow the manufacturer’s instructions carefully to ensure a smooth and even application.
By following these troubleshooting methods, you can overcome common window tinting issues and achieve a professional-looking result for your home.
Post-Installation Care And Maintenance
Proper post-installation care and maintenance of your window tint is essential in ensuring its longevity and effectiveness. By following a few simple steps, you can keep your tinted windows looking great and maximize their benefits. Let’s take a closer look at how to care for and maintain your newly installed window tint.
Allowing the tint to dry and settle
After your window tint is installed, it is important to allow it to dry and settle properly before using the windows. This process typically takes around 1-2 weeks, depending on the climate and humidity levels. During this time, it is important to avoid rolling down the windows or touching the tint to ensure it adheres securely to the glass.
Avoiding contact with the tinted windows
To prevent damage to your window tint, it is crucial to avoid unnecessary contact with the tinted windows. While the tint is designed to be durable, it can still be scratched or damaged if not handled properly. Avoid using abrasive materials or sharp objects when cleaning your windows and be careful when accessing your car from outside to avoid accidentally hitting or scraping the tint with keys or other objects.
Cleaning and maintaining the window tint
Maintaining a clean and clear window tint is essential for its overall performance and appearance. When cleaning your tinted windows, use only non-abrasive cleaning solutions and a soft microfiber cloth to gently remove dirt and smudges. Avoid using ammonia-based cleaners or abrasive tools that can cause damage to the tint film. Regularly cleaning your tinted windows not only helps maintain their clarity but also prevents the buildup of dirt and grime that could affect their overall performance.
Additionally, keeping the inside of your car clean and free from dirt and dust helps prevent these particles from sticking to the tint and causing visible marks or smudges. Regularly vacuuming the interior and wiping down surfaces will help ensure your window tint looks its best for years to come.
Understanding warranty and legal regulations
Before installing window tint in your home, it is essential to familiarize yourself with any warranty and legal regulations pertaining to window tinting. Each manufacturer may have different warranty terms and conditions, so be sure to read and understand them thoroughly. Familiarize yourself with any local laws or regulations regarding window tinting, as different states or countries may have specific guidelines on tint darkness and reflectivity. Adhering to these regulations ensures not only your safety but also prevents any potential legal issues in the future.
In conclusion, proper post-installation care and maintenance are crucial for the longevity and effectiveness of your window tint. Allowing the tint to dry and settle, avoiding unnecessary contact, using gentle cleaning methods, and following warranty and legal regulations will help keep your tinted windows looking great and performing at their best.
Frequently Asked Questions Of How To Install Window Tint At Home
Does Window Tint Need Glue?
No, window tint does not need glue. Window tint film typically uses a static cling or adhesive backing to stick to the glass surface. The film adheres securely without the use of additional glue.
Is Diy Window Tint Easy?
Window tinting is not easy for DIY projects.
How Do You Install Window Tint Without Bubbles?
To install window tint without bubbles, follow these steps: 1. Clean the window thoroughly before applying the tint. 2. Cut the tint to the exact size of the window. 3. Use a spray bottle to wet the window and the tint.
4. Slowly apply the tint, starting from the top and working your way down. 5. Smooth out any bubbles and excess water with a squeegee.
How Do You Make Window Film Stick?
To make window film stick, clean the window surface thoroughly. Measure and cut the film to fit the window. Spray the window with a soapy water solution, then apply the film, smoothing out any air bubbles. Use a squeegee to remove excess water and ensure a secure bond.
Conclusion
Learning how to install window tint at home can save you time and money while enhancing the aesthetics and functionality of your windows. By following the step-by-step guide provided in this blog post, you can confidently tackle this project and achieve professional-looking results.
Remember to prioritize safety and invest in high-quality materials for the best outcome. With these tips in mind, you’re ready to transform your windows and enjoy the benefits of window tinting.


