How to Install Wall Paneling on Ceiling?
To install wall paneling on the ceiling, follow these steps: Measure and cut the panels to fit, apply adhesive to the backside of the paneling, and press firmly against the ceiling to secure. Wall paneling can be a great way to add texture and style to your ceiling.
Whether you want to cover up old popcorn ceilings or simply enhance the overall look of your space, installing paneling on the ceiling can be a DIY project that yields impressive results. In this guide, we will walk you through the process of installing wall paneling on the ceiling, providing you with the necessary steps and tips for a successful installation.
So, if you’re ready to transform your ceiling, read on to learn how to install wall paneling on the ceiling in a few simple steps.
Preparing The Ceiling
Before you start installing wall paneling on your ceiling, it’s important to prepare the surface properly. A well-prepared ceiling will ensure a smooth and successful installation, maximizing the lifespan of your paneling. In this section, we’ll walk you through the necessary steps to prepare your ceiling, including checking for moisture and structural issues, as well as removing any existing ceiling materials if applicable.

Checking for Moisture and Structural Issues
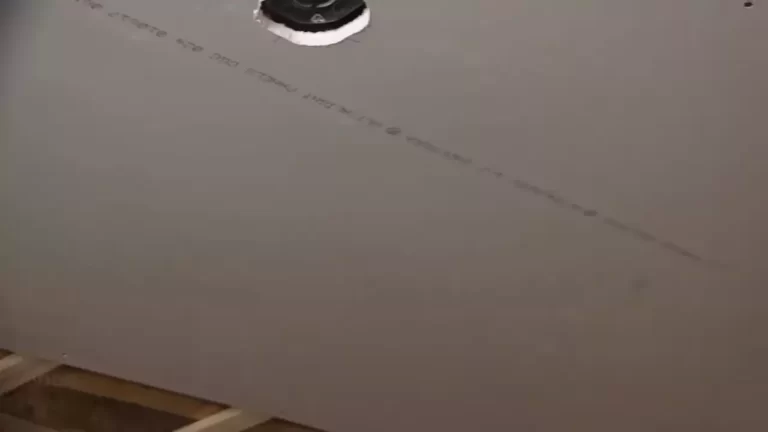
Prior to installing wall paneling on your ceiling, it’s crucial to assess the condition of the ceiling to identify any underlying moisture or structural issues. Addressing these problems before installation will prevent future damage to your paneling and ensure a stable and secure installation.
In order to check for moisture, examine the ceiling for signs of water stains, discoloration, or mold growth. These issues may indicate leaks or excessive moisture, which can compromise the durability of your wall paneling. If you notice any signs of moisture, it’s important to address the source of the problem and allow the ceiling to dry completely before proceeding with the installation.
Additionally, it’s essential to inspect the ceiling for any structural issues. Look for cracks, sagging, or other signs of damage that could affect the stability of the paneling. If you notice any structural problems, consult with a professional to assess the situation and make any necessary repairs before moving forward.
Removing Existing Ceiling Materials (if applicable)
If your ceiling already has existing materials, such as old drywall or plaster, you may need to remove them before installing wall paneling. Removing these materials will provide a clean and even surface for the paneling and ensure a proper installation.
Start by protecting the area by spreading drop cloths to catch any debris that may fall during the removal process. To remove the existing materials, use a utility knife to score along the edges and corners, allowing for easier removal. Carefully pry the material away from the ceiling, taking care not to damage the underlying structure.
Once the existing materials are removed, use a scraper or sandpaper to smooth out any remaining adhesive or rough spots on the ceiling. This step will help create a seamless and level surface for the wall paneling installation.
By following these steps and thoroughly preparing your ceiling, you’ll be ready to move on to the next phase of installing wall paneling, ensuring a beautiful and long-lasting finish for your ceiling.
Choosing The Right Paneling
When it comes to installing wall paneling on the ceiling, choosing the right paneling is crucial. The right material, aesthetics, and design options can make all the difference in achieving the desired look and functionality. In this section, we will explore the different aspects of choosing the right paneling for your ceiling.
Selecting the Right Material for Your Ceiling
The first step in choosing the right paneling for your ceiling is selecting the appropriate material. The material you choose will depend on various factors, such as your budget, the style you want to achieve, and the level of maintenance required.
For a budget-friendly option, PVC or vinyl paneling can be a suitable choice. These materials are durable, lightweight, and easy to clean. They are also resistant to moisture, making them perfect for areas prone to humidity, such as bathrooms and kitchens.
If you prefer a more natural look, wood paneling may be the ideal choice. Wood adds warmth and charm to any space and can be stained or painted to match your desired aesthetic. Keep in mind that wood paneling requires regular maintenance to prevent warping or damage.
| Material | Advantages | Disadvantages |
|---|---|---|
| PVC/Vinyl | – Budget-friendly | – Not as visually appealing as wood |
| Wood | – Natural and warm appearance | – Requires regular maintenance |

Considering Aesthetics and Design Options
When choosing paneling for your ceiling, considering aesthetics and design options is essential to achieve the desired look and complement the overall style of the room. Here are a few factors to keep in mind:
- Color: Decide whether you want the paneling to blend in or make a statement. Neutral colors offer a versatile and timeless look, while bold colors can add an exciting focal point to the room.
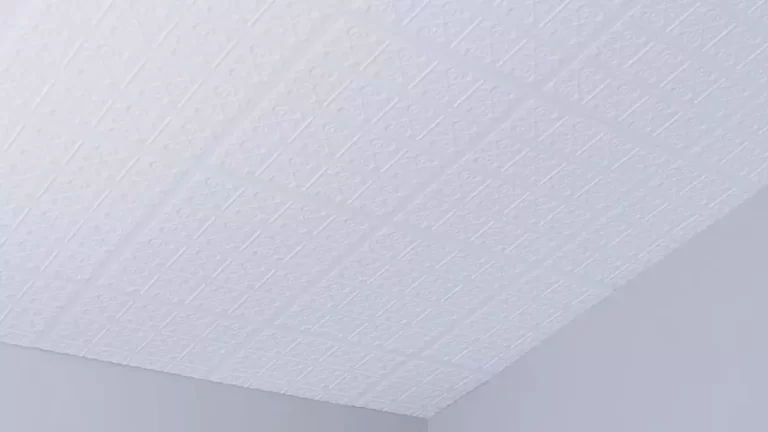
- Texture: Paneling comes in a range of textures, from smooth to textured finishes. Consider the texture that will best complement your decor and add visual interest to the ceiling.
- Pattern: Some paneling options provide intricate patterns, such as beadboard or raised panels. These patterns can add depth and visual appeal to the ceiling.
Calculating the Amount of Paneling Needed
Before purchasing the paneling, it’s important to calculate the amount needed to cover your ceiling. This step will help you avoid running out of materials or having excessive waste. Follow these simple steps:
- Measure the length and width of your ceiling in feet.
- Multiply the length and width measurements to determine the total square footage.
- Consider purchasing extra panels to account for any mistakes during the installation process.
By following these steps, you can ensure a smooth and successful installation of wall paneling on your ceiling. Remember to choose the right material that suits your budget and style preferences, consider the aesthetics and design options, and accurately calculate the amount of paneling needed for your project.
Gathering The Necessary Tools And Materials
When it comes to installing wall paneling on your ceiling, gathering the necessary tools and materials is the first step towards a successful and seamless installation process. Having all the required tools and materials ready beforehand will not only save you time and effort but also ensure a smooth and efficient installation. In this section, we will discuss the tools and materials necessary for a proper installation of wall paneling on your ceiling, helping you create a stunning and durable finish for your space.
Tools Required for the Installation Process
Before you begin the installation process, it is essential to have the right tools to ensure a professional and hassle-free outcome. Here is a list of tools that you will need:
- Drill/driver: A drill/driver will be necessary for drilling holes and driving screws into the ceiling and wall paneling. Make sure to have the appropriate drill bits and screwdriver attachments for your specific project.
- Measuring tape: Accurate measurements are essential for a perfect fit of the wall paneling. A measuring tape will help you measure the dimensions of your ceiling and the panels accurately.
- Level: A level will ensure that your wall panels are installed straight and even. It is crucial for achieving a polished and professional look.</li>
- Cutting tools: Depending on the type of wall paneling you are installing, you may need various cutting tools such as a saw, utility knife, or a jigsaw. These tools will help you trim the panels to the desired size and shape.
- Safety equipment: Installing wall paneling involves working with tools and materials that may present safety risks. Make sure to have the appropriate safety equipment, including safety goggles, gloves, and a dust mask, to protect yourself during the installation process.
- Stud finder: A stud finder will help you locate the studs in your ceiling, allowing you to securely attach the wall paneling for a sturdy installation.
- Screws/nails: Depending on the type of wall paneling and the nature of your ceiling, you will need appropriate screws or nails to attach the panels securely. Make sure to choose the right size and type of fasteners for your specific project.
- Adhesive/construction adhesive: In addition to screws or nails, you may also need adhesive or construction adhesive to provide extra stability and bonding between the wall panels and the ceiling surface. Check the manufacturer’s guidelines for the recommended adhesive for your specific wall paneling.
Materials Needed for Proper Installation
Apart from the necessary tools, you will also need specific materials to ensure a proper installation of wall paneling on your ceiling. Here are the materials you should have on hand:
- Wall panels: Choose the desired type and design of wall panels that are suitable for your space. There are various options available, such as wood paneling, PVC paneling, or decorative paneling. Make sure to measure your ceiling and calculate the required number of panels based on their size.
- Primer/paint: If you plan to paint the wall panels or the ceiling surface, you will need primer and the appropriate paint. Choose high-quality products that are suitable for the type of wall paneling you have selected.
- Caulk/filler: Depending on the type of wall paneling and the condition of your ceiling, you may need caulk or filler to seal any gaps or imperfections. This will ensure a seamless and professional-looking installation.
- Sandpaper/sanding block: Sandpaper or a sanding block will be necessary for smoothing any rough edges or surfaces on the wall panels or the ceiling. This will help create a smooth and flawless finish.
Installing The First Panel
When it comes to installing wall paneling on the ceiling, starting with the first panel is crucial. This is where you set the tone for the rest of the installation process. In this section, we will walk you through the step-by-step guide on how to install the first panel on the ceiling, ensuring a seamless and professional finish.
Marking the Centerline on the Ceiling
The first step is to mark the centerline on the ceiling. This is important to ensure that your wall paneling is evenly distributed and symmetrical. Here’s how you can mark the centerline:
- Measure the width of your ceiling and divide it in half. This will give you the center point.
- Using a chalk line or a pencil, draw a line from one end of the ceiling to the other, passing through the center point. This will serve as your reference line for the installation.
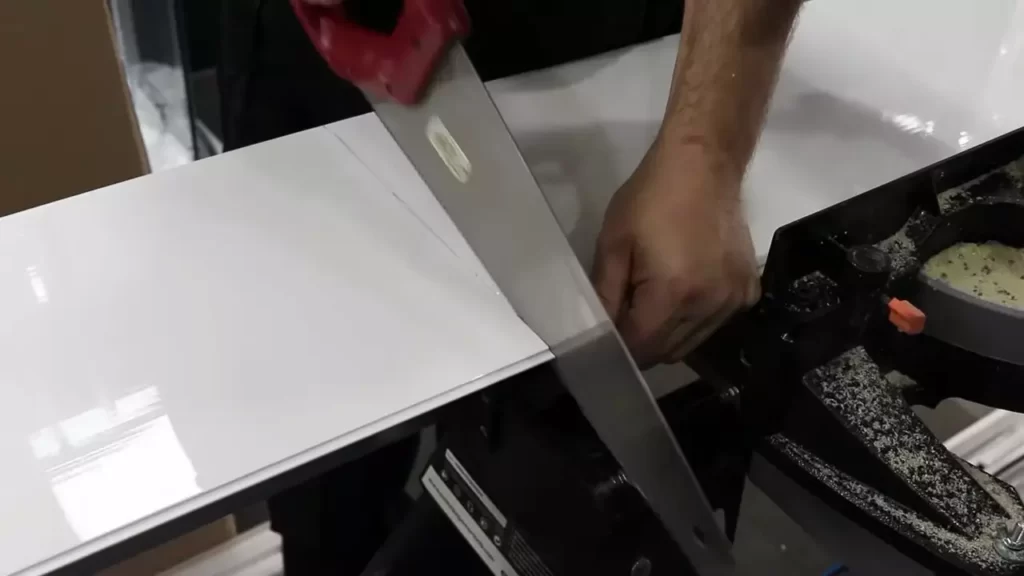
Cutting the First Panel to Size
Now that you have marked the centerline, it’s time to cut the first panel to size. Follow these steps to ensure a precise fit:
- Measure the length of the panel from the centerline to the wall, allowing for a small gap for expansion.
- Using a circular saw or a jigsaw, carefully cut the panel along the measured length.
- Repeat the process for the width of the panel, ensuring it fits snugly between the adjacent walls.
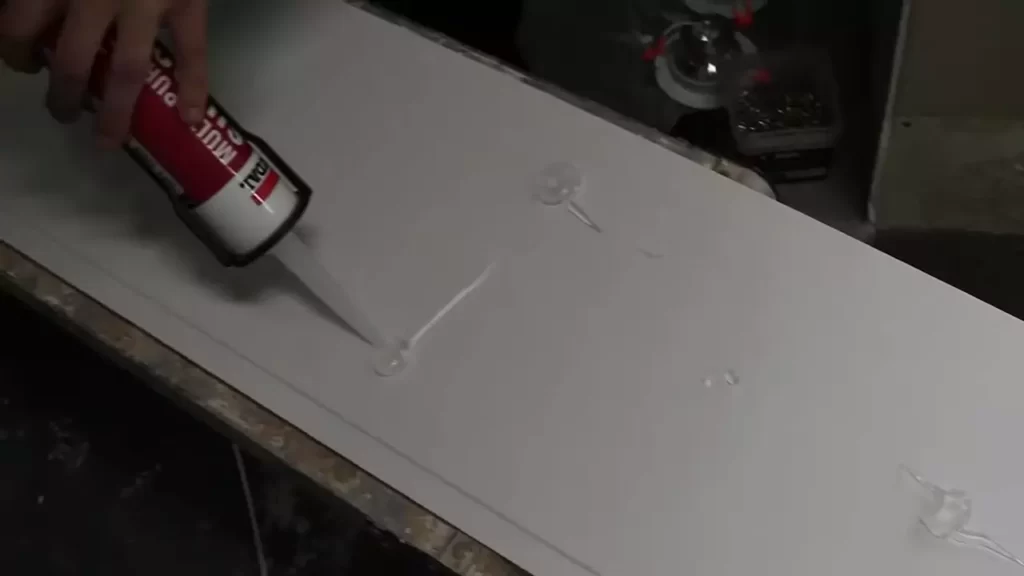
Applying Adhesive to the Back of the Panel
With the panel cut to size, it’s time to apply adhesive to the back. This will ensure a strong bond between the panel and the ceiling. Follow these steps:
- Apply a generous amount of construction adhesive to the back of the panel, focusing on the edges and corners.
- Using a putty knife, spread the adhesive evenly across the back of the panel to ensure full coverage.
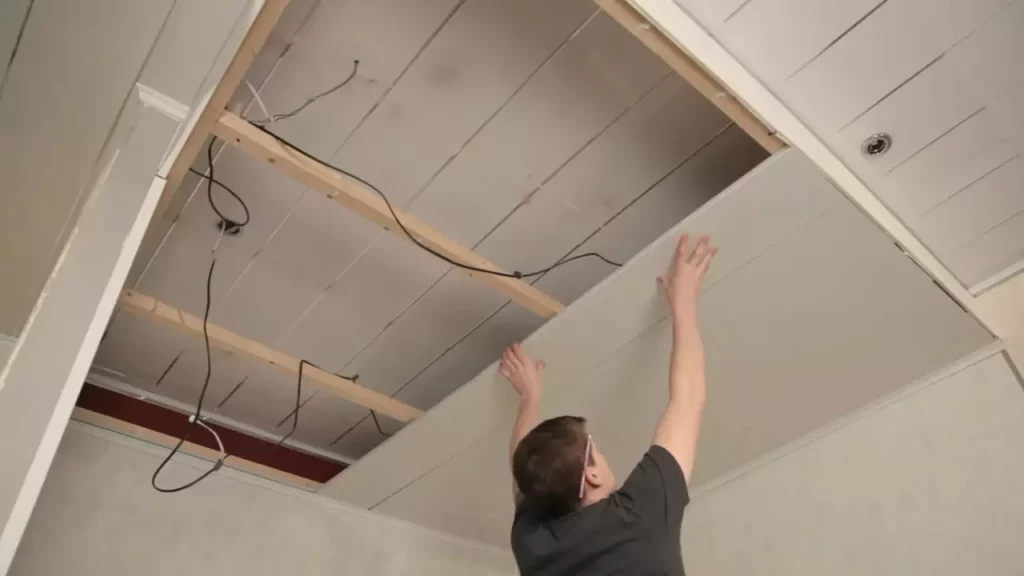
Securing the First Panel to the Ceiling
Now that the panel is properly prepared, it’s time to secure it to the ceiling. Pay close attention to ensure a secure and balanced installation:
- Align the panel with the centerline previously marked on the ceiling.
- Press the panel firmly against the ceiling, ensuring it is flush with the adjacent walls.
- Use finishing nails or paneling nails to secure the panel in place. Place the nails about every 6-8 inches along the edges of the panel.
By following these steps, you will successfully install the first panel of your wall paneling on the ceiling. Take your time and ensure each step is done accurately to achieve a professional and visually appealing result. Continue with the remaining panels, repeating the process until the ceiling is fully covered.
Installing The Remaining Panels
Once you have successfully installed the first row of wall paneling on your ceiling, it’s time to move on to installing the remaining panels. This process involves cutting panels to fit around fixtures and obstacles, as well as applying adhesive and securing panels in a staggered pattern. Follow the steps below to complete your wall paneling installation.
Cutting Panels to Fit Around Fixtures and Obstacles
Before proceeding with the installation, carefully assess the areas where you need to fit the wall panels around fixtures and obstacles. These can include electrical outlets, light fixtures, vents, and any other protruding objects.
Here’s how to cut the panels to fit:
- Measure the dimensions of the area you need to fit the panel around.
- Transfer those measurements onto the back of the panel using a pencil or marker.
- Use a jigsaw or a utility knife to carefully cut along the marked lines. Ensure to wear protective gloves and goggles for safety.
- Double-check the panel fits properly around the fixture or obstacle before proceeding to the next step.
Applying Adhesive and Securing Panels in a Staggered Pattern
With the panels cut to fit around fixtures and obstacles, it’s time to secure them to the ceiling in a staggered pattern. This pattern not only adds visual interest but also helps with stability.
Here are the steps to follow:
- Apply a suitable construction adhesive to the back of the panel, following the manufacturer’s instructions.
- Press the panel firmly onto the ceiling, starting from the corner where the first row was installed. Ensure that the panel aligns with the previous row.
- Use finishing nails or paneling nails to further secure the panel in place. Place the nails approximately every 12 inches along the edges and in the center of the panel.
- Repeat the process with the remaining panels, making sure to stagger the seams for added strength and an aesthetically pleasing look.
Continue installing the panels until the entire ceiling is covered. Remember to take breaks as needed and step back to admire your progress. Once the installation is complete, you can proceed with any additional finishing touches, such as painting or adding trim.
By following these steps, you’ll be able to install wall paneling on your ceiling efficiently and achieve a beautiful end result. Enjoy the transformation and the added character it brings to your space!

Creating A Professional Finish
Installing wall paneling on the ceiling can transform a room, adding depth and texture to the space. However, to achieve a truly professional finish, there are a few important steps you need to take. By filling and sanding panel seams and nail holes, as well as applying primer and paint to the paneling, you can ensure that your ceiling looks polished and flawless.
Filling and Sanding Panel Seams and Nail Holes
Before you begin painting, it’s crucial to fill the panel seams and nail holes to create a smooth surface. Start by using a putty knife to apply a thin layer of wood filler to the seams and holes. Make sure to press the filler firmly into the gaps to ensure a tight bond. Once the filler has dried, sand it down using fine-grit sandpaper, creating a seamless transition between the panels. Repeat this process as needed until all the seams and holes are completely filled and sanded.
Applying Primer and Paint to the Paneling
Once the paneling is fully prepped, it’s time to apply primer. Primer is essential for ensuring a smooth and long-lasting paint finish. Using a high-quality paintbrush or roller, apply a coat of primer to the entire surface of the paneling, making sure to cover all areas evenly. Allow the primer to dry according to the manufacturer’s instructions before moving on to the next step.
Now it’s time to choose your paint color. Opt for a high-quality latex or oil-based paint that is designed for use on wood surfaces. Before you start painting, make sure to give the paint a good stir to ensure it’s thoroughly mixed. Using the same technique as with the primer, start applying the paint to the paneling. Work in small sections, making sure to maintain a wet edge to prevent visible brush marks.
Once the first coat is dry, inspect the paneling for any imperfections or areas that require touch-ups. Use a light sanding block to smooth out any rough spots or drips, and then apply a second coat of paint. Depending on the color and coverage, a third coat may be necessary to achieve the desired finish. Once the final coat is dry, step back and admire your professionally finished wall paneling on the ceiling.
Adding Trim And Molding
When it comes to installing wall paneling on the ceiling, adding trim and molding is a crucial step in achieving a professional and finished look. Trim and molding not only cover gaps and edges but also enhance the overall aesthetic appeal of the ceiling. In this section, we will discuss the importance of choosing and installing the right trim pieces, as well as how to effectively cover gaps and edges with molding. Let’s dive in!
Choosing and Installing Trim Pieces
When choosing trim pieces for your ceiling paneling, it’s essential to consider the style of the room and the overall design theme. The right trim can complement the paneling and seamlessly blend with the surrounding decor. Here are a few tips to help you choose and install trim pieces:
- Measure accurately: Before purchasing trim pieces, measure the length and width of the ceiling panels. This will ensure that you buy the right quantity and dimensions of trim.
- Select the appropriate material: Trim pieces come in various materials such as wood, MDF, PVC, and metal. Choose a material that meets your specific requirements, budget, and desired look.
- Prep and paint: If you prefer a painted finish, it’s best to paint the trim pieces before installation. This saves time and allows for better coverage.
- Use a miter saw: To achieve clean and seamless corners, cut the trim pieces at precise angles using a miter saw. This step ensures a professional finish and eliminates unsightly gaps.
- Secure with adhesive and nails: Apply construction adhesive to the back of the trim pieces and then secure them in place using finishing nails. This combination provides optimal strength and stability.
Covering Gaps and Edges with Molding
Even with precise measurements and installation, there may still be gaps and edges visible between the wall paneling and the ceiling. To ensure a seamless appearance, it’s vital to cover them with molding. Here’s how:
- Choose the right molding: Select a molding style that complements the trim pieces and enhances the overall design of the ceiling. There are various options available, such as crown molding, baseboard molding, and cove molding.
- Measure and cut: Measure the length needed for the molding and cut it at the appropriate angle using a miter saw. Take extra care to ensure precise measurements for a seamless fit.
- Install with adhesive and nails: Apply construction adhesive to the back of the molding and press it firmly against the gap or edge. Secure it in place with finishing nails for added stability.
- Fill gaps: If there are any small gaps or imperfections between the molding and the wall paneling, use caulk or wood filler to fill them. This step ensures a smooth and flawless appearance.
- Paint or stain: Finally, paint or stain the molding to match the trim and ceiling paneling. This step completes the cohesive look and creates a harmonious visual flow.
Tips And Tricks For A Successful Installation
When it comes to installing wall paneling on the ceiling, it’s important to follow a few tips and tricks for a successful installation. From ensuring the panels are level and plumb to properly sealing edges and seams for moisture resistance, these steps will help you achieve a beautiful and long-lasting result. Additionally, cleaning and maintaining the wall paneling on the ceiling will ensure it stays in great condition for years to come. In this blog post, we’ll dive into each of these areas in more detail, providing you with the knowledge you need to successfully install and care for your wall paneling.
Ensuring Panels are Level and Plumb
One of the most important aspects of installing wall paneling on the ceiling is ensuring that the panels are level and plumb. This not only creates a visually appealing result but also helps with the overall stability and durability of the installation. Here are a few tips to achieve this:
- Use a level to check the ceiling joists and mark their locations on the wall.
- Start by installing a level ledger board along the bottom of the ceiling, which will act as a guide for the panels.
- Measure and cut your panels to size, ensuring a snug fit and accounting for any obstructions such as light fixtures or vents.
- Use a level to check each panel as you install it, adjusting as necessary to maintain a level and plumb alignment.
- Secure the panels to the ceiling joists using appropriate nails or screws, following the manufacturer’s recommendations.
Properly Sealing Edges and Seams for Moisture Resistance
Another important step in installing wall paneling on the ceiling is properly sealing the edges and seams for moisture resistance. This is crucial, especially in areas such as bathrooms or kitchens where moisture levels are higher. Here are some tips to ensure an effective seal:
- Before installing the panels, apply a waterproof paint or sealant to the edges and cut ends to prevent moisture penetration.
- Consider using adhesive caulk along the seams to provide an extra layer of protection against moisture.
- Regularly inspect the paneling for any signs of damage or wear and promptly repair or replace as needed.
Cleaning and Maintaining Wall Paneling on the Ceiling
Once your wall paneling on the ceiling is installed, it’s important to clean and maintain it to keep it looking its best. Here are some helpful tips for cleaning and maintaining your wall paneling:
- Regularly dust the surface with a soft, dry cloth to remove any debris or dirt.
- If necessary, gently wipe the paneling with a damp cloth or sponge using a mild soap solution.
- Avoid using abrasive cleaners or tools that may damage the surface of the paneling.
- Consider applying a protective coating or sealer to enhance the durability and longevity of the paneling.
By following these tips and tricks, you can ensure a successful installation and proper care for your wall paneling on the ceiling. Whether you’re adding a decorative touch to your home or enhancing the functionality of a space, wall paneling can transform any room. Take the time to install it correctly and maintain it properly, and you’ll enjoy the beauty and benefits of wall paneling for years to come.
Frequently Asked Questions On How To Install Wall Paneling On Ceiling
Can You Put Wall Paneling On A Ceiling?
Yes, you can use wall paneling on a ceiling. It adds a unique touch to the space and can help improve the appearance. Just ensure proper installation for best results.
How Do You Attach Panel Board To Ceiling?
To attach panel board to a ceiling, follow these steps:
1. Ensure the ceiling is clean and dry.
2. Measure and mark the desired position for the panel.
3. Apply construction adhesive to the back of the panel.
4. Press the panel firmly against the ceiling.
5. Secure the panel in place with screws or nails.
Can You Put Wood Paneling On The Ceiling?
Yes, wood paneling can be installed on ceilings. It adds a rustic and warm look to the space. Ensure proper support for the panels and consider the weight and height of the room. Wood paneling can be a great option to enhance the aesthetics of your ceiling.
Can Wall Planks Be Used On Ceiling?
Yes, wall planks can be used on the ceiling. They add a unique and modern look to any space. Just make sure to properly install them according to the manufacturer’s instructions for best results.
Conclusion
Installing wall paneling on the ceiling can be a great way to add a unique touch to any room. By following the step-by-step process outlined in this guide, you can DIY this project with ease. From gathering the necessary materials to trimming and attaching the panels, each step is essential in achieving a professional and polished look.
Don’t forget to take proper measurements and prepare the surface before starting. So go ahead and transform your ceiling into a stunning focal point with wall paneling.