How to Install Vinyl Plank on Stairs?
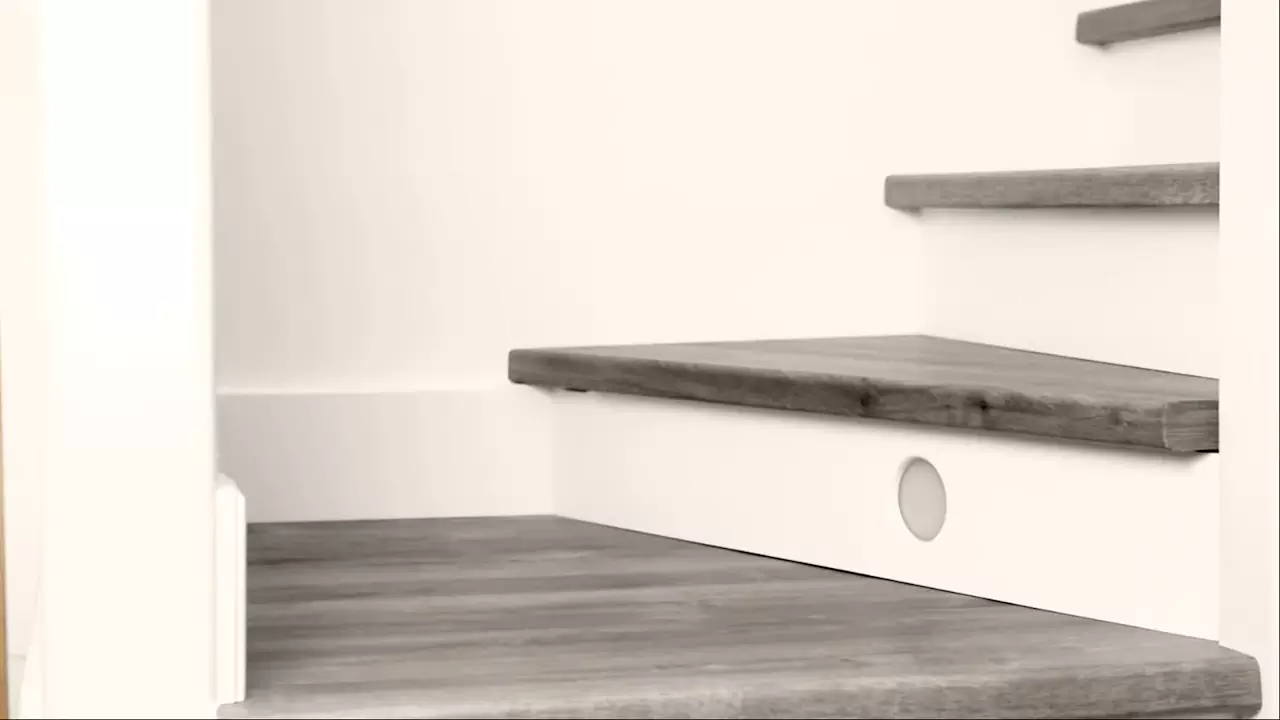
To install vinyl plank on stairs, start by measuring and cutting the planks to fit the dimensions of each stair. Then, apply adhesive to the back of the planks and press them firmly onto the stairs.
Preparing For Vinyl Plank Installation On Stairs
Before embarking on the installation of vinyl plank on your stairs, it’s crucial to properly prepare the area. This ensures a smooth and successful installation process, resulting in beautiful and durable stairs that will stand the test of time. In this section, we’ll cover the essential steps to take when preparing your stairs for vinyl plank installation.
Measuring the stairs for accurate vinyl plank calculation
One of the first steps in preparing your stairs for vinyl plank installation is to accurately measure them. Measuring the stairs allows you to calculate the amount of vinyl plank material needed for the project. To ensure accurate measurements, follow these steps:
- Begin by measuring the width of each stair tread. Use a measuring tape to measure from one side of the tread to the other, ensuring you measure at the widest point.
- Next, measure the length of each stair tread. Measure from the back of the tread to the front edge, excluding any overhang.
- If your stairs have risers, measure the height of each riser. Measure from the bottom edge of the previous tread to the top edge of the riser.
- After obtaining these measurements, calculate the total square footage of your stairs. Multiply the width of each tread by its length, and then sum up the results. This will give you the total area in square feet.

Gathering the necessary tools and materials
Once you have the accurate measurements, the next step is to gather all the necessary tools and materials for the vinyl plank installation. Having the right tools and materials readily available will streamline the installation process and ensure a professional finish. Here is a list of tools and materials you may need:
| Tools | Materials |
|---|---|
| Safety goggles | Vinyl plank flooring |
| Measuring tape | Underlayment (if needed) |
| Chalk line | Adhesive or double-sided tape |
| Straight edge | Transition strips (if necessary) |
| Jigsaw or circular saw | Tack strips (if applicable) |
| Hammer | Caulk (for finishing touches) |
| Utility knife | |
| Tapping block |
Removing any existing carpet, padding, or debris from the stairs
Before installing vinyl plank on your stairs, it’s important to remove any existing carpet, padding, or debris. This will ensure a clean and even surface for the installation. To remove these materials, follow these steps:
- Begin by wearing safety goggles to protect your eyes.
- Using a utility knife, cut the carpet into manageable sections.
- Remove the carpet sections and padding, if present, starting from the top step and working your way down.
- Take care to remove any staples or nails left behind.
- Sweep or vacuum the stairs to remove any remaining debris.
By following these steps, you will be well-prepared and ready to install vinyl plank on your stairs. Next, we’ll move on to the installation process itself.
Pre-Installation Steps
Before you jump into installing vinyl plank on your stairs, it’s important to take a few pre-installation steps. These steps will help ensure a smooth and successful installation, while also ensuring the durability and longevity of your new vinyl plank stairs. Here are the key factors to consider:
Evaluating the condition of the existing stairs
Take a close look at your existing stairs to evaluate their condition. Check for any signs of damage, such as cracks, loose or squeaky steps, or uneven surfaces. It’s crucial to address these issues before installing vinyl plank to ensure a solid foundation for your new stairs.
Repairing any damaged or uneven areas of the staircase
If you notice any damaged or uneven areas on your stairs, now is the time to repair them. Fix any cracks or broken steps, tighten loose ones, and sand down any uneven surfaces. A level and smooth staircase will not only make installation easier but also enhance the overall appearance of your finished project.
Ensuring the stairs are clean and dry before starting installation
Prior to installing vinyl plank on your stairs, it’s vital to clean and dry the surface thoroughly. Remove any dust, dirt, or debris using a broom or vacuum cleaner. Additionally, wipe down the stairs with a damp cloth or mop to eliminate any residue that may affect the adhesion of the vinyl plank. Ensuring a clean and dry surface will help maximize the bond between the vinyl and the stairs, ensuring a long-lasting installation.

Installing Vinyl Plank On Stairs
When it comes to installing vinyl plank on stairs, it’s important to follow the right steps to ensure a successful and long-lasting installation. One of the key aspects of this process is choosing the right adhesive. Applying the adhesive correctly on the stair risers and treads is crucial to ensure a secure bond. Placing the vinyl planks starting from the top and ensuring proper alignment and positioning of each plank also plays a vital role in the overall result. In this section, we will walk you through each step of the installation process, providing you with the necessary guidance to tackle this project with ease.
Choosing the Right Adhesive for Vinyl Plank Installation on Stairs
When it comes to installing vinyl plank on stairs, choosing the right adhesive is crucial for a secure and durable installation. There are different types of adhesives available in the market, so it’s important to select one that is specifically designed for vinyl plank installation. Look for a high-quality adhesive that is recommended by the manufacturer of the vinyl planks you are using. Ensure that the adhesive is suitable for use on stairs and can withstand heavy foot traffic. Using the right adhesive will ensure that the vinyl planks stay in place even in high-traffic areas.
Applying Adhesive to the Stair Risers and Treads
Before applying the adhesive, make sure the stair risers and treads are clean and free from any debris or dust. This will ensure a better bond between the vinyl planks and the stairs. Apply the adhesive to the back of each vinyl plank using a trowel or a notched adhesive spreader. Spread the adhesive evenly, making sure to cover the entire surface of the plank. Avoid applying too much adhesive, as this can cause the planks to slip or warp.
Placing Vinyl Planks on the Stairs, Starting from the Top
Once the adhesive is applied, it’s time to start placing the vinyl planks on the stairs. Begin at the top of the stairs and work your way down. Position each plank carefully, ensuring that it lines up with the edge of the step and the previous plank. Take your time to ensure proper alignment and positioning, as this will contribute to the overall aesthetic and functionality of the stairs. Use a level or a straightedge to ensure each plank is perfectly aligned.
Ensuring Proper Alignment and Positioning of Each Plank
As you place each vinyl plank on the stairs, it’s important to ensure proper alignment and positioning. Make sure that each plank fits snugly against the previous plank, without any gaps or overlaps. This will create a seamless and professional-looking installation. Use a rubber mallet or a tapping block to adjust the position of the plank if needed. Step back and check the alignment frequently to ensure a consistent and even installation.
Pressing Down Firmly to Secure the Planks in Place
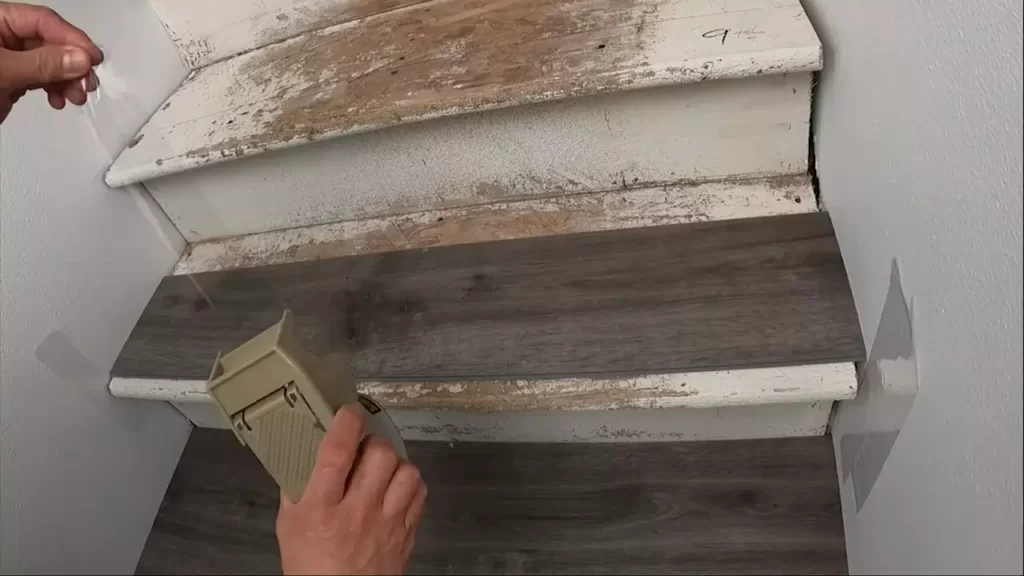
Once the vinyl planks are aligned and positioned correctly, it’s time to secure them in place. Use a hand roller or a laminate roller to press down firmly on each plank. This will help to ensure a strong bond between the planks and the adhesive, preventing any movement or shifting over time. Pay special attention to the edges and corners of the planks, as these areas may require extra pressure to ensure proper adhesion.
Trimming the Excess Vinyl Plank to Fit the Remaining Space
After you have placed all the vinyl planks on the stairs, you may need to trim the excess to fit the remaining space. Use a utility knife or a vinyl plank cutter to carefully trim the planks to the desired length. Take precise measurements and make straight, clean cuts to ensure a professional finish. Fit each trimmed plank into its respective space, making sure it fits snugly against the adjacent planks.
Finishing Touches And Maintenance
When it comes to installing vinyl plank on stairs, finishing touches and maintenance are crucial steps to ensure a professional and long-lasting result. In this section, we will discuss two important aspects of completing your vinyl plank stairs installation: installing stair nosing for a professional and finished look and checking for any gaps or loose planks and addressing them. We will also provide tips on cleaning and maintaining your vinyl plank stairs to ensure their durability and beauty for years to come.
Installing stair nosing for a professional and finished look
To achieve a polished and professional finish on your vinyl plank stairs, installing stair nosing is essential. Stair nosing not only adds an aesthetic appeal to the stairs but also provides a safe and secure edge for each step. Follow these steps to install stair nosing on your vinyl plank stairs:
- Measure the width of each step and cut the stair nosing accordingly.
- Apply a generous amount of adhesive to the back of the stair nosing.
- Press the stair nosing firmly onto the front edge of each step, ensuring it is aligned and flush.
- Secure the stair nosing further by using finishing nails or screws, making sure they are spaced evenly along the length.
- Repeat the process for each step until all stair nosing is installed.
By following these steps, your vinyl plank stairs will have a professional and finished look, enhancing the overall appearance of your staircase.
Checking for any gaps or loose planks and addressing them
Once the vinyl plank stairs are installed, it is crucial to check for any gaps or loose planks. These issues, if left unaddressed, can compromise the integrity of the stairs and cause potential hazards. Here’s how you can check for gaps and loose planks:
- Inspect each step carefully, looking for any visible gaps between the planks.
- If you notice any gaps, use silicone-based caulking to fill them in, ensuring a seamless and secure connection.
- For loose planks, apply adhesive to the back and press them firmly against the substrate.
- Use a roller or block to firmly press down on the plank, ensuring it bonds securely to the surface.
By addressing any gaps or loose planks, you are ensuring the stability and safety of your vinyl plank stairs for years to come.
Cleaning and maintaining vinyl plank stairs for long-lasting durability
Cleaning and maintaining your vinyl plank stairs is crucial in prolonging their durability and retaining their beauty. Here are some tips to keep in mind:
- Regularly sweep or vacuum the stairs to remove any dirt or debris.
- For stubborn stains, use a soft cloth or mop with a mild detergent solution to gently clean the affected area.
- Avoid using abrasive cleaners or harsh chemicals as they can damage the vinyl planks.
- Protect the stairs from excessive moisture by using doormats at the entry points and wiping up any spills immediately.
- Consider placing protective felt pads on the bottom of furniture legs to prevent scratching the vinyl planks.
By following these cleaning and maintenance tips, your vinyl plank stairs will maintain their durability and beauty, providing you with years of enjoyment.
Remember, finishing touches and regular maintenance are important to ensure the longevity and appearance of your vinyl plank stairs. By installing stair nosing, addressing gaps or loose planks, and implementing proper cleaning practices, you can enjoy your vinyl plank stairs for many years to come.

Tips And Tricks For A Successful Installation
Installing vinyl plank on stairs can rejuvenate the look of your home and add a modern touch. However, it’s important to follow certain tips and tricks to ensure a successful installation. From using a stair jig or template for precise cuts and measurements to seeking professional help when in doubt, here are some valuable tips to keep in mind.
Using a stair jig or template for precise cuts and measurements
One of the biggest challenges when installing vinyl plank on stairs is ensuring precise cuts and measurements. To achieve this, using a stair jig or template can be a game-changer. This tool allows you to accurately measure and mark each piece of vinyl plank, ensuring a perfect fit on your stairs. The result is a seamless and professional-looking installation.
Allowing sufficient drying time for the adhesive before using the stairs
While it can be tempting to start using the stairs immediately after installing vinyl plank, it’s crucial to allow sufficient drying time for the adhesive. Rushing this step can lead to poor adhesion and potentially ruin the installation. Be sure to check the manufacturer’s guidelines for the recommended drying time. By patiently waiting for the adhesive to fully dry, you’ll ensure a secure and long-lasting installation.
Applying pressure evenly across the entire surface of each plank
To create a solid bond between the vinyl plank and the stairs, it’s essential to apply pressure evenly across the entire surface of each plank. This ensures proper contact and minimizes the risk of air bubbles or gaps. Use a roller or your hands to firmly press down on each plank as you place it on the stairs. Taking the time to apply pressure evenly will result in a professional-looking installation that is built to last.
Use a tack cloth to remove any dust or debris from the stairs
Prior to installing vinyl plank on your stairs, it’s crucial to have a clean and debris-free surface. Dust and debris can prevent proper adhesion and compromise the quality of the installation. A simple yet effective way to remove any dust or debris is by using a tack cloth. This sticky cloth attracts and captures particles, leaving your stairs clean and ready for installation. Go over the entire surface of each stair, ensuring all traces of dust and debris are removed before proceeding.
Seeking professional help if unsure about any step of the installation process
While installing vinyl plank on stairs can be a DIY project, it’s important to recognize your limits and seek professional help if you’re unsure about any step of the installation process. Working with a professional can provide you with expert advice, address any challenges, and ensure a successful installation. Mistakes can be costly, so don’t hesitate to reach out to a professional if you have any doubts along the way.
Frequently Asked Questions Of How To Install Vinyl Plank On Stairs
Can You Install Vinyl Plank On the Stairs?
Yes, vinyl plank can be installed on the stairs. It is a popular and durable option for staircases, providing a stylish and easy-to-maintain solution.
What Are The Benefits Of Installing Vinyl Plank On Stairs?
Installing vinyl plank on stairs offers several benefits, including enhanced durability, water resistance, easy cleaning, and a wide range of design options. It also provides a safe and slip-resistant surface for stairs.
How Do You Prepare Stairs For Vinyl Plank Installation?
Before installing vinyl plank on stairs, it is important to prepare the surface properly. This can involve removing existing flooring, repairing any damage, and ensuring a level and smooth base. Proper preparation is crucial for a successful installation.
What Tools And Materials Do I Need To Install Vinyl Plank On Stairs?
To install vinyl plank on stairs, you will need some essential tools and materials. These may include a measuring tape, utility knife, adhesive, underlayment, stair nosing, and a hand roller. It is important to gather all the necessary supplies before starting the installation process.
Conclusion
Installing vinyl plank on stairs can be a simple and cost-effective way to transform the look of your home. By following the steps outlined in this guide, you can achieve a professional and durable finish. Remember to measure carefully, prepare the stairs properly, and use the right tools and materials.
With a little patience and attention to detail, your vinyl plank stairs will soon become a stunning focal point in your home. Get started today and enjoy the benefits of a beautiful and easy-to-maintain staircase.

