How to Install under Deck Ceiling?
To install an under-deck ceiling, follow a simple step-by-step process. First, measure and cut the panels to fit the deck’s length.
Next, attach the panels to the joists using brackets and screws. Finally, seal any gaps between the panels, and your under-deck ceiling is ready to go. Installing an under-deck ceiling is an effective way to maximize your outdoor space by creating a dry area underneath the deck.
This allows you to enjoy the outdoors even during rainy weather. Additionally, an under-deck ceiling can also help protect the deck structure from moisture damage. By following the right installation steps, you can easily and quickly set up an under-deck ceiling.
Understanding The Benefits And Importance Of An Under Deck Ceiling
Installing an under deck ceiling is an essential step towards creating a functional and inviting outdoor space. It not only enhances the aesthetics of your deck but also provides a range of benefits that can greatly improve your overall outdoor living experience. In this section, we will explore the key reasons why you should consider installing an under deck ceiling and how it can elevate your deck area to new heights.

Enhancing the functionality and aesthetics of your outdoor space
An under deck ceiling is a game-changer when it comes to maximizing the functionality of your outdoor space. By installing a ceiling beneath your deck, you are essentially creating an additional level where you can enjoy various activities regardless of the weather conditions. Whether you dream of hosting memorable outdoor parties or simply desire a cozy spot to relax and unwind, an under deck ceiling allows you to make the most of your backyard throughout the year.
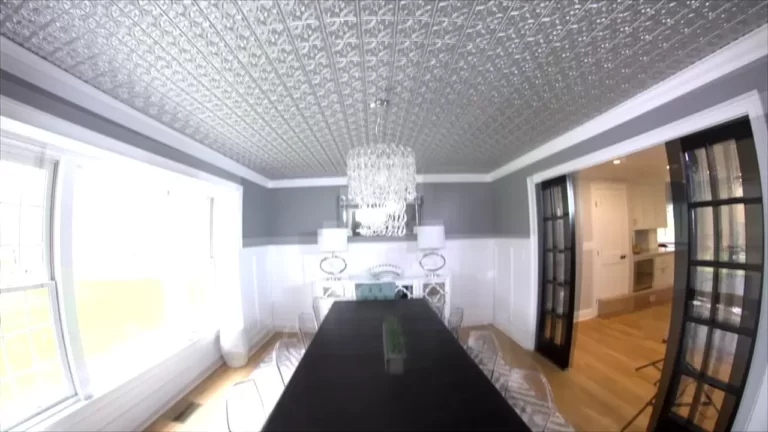
Moreover, an under deck ceiling adds a touch of elegance and sophistication to your outdoor area. With a wide range of materials, colors, and finishes available, you can easily customize your under deck ceiling to match your personal style and complement your existing deck design. Whether you prefer a rustic look or a modern aesthetic, the under deck ceiling acts as a seamless extension of your deck, enhancing its overall appeal.
Protecting the deck and the area beneath from water damage
One of the primary reasons to install an under deck ceiling is to protect your deck and the area below from water damage. Without a proper ceiling system, rainwater can seep through the gaps between the deck boards, causing structural issues and potential long-term damage. By installing an under deck ceiling, you create a waterproof barrier that diverts water away from the deck, ensuring its longevity and reducing the risk of costly repairs or replacements.
Furthermore, an under deck ceiling prevents water from penetrating and damaging the area beneath the deck. Whether you have a patio, a storage space, or a parking area, installing a ceiling system ensures that water does not leak through and compromise the integrity of these spaces. This not only safeguards your belongings but also increases the overall lifespan of your deck and the area below.
Creating additional storage or living space
Imagine having extra storage or living space beneath your deck, perfectly protected from the elements. Well, an under deck ceiling can turn this vision into a reality. Once you have a waterproof ceiling in place, you can transform the area beneath your deck into a functional and versatile space.
Whether you want to create a dedicated storage area for outdoor equipment, bicycles, or gardening tools, or you aspire to design an outdoor living area complete with seating, lighting, and even a fireplace, an under deck ceiling provides the perfect foundation for these endeavors. This additional space not only enhances the value of your home but also allows you to utilize every inch of your outdoor area more efficiently.
Gathering The Materials And Tools Needed For The Installation
Before you start installing an under deck ceiling, it’s important to gather all the necessary materials and tools to ensure a smooth and successful installation process. By having everything you need at hand, you can save time and avoid unnecessary trips to the store. In this section, we will discuss the essential items you will need for the installation.
Under deck ceiling panels
The first and most crucial item you will need for the installation is the under deck ceiling panels. These panels are specifically designed to redirect water that seeps through the deck boards, keeping your outdoor space dry and protected. Choose panels that are durable, weather-resistant, and easy to install. It’s recommended to measure the length and width of your deck accurately to determine how many panels you will need.
Mounting hardware
Next, you will need suitable mounting hardware to secure the under deck ceiling panels in place. This may include brackets, clips, or hangers, depending on the type of panels you have chosen. Make sure to select hardware that is compatible with your panels and offers proper support to prevent sagging or damage over time. It’s essential to follow the manufacturer’s instructions while installing the mounting hardware correctly.

Tape measure
A reliable tape measure is an indispensable tool for any DIY installation project, and installing an under deck ceiling is no exception. Use a tape measure to accurately measure the dimensions of your deck and the panels. This will help you determine the right size of panels needed, as well as ensure precise placement during the installation process. Remember, accuracy is key to achieving a professional-looking result.
Screwdriver
A screwdriver is a must-have tool when installing an under deck ceiling. It allows you to attach the mounting hardware securely to the deck structure and fasten the panels. Opt for a sturdy screwdriver with interchangeable tips, which can accommodate various screw sizes and types. Keep in mind that different brands of hardware may require specific types of screws, so having a versatile screwdriver will save you from any last-minute runs to the store.
Drill
In addition to a screwdriver, having a drill on hand can be extremely helpful during the installation process. Some panels may require pre-drilling holes to ensure a secure fit, and a drill makes this task much easier and faster. Moreover, a drill can be used with screwdriver bits to quickly drive screws into place, increasing efficiency and reducing manual effort. Make sure to have the appropriate drill bits and a fully charged battery for smooth operation.
By gathering these materials and tools before starting the installation, you’ll be well-prepared for a successful and hassle-free under deck ceiling project. Taking the time to prepare and having everything you need ensures a seamless installation process, helping you create a comfortable and protected outdoor space.
Measuring And Preparing The Deck For Installation
Before you can start installing an under deck ceiling system, it is crucial to properly measure and prepare your deck. This preparation phase will ensure a smooth and successful installation, so let’s dive right in!
Assessing the deck structure and clearance
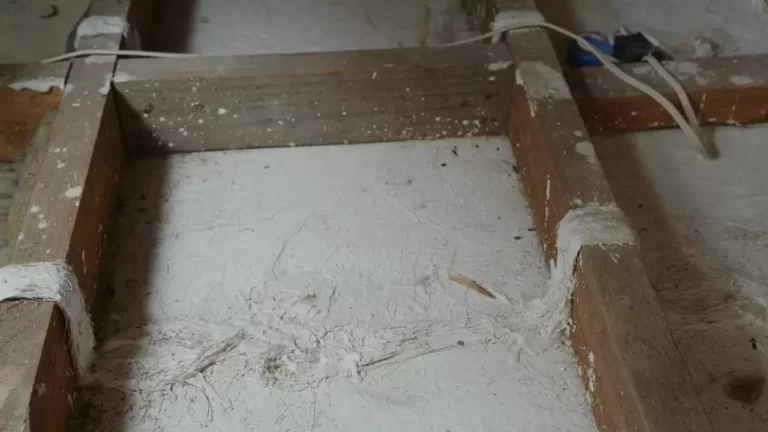
The first step in preparing your deck for an under deck ceiling installation is to assess the structure and clearance. Take a close look at your deck to ensure it is structurally sound and capable of supporting the additional weight of the ceiling system. Look for any signs of rot, decay, or weakness in the deck boards, joists, and supports.
If your deck passes the structural assessment, the next thing to consider is the clearance. Measure the distance from the bottom of your deck joists to the ground or lower deck surface. This measurement will help determine the appropriate panel height for your under deck ceiling system. It’s important to ensure there is enough clearance to comfortably accommodate the chosen panel height.
Taking accurate measurements for the ceiling panels
Once you have assessed the deck structure and clearance, it’s time to take accurate measurements for the ceiling panels. Measure the length and width of your deck to determine the amount of material you will need. Be sure to account for any obstructions, such as posts or staircases, and make note of any irregularities in the deck shape.
Using these measurements, you can calculate the number of panels needed and decide on the panel width that will best fit your deck. Keep in mind that it’s essential to leave a small gap between each panel for expansion and contraction. Refer to the manufacturer’s instructions for the recommended gap size.
Cleaning the deck surface and making necessary repairs
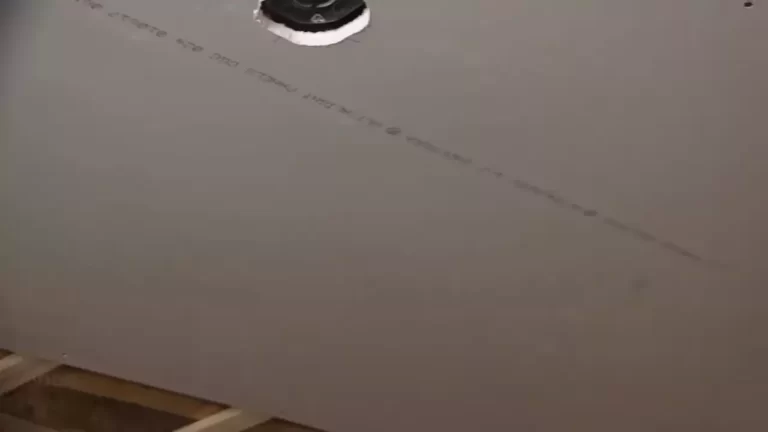
Before the installation, it’s essential to clean the deck surface and make any necessary repairs. Remove any debris, leaves, or dirt that may have accumulated between the deck boards. Use a pressure washer or a scrub brush to thoroughly clean the deck surface and allow it to dry completely.
Inspect the deck for any damaged or loose boards, nails, or screws. Replace or repair any compromised areas to ensure a solid foundation for the under deck ceiling system. This step is crucial to prevent water leakage and maximize the lifespan of your ceiling.
By assessing the deck structure and clearance, taking accurate measurements, and properly cleaning and repairing the deck surface, you are now ready to proceed with the installation of your under deck ceiling system. Taking the time to prepare your deck will ensure a seamless installation process and ultimately create a functional and beautiful outdoor living space.

Installing The Support System For The Under Deck Ceiling
Determining the Appropriate Support Structure
Before starting the installation of your under deck ceiling, it is crucial to determine the appropriate support structure. The support system will ensure the stability and longevity of your under deck ceiling, so you want to make sure it is properly designed and installed.
First, assess the existing deck structure and evaluate its capacity to support the additional weight of the under deck ceiling. If needed, consult a professional to ensure your deck can accommodate the installation. Consider factors such as the material of your deck, its age, and any previous modifications.
Next, determine the height and spacing of the support beams, which will depend on the overall dimensions of your deck. Typically, the support beams should be evenly spaced, with the maximum recommended spacing of 16 inches on center. This will provide adequate support for the under deck ceiling panels and prevent sagging or bowing.
Attaching Brackets or Hangers to the Deck Joists
Once you have determined the appropriate support structure, the next step is to attach brackets or hangers to the deck joists. These brackets or hangers will serve as the connection points for the support beams.
Select brackets or hangers that are specifically designed for under deck ceiling installations. Ensure they are made from durable and weather-resistant materials such as stainless steel or galvanized steel to prevent corrosion and maintain structural integrity.
Start by positioning the brackets or hangers along the centerline of the deck joists, ensuring a consistent spacing between each one. Use a level to ensure they are aligned properly. Then, secure them to the joists using appropriate screws or bolts, following the manufacturer’s instructions.
Ensuring Proper Spacing and Alignment of the Support System
After attaching the brackets or hangers, it is important to ensure proper spacing and alignment of the support system. This step will help maintain the overall structural integrity and prevent any potential issues.
Measure and mark the exact locations of the support beams according to the predetermined spacing. Use a chalk line or string to create a guideline, ensuring the beams are installed in a straight line. This will help achieve a uniform and visually appealing under deck ceiling.
Install the support beams by attaching them to the brackets or hangers. Double-check for proper alignment and levelness before securing them in place with screws or bolts. Remember to follow the manufacturer’s guidelines for installation and make any necessary adjustments to ensure a secure and stable support system.
By following these steps and ensuring the correct installation of the support structure for your under deck ceiling, you can create a functional and aesthetically pleasing outdoor space that will keep you dry and comfortable even during a rainy day.
Attaching And Securing The Under Deck Ceiling Panels
Once you have properly prepared the support system for your under deck ceiling, it is time to move on to attaching and securing the panels. This crucial step ensures that your under deck ceiling will be durable and able to withstand various weather conditions. In this section, we will discuss the steps involved in placing the first panel, aligning it with the support system, and then fastening the panels securely with either screws or clips. Additionally, we will cover the process of overlapping and sealing the joints between panels for a seamless finish.
Placing the First Panel and Aligning It with the Support System
The first panel is of utmost importance as it sets the foundation for the rest of the under deck ceiling. Proper alignment with the support system is crucial to maintain a level and sturdy surface. Here’s how you can execute this step:
- Start by positioning the first panel at one end of the support system. Ensure that it is centered and aligned with the support beams to maintain a symmetrical appearance.
- Using a level, check that the panel is perfectly horizontal. Adjust as necessary by raising or lowering one side.
- Once the first panel is aligned, secure it in place temporarily using clamps or by asking a helper to hold it steady while you proceed with fastening it permanently.

Fastening the Panels Securely with Screws or Clips
Now that the first panel is properly aligned, it is time to fasten it securely to the support system. This step ensures that the panels remain in place, even during extreme weather conditions. Follow these steps to achieve a secure installation:
- Identify the recommended fastening method specified by the under deck ceiling manufacturer. This can either be using screws or clips, depending on the system you have chosen.
- Using the recommended spacing as provided by the manufacturer, position the screws or clips along the edges of the first panel. Make sure to follow the instructions to achieve proper spacing between fasteners.
- Secure the panel to the support system by driving the screws or attaching the clips firmly. Use a power drill or designated tool for the specified fastening method.
- Repeat this process for each panel, ensuring that they are all securely fastened to the support system. Pay close attention to maintaining consistent spacing between fasteners to ensure a uniform look.
Overlapping and Sealing the Joints Between Panels
Lastly, to achieve a seamless and watertight under deck ceiling, it is essential to properly overlap and seal the joints between panels. This step waterproofs the system, preventing any water from seeping through and causing damage. Follow these steps to successfully complete this process:
- Position the next panel alongside the already installed panel, ensuring that they overlap according to the manufacturer’s recommendations. Typically, an overlap of 1 inch is recommended.
- Attach the second panel to the support system using the specified fastening method and spacing.
- Repeat the overlapping and fastening process for the remaining panels until the entire under deck ceiling is installed.
- Once all the panels are in place, inspect the joints for any gaps or spaces. Apply a recommended sealant or adhesive along the joints to create a watertight seal.
- Allow the sealant to dry according to the manufacturer’s instructions before exposing the under deck ceiling to any moisture.
By following these steps, you can effectively attach and secure under deck ceiling panels, ensuring a durable and watertight installation. Proper alignment, secure fastening, and sealing of joints are key elements in creating an under deck ceiling that will not only protect your space but also enhance its visual appeal.
Adding Finishing Touches And Enhancements
Once you have successfully installed your under deck ceiling, it’s time to add those finishing touches and enhancements that will elevate your outdoor space to the next level. These small additions can make a big difference in both the functionality and aesthetics of your under deck area. In this section, we will discuss three key enhancements: installing gutters and downspouts for proper drainage, adding insulation or soundproofing materials if desired, and incorporating lighting or ceiling fan options.
Installing Gutters and Downspouts for Proper Drainage
To ensure proper drainage and prevent water from pooling on your under deck ceiling, it’s crucial to install gutters and downspouts. Gutters will collect and redirect rainwater away from your deck, protecting both the ceiling and the area below. The downspouts will guide the water down to the ground, preventing any potential damage.
When installing gutters and downspouts, it’s essential to choose high-quality materials that can withstand outdoor elements. Aluminum gutters are a popular option, as they are durable and resistant to rust. Additionally, make sure to properly measure and position the gutters, ensuring they slope slightly downward to ensure proper water flow.
Adding Insulation or Soundproofing Materials if Desired
If you plan to use your under deck area for various activities, such as a home office or entertainment space, adding insulation or soundproofing materials can significantly improve the comfort and versatility of the space. Insulation will help regulate temperature, keeping the area cooler in the summer and warmer in the winter. It also acts as a barrier for noise, reducing any potential disturbances from above.
When choosing insulation materials, consider factors such as moisture resistance and fire safety. Closed-cell foam insulation is a popular choice for under deck ceilings as it provides excellent insulation value and is resistant to moisture. It also effectively blocks sound, creating a quieter and more peaceful environment.
Incorporating Lighting or Ceiling Fan Options
Enhance the ambiance of your under deck area by incorporating lighting options that suit your style and needs. Whether you prefer soft, warm lights for a cozy atmosphere or bright, white lights for a more functional space, there are various lighting options to choose from. Consider installing recessed lights along the perimeter of the ceiling or adding string lights for a charming and inviting look.
Additionally, adding a ceiling fan can be a game-changer, providing airflow and cooling during hot summer months. Ceiling fans come in a wide range of designs and sizes, allowing you to select one that complements your outdoor decor. Make sure to hire a professional electrician for the installation to ensure safety and proper functionality.

Testing And Inspecting The Installed Under Deck Ceiling
Testing and inspecting the installed under deck ceiling is an essential step in ensuring its effectiveness and longevity. This process involves checking for any installation flaws or gaps, testing the drainage system for proper water flow, and ensuring the overall stability and functionality of the ceiling. By conducting a thorough examination, you can address any potential issues and make necessary adjustments to ensure a seamlessly installed under deck ceiling.
Checking for any installation flaws or gaps
One of the crucial aspects of testing and inspecting the installed under deck ceiling is checking for any installation flaws or gaps. This involves closely examining the entire area to identify any discrepancies that may compromise the ceiling’s effectiveness. Look for any loose or missing panels, gaps between panels, or inconsistencies in the installation. By addressing these issues promptly, you can prevent any water leakage or future damage.
Testing the drainage system for proper water flow
The drainage system is a vital component of an under deck ceiling. To ensure its proper functionality, it is crucial to test it for proper water flow. Start by simulating rainfall on the deck and observing how the water flows through the drainage system. Check if any areas are not draining properly or if there is any water pooling. Adjust the slope or the positioning of the gutters if needed to ensure efficient water drainage.
Ensuring the overall stability and functionality of the ceiling
Aside from checking for installation flaws and testing the drainage system, assessing the overall stability and functionality of the ceiling is essential. Ensure that the ceiling is securely fastened and stable, particularly during heavy rainfall or strong winds. Inspect the supporting structures and connection points to identify any signs of weakness or damage. Additionally, visually inspect for any sagging or deformation in the ceiling panels, which may indicate structural issues. By ensuring the stability and functionality of the under deck ceiling, you can be confident in its ability to protect the area beneath from rain, snow, and debris.
Maintaining And Caring For Your Under Deck Ceiling
Maintaining and caring for your under deck ceiling is crucial to ensure its longevity and functionality. Regular cleaning, inspecting for any signs of damage or wear, and performing necessary repairs or maintenance are essential to keep your under deck ceiling in top condition. In this section, we will discuss each of these aspects in detail.
Regularly cleaning and removing debris
Regular cleaning of your under deck ceiling is necessary to prevent the buildup of dirt, leaves, and other debris that can clog the drainage system and cause damage over time. It is recommended to clean your under deck ceiling at least twice a year or more frequently if you live in an area with heavy rainfall or surrounded by trees.
Here’s how you can clean your under deck ceiling:
- Start by removing any loose debris using a broom or a leaf blower. Be thorough in removing leaves, twigs, and dirt that may have accumulated on the surface.
- Next, use a soft-bristle brush or a mop to scrub the ceiling panels with mild soap and water. Avoid using harsh chemicals or abrasive cleaners that can damage the surface.
- Rinse off the soap residue with a garden hose, ensuring that the water flows towards the drains to clear any remaining debris.
- Inspect the gutters and downspouts for any clogs or blockages, and clean them if necessary.
By regularly cleaning and removing debris, you can keep your under deck ceiling clean and prevent any potential issues caused by clogs or stagnant water.
Inspecting for any signs of damage or wear
Regular inspections of your under deck ceiling are essential to identify any signs of damage or wear early on. By catching these issues early, you can prevent further damage and avoid costly repairs down the line.
Here’s what you should look out for during your inspections:
- Check for any visible cracks, holes, or water stains on the ceiling panels. These can indicate damage that needs to be addressed.
- Inspect the joints and seams for any signs of separation or gaps. These areas are prone to leaks and should be repaired promptly.
- Examine the drainage system to ensure that water is properly flowing towards the downspouts. Any blockages or issues with the gutters should be resolved.
Regular inspections allow you to catch any potential problems and take appropriate action to maintain the integrity of your under deck ceiling.
Performing necessary repairs or maintenance as needed
When conducting inspections, it’s crucial to address any necessary repairs or maintenance tasks promptly. Ignoring these issues can lead to more significant damage and expensive repairs in the future.
Here are some common repairs and maintenance tasks you may need to perform:
- Repairing small cracks or holes in the ceiling panels using an appropriate sealant or patching compound.
- Replacing damaged or worn-out panels to maintain the functionality and aesthetic appeal of your under deck ceiling.
- Tightening loose screws or fasteners that hold the ceiling panels and components in place.
- Adjusting or replace the gutter system if it is not effectively directing water away from your under deck area.
By promptly addressing repairs and maintenance tasks, you can ensure that your under deck ceiling continues to perform its intended function and remains in excellent condition.
Regularly cleaning, inspecting, and performing necessary repairs or maintenance is vital for the longevity and functionality of your under-deck ceiling. By following these practices, you can enjoy a well-maintained outdoor space beneath your deck for years to come.
Frequently Asked Questions Of How To Install Under Deck Ceiling
Can I Put A Ceiling Under My Deck?
Yes, you can install a ceiling under your deck. It adds a finished look and protects against rain. Be sure to choose durable materials and consider ventilation to prevent moisture buildup. A ceiling can enhance the aesthetic appeal and functionality of your deck.
What Do You Put Under A Deck Ceiling?
You can put various materials under a deck ceiling, such as vinyl, aluminum, or wood panels. These materials provide a protective layer, preventing rain, debris, and sunlight from passing through the deck floor. It improves the aesthetic appeal and increases the functionality of the outdoor space.
How Do You Slope Under A Deck Ceiling?
To slope under a deck ceiling, follow these steps:
1. Determine the desired slope and install a beam to create the slope.
2. Attach joist hangers to the beam and secure them to the deck supports.
3. Install the deck boards at a slight angle, directing water towards the outer edge.
4. Ensure proper drainage by adding a gutter or drainage system.
5. Regularly inspect and maintain the slope to prevent water accumulation and damage.
How Do You Waterproof A Deck Ceiling?
To waterproof a deck ceiling, follow these steps:
1. Start by cleaning the surface thoroughly.
2. Apply a waterproofing sealer with a paint roller or sprayer.
3. Ensure all cracks and seams are sealed using caulk or silicone.
4. Install a waterproof membrane over the entire ceiling area.
5. Finish by applying a waterproof paint or stain for added protection.
Conclusion
Installing an under deck ceiling is a great way to enhance your outdoor space and protect it from the elements. By following the step-by-step instructions outlined in this guide, you can easily transform your under deck area into a functional and aesthetically pleasing space.
With the right materials and tools, this project can be completed efficiently. So, why wait? Get started and enjoy the benefits of your newly installed under deck ceiling today!