How to Install Tile Carpet?
To install tile carpet, start by preparing the subfloor and ensuring it is clean and level. Then, apply adhesive to the subfloor and press the carpet tiles firmly into place, ensuring they are aligned properly.
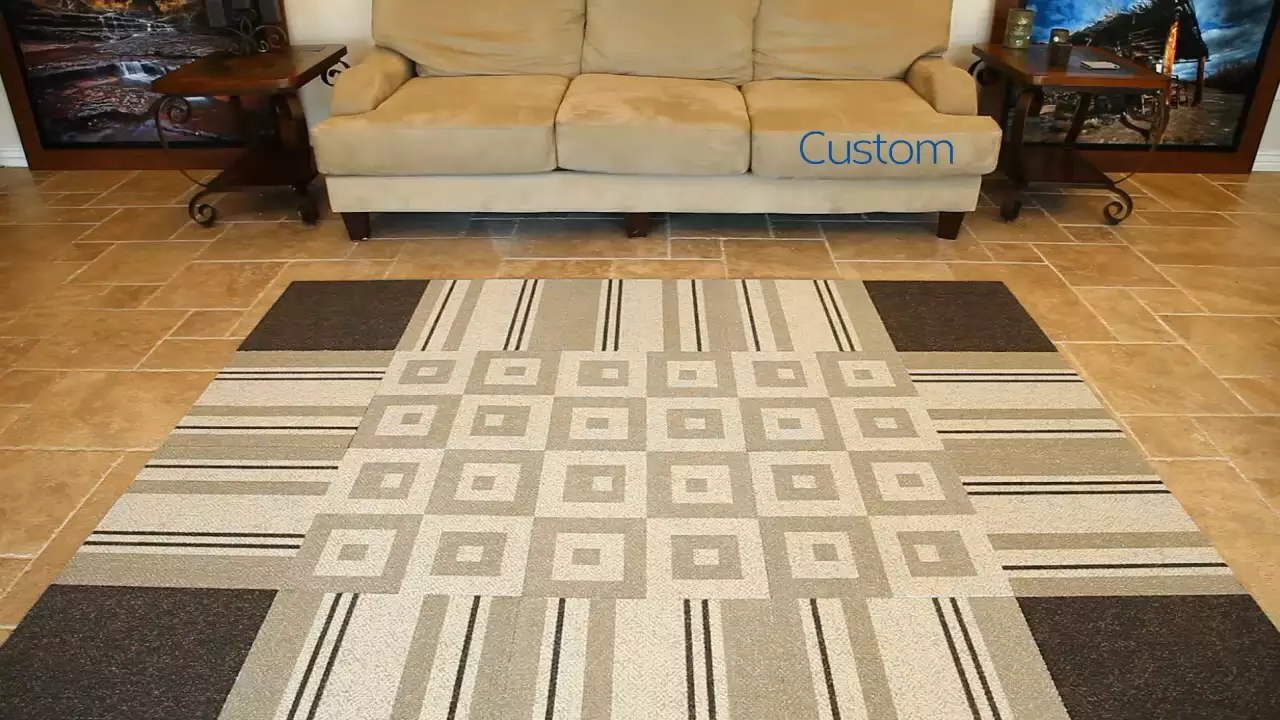
Tile carpet installation is a popular way to enhance the aesthetics and functionality of any space. Whether it’s a residential or commercial setting, tile carpet offers numerous benefits, including easy maintenance and versatility. However, installing tile carpet requires precision and careful handling.
This article will guide you through the step-by-step process of installing tile carpet, ensuring a seamless and professional finish. From preparing the subfloor to selecting the right adhesive and aligning the tiles correctly, we’ll provide you with expert tips to help you achieve stunning results. So, let’s dive into the detailed instructions and transform your floors with tile carpet installation.
Preparing For Tile Carpet Installation
Gather the tools and materials needed
To prepare for tile carpet installation, it is important to gather all the necessary tools and materials. This will ensure that the installation process goes smoothly and efficiently. Here is a list of essential tools and materials that you will need:
- Tile carpet
- Utility knife
- Measuring tape
- Straightedge
- Chalk line
- Adhesive
- Notched trowel
- Roller
- Knee pads
- Safety goggles
Measure the area for tile carpet installation
Before installing tile carpet, it is crucial to measure the area accurately. This will help you determine the amount of tile carpet required and ensure that you have enough materials to complete the installation. Follow these steps to measure the area:
- Start by measuring the length and width of the room using a measuring tape.
- Multiply the length and width measurements to get the total square footage of the room.
- Ensure to add extra for waste and cuts, as it is always better to have more than not enough.
Prepare the subfloor before installation
The subfloor plays a vital role in the longevity and stability of the tile carpet. Therefore, it is essential to prepare the subfloor properly before installation. Follow these steps to prepare the subfloor:
- Ensure that the subfloor is clean, dry, and free from any dirt, dust, or debris. Use a broom or vacuum to remove any loose particles.
- Inspect the subfloor for any cracks, holes, or uneven areas. If any are found, use a patching compound to fill them in and level the surface.
- If the subfloor is wooden, check for loose or squeaky boards. Secure them with screws or nails to provide a stable foundation.
- Apply a layer of primer to the subfloor to improve adhesion and prevent moisture penetration.
By following these steps and being well-prepared with the necessary tools and materials, you can ensure a successful and hassle-free tile carpet installation. Remember to take proper safety precautions, such as wearing knee pads and safety goggles, to protect yourself during the installation process.
Measuring And Preparing The Subfloor
When it comes to installing tile carpet, one of the most crucial steps is measuring and preparing the subfloor. This ensures a smooth and durable installation that will withstand everyday wear and tear. In this article, we will guide you through the process of calculating the square footage of the area, removing existing flooring materials, and inspecting and repairing the subfloor.
Calculate the square footage of the area
Before you start laying tile carpet, it’s important to know the exact square footage of the space. This will help you determine how much material you need to purchase and ensure a budget-friendly installation.
To calculate the square footage, follow these simple steps:
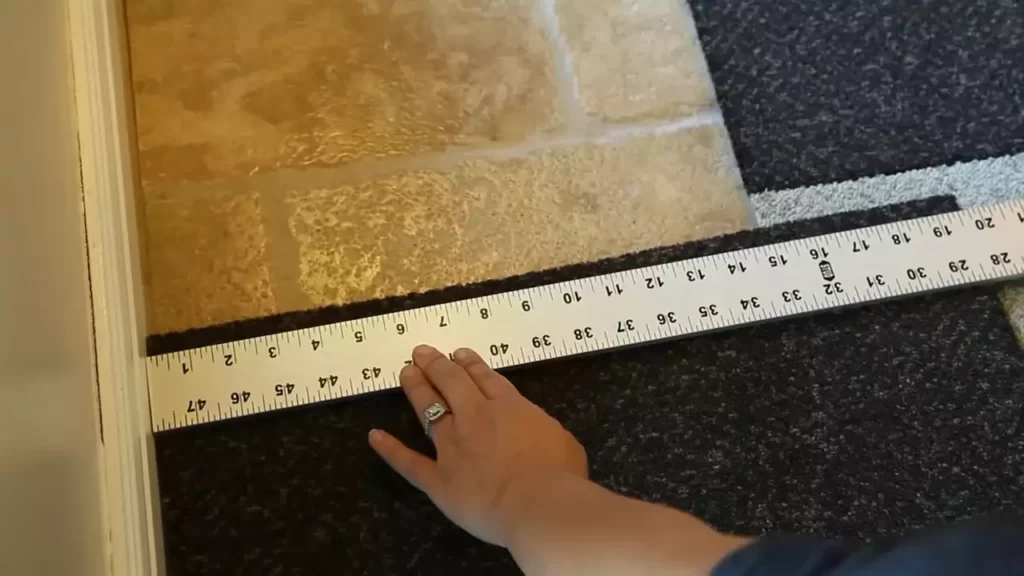
- Measure the length and width of the room in feet using a tape measure.
- Multiply the length by the width to get the total square footage.
- If the room has multiple sections, repeat the measurements and calculations for each section. Then, add up the square footage of all sections to get the total square footage of the area.
For example, if the length of the room is 12 feet and the width is 10 feet, the total square footage would be 120 square feet (12 ft x 10 ft = 120 sq ft). Repeat this process for any additional sections and add up the square footage.
Remove existing flooring materials
Once you have calculated the square footage, it’s time to remove any existing flooring materials. This step is essential to ensure a clean and level surface for the tile carpet installation.
Start by removing any carpets, rugs, or padding. Use a utility knife to cut the carpet into manageable sections, then roll them up and dispose of them properly.
Next, remove any adhesive residue or debris from the subfloor. Use a scraper or floor cleaner to remove any stubborn stains or sticky substances. Sweep or vacuum the subfloor to remove any loose dirt or dust. This will create a smooth and clean surface for the new tile carpet.
Inspect and repair the subfloor
Before installing the tile carpet, it’s crucial to inspect the subfloor for any damage or imperfections. This ensures that the new flooring will be stable and long-lasting.
Start by visually inspecting the subfloor for any cracks, dips, or uneven areas. Use a level to check for flatness and make note of any areas that require attention.
If you come across any cracks or uneven spots, it’s important to repair them before proceeding with the installation. Fill any cracks or holes with a suitable filler or patching compound and level any uneven sections using a floor leveler.
Once the subfloor is inspected and repaired, it’s ready for the tile carpet installation. Taking the time to measure and prepare the subfloor ensures a successful installation that will enhance the beauty and longevity of your new tile carpet.
Choosing And Ordering Tile Carpet
When it comes to installing tile carpet, choosing the right type and ordering the correct quantity are crucial. Taking the time to consider the desired style and design, selecting the appropriate tile carpet type and material, and estimating the quantity needed will ensure a successful installation. In this guide, we will explore each step in detail, providing you with the information you need to make informed decisions and order the perfect tile carpet for your space.
Consider the desired style and design
The first step in choosing tile carpet is to carefully consider the desired style and design of your space. Take into account the overall aesthetic you want to achieve, whether it’s a modern, minimalist look or a cozy, traditional feel. Think about the color scheme and patterns that will complement the existing decor and furniture.
Additionally, consider the function of the space. Are you installing tile carpet in a high-traffic area? If so, durability and stain resistance should be paramount. On the other hand, if the area is less frequently used, you may have more flexibility in terms of style and material.
Select the appropriate tile carpet type and material
Once you have a clear understanding of the style and design you want to achieve, it’s time to select the appropriate tile carpet type and material. There are a variety of options available, each with its own characteristics and benefits.
One popular option is loop pile tile carpet, which features small loops of yarn for a low-profile, durable surface. Another option is cut pile tile carpet, which has longer, cut strands for a softer, more luxurious feel. Each of these options has its own advantages, so consider the specific needs of your space when making your selection.
In terms of material, nylon is a common choice due to its durability and stain resistance. However, there are also eco-friendly options available, such as carpet tiles made from recycled materials. Consider your priorities in terms of sustainability and choose a material that aligns with your values.
Estimate the quantity of tile carpet needed
Estimating the quantity of tile carpet needed is an important step in the ordering process. Ordering too much can result in unnecessary waste, while ordering too little can delay your project. To ensure accuracy, measure the length and width of the area where the tile carpet will be installed.
Once you have the measurements, refer to the product specifications to determine how many square feet each tile covers. Divide the total square footage of your space by the coverage per tile to determine the number of tiles you need to order.
Remember to account for wastage and order a few extra tiles to have on hand in case of any future repairs or replacements. It’s always better to have a bit more than you need.
By following these steps – considering the desired style and design, selecting the appropriate tile carpet type and material, and estimating the quantity needed – you can confidently choose and order the perfect tile carpet for your space. With careful planning and attention to detail, your tile carpet installation will be a success.
Installing The Tile Carpet
The installation process of tile carpet can seem intimidating at first, but with the right tools and techniques, it can be a straightforward and satisfying DIY project. Whether you’re looking to revamp your living room or add a touch of elegance to your office space, installing tile carpet is a fantastic choice. In this guide, we will walk you through the essential steps to install tile carpet, from preparing the layout and pattern to applying adhesive and finally laying the tile carpet in place.
Start by preparing the layout and pattern
The first step in installing tile carpet is to carefully plan and prepare the layout and pattern. Start by measuring the area where you want to install the tile carpet and calculate the number of tiles you will need. It is essential to ensure that the tiles are laid in a visually pleasing pattern and fit seamlessly into the space.
Consider using a table to organize your measurements and create a detailed plan. This will help you visualize the layout and ensure accuracy during the installation process. Once you have the layout and pattern planned, you can move on to the next step.
Apply adhesive to the subfloor
Before laying the tile carpet, you need to ensure that the subfloor is clean and free of any dust or debris. Sweep and vacuum the subfloor thoroughly to create a smooth surface for the adhesive.
Using a trowel, apply the adhesive evenly on the subfloor, ensuring complete coverage. The type of adhesive you use will depend on the specific instructions provided by the manufacturer of the tile carpet. Be sure to follow these instructions closely to ensure a secure and long-lasting installation.
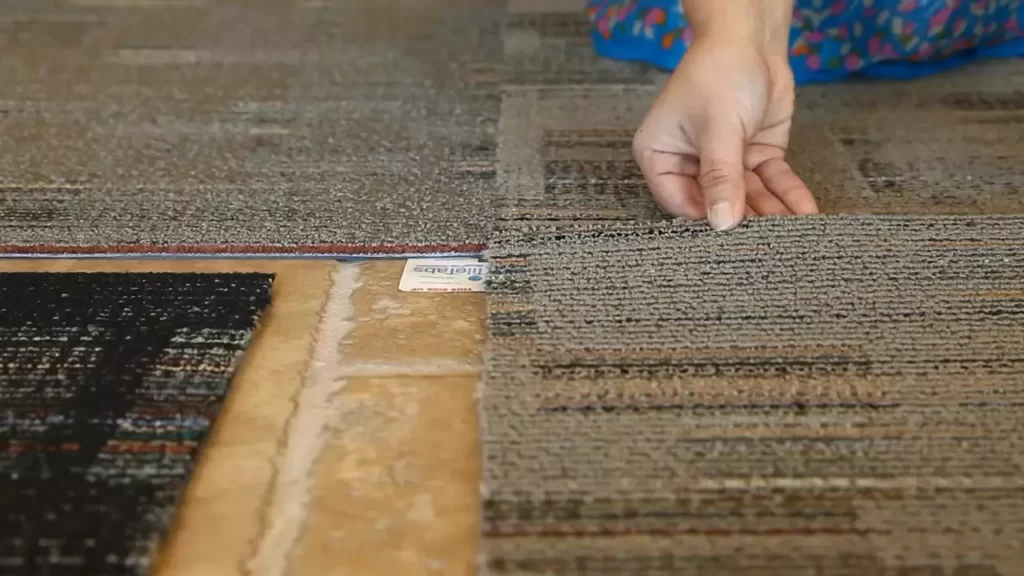
Lay the tile carpet in place and press firmly
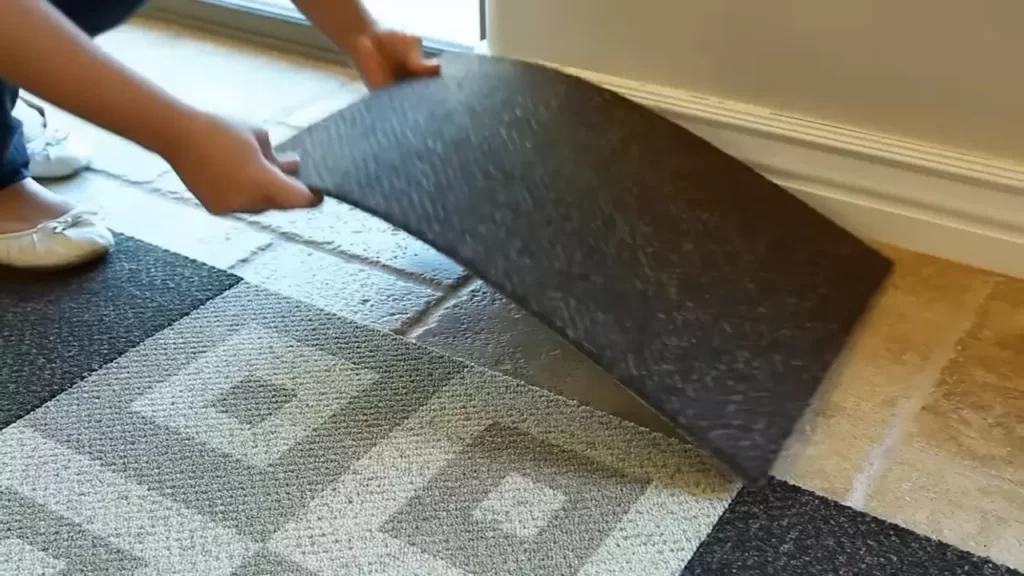
Now it’s time to lay the tile carpet in place. Starting from one corner of the room, position the first tile carefully, aligning it with the planned layout and pattern. Continue laying the tiles one by one, working your way across the room.
Once all the tiles are in place, use a carpet roller or a wooden block and gently press firmly on each tile to ensure proper adhesion to the subfloor. This step is crucial to avoid any bubbles or unevenness in the finished installation. Take your time and make sure to apply enough pressure to securely bond the tile carpet to the subfloor.
Finishing Touches
After successfully installing tile carpet in your space, it’s time to add the finishing touches to ensure a clean and professional look. Follow these steps to complete the installation process:
Trim the edges and corners for a clean finish
Trimming the edges and corners is crucial to achieving a polished and seamless look for your tile carpet installation. Here’s how:
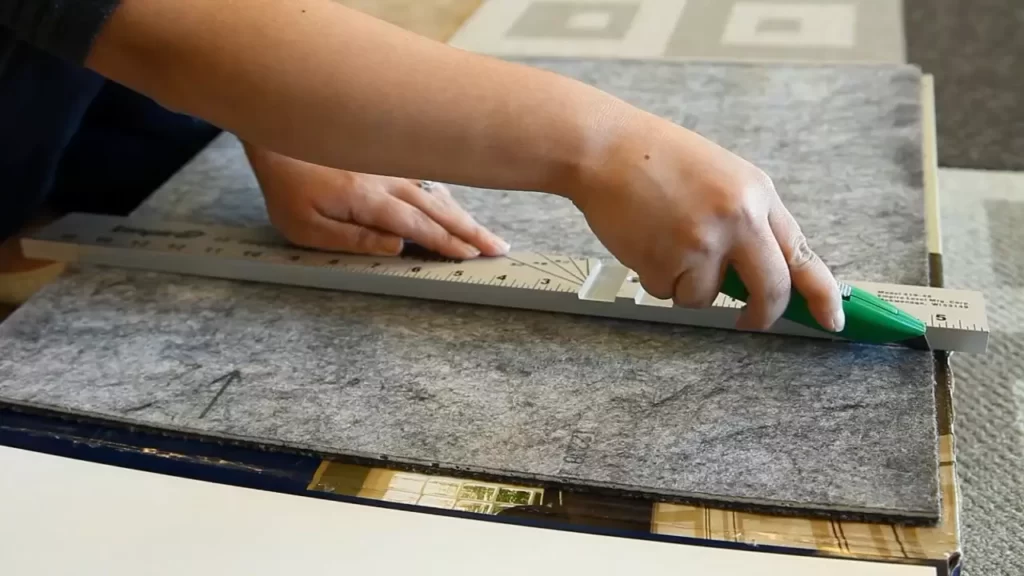
- Carefully measure and mark where you need to trim the carpet. Use a straightedge and a utility knife to ensure clean and precise cuts.
- Place the straightedge along the marked line and carefully run the utility knife along it, applying firm and even pressure. Take your time to avoid any mistakes or jagged edges.
- Once the carpet is trimmed, press it firmly against the edge or corner to ensure it adheres properly.
- If necessary, use a carpet edge trim or transition strip to conceal the trimmed edges and create a seamless transition between the tile carpet and other flooring surfaces.
Allow the adhesive to dry and cure properly
Properly allowing the adhesive to dry and cure is essential to ensure that the tile carpet stays securely in place. Here’s what you need to keep in mind:
- Check the manufacturer’s instructions for the recommended drying and curing time for the adhesive you used.
- Avoid walking on the newly installed tile carpet until the adhesive has completely cured to prevent any shifting or loosening of the tiles.
- Consider placing caution signs or tape around the area to remind others to avoid stepping on the tile carpet until it’s fully set.
- Ensure proper ventilation in the space to aid in the drying process. Open windows or use fans if necessary.
Clean and maintain the newly installed tile carpet
To keep your newly installed tile carpet looking fresh and pristine for years to come, it’s important to establish a regular cleaning and maintenance routine. Follow these tips:
- Vacuum the tile carpet regularly to remove dirt, dust, and debris. Use a vacuum cleaner with a brush attachment to ensure a thorough clean.
- Address spills or stains immediately by blotting them with a clean cloth or using a mild carpet cleaner. Avoid scrubbing vigorously, as it may damage the carpet fibers.
- Consider using carpet protectors or area rugs in high-traffic areas to minimize wear and tear on the tile carpet.
- Avoid dragging heavy furniture or sharp objects across the tile carpet, as it can cause damage and disrupt the adhesive.
By following these finishing touches, you can ensure that your tile carpet installation not only looks amazing but also lasts for years to come.

Tips And Tricks For Successful Tile Carpet Installation
Installing tile carpet can transform the look and feel of any space. Whether you are renovating your home or giving your office a fresh new look, a well-executed tile carpet installation can make all the difference. To ensure your project goes smoothly, here are some valuable tips and tricks to keep in mind.
Plan the installation carefully
Planning is the key to a successful tile carpet installation. Before you begin, take the time to measure the area accurately and determine the amount of tile carpet you will need. Create a detailed layout plan to help you visualize how the tiles will be laid out and make any necessary adjustments before installation.
Additionally, consider factors such as the pattern, color, and texture of the tile carpet to ensure it complements the overall aesthetic of the space. Taking the time to carefully plan the installation will save you time and effort in the long run and help you achieve the desired results.
Use the right tools and materials
Having the appropriate tools and materials is crucial for a successful tile carpet installation. Make sure you have a good quality adhesive suitable for your specific type of tile carpet. It’s also important to use the appropriate tools, such as a carpet stretcher, knee kicker, and a sharp utility knife.
Using the right tools will not only make the installation process easier but also ensure that the tiles are properly secured and aligned. Investing in high-quality tools and materials will help you achieve a professional-looking finish and ensure the longevity of your tile carpet installation.
Take your time and be patient
Patience is key when installing tile carpet. Rushing through the installation process can lead to mistakes and uneven tiles. Take your time to carefully position each tile, ensuring they are aligned correctly and securely attached to the floor.
If necessary, use a straightedge to help guide the placement of the tiles and double-check your measurements along the way. Taking the time to be patient and meticulous will help you achieve flawless results and a durable tile carpet installation.
Frequently Asked Questions Of How To Install Tile Carpet
How Do I Prepare The Subfloor Before Installing Tile Carpet?
Before installing tile carpet, it is important to prepare the subfloor properly. Start by cleaning the subfloor to remove any dust or debris. Then, ensure that the subfloor is level and smooth. If necessary, use a self-leveling compound or sand down high spots.
Finally, apply a primer to improve adhesion and prevent moisture-related issues.
Do I Need Any Special Tools To Install Tile Carpet?
To install tile carpet, you’ll need a few special tools. These include a carpet knife for cutting the tiles to size, a trowel or adhesive spreader to apply the adhesive, and a roller to ensure proper adhesion. Additionally, you may need a straight edge for measuring and a knee kicker or power stretcher for stretching the carpet.
How Do I Choose The Right Adhesive For Installing Tile Carpet?
Choosing the right adhesive is crucial for a successful tile carpet installation. Look for adhesives that are specifically designed for carpet tiles and subfloor materials. Consider factors such as the size and type of carpet tiles used, the subfloor material, and any specific requirements for your project.
Always read the product labels and follow the manufacturer’s instructions for best results.
Can I Install Tile Carpet Over Existing Flooring?
In some cases, you can install tile carpet over existing flooring. However, it is important to evaluate the condition of the existing floor first. Ensure that it is clean, dry, and free from any loose or damaged material. Additionally, the existing floor should be level and smooth.
Consult with a professional or refer to the manufacturer’s guidelines to determine if installing over existing flooring is suitable for your project.
Conclusion
Installing tile carpet can be a complex task that requires careful planning and precise execution. By following the steps outlined in this blog post, you can ensure a successful installation process. Remember to measure and prep the area, mix the adhesive properly, and lay the tile carpet carefully.
With patience and attention to detail, you can enjoy a beautiful and durable tile carpet that enhances the aesthetic and functionality of your space. So, go ahead and give it a try!