How to Install Subway Tile Sheets?
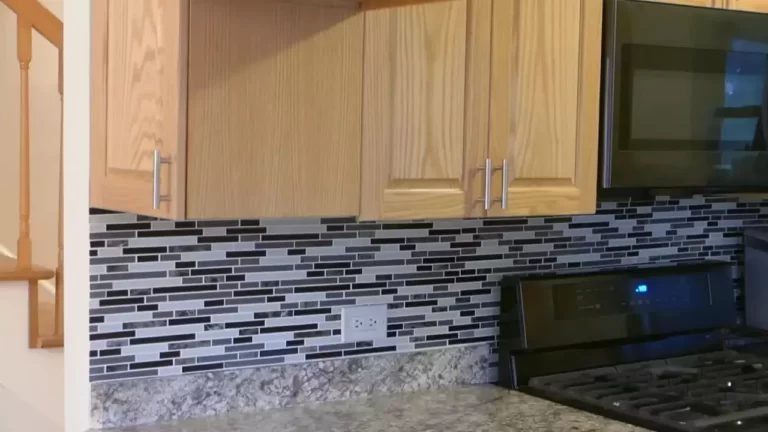
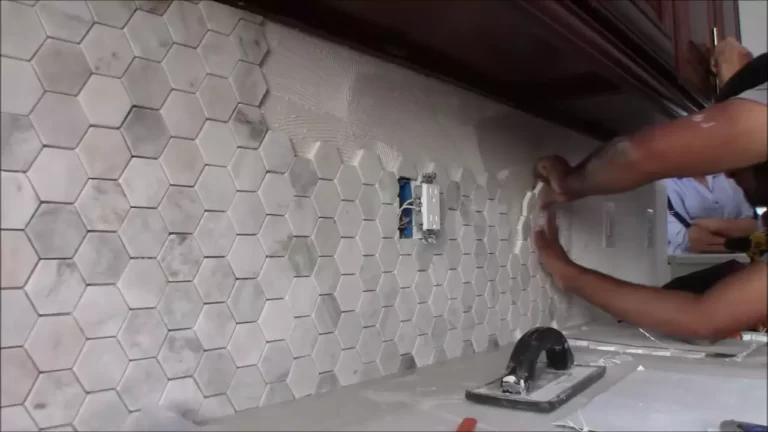
To install subway tile sheets, start by preparing the surface, applying adhesive, and positioning the sheets in the desired pattern. (16 words) Subway tile sheets are a popular choice for adding a sleek and modern touch to any space.
Whether you’re renovating your kitchen backsplash or updating your bathroom, subway tile sheets offer an easy and efficient way to achieve a professional-looking installation. With their pre-arranged design, subway tile sheets are quick to install and require minimal effort. In this guide, we will walk you through the step-by-step process of installing subway tile sheets, from preparing the surface to grouting and sealing.
So, let’s get started and transform your space with beautiful and stylish subway tile sheets.
Understanding The Basics Of Subway Tile Installation
When it comes to giving your space a fresh and timeless look, subway tiles are a popular choice. Easy to install and versatile in design, they are perfect for both kitchen backsplashes and bathroom walls. However, before you jump into the installation process, it’s crucial to understand the basics of subway tile installation.
In this article, we will walk you through differentiating subway tile sheets from traditional tiles, choosing the right subway tile sheets for your project, and preparing the surface for installation.
Differentiating subway tile sheets from traditional tiles
Subway tile sheets offer an efficient and time-saving alternative to traditional subway tiles. Unlike individual tiles, subway tile sheets come in pre-arranged patterns of multiple tiles, adhered to a mesh backing. This eliminates the need for painstakingly aligning each tile individually, resulting in a more uniform and streamlined look. The mesh backing also makes it easier to cut and install the subway tiles, even for those with limited DIY experience.
Choosing the right subway tile sheets for your project
When choosing subway tile sheets for your project, it’s important to consider a few factors. Firstly, opt for sheets that are made from high-quality materials to ensure durability and longevity. Look for porcelain or ceramic subway tile sheets that are resistant to moisture and stains, making them ideal for kitchen and bathroom settings. Secondly, consider the size and color of the tiles.
Subway tile sheets are available in a range of sizes and colors, allowing you to create a design that suits your aesthetic preferences and complements your existing décor. Lastly, take into account the adhesive used on the mesh backing. Ensure it is strong enough to hold the tiles securely in place, yet easy to work with during installation.
Preparing the surface for installation
Properly preparing the surface is crucial for a successful subway tile installation. Start by ensuring that the surface is clean and free from debris, grease, or any loose material. If you are installing subway tile sheets on a wall, fill and smooth any existing holes or cracks. Use a level to ensure the wall is straight and flat, making any necessary adjustments before installation.
Additionally, if you are planning to install subway tile sheets in a wet area, such as a shower, applying a waterproofing membrane can help protect the underlying structure from water damage. This step is especially important to prevent any moisture-related issues down the line.
By understanding the basics of subway tile installation, you can confidently embark on your project and achieve stunning results. Remember to differentiate subway tile sheets from traditional tiles, choose the right subway tile sheets for your project, and properly prepare the surface for installation. With these fundamental steps in place, your subway tile installation will be a breeze!
Gather The Necessary Tools And Materials
Before installing subway tile sheets in your project, it is essential to gather all the necessary tools and materials to ensure a successful installation. By having everything prepared in advance, you can save time and prevent unnecessary interruptions during the process. In this section, we will discuss the essential tools needed for subway tile sheet installation, the materials required for a successful installation, and additional supplies you may need for specific project needs.
Essential tools needed for subway tile sheet installation
When it comes to installing subway tile sheets, having the right tools at your disposal is crucial. These tools will help you achieve precise cuts, smooth application, and a professional-looking finish. Below are the essential tools you will need:
- Tape Measure: A tape measure is necessary for taking accurate measurements of your space and determining the amount of tile needed.
- Level: A level will ensure that your tile is installed evenly and straight.
- Tile Cutter: A tile cutter will be necessary for cutting the subway tile sheets to fit around corners, edges, or outlets.
- Trowel: A trowel is used to spread the adhesive or thin-set onto the wall before placing the tile sheets.
- Notched Trowel: A notched trowel creates ridges in the adhesive, allowing for better adhesion of the tile sheets.
- Grout Float: A grout float is used to spread the grout evenly between the tiles.
- Sponge: A clean sponge is necessary for wiping away excess grout and cleaning the surface of the tiles.
- Bucket: A bucket will be required for mixing the grout.
- Grout Sealer: A grout sealer will help protect the grout from stains and make it easier to clean.
- Safety Glasses and Gloves: It is important to protect your eyes and hands during the installation process.
Materials required for a successful installation
In addition to the tools mentioned above, you will also need the following materials to ensure a successful subway tile sheet installation:
- Subway Tile Sheets: Choose the desired style, color, and size of subway tile sheets that will complement your project.
- Adhesive or Thin-set: Select a high-quality adhesive or thin-set that is suitable for your specific project and tile material.
- Grout: Choose a grout color that complements your tile sheets and project design.
- Tile Spacers: Tile spacers will help maintain consistent spacing between the tiles and ensure a professional-looking result.
- Waterproofing Membrane (if applicable): If you are installing subway tile sheets in an area prone to moisture, such as a bathroom or kitchen backsplash, a waterproofing membrane is recommended to protect the underlying surface from water damage.
Considering additional supplies for specific project needs
Aside from the essential tools and materials, your specific project needs may require additional supplies. Here are some examples:
- Tile Nippers: Tile nippers are used to make small cuts or round edges of subway tile sheets.
- Spacers of different sizes: Depending on your design preference, you may need spacers in different sizes to create specific grout line widths.
- Grout Colorant: If you want to change the color of your grout or refresh its appearance, a grout colorant can be applied.
By considering these additional supplies, you can make sure that your subway tile sheet installation is tailored to your specific project requirements.
Step 1: Measuring And Planning The Layout
Step 1: Accurately measuring the installation area
Before starting the installation of subway tile sheets, it’s crucial to accurately measure the area where the tiles will be installed. This will help ensure you have the right amount of tiles and make the installation process much smoother. To measure the installation area:
- Start by measuring the height and width of the wall or surface where the subway tiles will be installed.
- Record these measurements, and then calculate the total square footage of the installation area by multiplying the height and width measurements.
- It’s always a good idea to add a few extra square feet to account for any cuts or mistakes that may occur during the installation process.
- Now you have an accurate measurement of the installation area, which will guide you in purchasing the correct amount of subway tile sheets.
Step 2: Creating a detailed layout plan before starting the installation
Once you have measured the installation area and purchased the subway tile sheets, the next step is to create a detailed layout plan. This plan will help you visualize the placement of the tiles and ensure a cohesive and aesthetically pleasing design. To create a detailed layout plan:
- Start by drawing a rough sketch of the installation area on a piece of paper or using design software.
- Consider the pattern you want to achieve with the subway tiles, such as a classic brick pattern or a herringbone pattern.
- Using your measurements, mark the dimensions of the installation area on the sketch.
- Then, consider any obstacles like windows, outlets, or switches, and plan the layout accordingly to ensure a seamless installation.
- Take into account the size of the subway tile sheets, and determine the number of sheets needed to cover the entire installation area.
Step 3: Determining the starting point and establishing reference lines
Before you start installing the subway tile sheets, it’s crucial to determine the starting point and establish reference lines. This ensures that the installation is straight and aligned. Follow these steps to determine the starting point and establish reference lines:
- Start by finding the center point of the installation area. This can be done by measuring the width and height of the installation area and marking the midpoint of each measurement.
- Use a level and a straight edge to draw a vertical and horizontal reference line at the center point. These lines will serve as your starting point, providing a guide for a straight installation.
- From the center point and reference lines, work your way outwards, ensuring that each tile sheet is aligned with the reference lines.
- Check the alignment of each tile sheet with a level as you go along to maintain a straight and even installation.
By following these steps, you can ensure an accurate and well-planned installation of subway tile sheets. Taking the time to measure and plan the layout will help you achieve a beautiful and professional-looking result.
Step 2: Preparing The Surface For Installation
Before you begin installing your subway tile sheets, it’s crucial to properly prepare the surface to ensure a smooth and successful installation. This step involves evaluating the condition of the wall or surface, patching and repairing any imperfections, and ensuring a clean and smooth surface for optimal adhesion. Let’s take a closer look at each of these essential tasks:
Evaluating the condition of the wall or surface
Start by carefully examining the wall or surface where you plan to install the subway tile sheets. Look for any signs of damage, such as cracks, dents, or holes. It’s important to note that these imperfections can interfere with the installation process and affect the overall result. If you discover any significant issues, it’s best to address them before proceeding further.
Patching and repairing any imperfections
Once you’ve identified any imperfections, it’s time to patch and repair them. Use a suitable patching compound or filler to fill in cracks and gaps, and ensure the surface is level and smooth. Following the manufacturer’s instructions, carefully apply the compound using a putty knife or trowel. Once the compound has dried, sand it down gently to create a seamless finish. Take your time with this step, as a well-prepared surface will contribute greatly to the overall appearance of your subway tile installation.
Ensuring a clean and smooth surface for optimal adhesion
Now that you’ve addressed any existing imperfections, it’s crucial to thoroughly clean the surface. Dust, dirt, grease, or any other residue can compromise the adhesive properties of the tile installation. Use a mild detergent and warm water to clean the surface, making sure to remove any debris or grime. Once cleaned, rinse the surface with clean water and allow it to dry completely before proceeding.
To further enhance adhesion, consider using a primer specifically designed for the type of surface you’re working with. This will create an additional layer of protection and help the tile sheets adhere securely.
By taking the time to evaluate, patch, repair, and clean the surface, you’ll ensure a solid foundation for your subway tile installation. These steps are crucial for a successful and long-lasting result. Now that your surface is ready, you’re one step closer to achieving the stunning subway tile look you desire.
Step 3: Applying The Thinset Adhesive
Now that you have prepped the surface and laid out your subway tile sheets, it’s time to move on to the next important step: applying the thinset adhesive. This is a crucial part of the installation process as it ensures the tiles stick securely to the surface, providing a durable and long-lasting finish. In this step, we will guide you through the process of choosing the right type of adhesive, preparing and mixing it properly, and applying it evenly using a trowel.
Choosing the right type of adhesive for your subway tile sheets
When it comes to choosing the right type of adhesive for your subway tile sheets, it’s important to consider a few factors. Firstly, check the manufacturer’s instructions for their recommended adhesive type. This information is usually provided on the packaging or their website. Secondly, consider the type of surface you are working with.
Different surfaces may require different adhesives, so make sure you select one that is suitable for your specific surface. Lastly, take into account the size and weight of your subway tile sheets. Larger and heavier sheets may require a stronger adhesive to ensure they stay in place.
Preparing and mixing the thinset adhesive according to manufacturer instructions
Before you start mixing the thinset adhesive, carefully read and follow the manufacturer’s instructions. These instructions will provide you with the correct mixing ratios and any specific requirements for the adhesive you are using. Typically, thinset adhesive is mixed with water in a clean bucket, using a mixing paddle or drill attachment. Follow the instructions to achieve a smooth and workable consistency. It’s important to mix only the amount of adhesive that you can use within the recommended working time to avoid it drying out or becoming less effective.
Applying the adhesive evenly to the surface using a trowel
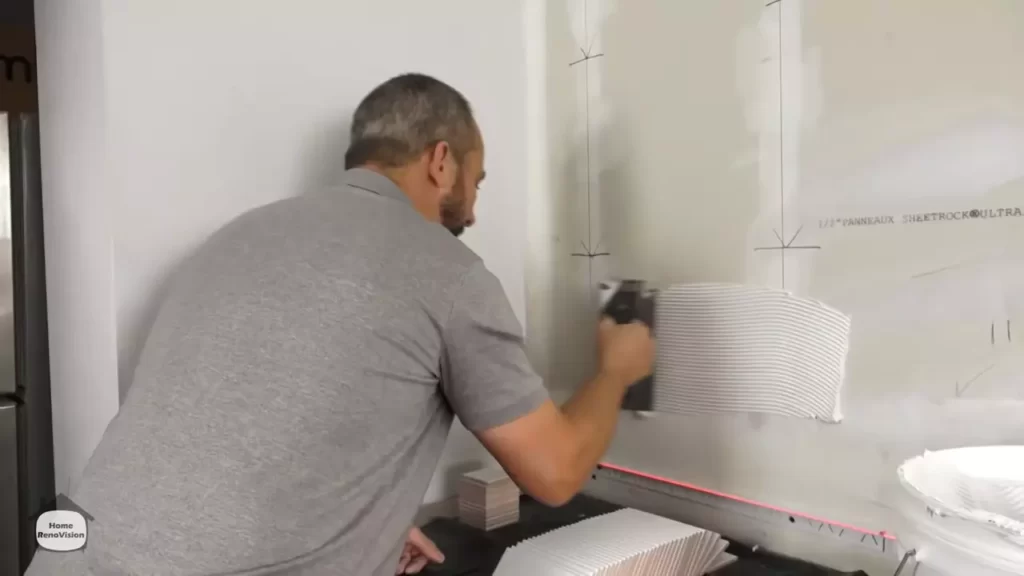
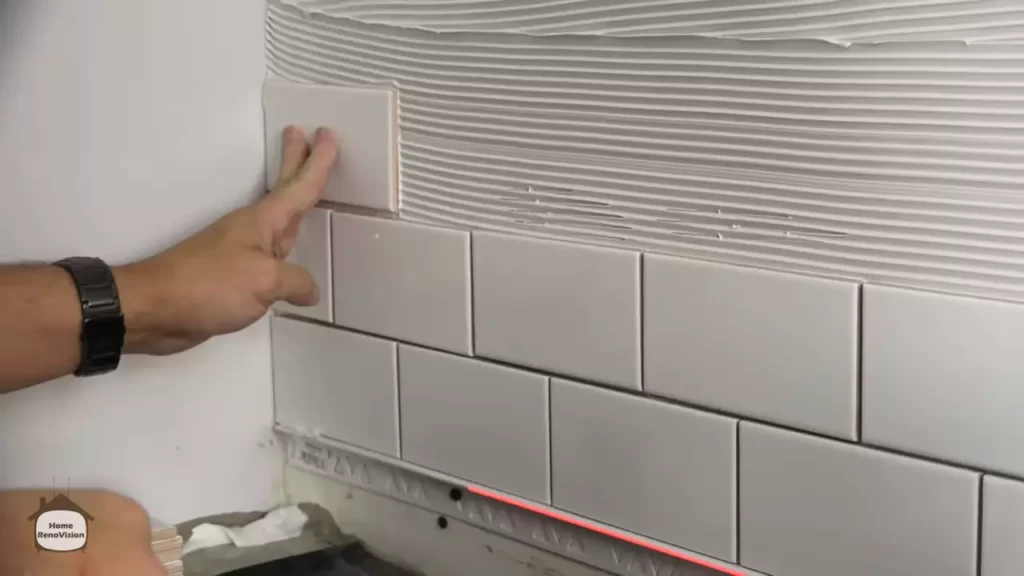
Once your thinset adhesive is properly mixed, it’s time to apply it to the surface. Using a notched trowel, spread the adhesive evenly on the surface, ensuring full coverage. The size of the notches on the trowel will depend on the size and spacing of the subway tile sheets. Place the trowel at a 45-degree angle and guide it across the surface, creating ridges of adhesive. This will help create a strong bond between the adhesive and the tiles. Remember to work in small sections to prevent the adhesive from drying out too quickly.
If needed, refer to the manufacturer’s instructions for any additional recommendations or techniques specific to the adhesive you are using. Once the adhesive is applied, you are ready to move on to the next step of pressing the subway tile sheets into place and ensuring proper alignment.
Step 4: Installing The Subway Tile Sheets
Placing the first subway tile sheet on the wall
Before you begin placing the subway tile sheets, ensure that you have adequately prepared the wall surface by removing any dirt, dust, or debris. Now, let’s dive into the steps to place the first subway tile sheet:
- Start by applying a thin layer of tile adhesive or mortar onto the wall using a notched trowel. This will help ensure proper adhesion.
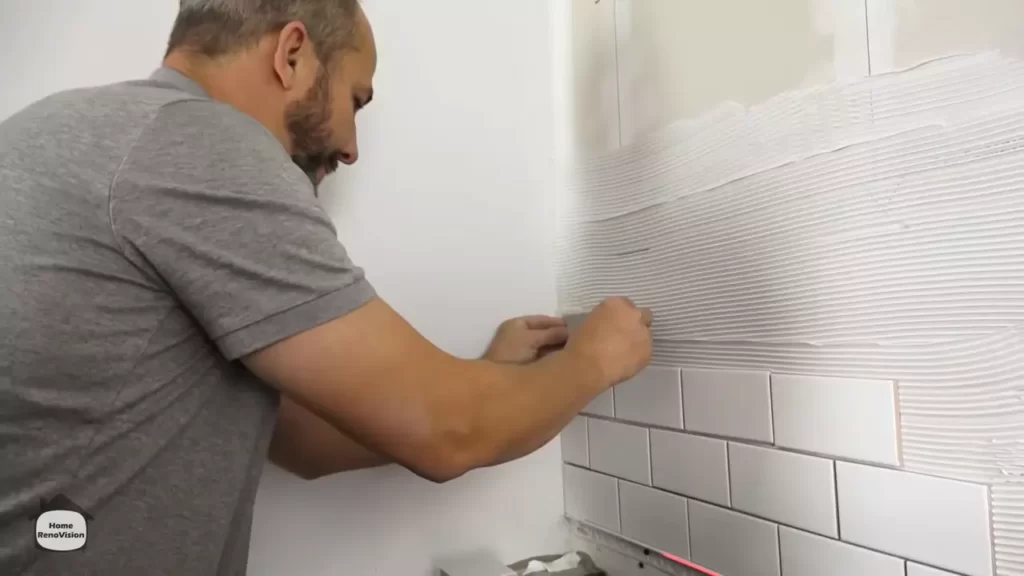
- Position the first subway tile sheet onto the wall, starting from the bottom and pressing it firmly into the adhesive. Make sure it aligns with the guidelines or markings you may have made earlier for a straight installation.
- Using a level, check for any unevenness or sloping. Adjust as necessary, ensuring that the first sheet is perfectly aligned both horizontally and vertically.
- Secure the sheet in place by lightly pressing it with your hands or using a tile float. This will help the adhesive bond better with the surface and prevent any shifting.
- Continue applying adhesive and placing the remaining subway tile sheets beside the first one, following the same procedure.
Aligning subsequent sheets for a seamless look
When installing multiple subway tile sheets, it is essential to achieve a seamless look. Follow these steps to ensure proper alignment:
- Ensure that each subsequent subway tile sheet is positioned snugly against the previous sheet to maintain even spacing and alignment.
- Verify the alignment periodically using a level to spot any discrepancies. Adjust as necessary to create a straight and seamless pattern.
- Avoid pushing the sheets too close together, as this may cause the adhesive to squeeze out and create an uneven appearance.
- Make any necessary adjustments while the adhesive is still wet and easy to manipulate. This will minimize the risk of damaging the tiles.
Using spacers to maintain consistent grout lines
Consistent grout lines contribute to the overall aesthetic of subway tile installations. Follow these steps to ensure precise spacing:
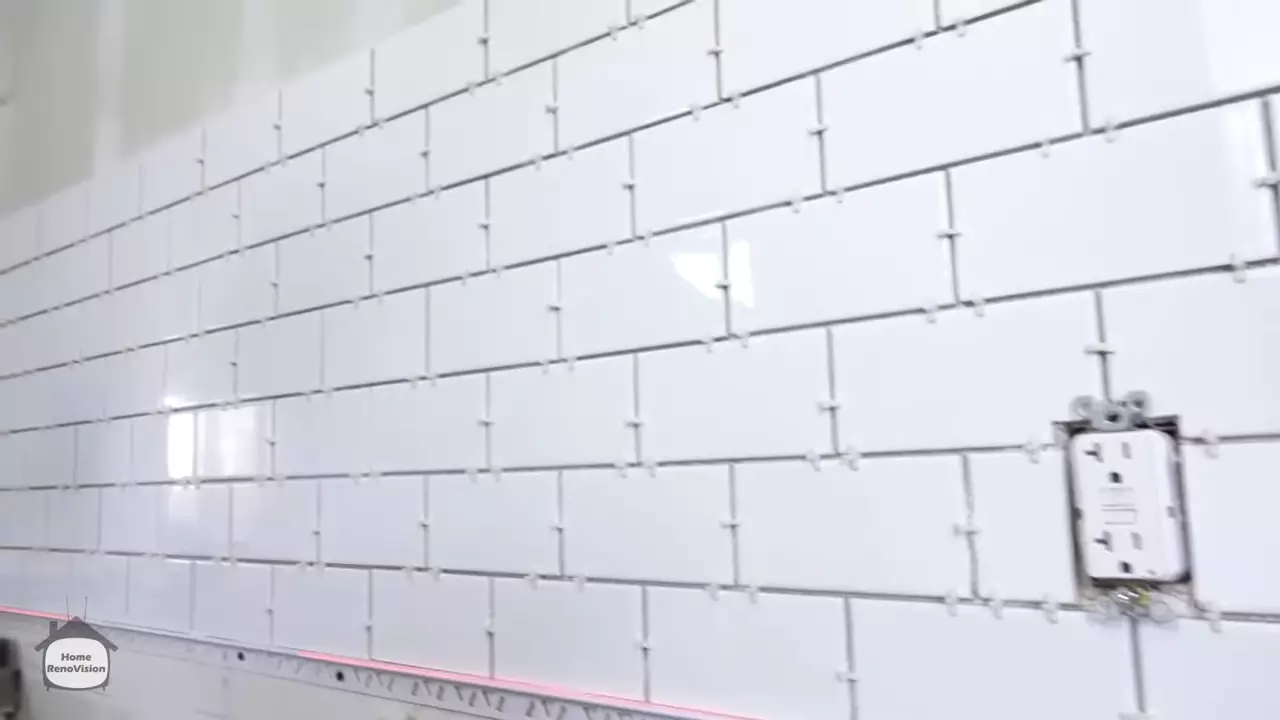
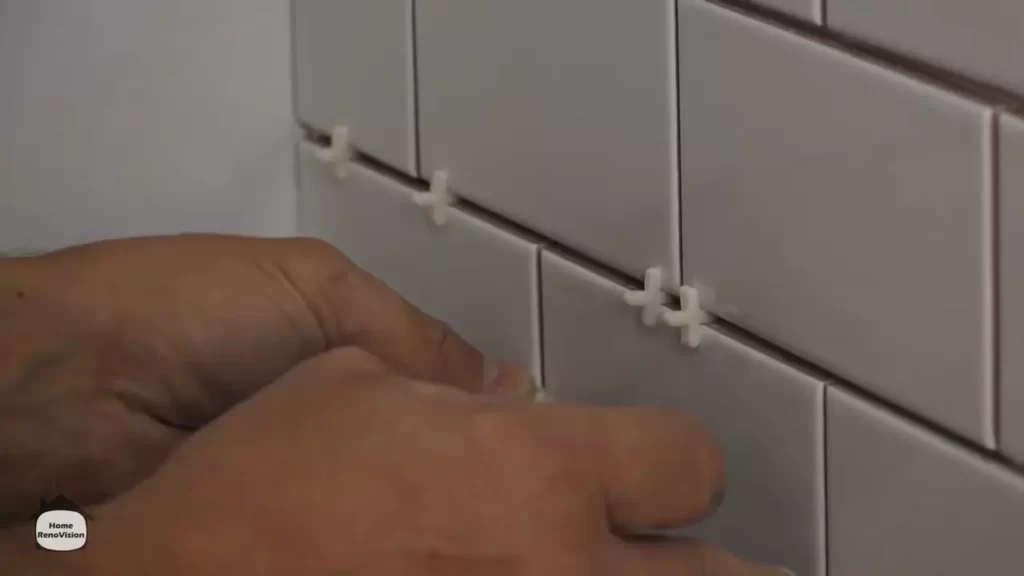
- Place tile spacers along the edges of each subway tile sheet before pressing it into the adhesive. Spacers help maintain even spacing between the sheets and ensure consistent grout lines.
- Choose the appropriate spacers based on your desired grout line width. Common options include 1/8 inch, 1/16 inch, or 3/16 inch.
- As you install each sheet, double-check that the grout lines created by the spacers are consistent throughout the project area.
- Remove the spacers carefully once the adhesive has dried and before applying grout. This will create space for the grout to fill the gaps between the tiles.
By following these steps, you can efficiently install subway tile sheets while maintaining proper alignment and achieving an appealing and professionally finished look for your space.
Step 5: Cutting And Fitting The Subway Tile Sheets
Once you have measured and prepared your subway tile sheets for installation, it’s time to move on to the crucial step of cutting and fitting the sheets to ensure a seamless and professional-looking finish. This step requires precision and attention to detail, but with the right tools and techniques, you’ll be able to achieve the desired look for your subway tile installation.
Measuring and marking tiles for cuts and adjustments
The first task in cutting and fitting subway tile sheets is to measure and mark the tiles for any necessary cuts and adjustments. This step is crucial to ensure that the tiles fit perfectly around edges, corners, and outlets.
To measure the tiles, use a measuring tape and a straight edge. Determine the dimensions of the area where the tile needs to be trimmed. Mark these measurements on the tile surface using a pencil or a tile marker. Make sure to leave a small gap to allow for grouting between the tiles.
Using a wet saw or tile cutter to trim the subway tile sheets
Once you have marked the tiles, it’s time to cut and trim them. There are two main options for cutting subway tiles: using a wet saw or a tile cutter.
A wet saw is a powerful tool that uses a diamond-tipped blade and water cooling system to cut through ceramic and porcelain tiles. It provides precise and clean cuts, making it ideal for cutting both straight lines and curves. To use a wet saw, follow the manufacturer’s instructions and always wear protective goggles and gloves.
If you don’t have access to a wet saw, a tile cutter can be a viable alternative. Tile cutters work by scoring the surface of the tile and then applying pressure to break it along the scored line. While not as precise as a wet saw, a tile cutter is suitable for straight cuts and can be a more budget-friendly option.
Ensuring proper fit around edges, corners, and outlets
Once you have cut the tiles to the desired size, it’s essential to ensure they fit properly around edges, corners, and outlets. Test the fitted tiles before applying adhesive to ensure a seamless appearance and proper alignment.
If you encounter any irregularities or need to make further adjustments, use a tile file or sandpaper to gently smooth the edges or trim any excess material. Take your time during this step to achieve a neat and uniform look for your subway tile installation.
Remember, the key to cutting and fitting subway tile sheets lies in careful measurement, precise cutting, and thorough testing. By following these steps, you’ll be well on your way to installing subway tiles that will enhance the aesthetic appeal of your space.
Step 6: Grouting The Subway Tile Sheets
Now that you have successfully installed the subway tile sheets on your wall, it’s time to take the next crucial step – grouting. Grouting not only enhances the appearance of your subway tiles but also provides protection against water damage and prevents dirt and grime from seeping into the gaps between the tiles. In this step, we will guide you through the process of grouting your subway tile sheets, ensuring a professional finish and long-lasting results.
Choosing the right grout color and type for your project
Before you begin grouting, it’s essential to choose the right grout color and type that complements the aesthetic of your space. The color of the grout can either blend in with the tiles for a seamless look or create contrast to highlight the individual tiles. Consider the overall design scheme and personal preferences when making this decision.
When it comes to grout type, there are two main options: sanded and unsanded. Sanded grout is suitable for wider grout lines, typically 1/8 inch or larger, while unsanded grout works well with narrower grout lines up to 1/8 inch. Consider the size of the gaps between your subway tiles and choose the appropriate grout type for a proper bond and durability.
Preparing the grout mixture and letting it set
Before mixing the grout, carefully read the manufacturer’s instructions and gather all the necessary tools and materials, including a grout float, grout sponge, and a bucket for mixing. Follow the recommended water-to-grout ratio to achieve the desired consistency and mix the grout thoroughly to ensure even distribution of color and additives.
Once the grout mixture is ready, let it set for a few minutes to allow the additives to activate. This resting period is essential for achieving a workable consistency and preventing premature drying during application. Use this time to prepare your workspace by covering any adjacent surfaces or vulnerable areas to protect them from grout stains.
Applying the grout to the subway tile sheets and wiping off excess
Now it’s time to apply the grout onto the subway tile sheets. Start by dipping your grout float into the mixture and evenly distribute the grout across the tiles. Hold the float at a 45-degree angle and firmly press the grout into the gaps between the tiles, ensuring complete coverage.
Once the grout is applied, wait for about 15-20 minutes to allow it to firm up and slightly dry. Then, using a slightly damp grout sponge, carefully wipe off the excess grout from the surface of the tiles in a diagonal motion. Rinse the sponge frequently to maintain its effectiveness and prevent the grout from smearing or drying onto the tiles.
Repeat the wiping process until the tiles are free from any grout haze or residue. Finally, let the grout cure according to the manufacturer’s instructions, usually for around 24-48 hours. Avoid exposing the freshly grouted area to excessive moisture or heavy traffic during this time to ensure optimal bonding and longevity.
By following these steps, you’re on your way to achieving perfectly grouted subway tile sheets that will transform your space into a stylish and durable masterpiece. The grouting process may require patience and attention to detail, but the end result will be well worth the effort.
Step 7: Sealing The Grout And Cleaning The Surface
After successfully installing the subway tile sheets, it’s crucial to complete the process by sealing the grout and ensuring a clean surface. This step will not only protect the grout from stains and moisture, but also give your tile installation a polished and professional finish.
Sealing the grout to protect it from stains and moisture
Sealing the grout is an essential step for maintaining the longevity and appearance of your subway tile installation. It acts as a barrier, preventing dirt, liquids, and other substances from seeping into the porous grout lines.
To seal the grout, follow these simple steps:
- Clean the grout lines using a gentle grout cleaner and a brush to remove any debris or stains. Make sure the grout lines are completely dry before proceeding to the next step.
- Apply the grout sealer using a small brush or sponge, making sure to cover the entire grout surface. It’s recommended to work in small sections to ensure thorough coverage.
- Allow the sealer to penetrate the grout for the recommended time specified by the manufacturer.
- Wipe off any excess sealer using a clean cloth, making sure to remove all visible residue.
Properly sealed grout not only helps to preserve the original color but also prevents discoloration and mold growth. It is recommended to reseal the grout periodically, as per the manufacturer’s instructions, to maintain its protective qualities.

Cleaning the surface of any grout residue or smudges
Once the grout is sealed, it’s time to clean the surface and remove any remaining grout residue or smudges. This final cleaning step will ensure a spotless and professional-looking finish.
Follow these steps to clean the surface effectively:
- Prepare a bucket of warm water and add a mild pH-neutral tile cleaner.
- Using a clean sponge or cloth, gently wipe the surface in a circular motion to remove any grout haze or smudges. Avoid using abrasive materials or cleaners that may damage the tiles.
- Rinse the sponge/cloth regularly to avoid spreading the residue.
- Dry the surface with a clean towel, ensuring no water spots or streaks are left behind.
By properly cleaning the surface, you’ll ensure a flawless and remarkable end result, enhancing the overall aesthetic appeal of your subway tile installation.
Finalizing the installation with a thorough inspection
Once the grout is sealed and the surface is clean, it’s time to conduct a thorough inspection to ensure everything has been properly installed and aligned.
During the inspection, pay attention to the following:
- Check for any loose tiles or grout lines that may need to be resecured or filled.
- Verify that the tiles are evenly spaced, with consistent grout lines throughout the installation.
- Inspect the joints and corners to ensure they are properly filled and aligned.
- Wipe away any remaining dust or debris to reveal the true beauty of your subway tile installation.
By conducting a thorough inspection, you’ll ensure the quality and longevity of your subway tile installation, giving you peace of mind and a stunning finished product.
Tips And Tricks For A Successful Subway Tile Sheet Installation
Installing subway tile sheets can be a creative and rewarding DIY project that adds a stylish touch to any space. Whether you’re updating a backsplash in the kitchen or revamping a bathroom wall, following some tips and tricks can ensure a successful installation. In this section, we’ll discuss how to maintain a consistent pattern and spacing, use a level for a straight and even installation, allow for proper drying and curing times, and troubleshoot common issues for a smooth installation.
Maintaining a consistent pattern and spacing throughout the installation
When it comes to subway tile sheets, achieving a consistent pattern and spacing is crucial for a professional and polished look. Here are some tips to help you maintain consistency:
- Start by planning the layout of your tiles, taking into consideration any corners, edges, or focal points of the area you’re tiling.
- Use tile spacers to ensure even spacing between each sheet of subway tiles. These spacers come in various sizes, so choose the one that matches your desired grout line width.
- Regularly step back and visually inspect the installation to ensure that the pattern and spacing are consistent. Adjust as needed before the adhesive dries.
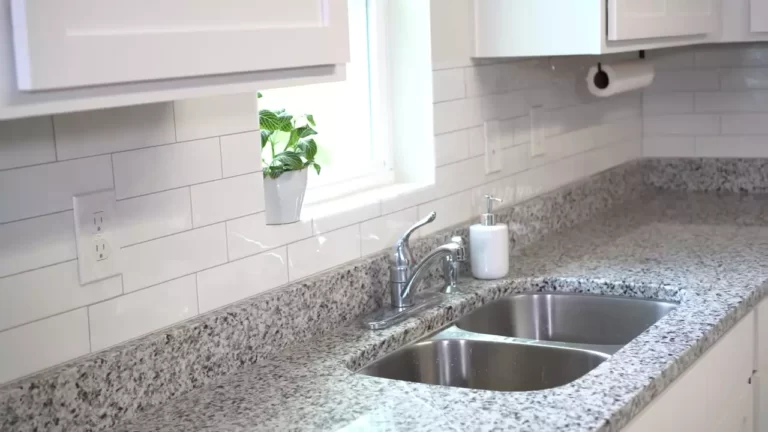
- Pay attention to transitions between subway tile sheets and adjacent surfaces, such as windows or countertops, to maintain a seamless and cohesive look.
Using a level and measuring frequently to ensure a straight and even installation
For a professional finish, it’s essential to keep your subway tile sheets straight and even. Here’s how you can achieve that:
- Before starting the installation, use a level to ensure that your starting point is perfectly level. This will serve as a reference point for the rest of the installation.
- Measure and mark guidelines on the wall to guide your tile placement. This will help you keep the sheets in line and avoid any slanted or uneven installations.
- Regularly check the levelness of the tiles as you progress. Adjust if necessary to maintain a straight installation.
- Ensure that each sheet is firmly pressed onto the adhesive to eliminate any air pockets or gaps that could affect the alignment.
Taking breaks and allowing proper drying and curing times
Patience is key when it comes to subway tile sheet installations. Take breaks and allow the proper drying and curing times to ensure a long-lasting result:
- Follow the manufacturer’s instructions regarding drying and curing times for the adhesive you are using.
- Avoid rushing the installation by applying excessive pressure to the tiles or grouting too quickly.
- During breaks, cover any exposed adhesive with masking tape to prevent it from drying out.
- Allow the tiles to fully cure before grouting, usually within 24 to 48 hours, to prevent any shifting or movement.
Troubleshooting common issues and finding solutions for a smooth installation
Even with careful planning and execution, you may encounter some common issues during a subway tile sheet installation. Here are some troubleshooting tips to help you overcome these challenges:
- If you notice any misaligned tiles, use a rubber mallet and a piece of scrap wood to gently tap them into place.
- In case of uneven spacing, use tile spacers or adjust the position of adjacent sheets for a more balanced look.
- If excess adhesive squeezes out between the tiles, wipe it away with a damp sponge before it dries.
- In the event of a cracked or damaged tile, carefully remove and replace it with a new one.
By following these tips and tricks, you can achieve a successful subway tile sheet installation that adds beauty and functionality to your space. Remember to plan the layout, maintain consistency, use a level for accuracy, allow for proper drying and curing times, and troubleshoot any issues that may arise. Happy tiling!
Frequently Asked Questions On How To Install Subway Tile Sheets
How Do I Prepare The Surface Before Installing Subway Tile Sheets?
Before installing subway tile sheets, make sure the surface is clean, dry, and free of any dust or debris. Use a primer to create a smooth and even surface for the tile adhesive to adhere properly. Fill in any cracks or holes with a suitable filler, and sand the surface if necessary for better adhesion.
What Tools Do I Need To Install Subway Tile Sheets?
To install subway tile sheets, you will need a few tools including a tile cutter, notched trowel, grout float, level, spacers, sponge, and a tile adhesive. These tools will help you cut the tiles to size, apply the adhesive evenly, and grout the tiles once they are installed.
Can I Install Subway Tile Sheets Over Existing Tile?
Yes, it is possible to install subway tile sheets over existing tile. However, it is crucial to ensure that the existing tile is in good condition, clean, and firmly adhered to the surface. Use a suitable primer to create a good bond between the existing tile and the adhesive for the subway tile sheets.
Conclusion
To sum up, installing subway tile sheets can be a straightforward and rewarding home improvement project. By following the steps detailed in this guide, you can achieve professional-looking results. Remember to gather the necessary tools, prepare the surface properly, and carefully apply the adhesive and grout.
Taking your time and paying attention to detail will ensure a stunning and lasting subway tile installation in your space. Start transforming your home today!

