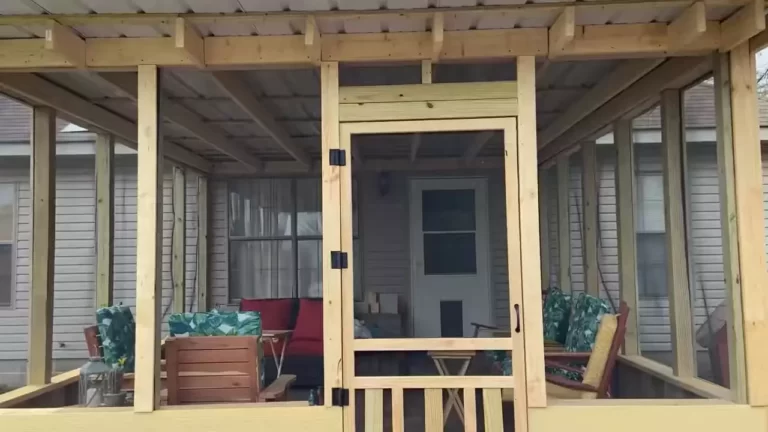
How to Install Screws in Metal Roofing?
To install screws in metal roofing, you need to align the holes in the roofing material with the holes in the metal roof panels and attach the screws tightly.
Understanding The Different Types Of Metal Roofing Screws
When it comes to installing screws on a metal roofing project, it is important to choose the right type of screw for the job. Different types of metal roofing screws have specific purposes and functions, ensuring a secure and long-lasting installation. In this section, we will explore three types of metal roofing screws: self-tapping screws, self-drilling screws, and stitch screws.
Self-tapping screws
Self-tapping screws are designed to create their internal threads as they are driven into the metal. These screws are commonly used for attaching metal panels to metal purlins or steel framing. They have a sharp, pointed tip and a unique thread design that allows them to cut through the metal and create a secure connection. Self-tapping screws offer convenience and efficiency as they eliminate the need for pre-drilling holes in the metal, saving time during installation.
Self-drilling screws
Self-drilling screws, on the other hand, are similar to self-tapping screws but with the added advantage of a built-in drill bit at the tip. Instead of relying on the screw to cut through the metal, the drill bit creates a pilot hole as the screw is driven in. This makes the installation process faster and more precise, especially when working with thicker metal or harder materials. Self-drilling screws are commonly used for attaching metal roofing to wood or metal substrates, providing a strong and secure attachment.

Stitch screws
Stitch screws are specially designed for metal-to-metal applications, such as joining two metal panels together. These screws have a unique feature – they create a stitching effect when driven into the metal, providing a watertight seal by overlapping the two panels. This type of screw is commonly used for low-slope roofing applications where water tightness is crucial. Stitch screws are available in various lengths and have self-sealing washers to prevent leaks and ensure a durable roof installation.
In conclusion, understanding the different types of metal roofing screws is essential for a successful and long-lasting metal roof installation. Whether you choose self-tapping screws, self-drilling screws, or stitch screws, each type has its own unique features, making them suitable for specific applications. By selecting the right screws for your metal roofing project, you can ensure a secure and watertight roof, providing durability and peace of mind for years to come.
Factors To Consider When Selecting Metal Roofing Screws
When it comes to installing screws in metal roofing, there are several factors that need to be considered. Choosing the right metal roofing screws is essential for ensuring a secure and long-lasting installation. In this article, we will explore some of the key factors to keep in mind when selecting metal roofing screws.
Material of the Roofing
The material of the roofing plays a crucial role in determining the type of screws that should be used. Different types of metal roofing, such as steel or aluminum, require specific screws that are designed to work with the particular material. Using the wrong type of screws can lead to corrosion or damage to the roofing, compromising its structural integrity.
Roof Pitch
The pitch or slope of the roof is another factor to consider when selecting metal roofing screws. The pitch determines the angle at which the roof is inclined, and it can range from flat to steep. A steeply pitched roof requires longer screws to ensure a secure attachment, while a flatter roof may require shorter screws. The length of the screws should be chosen accordingly to ensure proper engagement with the underlying structure.
Expected Weather Conditions
The weather conditions in your area are important to consider when selecting metal roofing screws. If you live in an area with high winds, heavy rainfall, or extreme temperature fluctuations, you will need screws that can withstand these conditions. Stainless steel screws are highly recommended for their resistance to corrosion and durability in harsh weather environments. This will help to prevent any potential leaks or damage due to weather-related factors.
Load Requirements
The load requirements of your metal roofing must also be taken into account when selecting screws. This refers to the weight and stress that the roofing structure will bear. If your metal roofing is intended to support heavy loads, such as snow accumulation or solar panels, you will need screws that are designed to handle the additional stress. It is crucial to choose screws with the appropriate load capacity to ensure the safety and stability of your metal roofing.
By considering these factors when selecting metal roofing screws, you can ensure a secure and reliable installation that will stand the test of time. Remember to choose screws that are compatible with the material of your roofing, suitable for the roof pitch, resistant to weather conditions, and capable of handling the load requirements. Investing in high-quality screws is essential for maintaining the integrity of your metal roof and avoiding potential issues down the road.
Checking The Roofing Sheets For Compatibility With Screws
Examining the thickness and gauge of the sheets
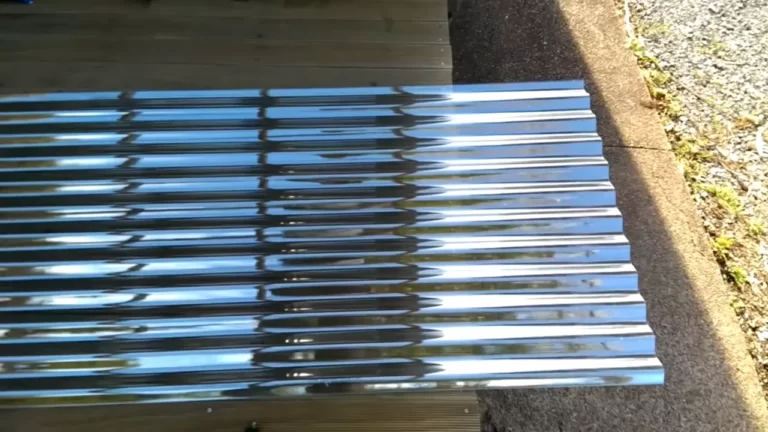
Before installing screws into your metal roofing, it is crucial to check the compatibility of the roofing sheets. One important aspect to consider is the thickness and gauge of the sheets. The thickness of the metal will determine the type and length of screws needed to securely fasten the roofing sheets to the structure.
To begin, measure the thickness of the metal roofing sheet using a caliper or gauge tool. This will give you an accurate reading of the sheet’s thickness in millimeters or gauge. The gauge number represents the thickness of the sheet metal, with a lower gauge indicating a thicker sheet. A common gauge range for metal roofing sheets is between 22 and 29 gauge.
Once you have determined the gauge of your roofing sheets, it is essential to select screws that are specifically designed for that gauge. Using the wrong size or type of screw can result in improper installation and compromise the integrity of your metal roof.
Verifying the quality of the metal coating
Another factor to consider when checking the compatibility of roofing sheets with screws is the quality of the metal coating. Metal roofing sheets are often coated with protective finishes, such as galvanized or coated paint, to enhance durability and resist corrosion.
Inspect the metal coating carefully to ensure it is intact and in good condition. Look for any signs of rust or damage that may compromise the effectiveness of the coating. If you notice any issues, it is important to address them before proceeding with the installation. Applying screws to damaged or corroded coated metal can lead to premature rusting and potential leaks.
Additionally, consider the type of screw you will be using. Stainless steel screws are highly recommended for metal roofing installations due to their exceptional resistance to corrosion. These screws have a protective coating that prevents them from reacting with the metal and forming rust. Using stainless steel screws will help maintain the structural integrity of your metal roof over time.
Measuring And Marking The Screw Placement
Tools And Equipment Required For Screw Installation
Properly installing screws in metal roofing is essential to ensure a secure and long-lasting roof. To achieve this, you will need the right tools and equipment. Here are the main items you’ll need:
Power drill
A power drill is an indispensable tool for screw installation in metal roofing. It allows you to drill holes quickly and effectively, saving you time and effort. Make sure your power drill is in good working condition before starting the installation process.
Appropriate screwdriver bit
Choosing the right screwdriver bit is crucial for a successful screw installation. The type of bit you’ll need depends on the screws you are using. Common types include Phillips, square, and hexagonal bits. Ensure you have the correct bit to avoid damaging the screws and achieving a secure fit.
Safety gloves and goggles
Your safety should always be a priority when working with metal roofing. Wearing safety gloves will protect your hands from sharp edges and potential injuries. Additionally, safety goggles will shield your eyes from any flying debris or metal fragments during the installation process.
By having these tools and equipment at your disposal, you’ll be well-prepared to install screws in metal roofing efficiently and effectively, ensuring a reliable and secure installation.
Step-By-Step Guide To Properly Install Screws In Metal Roofing
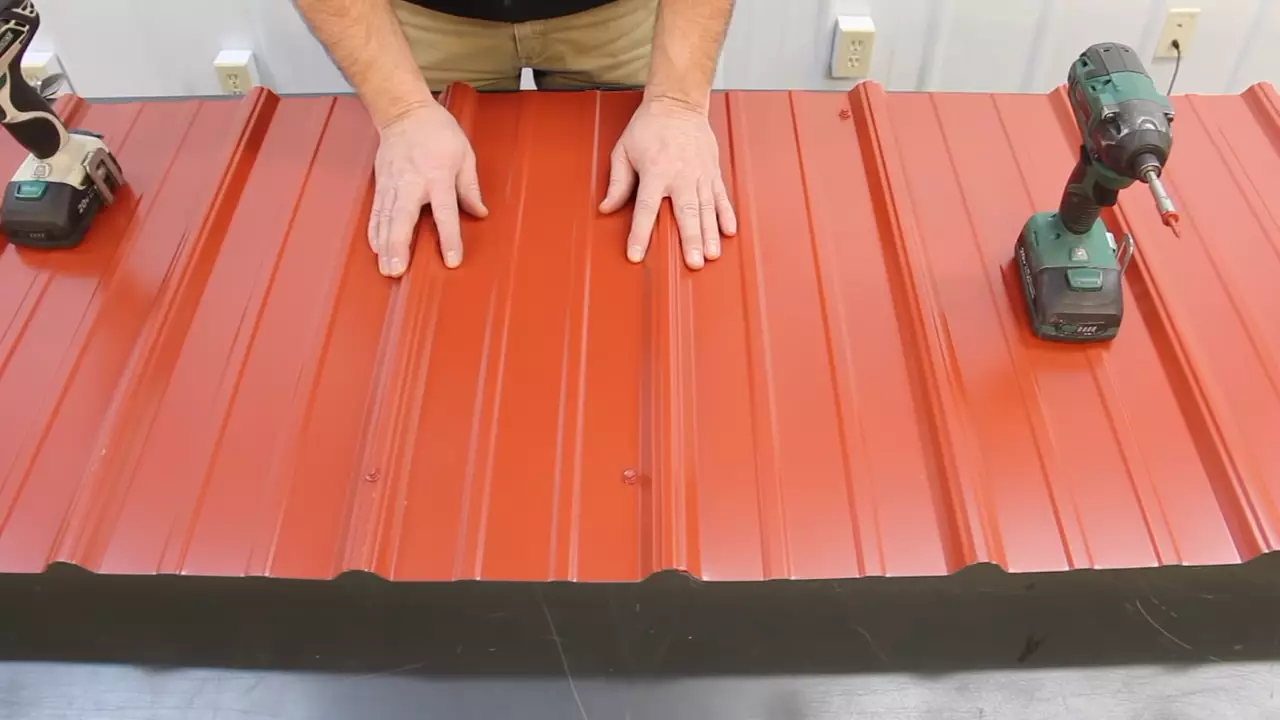
Installing screws in metal roofing is a critical step to ensure the durability and stability of your roof. Whether you are a DIY enthusiast or a professional roofer, following a step-by-step guide is essential for a successful installation. In this guide, we will walk you through the process of pre-drilling holes for self-tapping screws, drilling pilot holes for self-drilling screws, and applying the correct amount of pressure when driving in screws. By the end of this guide, you will have the knowledge and skills to confidently install screws in metal roofing.
<h3>Pre-drilling holes for self-tapping screws</h3>
The first step in installing screws in metal roofing is to pre-drill holes for self-tapping screws. Pre-drilling is necessary to prevent the metal from cracking or splitting when driving in the screws. Here is a step-by-step process to pre-drill holes:
- Start by marking the locations where the screws will be installed on the metal roofing.
- Use a drill bit that is slightly smaller than the diameter of the self-tapping screws to create pilot holes at the marked locations. This will help guide the screws and prevent them from wandering off course.
- Make sure to position the drill perpendicular to the metal surface to ensure straight and accurate pilot holes.
- Drill the pilot holes to a depth that allows the screws to penetrate the metal roofing without going too deep.
By pre-drilling holes for self-tapping screws, you ensure a secure and stable attachment of the metal roofing and minimize the risk of damage to the material.
<h3>Drilling pilot holes for self-drilling screws</h3>
If you are using self-drilling screws, the process is slightly different. Self-drilling screws have a drill bit tip that eliminates the need for pre-drilling. Here is a step-by-step process to drill pilot holes for self-drilling screws:
- Start by marking the locations where the screws will be installed on the metal roofing.
- Choose a drill bit that matches the diameter of the self-drilling screws.
- Position the drill bit perpendicular to the metal surface and apply gentle pressure to start drilling.
- Drill the pilot holes to the desired depth, making sure not to go too deep.
Drilling pilot holes for self-drilling screws ensures a clean and accurate installation, while also reducing the risk of damaging the metal roofing.
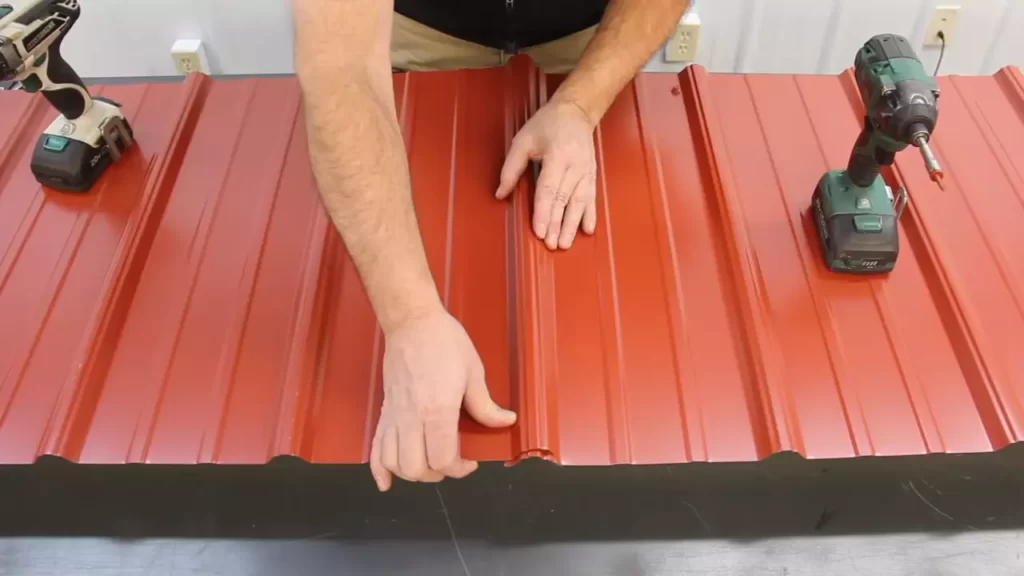
<h3>Applying the correct amount of pressure when driving in screws</h3>
Once the pilot holes are prepared, it’s time to drive in the screws. Applying the correct amount of pressure during this step is crucial to avoid damaging the metal roofing or stripping the screws. Follow these steps for properly driving in screws:
- Align the screws with the pre-drilled or pilot holes, making sure they are centered.
- Use a drill with an appropriate screwdriver bit to drive in the screws.
- Apply steady and firm pressure to the drill while driving in the screws, but be cautious not to overtighten them.
- Stop driving the screws once they are fully secured in the metal roofing, and avoid applying excess force or torque.
Remember to check the manufacturer’s guidelines for the recommended torque and pressure specifications for the specific screws you are using. Applying the correct amount of pressure when driving in screws ensures a secure attachment without causing any damage.

Following Manufacturer Instructions For Screw Installation
Proper screw installation is crucial for the long-term durability and integrity of a metal roofing system. One of the most important factors to consider when installing screws in metal roofing is following the manufacturer’s instructions. These instructions provide detailed guidelines on the recommended installation techniques and torque specifications. Adhering to these instructions ensures that the screws are installed correctly, minimizing the risk of leaks and damage to the roofing material.
Understanding the recommended installation techniques
The manufacturer’s instructions typically outline the specific techniques that should be followed when installing screws in metal roofing. These techniques may vary depending on factors such as the type of metal, the pitch of the roof, and the environmental conditions. It is essential to carefully read and understand these instructions before beginning the installation process. The recommended techniques may include:
- Pre-drilling holes: In some cases, pre-drilling holes in the metal roofing panels may be necessary to ensure proper screw placement and prevent the material from cracking or splitting.
- Using gaskets or washers: Gaskets or washers are often provided by the manufacturer to create a watertight seal around the screw heads. These should be installed as directed to enhance the roof’s resistance to water penetration.
- Utilizing specific tools: The manufacturer may recommend using specific tools, such as power drivers or impact drivers, to ensure the screws are installed with the correct force and speed.
Adhering to the manufacturer’s torque specifications
Torque refers to the amount of rotational force applied when tightening the screws. The manufacturer’s instructions will include specific torque specifications that should be followed during the installation process. This information is crucial as over-tightening or under-tightening the screws can lead to issues such as panel distortion or insufficient fastening. To adhere to the manufacturer’s torque specifications:
- Use a torque wrench: A torque wrench should be used to achieve accurate and consistent torque values. This tool allows you to tighten the screws with the appropriate amount of force.
- Reference the specifications: The manufacturer’s instructions typically provide the recommended torque values based on factors such as screw size and material. Consult these specifications and adjust the torque wrench accordingly.
- Apply torque evenly: When tightening the screws, it is vital to apply the torque evenly across the roof’s surface. This ensures that the load is distributed uniformly and minimizes the risk of structural damage.
By following the manufacturer’s instructions for screw installation, you can ensure that your metal roofing system is installed correctly and will provide long-lasting protection for your structure. Remember to always refer to the specific installation guidelines provided by the manufacturer of your roofing material, as they may vary. Taking the time to understand and implement these instructions will help maintain the overall performance and longevity of your metal roof.
Ensuring Proper Alignment And Tightness Of Screws
When it comes to installing screws in metal roofing, ensuring proper alignment and tightness is crucial for the overall structural integrity and longevity of your roof. In this section, we will guide you through the necessary steps to align the screws parallel to the roof ridge and check for any loose or over-tightened screws.
Aligning the screws parallel to the roof ridge
Aligning the screws parallel to the roof ridge is essential to maintain a uniform appearance while also ensuring optimal weatherproofing. Here’s how you can achieve proper alignment:
- Start by marking the desired location of the screws on the metal roofing panels. This can be done using a marker or by creating a small indentation with a nail punch.
- Once you have marked the locations, position the screw in the center of the marked spot and hold it perpendicular to the roof surface.
- Gradually begin turning the screw clockwise while applying downward pressure. Make sure the screw remains perpendicular to the roof surface throughout the installation process.
- As you turn the screw, pay close attention to the resistance you encounter. If the screw starts going in too easily, it may indicate that the alignment is off. In such cases, it’s best to remove the screw and reposition it properly before proceeding.
- Repeat this process for each marked location, ensuring that all screws are aligned parallel to the roof ridge.
Checking for any loose or over-tightened screws
Once the screws are aligned, it’s crucial to check for any loose or over-tightened screws. Here’s how you can ensure each screw is properly tightened:
- With a screwdriver or a drill fitted with an appropriate screw bit, gently test the tightness of each screw by slightly turning it clockwise.
- If you come across any loose screws, tighten them until they are snug. Be cautious not to over-tighten, as this can cause damage to the metal roofing panel.
- Additionally, inspect the surrounding area of each screw for any signs of deformity or damage caused during the installation process.
- It’s important to note that over-tightening the screws can lead to the metal panel warping or cracking. Therefore, exercise caution and only tighten the screws until they are secure.
By ensuring proper alignment and tightness of screws in your metal roofing, you can maintain the structural integrity and aesthetic appeal of your roof for years to come. Take your time during the installation process, regularly check for loose or over-tightened screws, and always follow the manufacturer’s guidelines to achieve the best results.

Regular Inspection And Retightening Of Screws
One of the essential maintenance tasks that should be regularly performed on a metal roof is the inspection and retightening of screws. Over time, screws in metal roofing can become loose due to various factors such as expansion and contraction of the metal, exposure to the elements, or even human error during installation. To ensure the longevity and integrity of your metal roof, it is crucial to check for any signs of corrosion or damage and retighten any loose screws.
Checking for any signs of corrosion or damage
Regular inspection of your metal roof is vital in identifying any signs of corrosion or damage to the screws. Corrosion can occur due to moisture exposure or chemical reactions, compromising the structural integrity of the screws. To effectively perform this inspection, follow these simple steps:
- Carefully walk along your metal roof and visually examine each screw.
- Look for any signs of rust, discoloration, or deterioration on the surface of the screws.
- If you notice any damaged screws, mark them for immediate replacement.
- Take note of the areas that require attention and create a list for later action.
Boldly addressing any signs of corrosion or damage at the earliest stage helps prevent further deterioration and potential roof leaks. Remember, a proactive approach to maintenance will save you time and money in the long run.
Re-tightening any loose screws
Loose screws are a common issue with metal roofing that can lead to leaks and compromised structural stability. To maintain the tightness of the screws, follow these steps:
- Equip yourself with the necessary safety gear, including gloves and a sturdy ladder.
- Identify the loose screws by touching them gently or listening for any rattling noises.
- Securely tighten each loose screw using an appropriate screwdriver or a drill with a screwdriver bit.
- Ensure the screws are tightened securely but be careful not to overtighten, as it may damage the metal or strip the screw threads.
- After tightening all the loose screws, double-check the entire roof for any remaining loose screws.
Regularly retightening any loose screws will help maintain the structural integrity of your metal roof, prevent leaks, and prolong its lifespan. It’s a simple yet important task that contributes to the overall maintenance of your roof.
Precautions To Avoid Damaging Metal Roofing Screws
Properly installing screws in metal roofing is crucial to ensure the overall integrity and longevity of your roof. One wrong move can lead to damaged screws, compromised roofing materials, and ultimately costly repairs. To avoid such mishaps, it is essential to take certain precautions during the installation process. In this section, we will explore two critical aspects that will help protect your metal roofing screws: using the correct screw size and type for specific applications, and avoiding excessive torque or pressure during installation.
Using the Correct Screw Size and Type for Specific Applications
When it comes to metal roofing, using the right screw size and type is crucial. The size of the screw should match the thickness of the metal panels to ensure a secure and tight fit. Additionally, the type of screw should be compatible with the roofing material itself.
For example, self-tapping screws are commonly used for metal roofs as they have sharp points and can penetrate the metal easily. These screws also have a built-in washer that helps create a water-tight seal, preventing leaks and rust formation.
On the other hand, self-drilling screws are suitable for thicker metal roofs and are designed to cut through the metal, eliminating the need for pre-drilling.
By using the correct screw size and type, you can ensure a secure installation without the risk of damaging the roofing material or the screws themselves.
Avoiding Excessive Torque or Pressure During Installation
When installing screws in metal roofing, it is crucial to apply the right amount of torque or pressure. Excessive force can lead to over-tightening, which can damage the metal panels, strip the screw threads, or even cause the screw to break.
To avoid such damage, it is recommended to use a torque-limiting screw gun or a drill with an adjustable torque setting. This allows you to control the amount of force applied during installation. Be sure to refer to the manufacturer’s guidelines for the recommended torque settings specific to the screw size and material.
Furthermore, it is good practice to periodically check the tightness of the screws after installation and make any necessary adjustments. Regular inspections will help ensure that the screws remain secure without causing any damage.
By following these precautions and taking appropriate measures, you can avoid damaging metal roofing screws and ensure a secure and long-lasting installation. Remember to use the correct screw size and type for specific applications and to apply the right amount of torque or pressure during installation. With these precautions in place, you can enjoy a durable and reliable metal roof for years to come.
Frequently Asked Questions Of How To Install Screws In Metal Roofing
How Do You Install Screws In Metal Roofing?
To install screws in metal roofing, start by choosing the right type of screws for your roof. Pre-drill holes at the ridges of the metal sheets and then align them properly. Use a screw gun to secure the screws, ensuring they are tightly fastened but not over-tightened.
Repeat the process for each metal sheet, working systematically across the roof. Proper installation will ensure a secure and durable metal roof.
What Type Of Screws Should I Use For Metal Roofing?
When installing metal roofing, it is recommended to use self-tapping metal screws. These screws are specifically designed for metal applications, with sharp points that enable easy drilling into the metal. Self-tapping screws also have a weather-resistant coating to prevent rust and corrosion.
Make sure to choose the appropriate size and length of screws based on the thickness of your metal roof.
How Far Apart Should Screws Be In Metal Roofing?
The spacing of screws in metal roofing depends on the slope of the roof and the thickness of the metal sheets. In general, screws should be placed every 12 to 24 inches along the ridges of the metal sheets. For steep roofs or areas with high wind loads, it is recommended to decrease the spacing to ensure maximum stability and prevent water infiltration.
Always refer to the manufacturer’s guidelines for specific spacing recommendations.
Conclusion
Installing screws in metal roofing requires careful planning and precise execution. By following the step-by-step process outlined in this blog post, you can ensure a secure and watertight installation. Remember to use the appropriate type of screws and tools for your specific metal roofing material.
Taking the time to properly install screws will help prolong the lifespan of your metal roof and protect your building from leaks and damage. So, go ahead and confidently tackle your metal roofing project with these helpful tips and techniques!