How to Install Screw Hooks?
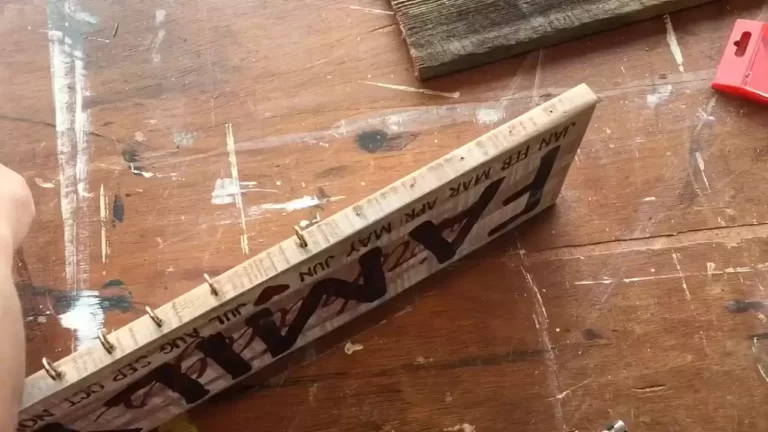
To install screw hooks, first identify the location and mark it. Then, use a pilot hole to create a starter hole before screwing the hook manually or with a drill.
Installing screw hooks can be a simple and convenient solution for organizing and storing various items, such as tools, towels, or pots and pans. Whether you’re looking to hang decorations or create additional storage space, learning how to properly install screw hooks is essential.
By following a few straightforward steps, you can have your screw hooks securely in place in no time. This article will guide you through the process of installing screw hooks, ensuring that your hooks stay firmly attached and serve their purpose effectively.
Choosing The Right Screw Hooks
Understand the Types of Screw Hooks Available
When it comes to installing screw hooks, it is crucial to choose the right type for your specific needs. Screw hooks are available in various types, each designed to serve a particular purpose. Understanding the different types of screw hooks will help you make an informed decision.
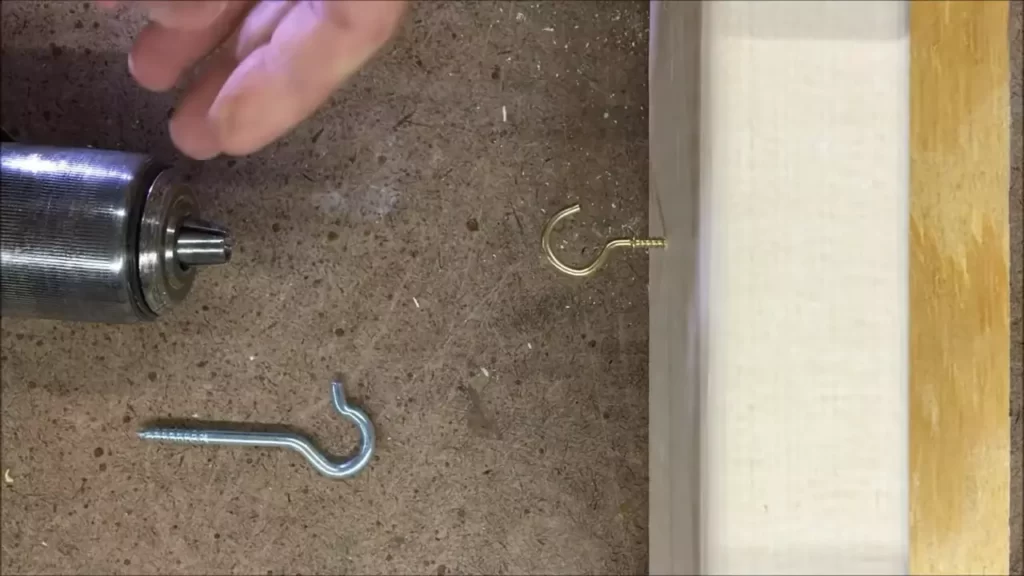
- Regular Screw Hooks: These are the most common type of screw hooks and are suitable for a wide range of applications. They feature a curved end, allowing you to hang lightweight items such as keys, small pictures, or kitchen utensils.
- Ceiling Screw Hooks: Designed specifically for attaching objects to ceilings, these hooks have a longer shank that provides a secure hold. They can be used to hang plants, light fixtures, or even decorative items like mobiles or wind chimes.
- Cup Hooks: These hooks have a unique shape that resembles a cup, hence the name. They are commonly used to hang coffee mugs, kitchen tools, or small hanging plants. Cup hooks are available in different sizes and finishes to match your decor.
Consider the Weight and Size Requirements
Choosing screw hooks requires careful consideration of weight and size requirements. It is essential to select hooks that can support the weight of the items you intend to hang.
- Weight Capacity: Before purchasing screw hooks, determine the maximum weight they can hold. This information is usually provided by the manufacturer. Be sure to choose screw hooks that can handle the weight of the object you want to hang without risking damage or falls.
- Size: Screw hooks come in various sizes, and it is crucial to select the right size for your specific application. Consider the thickness of the material you are attaching the hook to and choose a size that will securely fit without causing any damage.
Assess the Material and Surface for Installation
Assessing the material and surface where you plan to install the screw hooks is essential for ensuring a secure and long-lasting installation.
1. Material: Consider the material of the screw hook to ensure it is suitable for your specific needs. For example, if you are installing hooks in a bathroom or outdoor area exposed to moisture, it is advisable to choose hooks made of stainless steel or other corrosion-resistant materials.
2. Surface: Different surfaces require different installation techniques. If you are attaching screw hooks to a wooden surface, pre-drill small holes to prevent splitting. For drywall or plaster, use anchors or toggle bolts to ensure a strong hold.
Remember that the success of your installation depends on choosing the right screw hooks for your needs. By understanding the types available, considering weight and size requirements, and assessing the material and surface, you will ensure a secure and reliable hanging solution.
Preparing The Tools And Surface
Before you start installing screw hooks, it is important to gather the necessary tools and safety equipment, as well as clean and prepare the surface for installation. Following these steps will ensure a smooth and successful installation process.
Gather the Necessary Tools and Safety Equipment
Before beginning the installation, make sure you have the following tools and safety equipment:
- Screw hooks
- Screwdriver or power drill with screwdriver bit
- Tape measure
- Pencil or marker
- Safety goggles
- Gloves
- Dust mask (if necessary)
Having these tools and equipment ready will save you time and ensure a safe working environment.
Clean and Prepare the Surface for Installation
Before you mark the desired location for the screw hook, it is important to clean and prepare the surface. Follow these steps:
- Remove any dirt, dust, or debris from the surface using a brush or a damp cloth.
- If the surface is smooth, consider lightly sanding it to create a rough texture. This will help the screw hook grip the surface more securely.
- Inspect the surface for any cracks or damage. If necessary, repair any defects before proceeding with the installation.
- If you are installing a screw hook on a painted surface, make sure the paint is dry and not flaking off. Sand any loose paint away before continuing.
Taking the time to clean and prepare the surface will ensure a strong and long-lasting installation.
Mark the Desired Location for the Screw Hook
Now that the surface is clean and prepared, it’s time to mark the desired location for the screw hook. Follow these steps:
- Measure the height at which you want the screw hook to be installed.
- Use a tape measure and a pencil or marker to make a small mark on the surface at the desired location.
- Double-check the measurements and the position of the mark before proceeding.
By taking the time to mark the desired location accurately, you’ll ensure that the screw hook is installed exactly where you want it.
Now that you have gathered the necessary tools and safety equipment, as well as cleaned and prepared the surface, and marked the desired location for the screw hook, you are ready to proceed with the installation. Stay tuned for our next blog post, where we will cover the step-by-step process of actually installing the screw hook.
Installing The Screw Hook
Installing screw hooks can be a simple and effective solution for hanging various items such as plants, lights, and decorations. Whether you’re a DIY enthusiast or a homeowner looking to add functionality to your space, knowing how to install screw hooks correctly is essential. In this section, we will walk you through the step-by-step process of installing a screw hook, ensuring stability and a secure fit.
Select the Appropriate Drill Bit Size
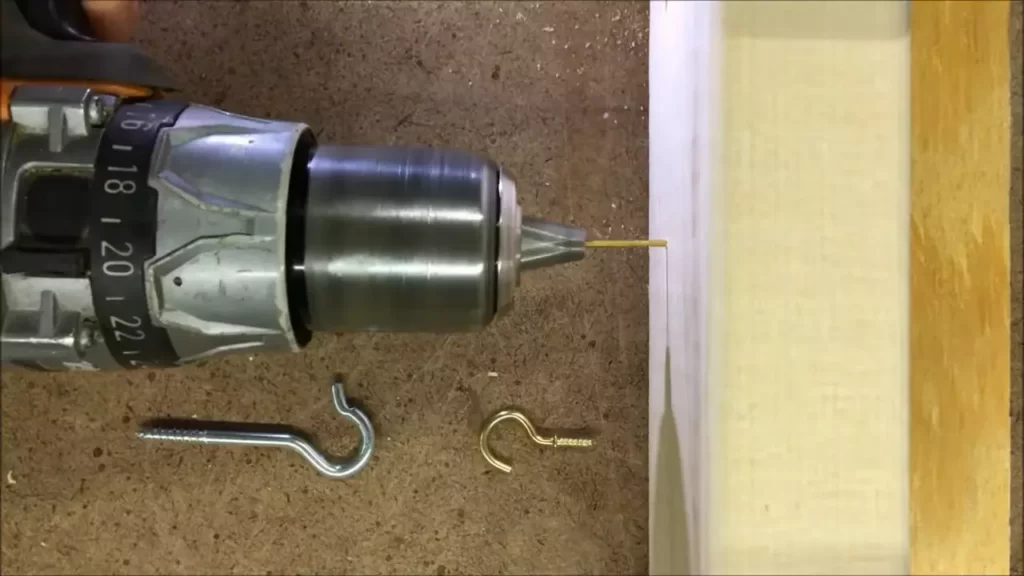
Before getting started, it’s important to choose the right drill bit size for your screw hook. Using the correct size will prevent any damages to your walls or surfaces. To determine the appropriate size, match the drill bit to the diameter of the screw hook.
Drill a Pilot Hole for the Screw Hook
Now that you have the right drill bit, it’s time to drill a pilot hole. A pilot hole is a small guide hole that helps the screw hook go in smoothly and accurately. Start by marking the spot where you want to install the screw hook. Then, using your drill and the appropriate drill bit, gently drill into the marked spot, making sure to maintain a straight angle. Take care not to drill too deep, as this can cause the screw hook to become loose.
Inserting and Hand-Tightening the Screw Hook
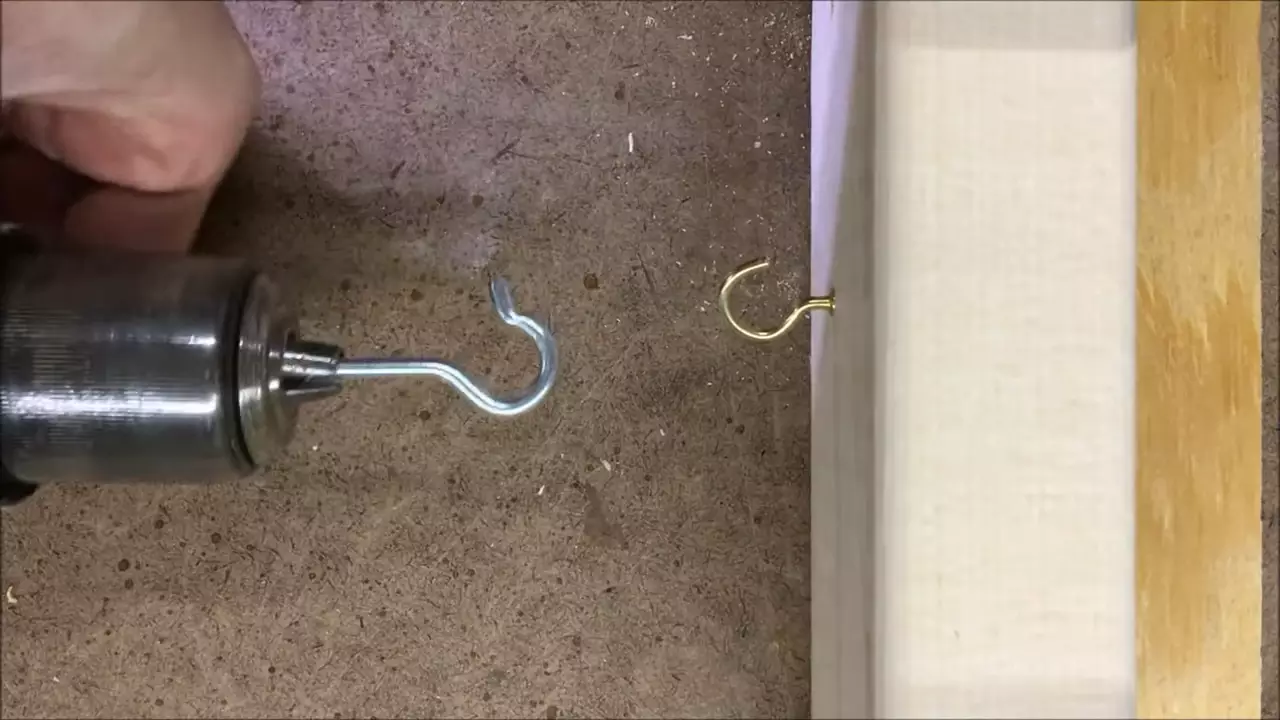
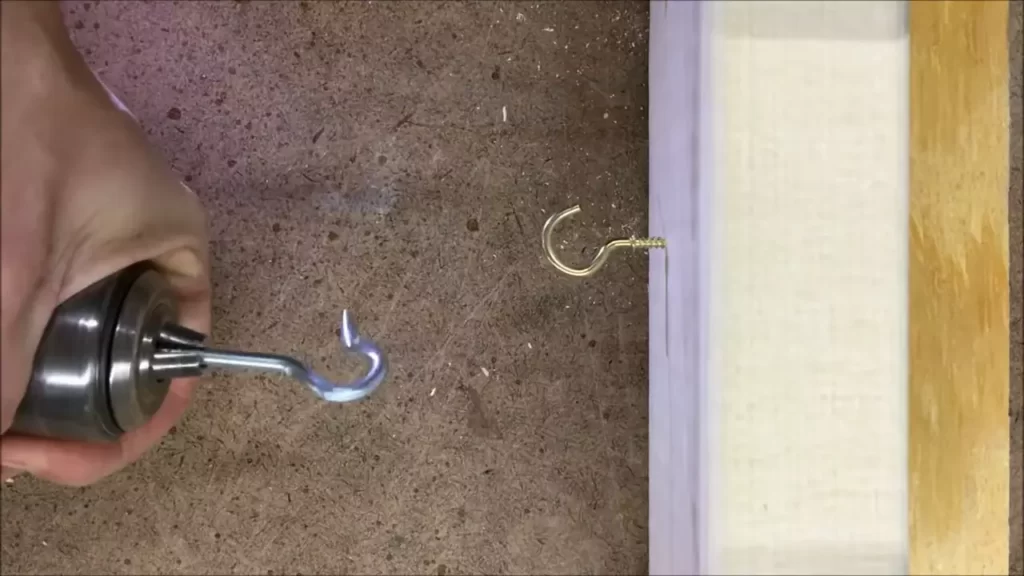
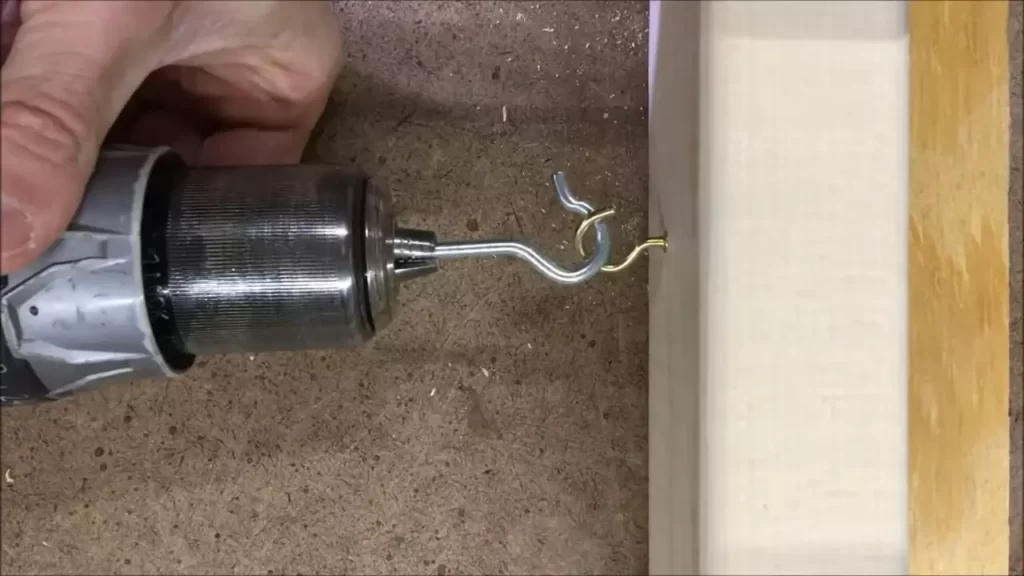
Once the pilot hole is complete, it’s time to insert the screw hook. Holding the screw hook by its threaded end, align it with the pilot hole and begin to twist it clockwise. Apply steady pressure as you turn the screw hook to ensure it goes in straight and securely. For most applications, hand-tightening the screw hook will be sufficient. However, if you need additional tightening to support heavier items, you can use a pair of pliers.
Using Pliers for Additional Tightening
If you find that the screw hook needs more tightening or if you’re hanging something heavy, you can use a pair of pliers to provide extra leverage. Simply grip the base of the screw hook with the pliers and turn clockwise until it feels secure. Be cautious not to overtighten, as this can strip the hole or cause damage.
By following these simple steps, you’ll be able to install screw hooks with ease and confidence. Remember to select the appropriate drill bit size, drill a pilot hole, insert and hand-tighten the screw hook, and use pliers if necessary for additional tightening. Now, you’re ready to hang your items securely and enjoy the added functionality they bring to your living space.
Tips For Secure Installation
Proper installation of screw hooks is crucial for ensuring their strength and stability. By following a few simple tips, you can ensure that your screw hooks are securely installed and can bear the weight they are intended to hold. In this section, we will discuss three important factors to consider when installing screw hooks: ensuring proper alignment and straightness, determining the weight-bearing capacity, and testing the strength and stability of the installation.
Ensuring Proper Alignment and Straightness
One of the key factors in installing screw hooks securely is ensuring that they are properly aligned and straight. This will not only enhance the aesthetic appeal of the installation but also contribute to its stability.
Here are a few tips to help you achieve proper alignment and straightness:
- Before starting the installation, mark the desired position of the screw hook on the surface using a pencil or a marker.
- Use a level to verify that the marking is straight. Adjust it if necessary to ensure a level and straight installation.
- If you are installing multiple screw hooks in a row, use a straight edge or a ruler to measure the distance between them, ensuring uniformity.
Determining the Weight-Bearing Capacity of the Screw Hook
Each screw hook has a specific weight-bearing capacity, which indicates the maximum amount of weight it can support. It is crucial to determine this capacity before installation to ensure that the screw hook is suitable for your intended use.
To determine the weight-bearing capacity of the screw hook, refer to the manufacturer’s guidelines or packaging. Look for the maximum weight limit specified by the manufacturer and make sure it aligns with your requirements. It is advisable to choose a screw hook with a weight-bearing capacity that exceeds your intended use to provide a safety margin.
Testing the Strength and Stability of the Installation
Once the screw hook is installed, it is essential to test its strength and stability to ensure that it is securely in place and can bear the weight it is intended to hold. Follow these steps to test the installation:
- Gently apply pressure to the screw hook and check for any movement or looseness. If it feels wobbly, it may not be securely installed.
- If the screw hook passes the initial test, gradually increase the pressure to simulate its weight-bearing capacity. Observe if the installation holds up without any signs of instability.
- If the screw hook passes the above tests, consider hanging a lighter load initially to confirm its strength. Gradually increase the weight to ensure the installation is reliable.
By following these tips, you can ensure a secure and strong installation of screw hooks. Remember to always consider the specific requirements of your intended use and choose the appropriate screw hook accordingly.
Common Mistakes To Avoid
When it comes to installing screw hooks, it’s important to be mindful of the common mistakes that can easily be made. These mistakes can not only make the installation process more difficult but can also lead to ineffective or unsafe results. In this section, we will discuss the most common mistakes to avoid when installing screw hooks to ensure a successful and secure installation.
Over-tightening the Screw Hook
One of the most common mistakes you can make when installing screw hooks is over-tightening them. While it may seem logical to tighten the hook as much as possible to ensure stability, it can actually weaken the grip and damage the surface you are attaching it to. Over-tightening can cause the screw threads to strip, making it difficult to securely hold any weight, or even worse, the hook could snap off completely.
To avoid this mistake, it’s important to stop tightening the screw once you feel resistance. Avoid using excessive force, as this can lead to damage. Remember, the goal is to create a secure attachment point, not to tighten the screw until it can’t go any further.
Using Incorrect Drill Bit Size
Another common mistake is using the incorrect drill bit size when pre-drilling the hole for the screw hook. It’s crucial to choose a drill bit that matches the diameter of the screw shaft. Using a drill bit that is too small can cause the hole to be too tight, making it difficult to screw in the hook. On the other hand, using a drill bit that is too large can result in a loose fit, compromising the stability of the hook.
To avoid this mistake, it’s recommended to carefully read the instructions provided with the screw hook or measure the shaft diameter using a caliper. Once you have the correct measurement, select a drill bit that matches the exact size.
Not Testing for Adequate Support
The third and equally important mistake to avoid is failing to test for adequate support before hanging any weight on the screw hook. Simply assuming that the surface can support the weight can lead to disastrous consequences, such as the hook pulling out of the wall or the surface crumbling.
Before installing the screw hook, it’s crucial to test the strength of the surface by gently applying pressure or tugging it. If the surface feels weak or flexes easily, it’s likely not suitable for bearing any significant weight. In such cases, it’s recommended to find an alternative surface or consider using additional support, such as wall anchors or a different installation method.
A successful and secure installation of screw hooks requires avoiding these common mistakes. By being cautious about over-tightening the screw hook, using the correct drill bit size, and thoroughly testing for adequate support, you can ensure your screw hooks are installed correctly and provide the stability you need for your hanging needs.
Alternative Installation Methods
When it comes to hanging items around your home, using screw hooks is a convenient and versatile option. However, there may be situations where the standard installation method doesn’t quite cut it. In these cases, it’s helpful to be aware of alternative installation methods that can provide extra support or allow you to hang screw hooks in different surfaces. In this section, we will explore a few of these alternative methods.
Using Anchors for Extra Support
If you’re planning to hang heavy objects or items on drywall that require extra stability, using anchors along with your screw hooks can provide the necessary support. Anchors essentially help distribute the weight and prevent screws from pulling out of the wall or surface.
To install screw hooks with anchors, follow these steps:
- Choose an anchor that is suitable for your specific mounting surface. Plastic anchors work well for lightweight applications, while metal anchors may be more appropriate for heavier items.
- Using a drill, carefully create a hole in the desired location for the anchor.
- Insert the anchor into the hole, ensuring it is flush with the surface.
- Place the screw hook over the anchor and begin screwing it in. Apply firm pressure to ensure a secure fit.
- If necessary, use a screwdriver or pliers to fully tighten the screw hook.
Installing Screw Hooks in Different Surfaces
While screw hooks are commonly used on wood, there may be instances where you want to hang items on different surfaces, such as concrete or metal. Installing screw hooks in these surfaces requires a slightly different approach.
For concrete surfaces:
- Drill a hole in the concrete using a masonry bit that matches the size of the screw hook.
- Insert a plastic or metal anchor into the hole.
- Place the screw hook over the anchor and begin screwing it in, making sure it is firmly attached to the concrete.
For metal surfaces:
- Use a drill equipped with a metal bit to create a pilot hole in the metal surface.
- Insert the screw hook into the pilot hole and twist it clockwise until it is securely fastened.
Exploring Different Hanging Techniques
In addition to considering alternative installation methods, it’s also worth exploring different hanging techniques to achieve your desired outcome. Here are a few techniques you can try:
- Hang items using multiple screw hooks spaced evenly apart to distribute the weight.
- Utilize picture hanging kits that include wire and hooks for a more professional and adjustable hanging solution.
- Use adhesive hooks or hooks with suction cups for hanging lightweight items on smooth surfaces.
By experimenting with these alternative installation methods and exploring different hanging techniques, you can ensure your screw hooks are securely installed and provide the support necessary for your specific needs.
Troubleshooting And Maintenance
After successfully installing screw hooks, it is important to understand the troubleshooting and maintenance techniques to ensure their longevity and efficiency. This section will guide you through adjusting or removing the screw hooks, repairing damaged surfaces, and regular inspections and maintenance.
Adjusting or Removing the Screw Hook
If you find that the position of the screw hook needs adjustment or if you need to remove it entirely, follow these simple steps:
- Loosening: To adjust the position of the screw hook, start by loosening it. Use a screwdriver or a wrench, depending on the size and type of the screw hook. Turn it counterclockwise gently until it is loose enough to move.
- Adjustment: Once the screw hook is loosened, carefully adjust its position as desired. Make sure it is securely fastened to the surface.
- Tightening: After adjusting the position, tighten the screw hook by turning it clockwise. Ensure it is firmly in place but be cautious not to overtighten, as it may damage the surface or affect the screw hook’s stability.
- Removing: If you need to completely remove the screw hook, loosen it following the first step and then continue turning it counterclockwise until it can be easily pulled out of the surface.
Repairing Damaged Surfaces
In some cases, screw hooks can cause damage to the surface they are installed on. If you notice any cracks, holes, or other types of damage, here’s what you can do for repairing them:
- Surface Evaluation: Inspect the damaged area to assess the extent of the damage. Identify the type of surface material, whether it is wood, drywall, plaster, or another material, to determine the appropriate repair method.
- Surface Preparation: Clean the damaged area by removing any debris or loose materials. Use sandpaper or a putty knife to smooth out any rough edges.
- Material Selection: Based on the surface type and damage severity, select the appropriate repair material such as wood filler, spackling compound, or joint compound.
- Repair Application: Apply the chosen repair material to the damaged area following the manufacturer’s instructions. Smooth it out using a putty knife or a suitable tool, ensuring it blends seamlessly with the surrounding surface. Allow the repair material to dry completely.
- Surface Finishing: Once the repair material is dry, sand the area gently to achieve a smooth and even surface. Wipe away any dust or debris.
- Repainting or Refinishing: If necessary, repaint or refinish the repaired area to match the rest of the surface. Use a paintbrush or appropriate tools, following the recommended paint or finish type for the surface material.
Regular Inspections and Maintenance
To ensure the safety and longevity of screw hooks, regular inspections and maintenance are essential. Follow these guidelines:
- Visual Inspection: Periodically examine the screw hooks for any signs of damage, rust, or looseness.
- Tightening and Cleaning: If you notice any loose screw hooks during the inspection, use a screwdriver or a wrench to tighten them. Additionally, clean the screw hooks and the surrounding area to remove any dirt or debris that may affect their performance.
- Preventive Measures: Consider applying a rust-resistant coating, such as paint or clear sealant, to protect the screw hooks from moisture and corrosion.
- Safety Check: Ensure that the weight capacity of the screw hooks is not exceeded. Avoid hanging objects that are too heavy for them to support.
By following these troubleshooting and maintenance tips, you can keep your screw hooks in optimal condition, ensuring their effectiveness and reliability for years to come.
Frequently Asked Questions On How To Install Screw Hooks
How Do I Choose The Right Screw Hook Size?
To choose the right screw hook size, you need to consider the weight and size of the object you’ll be hanging. For light objects, use small screw hooks, while heavy objects require larger hooks. Make sure the hook’s diameter matches the screw’s size for a secure hold.
Can Screw Hooks Be Used On Different Surfaces?
Yes, screw hooks can be used on various surfaces such as wood, drywall, and concrete. However, make sure to select the appropriate type of anchor or screw for the specific surface. This ensures a secure installation and prevents damage to the surface.
What Is The Recommended Spacing Between Screw Hooks?
The recommended spacing between screw hooks depends on the weight of the object being hung. For light items, space the hooks approximately 10 inches apart. Heavier items may require closer spacing, around 6 inches apart, to provide adequate support.
How Do I Install Screw Hooks In Wood?
To install screw hooks in wood, start by marking the desired location with a pencil. Then, use a pilot drill bit to create a small hole for easier insertion. Finally, screw the hook into the hole by hand or with the assistance of pliers, ensuring it is securely fastened.
Conclusion
To sum up, learning how to install screw hooks doesn’t have to be a daunting task. By following these simple steps, you can securely hang various objects and organize your space efficiently. Whether it’s for decorative purposes or practical use, mastering this skill will undoubtedly come in handy.
So, grab your tools, be confident, and enjoy the satisfaction of a job well done. Happy hooking!

