How to Install Redhead Concrete Anchors?
To install Redhead concrete anchors, first, drill a hole into the concrete using a rotary hammer. Then, insert the anchor into the hole and tighten it with a wrench until it is secure.
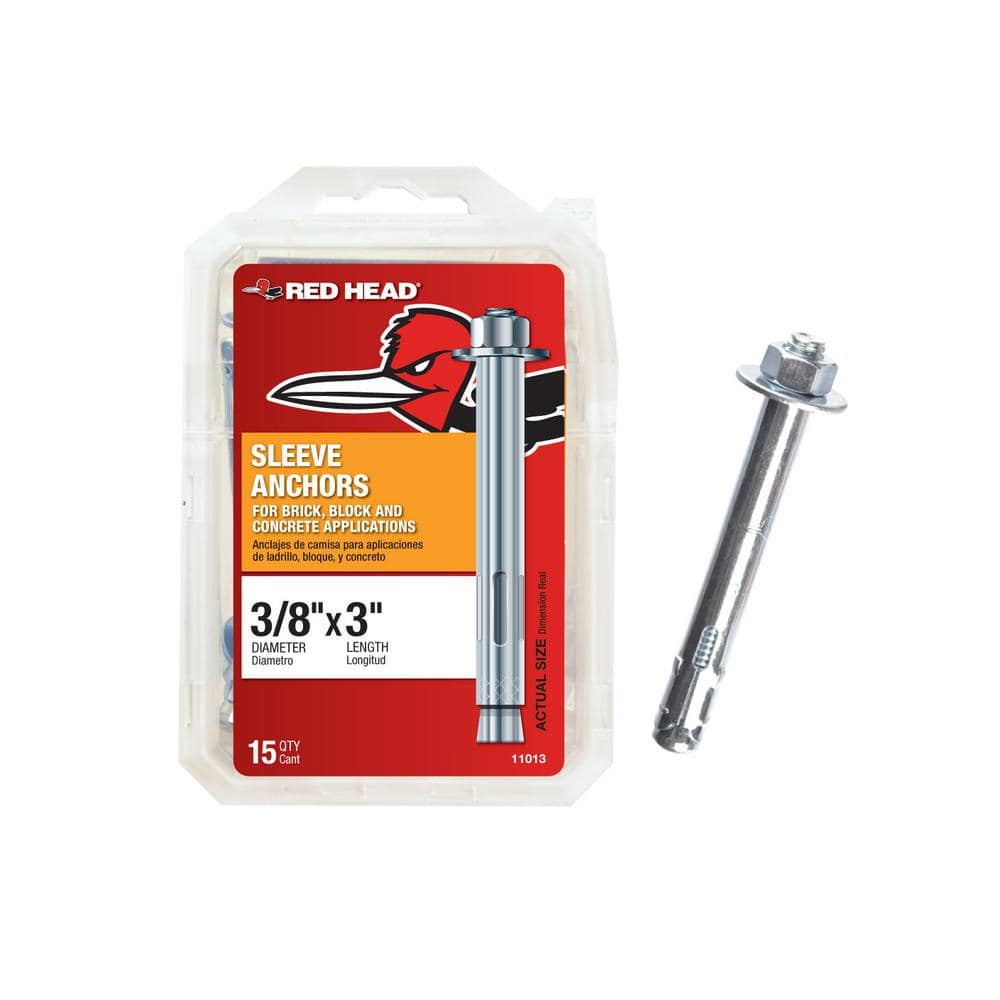
Credit: www.homedepot.com
Understanding Redhead Concrete Anchors
Redhead Concrete Anchors are one of the most reliable and durable types of anchors used for securing heavy objects to concrete surfaces. Whether you’re looking to install shelves, hang artwork, or secure structural elements, Redhead Concrete Anchors provide the strength and stability you need. In this section, we will delve into the different types of Redhead Concrete Anchors, their advantages, and how they can be installed with ease. So, let’s get started!
What are Redhead Concrete Anchors?
Redhead Concrete Anchors are mechanical fasteners designed to secure objects to concrete, masonry, or other hard substrates. They consist of an anchor body, which is typically made of steel, and are installed into pre-drilled holes using a hammer drill or similar tool. Once installed, Redhead Concrete Anchors provide exceptional holding power, allowing you to confidently hang heavy objects without fear of them becoming loose or falling.
Different types of Redhead Concrete Anchors
There are various types of Redhead Concrete Anchors available, each designed for specific applications and load capacities. Here are some of the most common types:
| Type | Description |
|---|---|
| Wedge Anchors | Built with a wedge-shaped end that expands within the concrete, providing a secure and reliable hold. |
| Sleeve Anchors | Consist of a cylindrical sleeve with a cone-shaped end, creating a strong grip when inserted into the drilled hole. |
| Drop-In Anchors | Featuring an internally threaded sleeve, drop-in anchors are perfect for applications that require frequent removal and reinstallation. |
Advantages of using Redhead Concrete Anchors
Using Redhead Concrete Anchors offers several advantages over alternative fastening methods. Here are some key reasons why you should consider using Redhead Concrete Anchors:
- Superior strength: Redhead Concrete Anchors are designed to provide exceptional holding power, ensuring your objects remain securely fastened to the concrete surface.
- Easy installation: With the right tools and techniques, installing Redhead Concrete Anchors is a straightforward process. This means you can save time and effort during your projects.
- Versatility: Redhead Concrete Anchors are suitable for various applications, ranging from light-duty tasks to heavy-duty installations.
- Long-lasting durability: Made from high-quality materials, Redhead Concrete Anchors are built to withstand the test of time, ensuring your installations remain sturdy and reliable.
With an understanding of what Redhead Concrete Anchors are, the different types available, and the advantages they offer, you are now equipped to confidently choose and install the right anchor for your project. Stay tuned to learn more about the step-by-step process of installing Redhead Concrete Anchors in our next blog post!
Tools And Materials Needed
Before installing Redhead Concrete Anchors, it is important to gather all the necessary tools and materials to ensure a successful installation. With the right equipment at hand, you can complete the task efficiently and effectively. In this section, we will outline the essential tools and required materials needed for installing Redhead Concrete Anchors.
Essential tools for installing Redhead Concrete Anchors
Installing Redhead Concrete Anchors requires a few essential tools to make the process seamless. These tools will help you prepare the concrete surface and ensure a secure installation. Below are the must-have tools:
- Masonry drill: A masonry drill is necessary to create the precise holes in the concrete surface. Ensure that you have the right size of the drill bit recommended for the Redhead Concrete Anchors you are using.
- Hammer drill: If you are dealing with tough concrete surfaces, a hammer drill will come in handy. This tool combines rotary drilling with a hammering action to easily penetrate the concrete.
- Hole cleaning brush: After drilling the holes, it is essential to clean them thoroughly to remove any dust or debris. A hole cleaning brush will help you achieve this.
- Allen wrench: Depending on the type of Redhead Concrete Anchors being used, you may need an Allen wrench to tighten the anchor securely into the hole.
- Wrench or socket set: In some cases, you may need a wrench or socket set to tighten the bolt of the anchor, ensuring a secure connection.
Required materials for successful installation
In addition to the tools, there are specific materials you will need to complete the installation of Redhead Concrete Anchors. These materials play a crucial role in ensuring the anchors hold firmly in place. Here are the required materials:
- Redhead Concrete Anchors: Of course, you will need Redhead Concrete Anchors themselves. Make sure to select the appropriate type and size for your application.
- Concrete cleaner: Before installing the anchors, it is important to clean the concrete surface thoroughly. A concrete cleaner will help remove dirt, oil, and other contaminants that may hinder the anchor’s performance.
- Dust masks and safety glasses: As you work with concrete and create dust, it is essential to protect yourself. Dust masks and safety glasses will keep you safe from airborne particles.
- Epoxy or adhesive: Depending on the anchor type, you may need epoxy or adhesive to ensure a stronger bond between the anchor and the concrete surface.
- Measuring tape: Precise measurements are crucial for accurate installation. Keep a measuring tape handy to mark the drilling locations accurately.
- Caulk or sealant: Once the anchors are installed, using caulk or sealant is recommended to cover the exposed part of the anchor, providing additional protection against moisture and corrosion.
By having these essential tools and required materials ready, you are well-equipped to handle the installation of Redhead Concrete Anchors with confidence. Remember, using the right tools and materials ensures a successful and long-lasting anchor installation.
Preparing The Concrete Surface
Before you can install Redhead concrete anchors, it is crucial to prepare the concrete surface properly. This step ensures a secure and long-lasting anchor installation. By following these steps, you can ensure that your anchors will be able to withstand heavy loads and resist any potential outward pulls or vibrations.
Evaluating the Concrete Condition
The first step in preparing the concrete surface is to evaluate its condition. Inspect the concrete for any cracks, chips, or other damage that could affect the anchor’s performance. Pay close attention to the age of the concrete and any signs of deterioration. If you are unsure about the condition, it is recommended to consult a professional to assess the concrete and determine if any repairs or reinforcements are needed.
Cleaning the Surface for Optimal Anchoring
Cleaning the surface is an essential step in ensuring optimal anchoring. Start by removing any loose debris, dirt, or oil from the concrete surface. Use a broom or brush to sweep away loose particles, and then consider using a power washer or a wire brush to clean the surface thoroughly. This step helps create a clean and rough surface, which improves the bond between the concrete and the anchor.
Drilling the Holes for Anchor Placement
The next step is to drill the holes for the anchor placement. Carefully mark the exact spot where you want to install the anchor. Using a hammer drill or rotary hammer with a masonry bit specifically designed for concrete, start drilling the holes to the required depth and diameter for the anchor size you are using. Make sure to drill the holes at a right angle to the surface to ensure proper anchor alignment.
- Consider creating a table for anchor sizes and their corresponding hole diameters and depths to make it easier to reference.
- Use a dust extractor or blow out the drilled holes to remove any concrete dust or debris that could affect the anchor’s performance.
- Remember to wear protective gear, such as safety glasses and a dust mask, during the drilling process to prevent any potential hazards.
Once you have drilled the holes, inspect them to ensure they are clean and free of any obstructions that could hinder the anchor’s installation. Make any necessary adjustments or cleaning before proceeding to install the anchors securely.
By properly preparing the concrete surface, you are setting the foundation for a successful anchor installation. Taking the time to evaluate the concrete condition, clean the surface thoroughly, and drill the holes accurately guarantees the anchors will perform to their full potential, providing the stability and reliability you require for your project. Now that you have completed the preparation stage, you are ready to move on to the installation process.
Installing Redhead Concrete Anchors
Selecting the Appropriate Anchor Size and Type
Before installing redhead concrete anchors, the first step is to make sure you select the right size and type of anchor for your specific application. The anchor size and type will depend on the load-bearing requirements and the concrete substrate you are working with.
Redhead concrete anchors are available in various sizes and types, including wedge anchors, sleeve anchors, and drop-in anchors. Wedge anchors are most commonly used for heavy-duty applications, while sleeve anchors are suitable for medium-duty applications. Drop-in anchors, on the other hand, are ideal for light-duty applications.
So, how do you determine the right size and type of anchor? The key is to assess the weight of the object you will be anchoring and the thickness of the concrete. Redhead provides a helpful chart that recommends the appropriate anchor size based on these factors. Refer to the chart below to find the perfect redhead anchor for your needs:
| Concrete Thickness (inches) | Anchor Size (inches) |
|---|---|
| 2-1/4 – 2-3/4 | 1/4 |
| 3-1/4 – 3-3/4 | 3/8 |
| 4-1/4 – 4-3/4 | 1/2 |
| 5-1/4 – 5-3/4 | 5/8 |
Inserting the Anchor into the Drilled Hole
Now that you have selected the appropriate redhead concrete anchor, it’s time to proceed with the installation process. The first step is to drill a hole in the concrete using a hammer drill and a carbide-tipped bit that matches the anchor diameter.
Once you have drilled the hole, it’s important to clean out any dust or debris using a wire brush or compressed air. This will ensure proper insertion and enhance the holding power of the anchor.
Next, align the anchor with the drilled hole and push it into place. A gentle tapping with a hammer may be required to fully seat the anchor, especially for deeper holes. Make sure the anchor is flush with the surface of the concrete, as this will provide a clean and secure installation.
Applying Proper Torque for Secure Anchoring
After inserting the anchor, the final step is to tighten it securely into the concrete. To achieve this, you will need a suitable wrench or socket to apply torque to the anchor.
It’s crucial to follow the manufacturer’s guidelines for torque specifications, as overtightening or undertightening can compromise the anchor’s holding strength. Redhead provides a torque table that specifies the recommended torque values for each anchor size. Refer to the table below for the proper torque settings:
| Anchor Size (inches) | Torque Setting (ft-lbs) |
|---|---|
| 1/4 | 5-7 |
| 3/8 | 15-20 |
| 1/2 | 30-40 |
| 5/8 | 60-75 |
Using the recommended torque setting, tighten the anchor until it is securely fastened to the concrete. This will ensure maximum holding power and provide a reliable anchoring solution for your project.
Testing And Verifying Anchor Installation
Ensuring the proper installation of Redhead concrete anchors is crucial to maintain structural integrity and prevent safety hazards. To ensure a reliable foundation, it is essential to perform thorough testing and verification of anchor installation. This will help you confirm that the anchors are aligned correctly, securely embedded, and capable of withstanding the intended loads.
Checking the anchor’s alignment and levelness
Before proceeding with any load tests, it is crucial to check that the anchor is correctly aligned and level with the surface. An improperly aligned anchor can lead to instability and reduced load-bearing capacity. To perform this check, follow these steps:
- Inspect the position of the anchor visually.
- Use a tape measure or level to determine if the anchor is positioned accurately.
- Adjust the anchor as necessary to achieve proper alignment and levelness.
Ensuring the anchor is flush with the surface
In addition to alignment, it is important to ensure that the anchor is flush with the surface it is embedded in. A protruding anchor may interfere with the intended installation or compromise its load-bearing capacity. To check if the anchor is properly flush:
- Use a caliper or ruler to measure the distance between the anchor head and the surface.
- If the anchor protrudes, use a hammer or mallet to gently tap it until it is flush with the surface.
- Verify the flushness by measuring again and adjust if necessary.
Conducting load and pull-out tests for anchoring strength
Once the anchor is aligned and flush, the final step is to conduct load and pull-out tests to ensure its anchoring strength. These tests will help determine if the anchor can withstand the intended loads. Here’s how to perform these tests:
- Attach the appropriate load-testing equipment to the anchor, following the manufacturer’s instructions.
- Increase the applied load gradually and monitor the anchor’s response.
- Ensure that the anchor remains secure and doesn’t exhibit any signs of loosening or failure.
- If required, perform pull-out tests to evaluate the anchor’s ability to resist vertical forces.
By following these steps and conducting thorough testing and verification of your Redhead concrete anchor installation, you can have confidence in the stability and safety of your project. Remember to always refer to the manufacturer’s guidelines for specific instructions related to your anchors.
Troubleshooting Common Installation Issues
Installing Redhead concrete anchors can provide a reliable and durable way to secure various items to concrete surfaces. However, like any installation process, it can sometimes come with its fair share of challenges. In this section, we will discuss some common issues that may arise during the installation of Redhead concrete anchors and provide practical solutions to help you overcome them.
Overcoming difficulties in drilling concrete holes
Drilling accurate and precise holes in concrete is crucial for successful anchor installation. However, concrete can be a tough material to work with, and challenges may occur. Here are some tips to help you overcome drilling difficulties:
- Choose the right drill bit: Use a carbide-tipped masonry bit specifically designed for drilling into concrete. This type of bit is more durable and can handle the hardness of the material.
- Start with a smaller hole: If you are having trouble drilling a larger hole, start with a smaller bit size and gradually increase to the desired diameter. This approach can make drilling more manageable and prevent excessive strain on the drill.
- Apply steady pressure: Use a firm, consistent pressure while drilling to avoid excessive strain on the bit. Let the drill do the work and avoid forcing it too hard, as this may result in a less precise hole.
- Keep the drill bit cool: Concrete drilling generates heat, which can damage the bit and impact its performance. To prevent overheating, periodically dip the bit in water or use a cooling lubricant during the drilling process. This will help to maintain the drilling efficiency.
Dealing with stripped or damaged anchors
Occasionally, during the installation process, anchors can become stripped or damaged, making them less effective at securing items to concrete. Here’s how to handle this issue:
- Remove the damaged anchor: If you encounter a stripped or damaged anchor, remove it from the concrete using appropriate tools such as pliers or wrenches. Ensure that all remnants of the damaged anchor are removed, providing a clean space for the new installation.
- Fill the old hole: If the damage is significant or the hole is enlarged, it may be necessary to fill the old hole before reinstalling the anchor. Use a suitable concrete filler to fill the hole and allow it to dry completely before attempting to install a new anchor.
- Choose a larger size anchor: If the hole diameter has become bigger due to damage, consider using a larger size anchor for the reinstallation. This will help to ensure a secure and stable connection.
Addressing alignment and stability problems
Alignment and stability issues can occur during the installation of concrete anchors, affecting the overall performance and reliability of the connection. Here’s how you can address these problems:
- Verify the anchor placement: Before securing the anchor, double-check its placement to ensure it aligns properly with the intended position. Measure and mark the drill holes accurately to ensure precise alignment.
- Use a shim for stability: For situations where the surface is uneven or the anchor feels unstable, consider using a shim. A shim can help fill any gaps between the anchor and the concrete, providing additional stability and support.
- Consolidate with an adhesive: If you encounter persistent stability issues, applying a suitable adhesive can help achieve a stronger bond between the anchor and the concrete. Follow the manufacturer’s instructions on the adhesive for optimal results.
By being aware of these common installation issues and taking steps to troubleshoot them, you can ensure a successful and reliable installation of Redhead concrete anchors. Don’t let challenges discourage you – with the right approach and the information provided, you can overcome any difficulty that arises during the installation process.
Safety Considerations
When it comes to installing Redhead Concrete Anchors, safety should be your utmost priority. Following safety guidelines and precautions is essential to prevent accidents and ensure a successful installation. In this section, we will discuss the importance of using personal protective equipment (PPE) during installation as well as proper handling and disposal of anchor packaging and waste materials.
Using personal protective equipment (PPE) during installation
During the installation process, it is crucial to wear the necessary personal protective equipment (PPE) to protect yourself from potential hazards. Here are some essential PPE items you should use:
- Safety goggles: Wear safety goggles to safeguard your eyes from flying debris or concrete particles.
- Gloves: Use high-quality gloves to protect your hands from cuts, abrasions, and chemical exposure.
- Protective clothing: Wear suitable clothing that covers your body, including long sleeves, to minimize the risk of injuries.
- Dust mask or respirator: Use a dust mask or respirator to protect your respiratory system from inhaling dust or hazardous fumes.
Proper handling and disposal of anchor packaging and waste materials
When handling Redhead Concrete Anchors, it is essential to be mindful of proper handling and disposal of anchor packaging and waste materials. Here are some key points to consider:
- Package inspection: Before usage, check the anchor packaging for any damages or defects. Do not use anchors with compromised packaging.
- Secure storage: Store the anchors in a cool, dry place, away from sources of moisture or extreme temperatures.
- Disposal: Dispose of the anchor packaging and any waste materials in accordance with local regulations and guidelines for hazardous waste disposal. Avoid littering or improper disposal that could harm the environment.
By following proper handling and disposal practices, you not only ensure your safety but also contribute to environmental protection.
Remember, safety is non-negotiable. Always prioritize safety measures and adhere to the instructions provided by the manufacturer for a safe and successful installation of Redhead Concrete Anchors.
Tips For Maximizing Anchor Performance And Durability
When it comes to securing heavy loads to concrete surfaces, Redhead Concrete Anchors are a reliable choice. However, to ensure maximum performance and durability, it is important to follow a few key tips. In this section, we will discuss recommendations for selecting the right anchor for different applications, maintenance tips to extend the lifespan of Redhead Concrete Anchors, and understanding load capacities and weight limits for specific anchoring scenarios.
Recommendations for selecting the right anchor for different applications
When selecting Redhead Concrete Anchors for your project, it is crucial to consider the specific application and the weight load it will need to support. Here are a few key recommendations to help you choose the appropriate anchor:
- Identify the concrete surface: Determine the type of concrete surface you will be anchoring to, such as poured concrete, block, or precast. This information will help you select an anchor that is compatible with the specific surface.
- Consider the load requirements: Evaluate the weight load that the anchor will need to support. Redhead Concrete Anchors come in various load capacities, so make sure to choose an anchor that meets or exceeds your specific requirements.
- Assess the environmental conditions: Take into account the environmental conditions that the anchor will be exposed to, such as humidity, temperature fluctuations, or exposure to chemicals. This will help you select an anchor with the appropriate corrosion resistance properties.
Maintenance tips to extend the lifespan of Redhead Concrete Anchors
To ensure the longevity of your Redhead Concrete Anchors and maintain their optimal performance, follow these maintenance tips:
- Regular inspections: Periodically inspect the anchors to check for signs of damage or corrosion. If any issues are detected, take appropriate measures to repair or replace the anchors.
- Cleaning and lubrication: Clean the anchors regularly to remove dirt, debris, or any buildup that can affect their performance. Apply a lubricant to moving parts, such as threaded rods, to prevent friction and ensure smooth operation.
- Monitor load limits: Keep track of the load limits of the anchors and avoid exceeding them. Excessive weight or overloading can lead to anchor failure and compromise the safety of your installation.
Understanding load capacities and weight limits for specific anchoring scenarios
Each Redhead Concrete Anchor has a specific load capacity and weight limit to ensure safe and reliable fastening. It is essential to understand these limits to prevent any potential failures. Here are a few key points to keep in mind:
| Anchor Type | Load Capacity | Weight Limit |
|---|---|---|
| Drop-In Anchor | Varies based on size and depth of embedment | Dependent on concrete strength and condition |
| Wedge Anchor | Varies based on size and length | Dependent on concrete strength and condition |
| Sleeve Anchor | Varies based on diameter and embedment depth | Dependent on concrete strength and condition |
Note: Load capacities and weight limits can also be affected by factors like edge distance and spacing between anchors. Consult the manufacturer’s guidelines or contact a Redhead Concrete Anchors representative for specific anchoring scenarios.
By following these tips and guidelines, you can ensure that Redhead Concrete Anchors perform at their best and provide long-lasting durability for your concrete applications. Remember to always prioritize safety and consult professionals for any complex or high-load anchoring projects.
Applications And Examples Of Redhead Concrete Anchors
Redhead concrete anchors are highly reliable and versatile fasteners that are specifically designed for securing objects to concrete surfaces. Whether you need to secure shelving units in a garage, mount heavy fixtures or equipment on concrete walls, or anchor railing systems for safety and stability, Redhead concrete anchors provide the necessary strength and durability. In this article, we will explore various applications and examples of how Redhead concrete anchors can effectively be used.
<h3>Securing shelving units in a garage</h3>
Shelving units in a garage require a strong and secure anchor to ensure stability and prevent accidents. Redhead concrete anchors are ideal for this application as they provide a reliable solution for securing shelves to concrete walls or floors. By using Redhead concrete anchors, you can easily install and stabilize your shelving units, allowing you to store heavy items without any concerns.
<h3>Mounting heavy fixtures or equipment on concrete walls</h3>
When it comes to mounting heavy fixtures or equipment on concrete walls, it’s essential to choose a fastening system that can withstand the weight and ensure long-lasting stability. Redhead concrete anchors are specifically designed to provide superior strength and durability for such applications. Whether you need to mount industrial machinery, electrical panels, or large wall-mounted displays, Redhead concrete anchors are the perfect solution to securely fasten these heavy fixtures to concrete walls.
<h3>Anchoring railing systems for safety and stability</h3>
Railing systems are crucial for ensuring safety and stability in various settings such as staircases, balconies, and walkways. Redhead concrete anchors are an excellent choice for anchoring railing systems because of their exceptional strength and reliability. By securely anchoring railings to concrete surfaces, Redhead concrete anchors provide peace of mind, preventing accidents and ensuring the safety of individuals using the area.
Frequently Asked Questions On How To Install Redhead Concrete Anchors
How To Choose The Right Size Of Redhead Concrete Anchors?
To choose the right size of Redhead Concrete Anchors, consider the weight and load capacity of the item you want to anchor. Use the manufacturer’s guidelines to determine the appropriate size and ensure a secure installation.
What Tools Are Needed For Installing Redhead Concrete Anchors?
To install Redhead Concrete Anchors, you’ll need a hammer drill, drill bits, a vacuum or brush for cleaning the holes, a torque wrench or socket wrench, and safety gear like goggles and gloves. Having these tools handy will make the installation process easier and more efficient.
Can Redhead Concrete Anchors Be Used On Different Types Of Concrete?
Yes, Redhead Concrete Anchors can be used on various types of concrete, such as regular concrete, lightweight concrete, and even some types of solid masonry. However, it is important to consult the manufacturer’s recommendations to ensure proper installation and reliability for your specific application.
Conclusion
The installation of Redhead concrete anchors is a straightforward process that can greatly enhance the stability and strength of your projects. By following the step-by-step guide and utilizing the recommended tools and techniques, you can ensure a secure and reliable anchor installation.
Whether it’s for a home improvement project or a construction site, Redhead concrete anchors offer the durability and peace of mind you need. Increase your project’s longevity and safety by choosing Redhead today.