How to Install Picture Rail?
To install a picture rail, measure and mark the desired location on the wall, then attach the rail using screws or nails. This guide will walk you through the step-by-step process of safely and accurately installing a picture rail to showcase your artwork and decorations.
Picture rails are a versatile and stylish way to display pictures, artwork, and decorations without damaging your walls. They are typically installed near the top of the wall, allowing you to hang and rearrange items easily. Whether you’re a DIY enthusiast or a homeowner looking to add a touch of class to your living space, installing a picture rail is a simple project that can make a big impact.
We’ll provide you with a clear and concise guide on how to install a picture rail in your home.
Choosing The Right Picture Rail Material
When it comes to installing picture rails, choosing the right material is crucial to ensure durability, functionality, and aesthetic appeal. With a wide range of options available in the market, it can be overwhelming to decide on the perfect picture rail material for your specific needs. In this section, we will discuss the different types of picture rail materials, factors to consider when selecting the material, and the benefits and drawbacks of each option. This will help you make an informed decision and achieve the desired look for your picture rail installation.

Different types of picture rail materials
Before diving into the selection process, it’s important to be familiar with the various types of materials commonly used for picture rails. Here are some popular choices:
| Material | Description |
|---|---|
| Wood | A traditional and timeless choice, wooden picture rails offer a classic and elegant look. They are available in a variety of finishes, such as oak, pine, and mahogany, allowing you to match the rail with your existing interior decor. Wood is known for its strength and durability, making it suitable for heavy art pieces. |
| Plastic | Plastic picture rails are lightweight and budget-friendly, making them a popular option for those looking for a cost-effective solution. They are available in different colors and finishes, providing flexibility in terms of design. However, plastic rails may not have the same level of durability as other materials. |
| Metal | Metal picture rails, such as aluminum or steel, offer a sleek and modern appearance. They are known for their strength and ability to hold heavier artworks. Additionally, metal rails can be powder-coated or anodized to prevent corrosion and ensure longevity. |
Factors to consider when selecting picture rail material
Now that you are familiar with the different types of picture rail materials, let’s explore the factors to consider when making your selection:
- Weight capacity: Determine the weight of the artworks you intend to hang and choose a material that can safely support them.
- Installation method: Consider the ease of installation with each material and whether you have the necessary tools and expertise.
- Design and aesthetics: Each material has its own unique look, so choose one that complements your interior style and enhances the overall visual appeal.
- Maintenance: Some materials may require more frequent maintenance or cleaning than others, so consider your level of commitment to upkeep.
Benefits and drawbacks of each material
Now, let’s delve into the benefits and drawbacks of each picture rail material:
- Wood: Offers a timeless and elegant appearance, durable and strong, matches various interior styles. However, requires regular maintenance to prevent damage from moisture or pests.
- Plastic: Lightweight and budget-friendly, available in different finishes and colors. However, may not have the same level of durability as other materials and can be prone to warping or cracking over time.
- Metal: Sleek and modern look, can hold heavy art pieces, offers corrosion resistance with proper finishes. However, can be more expensive than other materials, and installation may require specialized tools.
By considering the different types of picture rail materials, the factors to weigh in your decision-making process, and the benefits and drawbacks of each option, you can confidently select the right picture rail material that best suits your needs. Remember to choose a material that not only enhances the functionality of your picture rail but also complements the aesthetics of your space.
How To Measure And Prepare The Wall
When it comes to installing picture rail, properly measuring and preparing the wall is essential for a successful and aesthetically pleasing installation. This step is crucial to ensure that the picture rail is placed at the right height and that the wall surface is ready to support the rail securely. In this section, we will guide you through the process of measuring the wall for picture rail placement, outline the necessary tools and materials for preparation, and provide steps for preparing the wall surface.
Measuring the wall for picture rail placement
Before beginning the installation, it is important to measure the wall to determine the appropriate placement for the picture rail. Follow these steps to ensure accurate measurements:
- Start by measuring the height of your ceiling from floor to ceiling.
- Next, decide on the desired height for your picture rail. This will depend on factors such as the height of your walls and personal preferences.
- Measure and mark the desired height of the picture rail on the wall, ensuring that the marks are aligned consistently across the entire length where the picture rail will be installed. You can use a pencil for this.

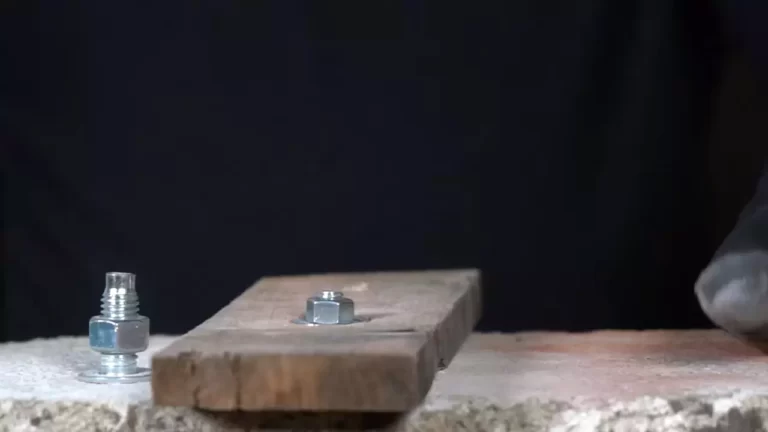
Necessary tools and materials for preparation
Before proceeding with the installation, gather the necessary tools and materials to ensure a smooth preparation process. Here’s a list of what you’ll need:
| Tools | Materials |
|---|---|
|
|
Preparing the wall surface for installation
Once you have measured the wall and gathered the necessary tools and materials, it’s time to prepare the wall surface for installation. Follow these steps to ensure a well-prepared surface:
- Remove any existing picture rail or other fixtures from the wall.
- Inspect the wall surface for any imperfections or damages such as cracks, holes, or loose paint.
- Repair any imperfections using appropriate methods, such as filling cracks and holes with spackling paste and sanding the surface smooth.
- Clean the wall surface thoroughly to remove any dust, dirt, or grease that may affect the adhesion of the picture rail.
- If necessary, apply a fresh coat of paint or finish to the wall before installing the picture rail.
By following these steps to measure and prepare the wall, you will be well on your way to a successful picture rail installation. Now that the wall is ready, the next step is to install the picture rail securely and enjoy the many benefits it brings to your space.
Step-By-Step Guide For Installing Picture Rail
Are you looking to add a touch of elegance to your walls by installing picture rail? Not only does picture rail provide a stylish way to hang artwork, but it also offers flexibility in your wall decorations. In this step-by-step guide, we will walk you through the process of installing picture rail. From marking the desired height for picture rail placement to securing the picture rail to the wall, we’ve got you covered. Let’s dive in!
Marking the desired height for picture rail placement
The first step in installing picture rail is to determine the desired height at which you want it to be placed. This will depend on factors such as the size of your artwork and the overall visual aesthetic you want to achieve. Once you have made this decision, use a measuring tape to mark the height along the walls where the picture rail will be installed.
Installing the first piece of picture rail
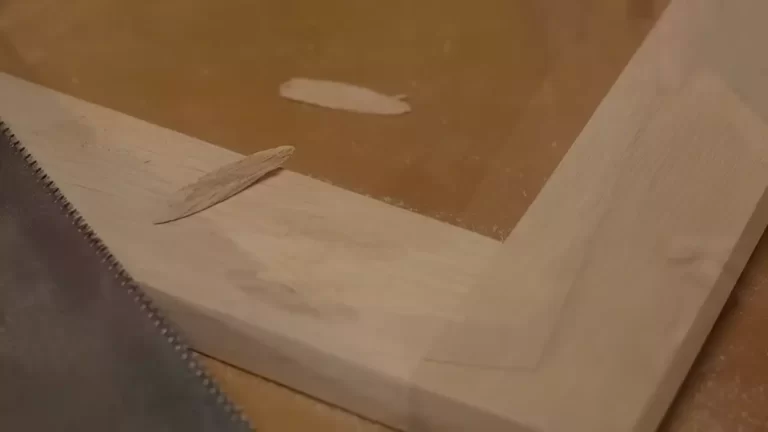
Now that you have marked the desired height, it’s time to install the first piece of picture rail. Start by measuring and cutting the picture rail to the desired length. Use a miter saw or a hand saw to ensure clean and precise cuts. Once the first piece is cut, hold it up against the wall at the marked height and use a level to ensure it is straight. Then, use a stud finder to locate the wall studs and mark their positions on the picture rail. Pre-drill holes at the marked positions on the picture rail, and then secure them to the wall by driving screws through the pre-drilled holes and into the wall studs.

Attaching subsequent sections of the picture rail
With the first piece of picture rail securely installed, it’s time to attach the subsequent sections. Measure and cut each piece of picture rail to the desired length, making sure to account for any corners or obstructions along the wall. Like before, hold each piece up against the wall at the marked height and use a level to ensure they are straight. Once aligned, mark the positions of the wall studs on the picture rail and pre-drill holes accordingly. Finally, attach the subsequent sections of picture rail to the wall using screws, making sure they are securely fastened.
Ensuring proper alignment and levelness
Throughout the installation process, it is crucial to maintain proper alignment and levelness. Check the level frequently to ensure that each piece of picture rail is straight and aligned with the others. This will help create a seamless and professional-looking installation. Make adjustments as needed before securing each section to the wall, ensuring a perfect fit and alignment.
Securing the picture rail to the wall
After attaching all the sections of picture rail, it’s time to secure them to the wall for added stability. Use a countersink drill bit to create recessed holes for the screw heads on the picture rail. Then, drive screws through the pre-drilled holes and into the wall studs, ensuring each section of the picture rail is securely fastened. Check for any loose or wobbly sections and tighten the screws if necessary.
And there you have it – a step-by-step guide for installing picture rail! By following these instructions and paying attention to the alignment and level, you will be able to achieve a professional and visually appealing installation. Now it’s time to hang your artwork and enjoy the timeless charm of picture rail!
Tips For Installing Picture Rail On Different Wall Surfaces
Installing Picture Rail on DrywallWhen it comes to installing picture rail on drywall, there are a few important considerations to keep in mind to ensure a successful installation. First, it’s crucial to locate the studs in the wall so that the picture rail can be securely fastened. Using a stud finder, scan the wall and mark the locations of the studs. Once you have identified the studs, use screws or nails long enough to penetrate the drywall and attach the picture rail securely to the studs. It’s also a good idea to use a level to ensure that the picture rail is installed straight and level. |
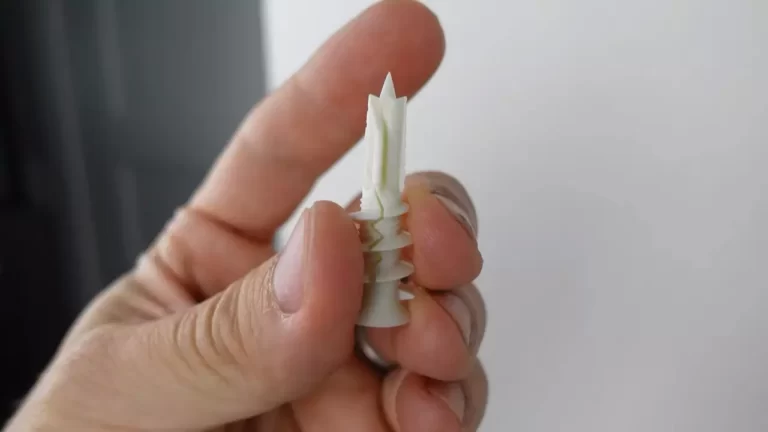
Installing Picture Rail on Plaster WallsIf you have plaster walls, the process of installing picture rail may be slightly different. Plaster walls are typically thicker and more fragile than drywall, so care must be taken to avoid cracking or damaging the plaster. To install picture rail on plaster walls, it’s recommended to use masonry screws or anchors instead of nails to ensure a secure attachment. Pre-drill holes into the plaster using a masonry drill bit, then insert the screws or anchors and attach the picture rail. Take care not to overtighten the screws or anchors, as this can cause the plaster to crack. Using a level is essential to ensure the picture rail is straight and level. |
Installing Picture Rail on Brick or Concrete WallsInstalling picture rail on brick or concrete walls requires a different approach due to the hardness and unevenness of the surface. To begin, gather the necessary tools including a masonry drill bit and masonry screws or anchors. Start by marking the locations where the picture rail will be installed on the wall. Use a masonry drill bit to create holes in the brick or concrete, making sure to drill deep enough for the screws or anchors. Insert the screws or anchors into the holes and tighten them securely. It may be helpful to use a hammer drill for this step to ensure the holes are perfectly aligned. Finally, attach the picture rail to the screws or anchors, making sure it is level and securely fastened. |
Hanging Pictures On Picture Rail
Once you have installed a picture rail in your home, the next step is to hang your pictures on it. This method not only adds a touch of elegance to your interior but also allows you to easily change and rearrange your artwork without damaging your walls. In this section, we will discuss the appropriate picture hanging hardware, how to hang pictures using picture rail hooks or wires, and how to adjust the height and placement of pictures on the rail.
Selecting the appropriate picture hanging hardware
Before you start hanging your pictures on the picture rail, it’s essential to choose the right hardware to ensure a secure and stable display. Here are a few options you can consider:
1. Picture Rail Hooks: These hooks are specifically designed to slide onto the picture rail and provide a sturdy base for hanging your artwork. They come in various styles and sizes to accommodate different weights and styles of frames. Make sure to select hooks that are appropriate for the weight of your pictures.
2. Picture Rail Wires: Another option is to use picture rail wires, which are thin steel cables that attach to the picture rail hooks. These wires enable you to hang multiple pictures on a single rail, giving you the flexibility to create a gallery wall or easily change the arrangement of your artwork.
3. Wall Hooks: If you prefer a more traditional approach, you can use wall hooks that insert into the picture rail and extend down to support the frame. Although this method requires drilling into the wall, it offers a strong and secure solution for heavier frames.

How to hang pictures using picture rail hooks or wires
Once you have chosen the appropriate hardware, follow these steps to hang your pictures using picture rail hooks or wires:
- First, determine the desired placement of your picture on the wall. It’s helpful to use a tape measure and level to ensure accurate positioning.
- Attach the picture rail hook or wire to the back of your frame according to the manufacturer’s instructions.
- Slide the hook onto the picture rail or attach the wire to the hook, ensuring a secure connection.
- Hold the frame against the wall and adjust the height and angle until it is aligned with your desired placement.
- Once satisfied with the positioning, gently release the frame, and it should stay securely in place on the picture rail.
Adjusting the height and placement of pictures on the rail
After hanging your pictures, you may want to make adjustments to achieve the perfect arrangement. Here are some tips for adjusting the height and placement:
- Experiment with Different Heights: Try hanging your pictures at various heights to create visual interest. You can have some frames at eye level and others slightly higher or lower, depending on your preferences and the overall aesthetic of your room.
- Consider the Surrounding Space: Take into account furniture, other art pieces, and the overall flow of the room when deciding where to position your pictures. They should complement the space and not overwhelm or appear disconnected.
- Create Cohesion: If you have multiple pictures to hang, visualize how they will look as a group. Pay attention to the spacing between frames to ensure a harmonious and balanced arrangement.
- Use Trial and Error: Don’t be afraid to move and adjust your pictures until you find the perfect configuration. It may take a few tries to achieve the desired result, but the beauty of picture rails is the ease with which you can make changes.
By following these steps and considering the various factors involved, you can hang your pictures on a picture rail with confidence and achieve an elegant and personalized display in your home.
Maintaining And Updating Picture Rail
Cleaning and maintaining picture rails
Proper cleaning and maintenance is crucial for keeping your picture rail looking great and ensuring its longevity. Here are some tips for cleaning and maintaining your picture rail:
- Regular dusting: Dust and dirt can accumulate on the surface of the picture rail over time. Use a soft cloth or feather duster to gently remove the dust. Avoid using abrasive cleaners or harsh chemicals that can damage the paint or finish of the rail.
- Removing stains: If you notice any stains on your picture rail, you can use a mild soap and water solution to gently clean the affected area. Apply the solution with a soft cloth and gently scrub the stain. Rinse with clean water and dry thoroughly.
- Inspect for damage: Regularly inspect your picture rail for any signs of damage or wear. Check for loose or damaged hooks, wires, or rail sections. If you notice any issues, repair or replace them as soon as possible to prevent further damage.
- Protect from humidity: Picture rails, particularly those located in bathrooms or kitchens, are exposed to humidity and moisture. To protect your rail from damage, make sure the area is well-ventilated and use a dehumidifier if needed.
- Preserve the paint or finish: If your picture rail has a painted or finished surface, you can prolong its lifespan by periodically applying a fresh coat. Choose a paint or finish that is compatible with the material of your rail and follow the manufacturer’s instructions for application.
Removing and replacing picture rail hooks or wires
If you need to remove or replace the hooks or wires on your picture rail, follow these simple steps:
- Assess the situation: Determine the type of hooks or wires that are currently attached to the rail and whether they need to be completely removed or replaced.
- Prepare the tools: Gather the necessary tools for the job, such as a screwdriver, pliers, or wire cutters.
- Remove the existing hooks or wires: If the hooks or wires can be unscrewed, use a screwdriver to loosen and remove them. If they are attached more securely, you may need to use pliers or wire cutters to carefully detach them.
- Install new hooks or wires: Once the old hooks or wires are removed, you can install new ones. Make sure to choose hooks or wires that are suitable for the weight of your artwork.
- Securely attach the new hooks or wires: Once the new hooks or wires are in place, ensure they are securely fastened to the rail. Test their strength by gently pulling on them.

Updating the look of picture rail with paint or finishes
If you’re looking to update the look of your picture rail, painting or refinishing it can give it a fresh new appearance. Here’s how you can do it:
- Prepare the surface: Clean the picture rail thoroughly to remove any dust or dirt. Sand any rough or uneven areas to create a smooth surface for painting or refinishing.
- Choose the right paint or finish: Select a paint color or finish that suits your decor style. It’s important to choose a product that is specifically designed for the material of your picture rail.
- Apply the paint or finish: Use a paintbrush or roller to apply an even coat of paint or finish to the picture rail. Follow the manufacturer’s instructions for application and drying times.
- Allow for proper drying: Once you’ve applied the paint or finish, allow it to dry completely. This ensures a durable and long-lasting result.
- Inspect the final result: Once the paint or finish has dried, inspect the picture rail for any blemishes or missed spots. Touch up as necessary to achieve a flawless look.
By following these tips for cleaning, maintaining, and updating your picture rail, you can enjoy a beautiful and functional display space for your artwork. Whether you’re showcasing cherished family photos or a curated art collection, a well-maintained picture rail adds a touch of elegance to any room.
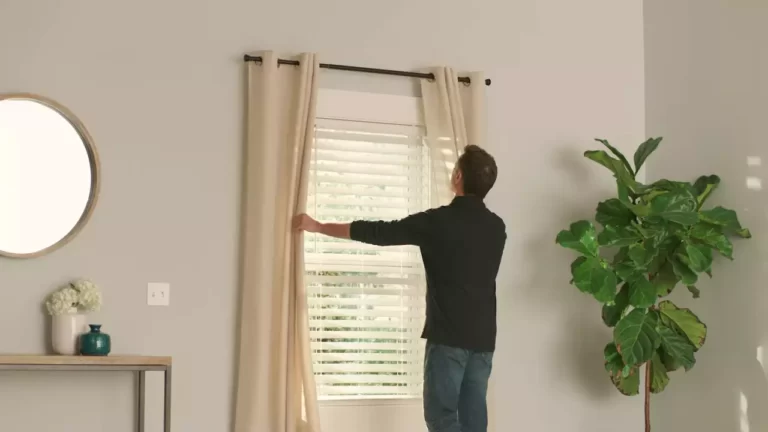
Enhancing Your Wall Decor With Picture Rail
Picture rail is a versatile and stylish way to enhance your wall decor. Whether you want to display cherished artwork, family photographs, or other decorative items, picture rail provides an easy and convenient solution. With its subtle design, picture rail adds a touch of elegance to any room, while also allowing you to change and rearrange your wall decor as often as you like.
Decorating ideas using picture rail
There are countless ways to decorate your walls using picture rail. Here are a few creative ideas to get you started:
- Create a stunning gallery wall
- Display a collection of framed photographs
- Hang a series of artwork or prints
- Showcase decorative plates or trays
- Add a touch of greenery with hanging plants
By using picture rail, you can easily switch out and rearrange your wall decor whenever the mood strikes. No need to commit to one layout or design – picture rail allows you to experiment and evolve your wall decor over time.
Displaying artwork, photographs, and other items
One of the greatest advantages of picture rail is its flexibility in displaying different types of items. Whether you have a beloved painting, a collection of vintage photographs, or a special tapestry, picture rail can accommodate them all.
By simply attaching hooks or wires to the picture rail, you can easily hang and showcase your treasures without causing any damage to your walls. This is particularly useful for those who live in rented spaces or frequently change their interior design.
Creating a gallery wall with picture rail
A gallery wall is a popular and visually stunning way to display a collection of artwork, photographs, or other decorative items. Picture rail makes it easy to create and maintain a gallery wall, even if you don’t have much experience in interior design.
- Start by selecting the pieces you want to include in your gallery wall. Consider the size, colors, and themes of the items to create a cohesive look.
- Measure the wall space where you want to hang your gallery wall.
- Install the picture rail along the top edge of the wall, following the manufacturer’s instructions.
- Attach hooks or wires to the picture rail, making sure they are level and evenly spaced.
- Hang your selected items on the hooks or wires, adjusting as needed to create a visually pleasing arrangement.
- Step back and admire your beautiful gallery wall!
With picture rail, you can easily modify and rearrange your gallery wall whenever you feel like refreshing your wall decor. Experiment with different layouts, mix and match different types of artwork, and let your creativity shine.
Enhance your wall decor with the versatility and elegance of picture rail. Whether you choose to create a gallery wall or display cherished items, picture rail offers a convenient and stylish solution for enhancing your walls. Start exploring the possibilities and transform your space into a personalized work of art.
Frequently Asked Questions Of How To Install Picture Rail
How Do You Install A Picture Rail?
To install a picture rail, start by measuring and marking the desired height on the wall. Then, use a level to draw a straight line for the rail. Next, attach the rail to the wall using screws or nails. Finally, hang your pictures using picture hooks and wires for a secure display.
What Tools Are Needed To Install Picture Rail?
To install picture rail, you will need a measuring tape, a level, a pencil, a drill or hammer, screws or nails, picture hooks, and picture hanging wires. Make sure to have these tools handy before starting the installation process.
Can Picture Rail Be Installed Without Damaging The Walls?
Yes, picture rail can be installed without damaging the walls. By using removable adhesive hooks specifically designed for picture rail, you can hang your pictures without the need for screws or nails. This allows for easy removal without leaving any marks or damage on the walls.
How High Should A Picture Rail Be Installed?
The height at which you should install a picture rail depends on personal preference and the size of your pictures. As a general guideline, a picture rail is typically installed around 6 to 8 inches below the ceiling. However, you can adjust the height to fit the size and arrangement of your artwork.
Conclusion
Installing picture rail is a simple and efficient way to enhance the aesthetic appeal of any room. By following the step-by-step instructions provided in this blog post, you can easily accomplish this task. Remember to select the right materials, measure accurately, and use proper tools.
With a little patience and effort, you can create a stylish and functional display for your artwork. Enjoy the process and showcase your creativity with picture rail installation!