How to Install Peel And Stick Wallpaper in a Bathroom?
To install peel and stick wallpaper in a bathroom, follow these steps: Prepare the surface by cleaning it thoroughly and ensuring it is smooth and dry. Measure and cut the wallpaper to fit the space, removing any excess.
Peel off the backing of the wallpaper and carefully stick it onto the wall, starting from one corner and smoothing out any air bubbles as you go.
Prepare The Space
Before you start installing peel and stick wallpaper in your bathroom, it’s essential to prepare the space properly. This will ensure a smooth and successful installation process. There are three key steps to preparing the space: cleaning the walls, removing any existing wallpaper or paint, and measuring and cutting the wallpaper to fit.
Clean the Walls
Prior to applying the peel and stick wallpaper, it’s important to thoroughly clean the walls. Use a mild cleaning solution and a sponge or cloth to remove any dirt, dust, or grime. Pay extra attention to areas near the sink, toilet, and shower, as these are prone to moisture and can accumulate residue over time. Allow the walls to dry completely before moving on to the next step.
Remove any Existing Wallpaper or Paint
If there is any existing wallpaper or paint on the walls, it’s crucial to remove it before installing the peel and stick wallpaper. Use a scraper or putty knife to gently peel off the old wallpaper. In the case of paint, sand it down to create a smooth surface for the adhesive to stick to. Removing any obstacles will help ensure that the new wallpaper adheres properly and lasts for a long time.
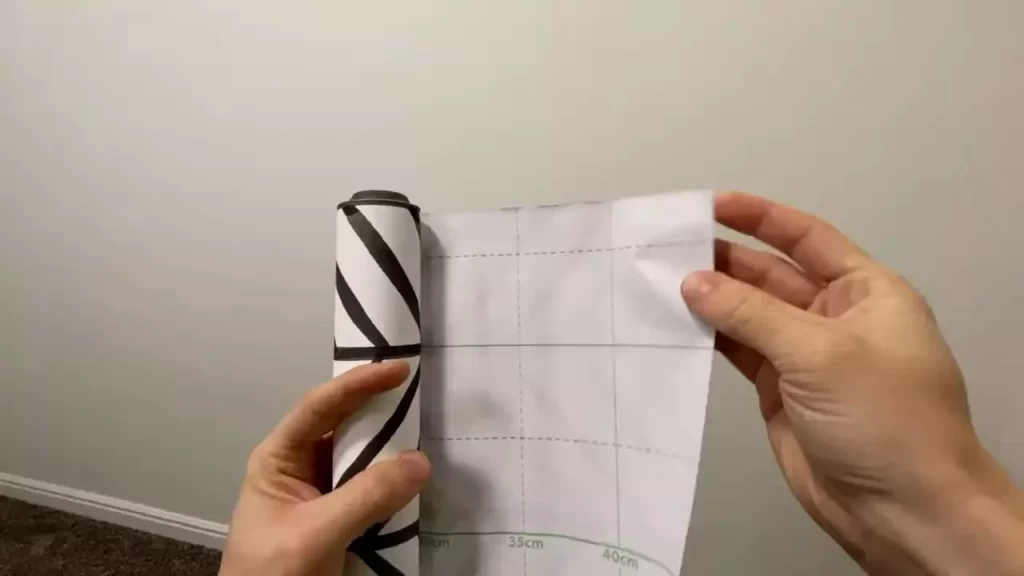
Measure and Cut the Wallpaper to Fit
Accurate measurement is crucial for a seamless installation. Begin by measuring the height of your walls, starting from the top to the baseboard or floor. Add a few additional inches to accommodate any variations or unexpected corners. Once you have the measurements, mark them on the back of the peel and stick wallpaper using a pencil or marker.
Next, carefully cut the wallpaper to fit using a utility knife or pair of scissors. Take your time and ensure the cuts are precise to avoid uneven edges. If your bathroom has any outlets or fixtures on the walls, make sure to carefully cut holes or slits to accommodate them.
By properly preparing the space before installing peel and stick wallpaper in your bathroom, you are setting the foundation for a successful and durable application. Clean walls, the removal of any existing wallpaper or paint, and accurate measurements and cuts will help ensure a professional-looking finish that enhances the aesthetic of your bathroom.
Cleaning The Walls
Cleaning the walls is an essential step that must be done before installing peel and stick wallpaper in your bathroom. Properly cleaning the walls ensures that the wallpaper adheres well and lasts longer. In this section, we will discuss three important steps to follow when cleaning your bathroom walls.
Remove any dirt or grime
The first step in preparing your walls for peel and stick wallpaper is to remove any dirt or grime that may be present. This can be done by following these simple steps:
- Start by using a dry cloth or broom to remove any loose dust or debris from the walls. This will prevent it from getting trapped under the wallpaper.
- Next, prepare a mixture of warm water and mild soap. Dip a sponge or cloth into the soapy water and gently scrub the walls, paying particular attention to areas that appear dirty or stained.
- Rinse the walls with clean water to remove any soap residue. Use a clean cloth or sponge to wipe away the excess water. Allow the walls to dry completely before proceeding to the next step.
Fill in any holes or imperfections
Once your walls are clean and dry, it’s important to fill in any holes or imperfections to create a smooth surface for the wallpaper. Here’s how you can do it:
- Inspect the walls for any cracks, dents, or nail holes. Use a putty knife or a filling compound to fill in these imperfections.
- Apply the filling compound or putty using a scraper or putty knife, ensuring that it is evenly spread. Smooth out the surface using a sandpaper or sanding block, following the manufacturer’s instructions for drying time.
- Once the filling compound is completely dry, sand the patched areas again to create a seamless finish. Wipe away any dust or debris with a clean cloth.
Sand the walls to create a smooth surface
Sanding the walls is an important step to ensure that the surface is smooth and ready for the peel and stick wallpaper. Here’s how you can do it:
- Begin by using medium-grit sandpaper or a sanding block. Gently sand the entire surface of the walls, moving in circular motions. This helps to create a rough texture that allows the wallpaper adhesive to adhere better.
- After sanding, wipe away any dust or debris using a clean cloth.
- For a smoother finish, switch to a finer-grit sandpaper and lightly sand the walls again. This will help to eliminate any remaining roughness and ensure a flawless application of the wallpaper.
- Once you have finished sanding, make sure to remove any dust or debris from the walls using a clean cloth or vacuum cleaner. Your walls are now ready for the peel and stick wallpaper!
By following these steps and properly cleaning, filling, and sanding your bathroom walls, you can ensure that your peel and stick wallpaper adheres well, providing a beautiful and long-lasting update to your bathroom décor.

Removing Existing Wallpaper Or Paint
Use a wallpaper steamer or remover solution
Removing existing wallpaper or paint is the first step in installing peel and stick wallpaper in your bathroom. If you have wallpaper, you might need a wallpaper steamer or a remover solution to help loosen it from the walls. A wallpaper steamer uses steam to penetrate the wallpaper and make it easier to remove. However, if you don’t have access to a steamer, you can use a remover solution instead. These solutions are specially designed to break down the adhesive and make it easier to scrape off the wallpaper or paint.
Scrape off the old wallpaper or paint
Once you have softened the wallpaper or paint using a steamer or remover solution, it’s time to start scraping it off. To do this, you’ll need a putty knife or a wallpaper scraper. Use the edge of the knife or scraper to gently lift the edges of the wallpaper or paint and then slowly peel it away from the wall. Be careful not to damage the underlying wall surface while doing so. If there are stubborn spots that won’t come off easily, you can use the scraper to gently scrape them away. Take your time with this step to ensure all the old wallpaper or paint is completely removed.
Clean the walls again to remove any residue
Once you have successfully removed the old wallpaper or paint, it’s important to clean the walls to remove any residue that may be left behind. Residue can affect the adhesion of the new peel and stick wallpaper, so it’s crucial to have a clean surface. Use a mild detergent mixed with warm water and a sponge or cloth to gently scrub the walls. Make sure to rinse the walls thoroughly with clean water to remove any soapy residues. Allow the walls to dry completely before proceeding with the installation of the new peel and stick wallpaper.
In conclusion, to prepare your bathroom walls for the installation of peel and stick wallpaper, you need to remove any existing wallpaper or paint. This can be done by using a wallpaper steamer or remover solution to soften the old wallpaper or paint and then scraping it off with a putty knife or wallpaper scraper. Once the old wallpaper or paint is completely removed, clean the walls again to remove any residue. By following these steps, you’ll ensure a smooth and adhesive-ready surface for your new peel and stick wallpaper.
Measuring And Cutting The Wallpaper
One of the most important steps in installing peel and stick wallpaper in a bathroom is accurately measuring and cutting the wallpaper. Taking the time to measure properly and cut the wallpaper to fit your walls will ensure a seamless and professional-looking finish. In this section, we will guide you through the process of measuring the height and width of your walls, how to add extra length to accommodate for pattern matching, and how to cut the wallpaper using a straightedge and utility knife.
Measure the height and width of the walls
To start, you need to measure the height and width of each wall where you plan to install the peel and stick wallpaper. Use a tape measure to measure from floor to ceiling for the height, and from one end of the wall to the other for the width. It’s a good idea to measure multiple times to ensure accuracy. Make sure to record the measurements for each wall as you go.
Add extra length to accommodate for pattern matching
When installing peel and stick wallpaper with a pattern, it’s essential to add extra length to allow for proper pattern matching. This will ensure that the pattern aligns seamlessly across the entire wall. To determine how much extra length to add, examine the wallpaper pattern and locate a distinctive element that repeats. Measure the distance between two identical elements and use this measurement to determine the amount of extra length needed for each strip of wallpaper.
Use a straightedge and utility knife to cut the wallpaper
Once you have your measurements and have accounted for pattern matching, it’s time to cut the peel and stick wallpaper. Start by laying the wallpaper face down on a clean and flat surface. Use a straightedge, such as a ruler or level, to create a straight cutting guide.
Using a utility knife, carefully cut along the straightedge, applying even pressure to ensure a clean and straight cut. Take your time and make precise cuts to avoid any jagged edges or mistakes. Repeat this process for each strip of wallpaper, being sure to label each piece for easy identification during the installation process.
Remember to account for any corners, outlets, or other obstacles on your walls and make necessary adjustments when cutting the wallpaper.
By following these steps and taking the time to measure and cut the peel and stick wallpaper properly, you will be well on your way to achieving a stunning and professional-looking finish in your bathroom.

Applying The Wallpaper
Start from a Corner or Focal Point
When it comes to installing peel and stick wallpaper in your bathroom, it’s important to start from a corner or focal point. This will ensure that your wallpaper is applied evenly and straight, giving your bathroom a professional-looking finish.
Peel off the Backing and Position the Wallpaper
To begin, peel off the backing of the wallpaper, revealing the adhesive side. Position the wallpaper carefully, ensuring that it aligns with your starting corner or focal point. If necessary, measure and cut the wallpaper to fit your desired area.
If you’re working with a patterned wallpaper, make sure to match up the pattern as you position each piece. This will create a seamless and cohesive look in your bathroom.
Smooth out any Air Bubbles or Wrinkles
Once the wallpaper is positioned, use a smoothing tool or a credit card to gently smooth out any air bubbles or wrinkles. Start from the center and work your way outwards, exerting even pressure to ensure proper adhesion.
If you encounter any stubborn air bubbles, simply peel back the wallpaper slightly and smooth it out again. This will help to eliminate any imperfections and create a smooth and flawless finish.
By following these steps, you’ll be able to easily and effectively apply peel and stick wallpaper in your bathroom. So go ahead and give your bathroom a stylish makeover!
Starting From A Corner Or Focal Point
When it comes to installing peel and stick wallpaper in a bathroom, starting from a corner or focal point is essential for achieving a seamless and professional-looking result. This method not only helps in creating a visually cohesive appearance but also allows for easier alignment and application of each wallpaper strip.
Choose a corner or the most visible wall
The first step in starting your peel and stick wallpaper installation is selecting a corner or the most visible wall in your bathroom. This will serve as your starting point and will determine the overall layout of your wallpaper design. Consider factors such as the position of doors, windows, or any architectural features to ensure a balanced and aesthetically pleasing result.
Mark a guideline for the first strip of wallpaper
After choosing the corner or focal point, it’s important to mark a guideline for the first strip of wallpaper. This guideline will ensure that your wallpaper is applied in a straight and leveled manner. Use a measuring tape and a pencil to mark a vertical line from the ceiling to the floor at the starting point. This line will serve as your reference when positioning and aligning the first strip of wallpaper.
Begin applying the wallpaper from that corner or focal point
Now that you have chosen a corner or focal point and marked a guideline, it’s time to start applying the peel and stick wallpaper. Begin by removing the backing from the first strip of wallpaper and align it with the marked guideline. Slowly peel off the backing while pressing the wallpaper against the wall, working your way down from the top. Smooth out any air bubbles or wrinkles as you go, using a squeegee or a smooth cloth.
Continue this process, one strip at a time, until you’ve covered the entire wall or bathroom. Remember to match patterns and edges as needed to maintain a seamless look. Once you reach corners or obstacles like switches or outlets, carefully trim the excess wallpaper using a utility knife or scissors.
In conclusion, starting your peel and stick wallpaper installation from a corner or focal point in your bathroom is a crucial step in achieving a professional and visually appealing result. By choosing a corner or the most visible wall, marking a guideline, and beginning the application process from that starting point, you’ll ensure that each strip of wallpaper adheres seamlessly and creates a cohesive design that enhances the overall aesthetics of your bathroom.
Peeling Off The Backing And Positioning The Wallpaper
When it comes to adding a stylish touch to your bathroom, peel-and-stick wallpaper can be a game-changer. Not only is it easy to install, but it also offers a myriad of design possibilities. In this section, we’ll walk you through the process of peeling off the backing and positioning the wallpaper to achieve a flawless result.
Peel a small portion of the backing paper
Start by peeling a small portion of the backing paper from the top corner of your wallpaper. This will expose the adhesive side of the wallpaper, which will later be applied to the wall. Remember to remove the backing slowly and steadily, to prevent the wallpaper from sticking prematurely.
Align the wallpaper with the guideline
Next, align the wallpaper with the guidelines you’ve marked on the wall. This guideline will help you ensure that the wallpaper is straight and properly positioned. Take your time to align the top edge of the wallpaper with the guideline, as it will serve as a reference point for the rest of the installation.
Slowly peel off the remaining backing paper while applying the wallpaper, ensuring that each H3 heading adheres to the correct HTML syntax. As you go along, smooth out any air bubbles or wrinkles using a wallpaper smoother or a soft cloth. Be patient and work carefully, making sure that the wallpaper is flush against the wall.
As you continue applying the wallpaper, keep referring to the guideline to maintain the correct alignment. Remember to remove the backing paper inch by inch, and smooth out any imperfections as you go. This will ensure a professional-looking finish and minimize the risk of creases or bubbles.
In conclusion, peeling off the backing and positioning the peel and stick wallpaper in your bathroom is a straightforward process. By following these simple steps and taking your time, you can transform your space with ease. With a little patience and attention to detail, you’ll have a stunning bathroom that reflects your personal style in no time.
Smoothing Out Air Bubbles Or Wrinkles
Use a Wallpaper Smoother or Squeegee
When it comes to installing peel and stick wallpaper in your bathroom, it’s crucial to know how to smooth out air bubbles or wrinkles to achieve a flawless finish. One essential tool that can help you with this task is a wallpaper smoother or squeegee. This tool will allow you to apply even pressure to the wallpaper, helping to remove any air bubbles or wrinkles that may appear during installation.
Before you begin smoothing out the wallpaper, make sure you have properly positioned and aligned the wallpaper on the wall. This will ensure that you have a good starting point for the smoothing process.
Start from the Center and Work Your Way Out
Once your wallpaper is aligned and ready, it’s time to start smoothing. To ensure an even and consistent finish, begin smoothing from the center of the wallpaper and work your way outwards. This method will help distribute the pressure evenly and minimize the risk of creating new wrinkles or bubbles.
Using your wallpaper smoother or squeegee, start at the center and gently push the tool from the middle towards the edges. Apply steady but gentle pressure, being careful not to damage or tear the wallpaper in the process.
Smooth Out Any Air Bubbles or Wrinkles as You Go
As you work your way outwards, keep a close eye on the wallpaper for any air bubbles or wrinkles that may appear. If you spot any, address them immediately to achieve a smooth and flawless finish. Here are a few techniques you can use to smooth them out:
- Gently lift the wallpaper near the bubble or wrinkle using a sharp knife or straight pin.
- Apply some adhesive under the lifted portion using a small paintbrush or adhesive applicator.
- Smooth out the lifted portion using your wallpaper smoother or squeegee.
Continue this process of lifting, applying adhesive, and smoothing until the air bubbles or wrinkles are fully eliminated.
Remember to take your time and work methodically to avoid introducing new wrinkles or bubbles. Patience and attention to detail are key when smoothing out air bubbles or wrinkles in peel and stick wallpaper.

Finishing Touches
Now that you have successfully installed your peel and stick wallpaper in your bathroom, it’s time to add the finishing touches. These final steps will ensure that your newly wallpapered bathroom looks seamless and lasts for a long time.
Trim Excess Wallpaper
The first step in giving your bathroom a polished look is to trim any excess wallpaper. After applying the peel and stick wallpaper, you may have some edges that hang over the designated area. Use a sharp utility knife or a pair of scissors to carefully trim the excess wallpaper along the edges of your walls. Make sure to follow the natural lines and angles of your walls to achieve a clean and professional finish.
Seal the Edges for Extra Durability
To ensure that your peel and stick wallpaper stays in place and has enhanced durability, it’s a good idea to seal the edges. One way to do this is by using a clear, water-based adhesive. Apply a thin layer of the adhesive along the edges and corners of the wallpaper, using a small brush or a sponge. This will create a protective barrier against moisture and prevent the wallpaper from peeling or curling over time.
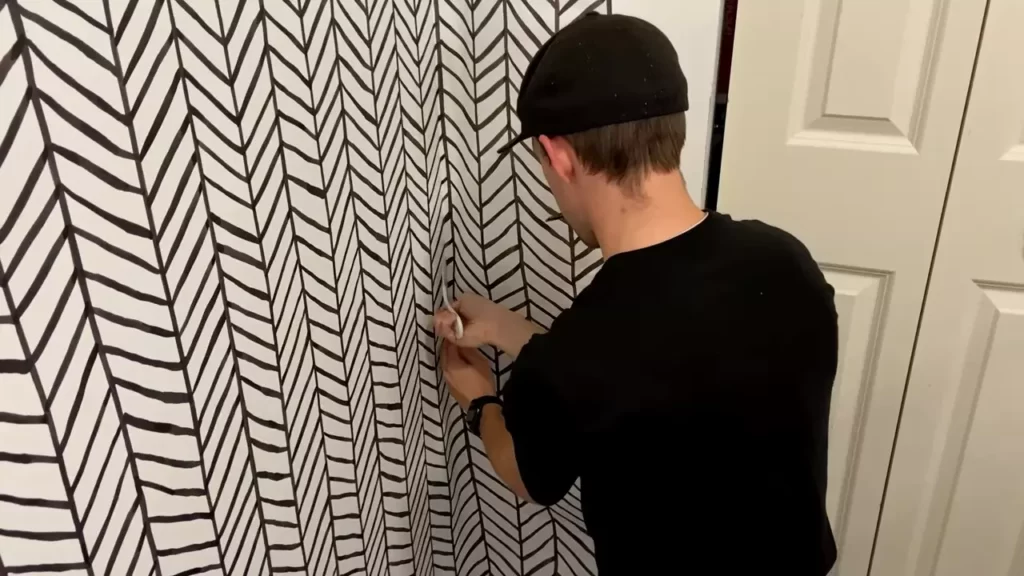
Enjoy Your Newly Wallpapered Bathroom
With the finishing touches complete, it’s time to step back and admire the transformation of your bathroom. The peel and stick wallpaper has not only added a stylish touch but also protected your walls from moisture and damage. Take a moment to appreciate the hard work you put into the installation process and enjoy the fresh new look of your wallpapered bathroom.
Trimming Excess Wallpaper
Installing peel and stick wallpaper in a bathroom can be a fun and rewarding DIY project that can instantly transform the look and feel of the space. However, once you have successfully adhered the wallpaper to the walls, you will need to trim any excess to achieve a professional finish. In this section, we will discuss two methods for trimming excess wallpaper: using a sharp utility knife or scissors, and trimming along the edges and corners.
Use a Sharp Utility Knife or Scissors
To begin trimming the excess wallpaper, you can use either a sharp utility knife or a pair of scissors. Both tools have their advantages, so it ultimately depends on your preference and comfort level.
If you choose to use a sharp utility knife, make sure it has a fresh blade for the cleanest cuts. Start by carefully scoring the edge of the wallpaper where you want to make the cut. Then, apply gentle pressure and cut along the scored line, ensuring a smooth and precise trim. Be cautious not to cut too close to the wall to avoid any accidental damage.
Alternatively, if you prefer to use scissors, opt for a pair with sharp blades specifically designed for cutting wallpaper. Position the scissors parallel to the wall and carefully trim the excess wallpaper, following the edge. Take your time and make small, controlled cuts to ensure accuracy and avoid any unintended mishaps.
Trim Along the Edges and Corners
As you trim the excess wallpaper, pay special attention to the edges and corners for a seamless finish. Use the following tips to achieve the best results:
1. Work in sections: Start at one corner or edge and gradually move to the next, working in small sections. This will help you maintain control and create clean, straight cuts.
2. Trim precisely: Carefully cut along the edge or corner, ensuring accuracy and maintaining a consistent distance from the wall. Take your time and adjust your grip as needed to achieve the desired outcome.
3. Check for any missed areas: Once you have completed trimming all the edges and corners, inspect the walls to ensure that no excess wallpaper remains. If you spot any, use your knife or scissors to delicately remove it.
Remember, precision and patience are key when trimming excess wallpaper. Take your time, be mindful of the cutting tools you choose, and follow the guidelines mentioned above. By doing so, you will achieve a professional-looking result that enhances the overall aesthetic of your bathroom.
Sealing The Edges
When it comes to installing peel and stick wallpaper in your bathroom, one crucial step that you shouldn’t overlook is sealing the edges. By properly sealing the edges of the wallpaper, you can ensure a long-lasting, professional-looking application. In this section, we will discuss two important techniques: applying a wallpaper seam roller or adhesive, and securely pressing down on the edges for proper adhesion.
Apply a wallpaper seam roller or adhesive
To achieve a seamless finish and prevent any potential lifting or peeling, using a wallpaper seam roller or adhesive is highly recommended. These tools help to create a stronger bond between the wallpaper and the wall surface, ensuring that the edges stay in place over time.
To apply a wallpaper seam roller, simply roll it along the edges of the wallpaper using gentle pressure. This will help to activate the adhesive and ensure that it firmly adheres to the wall. Make sure to go over all the edges, corners, and seams of the wallpaper for thorough sealing.
Alternatively, you can use a wallpaper adhesive specifically designed for sealing edges. Apply a thin layer of adhesive onto the edges of the wallpaper using a small paintbrush or a foam roller. Be careful not to apply too much adhesive, as it may cause visible marks or bubbles. Allow the adhesive to dry according to the manufacturer’s instructions before moving on to the next step.
Press down on the edges to ensure proper adhesion
Once you have applied a wallpaper seam roller or adhesive, it is essential to press down on the edges to ensure proper adhesion. Using your fingertips or a clean, dry cloth, firmly press down along the edges, corners, and seams of the wallpaper. This will help to activate the adhesive and create a strong bond with the wall surface.
Continue pressing down on the edges for a few moments, making sure to apply even pressure throughout. Pay extra attention to any areas that seem to be lifting or not adhering properly. By doing so, you can prevent any potential lifting or peeling over time.
By following these techniques for sealing the edges of your peel and stick wallpaper in the bathroom, you can enjoy a beautiful and long-lasting result. Remember to apply a wallpaper seam roller or adhesive and press down on the edges to ensure proper adhesion. With proper sealing, you can avoid any worries of peeling or lifting and create a stunning transformation in your bathroom.
Frequently Asked Questions On How To Install Peel And Stick Wallpaper In A Bathroom
Can I Install Peel And Stick Wallpaper In A Bathroom?
Yes, peel and stick wallpaper is perfect for bathroom walls. It is easy to install, moisture resistant, and can handle high humidity levels. Just make sure the walls are clean and dry before application for the best results.
Will Peel And Stick Wallpaper Damage Bathroom Walls?
No, peel and stick wallpaper is designed to be easily removable without damaging the walls. It uses a gentle adhesive that allows for clean removal, so you can change your bathroom decor without worrying about unsightly residue or wall damage.
How Do I Prepare The Bathroom Walls Before Installing Peel And Stick Wallpaper?
Before applying peel and stick wallpaper, ensure that the walls are clean, dry, and free from any existing wallpaper or paint. Remove any dust, grease, or grime using a mild cleaner and a sponge. Smooth out any imperfections and let the walls dry completely before starting the installation.
Can I Install Peel And Stick Wallpaper Over Existing Tile In The Bathroom?
Yes, peel and stick wallpaper can be installed over existing tile. However, it is essential to thoroughly clean the tile surface and remove any grout lines or uneven areas. Use a primer or adhesive promoter before applying the wallpaper to ensure proper adhesion and a smooth finish.
Conclusion
Updating your bathroom with peel and stick wallpaper is a simple and affordable way to transform the space. By following the step-by-step guide provided in this blog post, you can successfully install this DIY-friendly wallpaper in your bathroom. Remember to properly prepare the walls, measure accurately, and apply the wallpaper with care.
With its wide range of styles and easy installation process, peel and stick wallpaper is a great option for updating the look of your bathroom. Enjoy the beautiful results!