How to Install Peel And Stick Carpet Tiles?
To install peel and stick carpet tiles, start by preparing the floor and ensuring it is clean and level. Next, remove the backing from the first tile and press it firmly onto the floor, aligning it with the adjacent tiles.
Repeat this process for the remaining tiles, cutting them as needed to fit the space. Finally, use a roller or heavy object to press the tiles firmly into place and ensure proper adhesion. Carpet tiles offer a convenient and attractive flooring option for both residential and commercial spaces.
Not only are they easy to install, but they also allow for customization and easy maintenance. By following a few simple steps, you can install peel and stick carpet tiles yourself and transform the look and feel of your space. We will discuss the step-by-step process of installing peel and stick carpet tiles, ensuring a successful and stylish result. So, let’s dive in and learn how to install peel and stick carpet tiles to enhance the beauty and functionality of your floors.
What Are Peel And Stick Carpet Tiles And Their Benefits
Definition and Overview
Peel and stick carpet tiles are a convenient and easy-to-install flooring option that is gaining popularity among homeowners and businesses. These tiles are designed to be self-adhesive, eliminating the need for messy glue or additional equipment. Simply peel off the backing and stick them onto the floor surface. Along with their ease of installation, they offer a wide range of benefits that make them a preferable choice for many.
Advantages of Peel And Stick Carpet Tiles
Peel and stick carpet tiles come with a host of advantages that set them apart from traditional carpet or other flooring options. Understanding these benefits can help you make an informed decision when it comes to choosing the right flooring option for your space.
- Highly Versatile: Peel and stick carpet tiles are available in various sizes, colors, patterns, and textures. This gives you the flexibility to create unique designs and layouts that suit your personal style and preferences. Whether you want to create a cohesive look or experiment with different colors, the possibilities are endless.
- Easy Installation: One of the biggest advantages of peel and stick carpet tiles is how easy they are to install. Unlike traditional carpet installation that requires special tools, adhesives, and professional assistance, peel and stick tiles can be installed by anyone with minimal effort. They are a perfect DIY solution that saves you both time and money.
- Convenient Replacement: Accidents happen, and carpets can suffer from stains, wear, or damage over time. With peel and stick carpet tiles, the replacement process becomes a breeze. Simply remove the damaged tile and replace it with a new one. There’s no need to remove the entire carpet or hire a professional to fix the problem.
- Easier Cleaning: Maintenance is a crucial aspect of maintaining the longevity of your flooring. Peel and stick carpet tiles make cleaning a hassle-free task. Stains and spills can be easily removed by spot cleaning or replacing individual tiles if necessary. This ensures that your floor always looks fresh and pristine.
- Cost-Effective: Peel and stick carpet tiles are an affordable flooring solution compared to traditional carpet or other options. Not only are they reasonably priced, but their easy installation means you can save on labor costs. Additionally, if a tile gets damaged in the future, you only need to replace a single tile instead of an entire carpet, making it a cost-effective investment.
By taking advantage of the benefits offered by peel and stick carpet tiles, you can transform your space with a durable, stylish, and budget-friendly flooring option. Whether you are remodeling your home or upgrading your office, these tiles provide convenience and versatility that suit various environments.
Preparing The Subfloor For Installation
Before you can begin the installation of peel and stick carpet tiles, it is important to properly prepare the subfloor. This crucial step ensures a smooth and long-lasting installation, and helps to prevent any issues that may arise in the future. There are several key tasks involved in preparing the subfloor, including cleaning the subfloor, leveling the subfloor, and repairing any damaged areas.
Cleaning the Subfloor
First and foremost, you will need to thoroughly clean the subfloor before installing the carpet tiles. This ensures that the tiles adhere properly and helps to prevent any dirt, dust, or debris from interfering with the installation process. Start by removing any existing flooring and scraping away any residue or adhesive that may be left behind. Vacuum the entire subfloor to remove any loose particles, and use a mild detergent and warm water solution to clean any stubborn stains or spills. Allow the subfloor to dry completely before moving on to the next step.
Leveling the Subfloor
Once the subfloor is clean and dry, the next step is to level it to ensure a smooth and even surface. Use a straight edge or level to check for any areas that may be uneven or have low spots. If you find any unevenness, you will need to fill these areas with a self-leveling compound. Mix the compound according to the manufacturer’s instructions and pour it onto the uneven areas. Use a trowel to spread the compound evenly and ensure that it is level with the rest of the subfloor. Allow the compound to dry thoroughly before proceeding to the next step.
Repairing Any Damaged Areas
Before installing the carpet tiles, it is important to repair any damaged areas of the subfloor. This includes filling in any cracks, holes, or gaps that may be present. Use a patching compound or filler appropriate for your subfloor material to fill in these areas, following the manufacturer’s instructions. Smooth out the compound with a putty knife and allow it to dry completely before moving forward with the installation. This step is crucial in ensuring a strong and stable foundation for your carpet tiles.
Proper Measurement And Planning
Proper Measurement and Planning are essential steps for a successful installation of peel and stick carpet tiles. By taking accurate measurements, calculating the required quantity of tiles, and planning the layout, you can ensure a seamless and visually appealing result. In this section, we will discuss the three crucial aspects of measurement and planning: Measuring the Room, Calculating the Quantity of Tiles Needed, and Planning the Layout.
Measuring the Room
Before you start installing peel and stick carpet tiles, it is imperative to measure the room accurately. This will help you determine the quantity of tiles needed and plan the layout effectively. Here’s how you can measure the room:
- Clear the room of any furniture or obstacles that might hinder your measurement process.
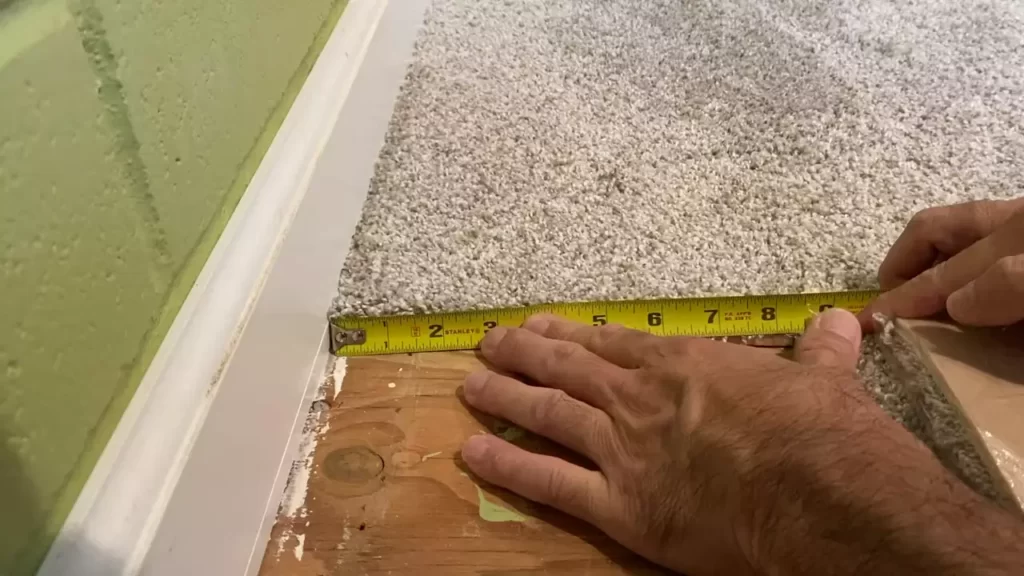
- Use a tape measure to measure the length and width of the room in feet. Measure from wall to wall, ensuring you include any alcoves or protrusions in your measurements.
- Record the measurements accurately and convert them to square feet by multiplying the length and width.
Calculating the Quantity of Tiles Needed
Once you have measured the room, the next step is to calculate the quantity of tiles needed for the installation. This ensures that you neither run short nor have excessive tiles. Here’s how you can calculate the quantity:
- Refer to the specifications of the peel and stick carpet tiles you have chosen for their coverage area per tile. This information is usually mentioned on the packaging or product description.
- Divide the total square footage of the room (obtained from the measurements) by the coverage area per tile. The resulting number will give you an approximate count of tiles required.
- Round up the number to include some extra tiles for waste, irregular cuts, or future replacements.
Planning the Layout
Planning the layout is crucial to achieve a visually appealing and well-organized installation. Here are some key points to consider:
- Start by deciding the direction in which you want to lay the tiles. It can be perpendicular or parallel to the longest wall, depending on your preference.
- Plan the tile placement to minimize seams and create a uniform look. Avoid placing cut tiles at highly visible areas.
- Consider using a chalk line or a straight edge to mark guidelines for aligning the tiles.
- Be mindful of doors, transitions, and any other architectural features that may require special attention.
By following these steps, you can ensure that you have measured the room accurately, calculated the required quantity of tiles, and planned the layout effectively. These fundamental aspects of proper measurement and planning will set the stage for a successful peel and stick carpet tile installation.
Installing Peel And Stick Carpet Tiles
Installing peel and stick carpet tiles is a convenient and cost-effective way to add a fresh look and cozy feel to any room. Whether you’re a DIY enthusiast or a first-time installer, this step-by-step guide will walk you through the process of installing these tiles with ease. In this article, we’ll cover the necessary tools, starting at the center of the room, laying the tiles in a staggered pattern, and trimming the tiles to fit the edges. So let’s get started!
Gathering the Necessary Tools
To ensure a successful installation, it’s important to gather all the necessary tools beforehand. These tools will help you achieve a professional-looking finish:
| Squeegee or roller | Abrasive pad or brush |
| Tape measure | Utility knife or carpet cutter |
| Straight edge or chalk line | Heavy-duty scissors |
| Adhesive remover (if needed) |
Starting at the Center of the Room
When installing peel and stick carpet tiles, it’s best to start at the center of the room and work your way outwards. This approach creates a balanced and symmetrical layout. Here’s how you can do it:
- Clean the floor thoroughly to remove any dust, debris, or existing adhesive residue. This step ensures a smooth surface for the tiles to adhere to.
- Measure the length and width of the room to determine the center point. Mark this point with a small X using a chalk line or a straight edge.
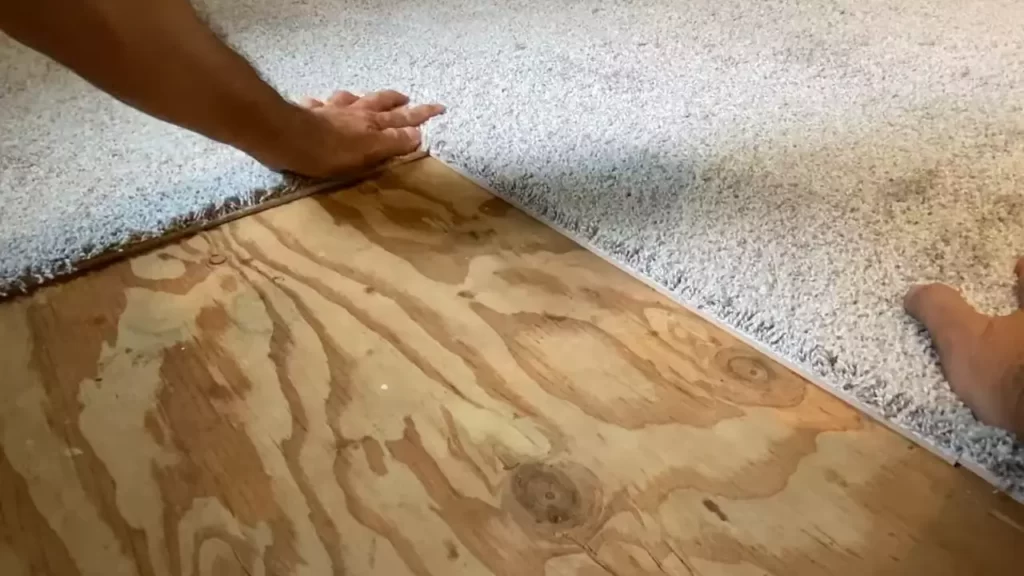
- Place the first tile at the center point and firmly press it down, starting from the center and working towards the edges. Repeat this process for the surrounding tiles, aligning the edges as closely as possible.
- Continue laying tiles in a grid-like pattern, working your way towards the walls. Be sure to leave a small gap, about 1/8 inch, between the tiles and the walls to allow for expansion.
Laying the Tiles in a Staggered Pattern
To achieve a seamless and visually appealing look, it’s recommended to lay the tiles in a staggered pattern. This pattern helps to distribute seams evenly and prevents a repetitive appearance. Here’s how you can achieve it:
- Start the second row of tiles with a half tile, cut to fit if necessary, to create an offset pattern. This staggered layout creates a more natural and random appearance.
- Continue laying the tiles row by row, alternating between full tiles and half tiles. Use a straight edge or chalk line to ensure the rows are straight and aligned.
- Periodically step back and check the overall pattern for consistency. Adjust the tiles if needed to maintain a consistent staggered layout.
Trimming the Tiles to Fit the Edges
Once you’ve reached the edges of the room, you’ll likely need to trim the tiles to fit. Follow these steps to achieve a precise fit:
- Measure the space between the last full tile and the wall. Leave a small gap for expansion.
- Transfer the measurement to a new tile and mark the cutting line using a straight edge and a utility knife or carpet cutter.
- Carefully cut along the marked line using a sharp utility knife or carpet cutter. Take caution to avoid cutting too deeply into the subfloor.
- Place the trimmed tile against the wall, ensuring a snug fit. Press it firmly down to adhere it to the floor.
- Repeat this process for all remaining tiles along the edges of the room.
With these steps, you are now equipped to confidently install peel and stick carpet tiles in any room of your home. Enjoy the process and revel in the transformation of your space!
Ensuring A Secure Installation
Applying Pressure to Activate the Adhesive
One of the most important steps in ensuring a secure installation for peel and stick carpet tiles is applying sufficient pressure to activate the adhesive. This step ensures that the tiles adhere firmly to the floor surface, preventing any potential loosening or shifting over time. When installing each tile, make sure to firmly press it down with your hand or use a carpet roller to apply even pressure across the entire surface. Applying sufficient pressure helps the adhesive bond effectively with the floor, creating a stable and secure installation.
Rolling the Tiles
Rolling the tiles after installation is an additional step that helps enhance the adhesive bond and ensures a secure installation. To roll the tiles, use a carpet roller or a heavy object like a rolling pin. Starting from one end of the installed carpet tile, apply steady pressure by rolling over the entire surface, moving in a back-and-forth motion. This rolling action helps to eliminate any air bubbles or gaps between the tile and the floor, ensuring a tight and secure bond. Remember to roll each tile individually to ensure a complete and thorough rolling process.
Checking for Loose or Unsecured Tiles
After completing the installation of your peel and stick carpet tiles, it is crucial to perform a final check to ensure that all tiles are securely adhered to the floor. Walk across the installed area and carefully inspect each tile. Pay close attention to any tiles that feel loose or show signs of lifting at the edges. If you encounter any loose or unsecured tiles, reapply pressure to those areas, focusing on the edges, to ensure proper adhesion. Taking the time to check for loose tiles immediately after installation can help prevent any potential issues down the line and ensure a secure and long-lasting installation.

Maintaining And Caring For Peel And Stick Carpet Tiles
Once you have successfully installed your peel and stick carpet tiles, it’s important to establish a regular maintenance routine to ensure their longevity and keep them looking their best. By following a few simple steps for regular vacuuming and cleaning, addressing stains and spills promptly, and knowing how to replace damaged tiles, you can keep your carpet tiles in top condition.
Regular Vacuuming and Cleaning
Regular vacuuming is essential for keeping your peel and stick carpet tiles clean and free from dirt and debris. It is recommended to vacuum your carpet tiles at least once a week or more frequently in high-traffic areas. Here are a few tips to keep in mind:
- Use a vacuum cleaner with a beater bar or brush attachment to lift dirt and loosen fibers.
- Ensure the vacuum cleaner is set to the appropriate height for your carpet tiles.
- Vacuum in both vertical and horizontal directions to thoroughly clean the tiles.
- Pay extra attention to the edges and corners where dirt can accumulate.
In addition to regular vacuuming, occasional deep cleaning can help remove deeply embedded dirt and restore the carpet tiles’ appearance. Follow the manufacturer’s instructions for deep cleaning, or consider hiring a professional carpet cleaner for best results.
Addressing Stains and Spills
Accidents happen, but with quick action, most stains and spills can be easily dealt with on peel and stick carpet tiles. Follow these steps to address stains and spills effectively:
- Blot the area immediately with a clean, absorbent cloth to remove any excess liquid.
- Remove solid debris gently using a spoon or spatula, taking care not to push the stain further into the carpet tiles.
- Dampen a clean cloth with a mild carpet cleaner or a mixture of water and vinegar.
- Gently blot the stain, starting from the outer edges and working your way toward the center. Avoid rubbing the stain, as it can cause it to spread.
- Rinse the area with clean water and blot dry using a clean cloth.
- If the stain persists, repeat the above steps or consider using a specialized carpet stain remover.
Replacing Damaged Tiles
If a carpet tile becomes significantly damaged or stained and cannot be effectively cleaned, it is advisable to replace the tile. Here’s how to replace a damaged peel and stick carpet tile:
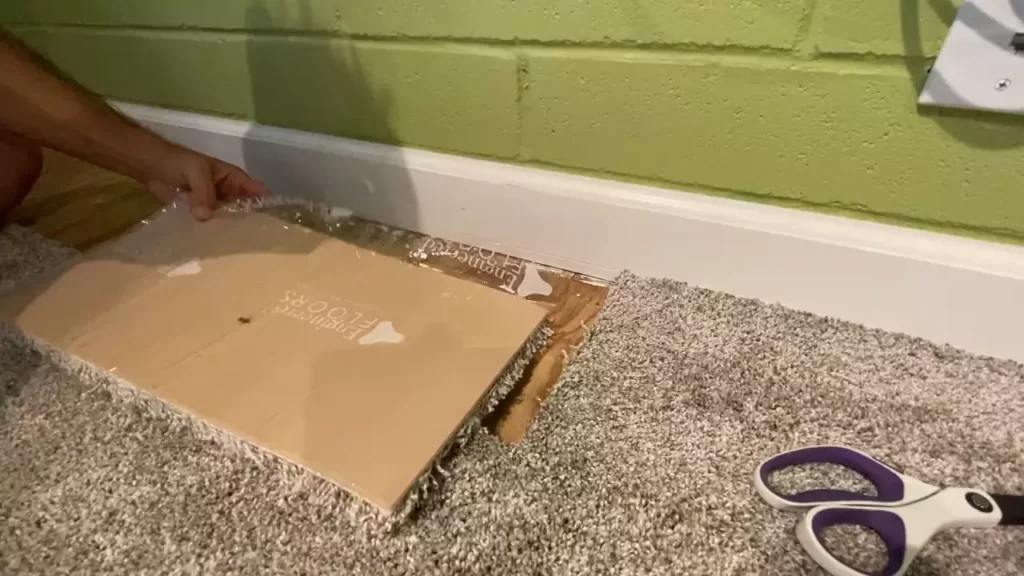
- Carefully lift the surrounding tiles around the damaged tile to expose the adhesive backing.
- Peel away the damaged tile, starting from one corner and slowly working your way across.
- Clean the exposed floor surface and remove any adhesive residue using a cleaner recommended by the tile manufacturer.
- Peel the backing off a new carpet tile and firmly press it into place, aligning it with the surrounding tiles.
- Apply pressure to the tile for a few seconds to ensure it adheres properly.
- Replace the surrounding tiles, pressing them firmly to create a seamless look.
By following these steps for regular maintenance, addressing stains and spills promptly, and knowing how to replace damaged tiles, you can keep your peel and stick carpet tiles looking fresh and clean for years to come. With proper care, your carpet tiles will continue to enhance the aesthetic appeal and provide comfort within your space.
Frequently Asked Questions For How To Install Peel And Stick Carpet Tiles
How Do You Install Peel And Stick Carpet Tiles?
Peel and stick carpet tiles are easy to install. Start by cleaning the floor and removing any existing flooring. Then, peel off the backing of the tile and stick it onto the floor. Make sure to align the tiles properly and use a roller to ensure they stick securely.
Can You Install Peel And Stick Carpet Tiles On Any Floor?
Peel and stick carpet tiles can be installed on a variety of floors, including concrete, plywood, and vinyl. However, they may not adhere well to uneven or heavily textured surfaces. It’s important to prepare the floor properly before installation to ensure the best results.
How Do You Cut Peel And Stick Carpet Tiles?
To cut peel and stick carpet tiles, start by measuring the area you need to cut. Use a straightedge and a utility knife to score the back of the tile along the measurement. Then, bend the tile along the scored line and cut through the backing.
This will ensure a clean and precise cut.
Conclusion
Installing peel and stick carpet tiles is a cost-effective and convenient way to revamp your floors. By following the step-by-step instructions provided in this blog post, you can easily transform any room in your home. With its easy application process and durable nature, peel and stick carpet tiles offer a practical and stylish flooring solution.
So, why wait? Start your DIY project and enjoy the benefits of beautiful and hassle-free carpeting today.