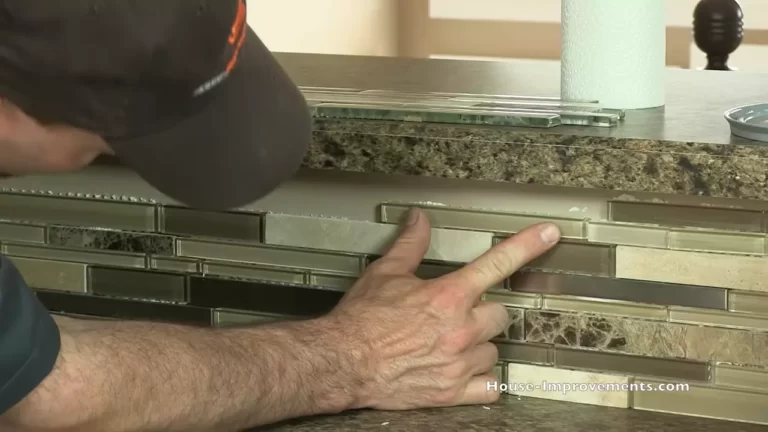
How to Install Mosaic Tile in a Shower?
To install mosaic tile in a shower, you will need to clean and prepare the surface, apply thin-set mortar, lay the tile, and grout the joints for a finished look. A shower is a great place to add a touch of style and sophistication with a mosaic tile installation.
Mosaic tiles not only enhance the aesthetic appeal of the shower but also provide a durable and waterproof surface. However, installing mosaic tile in a shower requires careful planning and execution to ensure a successful outcome. In this guide, we will walk you through the step-by-step process of installing mosaic tile in a shower, from cleaning and prepping the surface to applying thin-set mortar, laying the tile, and finishing with grout.
By following these instructions, you can transform your shower into a stunning space with mosaic tile.
Assessing The Shower Area
Before embarking on the exciting journey of installing a mosaic tile in your shower, it is crucial to assess the shower area thoroughly. Taking these necessary steps will ensure a smooth and successful installation process. The assessment includes measuring the shower dimensions, examining the existing shower surface, and identifying any necessary repairs or preparations.
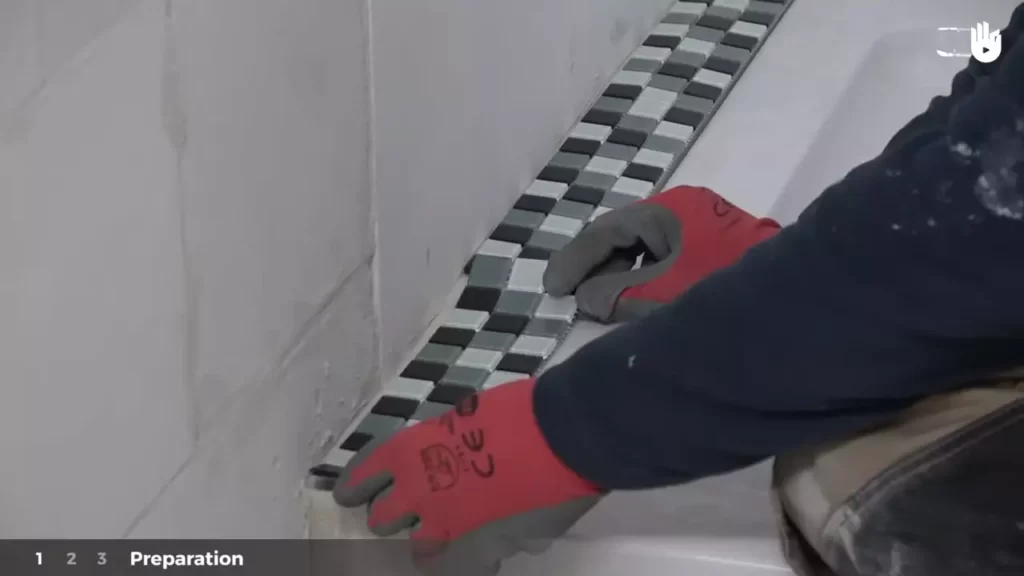
Measuring the Shower Dimensions
The first step in assessing the shower area is to accurately measure the dimensions of the shower. This will help determine the amount of mosaic tile and supplies needed for the project. Using a tape measure, measure the length, width, and height of the shower walls.
It is essential to measure not just the overall dimensions but also any irregularities, such as recesses or niches, in the shower. These measurements will guide you when it comes to cutting and fitting the mosaic tiles perfectly.
Sometimes, the shower dimensions might not be uniform due to sloping or uneven walls. In such cases, measure at multiple points to ensure accuracy. Be sure to take note of any variations in the dimensions, as these will affect the tile installation process.
Examining the Existing Shower Surface
Equally important is examining the existing shower surface. This step allows you to assess the condition of the walls and determine the necessary preparations before installing the mosaic tile.
Start by checking for any signs of damage or moisture-related issues. Are there any cracks, chips, or loose tiles? These need to be addressed and repaired before proceeding. If you notice any signs of moisture damage, it is crucial to find the source and fix it to prevent further issues down the line.
Additionally, it is vital to ensure that the existing surface is smooth and free from any protrusions. Any bumps or uneven spots can interfere with the tile installation process. Take your time to inspect the walls thoroughly, paying attention to every nook and cranny.
Identifying Any Necessary Repairs or Preparations
Once you’ve thoroughly examined the existing shower surface, it’s time to identify any necessary repairs or preparations. This could include patching up cracks or holes, replacing damaged tiles, or applying a waterproofing membrane to ensure the durability of the mosaic tile installation.
Make a checklist of the required repairs or preparations based on your examination. This checklist will serve as a guide throughout the process, ensuring that no essential steps are missed.
Remember, a well-prepared and repaired shower surface is the foundation for a successful mosaic tile installation. Taking the time to identify and address any issues beforehand will result in a stunning and long-lasting finished product.
Gathering The Materials And Tools
Before you begin the exciting task of installing mosaic tiles in your shower, it is essential to gather all the necessary materials and tools. Proper planning and preparation will ensure a smooth and successful installation process. In this article, we will guide you through each step of this preparation phase, from researching and selecting the appropriate mosaic tiles to obtaining the necessary quantity of tiles and adhesive, and acquiring the essential tools for installation.
Researching and selecting the appropriate mosaic tiles
The first step in gathering the materials for your mosaic tile shower installation is to research and select the right tiles for your project. Mosaic tiles come in a wide variety of materials, sizes, colors, and patterns, so it’s important to choose the ones that best suit your shower space and design preferences. Here are a few things to consider during your selection process:
- Size of the tiles: Determine the size of the tiles that will fit well in your shower area. Smaller tiles are better for curved surfaces or intricate designs, while larger tiles can make the shower appear more spacious.
- Material: Choose a material that is suitable for shower use, such as ceramic, porcelain, glass, or natural stone. Each material has its own unique characteristics and maintenance requirements.
- Color and pattern: Consider the color scheme and overall aesthetic of your bathroom when selecting mosaic tiles. Whether you prefer a bold and vibrant look or a subtle and soothing ambiance, you can find mosaic tiles in various colors and patterns to complement your style.
Obtaining the necessary quantity of tiles and adhesive
Once you have chosen the mosaic tiles that meet your design requirements, it’s important to determine the quantity of tiles and adhesive you will need for your shower installation. Here’s how you can calculate the necessary amounts:
- Measure the shower area: Use a tape measure to determine the length and width of the shower walls and floor. Multiply these measurements to find the total square footage.
- Consider tile wastage: Since mosaic tiles come in small pieces, it is recommended to account for some wastage due to cutting and fitting. Depending on the complexity of your design, you may need to add an extra 10-15% to the total square footage to ensure you have enough tiles.
- Calculate adhesive quantity: The packaging of the tile adhesive will specify the coverage area per bag or tub. Divide the total square footage by the coverage area to determine the number of adhesive units required.
Acquiring the essential tools for installation
With your mosaic tile and adhesive quantities determined, it’s time to acquire the essential tools for the installation. The right tools will make the job easier and ensure a professional-looking finish. Here is a list of tools you will need:
| Tool | Description |
|---|---|
| Trowel | A notched trowel is used to apply adhesive evenly onto the shower walls and floor. |
| Grout float | This tool is used to spread and smooth grout over the mosaic tiles. |
| Tile cutter or wet saw | Depending on the type of tiles you have chosen, you will need either a manual tile cutter or a wet saw to make precise cuts. |
| Tile nippers | Tile nippers are handy for cutting small pieces and making intricate tile cuts. |
| Level | A level is used to ensure that the tiles are installed in a straight and even manner. |
| Sponge | You will need a damp sponge to clean excess grout off the tiles during the installation process. |
| Bucket and mixing paddle | To mix the adhesive and grout, you will need a bucket and a mixing paddle. |
| Protective gear | Don’t forget to wear safety glasses and gloves to protect yourself during the installation. |
By equipping yourself with the right tools, you can ensure a smooth and efficient installation process, resulting in a stunning mosaic tile shower that you can enjoy for years to come.

Removing Existing Tiles Or Coverings
Before you can install beautiful mosaic tiles in your shower, it is crucial to properly remove any existing tiles or coverings. This step ensures a clean and smooth surface for your new mosaic tiles, ensuring a long-lasting and professional-looking finish. In this section, we will guide you through the process of removing existing tiles or coverings in your shower.
Assessing the condition and adhesion of the current tiles or coverings
The first step in removing existing tiles or coverings from your shower is to assess their condition and adhesion. It is important to determine whether the tiles or coverings are loose, damaged, or securely adhered to the surface. Assessing the condition will help you plan the removal process accordingly.
If the tiles or coverings are loose or damaged, gently tap on them with a rubber mallet to see if they come off easily. If they do, you can proceed with removing them one by one. However, if they are securely adhered, you may need to use additional techniques to remove them.
It is also important to check the type of adhesive used to install the existing tiles or coverings. Different adhesives require different removal methods, and knowing the type of adhesive will ensure you choose the appropriate technique.
Safely removing the existing tiles or coverings, if necessary
If the tiles or coverings are loose or damaged, you can safely remove them using a few simple tools and techniques. Here’s a step-by-step guide to removing the existing tiles or coverings:
- Gather the necessary tools: You will need a pry bar, a chisel, safety glasses, and gloves to protect yourself during the removal process.
- Protect the shower: Cover the shower floor with a drop cloth or tarp to prevent any debris from damaging the drain or clogging the pipes.
- Start at the edges: Insert the pry bar or chisel at the edge of a loose tile or covering and gently pry it away from the wall or floor. Work your way around the edges, removing each tile or covering one by one.
- Use a chisel for stubborn tiles: If some tiles or coverings are stubborn and do not come off easily, use a chisel to carefully chip away at the adhesive. Be cautious not to damage the underlying surface.
- Clean the surface: Once all the tiles or coverings have been removed, clean the surface thoroughly to remove any remaining adhesive or debris. A scraper or sandpaper can help smooth out the surface.
Remember to always prioritize your safety during the removal process by wearing protective gear and using proper techniques. If you are unsure about removing the existing tiles or coverings yourself, it is recommended to seek professional assistance.
Prepping The Shower Surface
Cleaning the shower surface thoroughly
Before starting the installation of mosaic tile in your shower, it is crucial to clean the surface thoroughly. This step is essential to ensure that the tiles adhere properly to the shower walls and prevent any potential issues in the future. Here’s how you can clean the shower surface:
- Remove any existing grout or caulk using a scraper or a utility knife. Ensure that all residue is completely removed.
- Wipe down the walls with a mild cleanser or a tile cleaner. Make sure to remove any soap scum, dirt, or grime. Rinse the walls thoroughly and allow them to dry completely.
- For stubborn stains and mold, use a mixture of vinegar and water. Apply the solution to the affected areas and scrub gently with a brush. Rinse off the solution and allow the walls to dry.
- Inspect the shower surface for any remaining dirt or debris. Remove dust or loose particles using a vacuum cleaner or a lint-free cloth.
Repairing any cracks or imperfections
Before installing mosaic tiles, it is important to repair any cracks or imperfections on the shower surface. This step ensures a smooth and even base for your tiles and helps prevent water leakage. Follow these steps to repair cracks or imperfections:
- Inspect the shower walls for any cracks, chips, or dents. Use a magnifying glass if necessary. Mark the affected areas with a pencil or tape.
- Prepare a tile repair mortar according to the manufacturer’s instructions. Apply the mortar to the cracks or imperfections using a putty knife or a trowel. Smooth out the surface with a damp sponge or a cloth to create a seamless finish.
- Allow the repair mortar to dry completely before proceeding. Refer to the product instructions for the recommended drying time.
- Once the repair mortar is dry, sand the repaired areas lightly to create a level surface. Remove any dust or debris resulting from sanding.
Applying a waterproofing membrane or primer, if required
In certain cases, applying a waterproofing membrane or primer is necessary to protect the shower surface from moisture and potential water damage. Here’s how you can apply a waterproofing membrane or primer:
- Identify if your shower surface requires a waterproofing membrane or primer. This step is crucial to ensure the longevity of your shower and prevent any water-related issues.
- Carefully read and follow the manufacturer’s instructions for the selected waterproofing membrane or primer. Apply the product to the shower walls using a paintbrush or a roller. Cover the entire surface evenly.
- Allow the waterproofing membrane or primer to dry completely. The drying time may vary depending on the product used, so refer to the manufacturer’s instructions for accurate drying times.
- Once the waterproofing membrane or primer is dry, inspect the surface for any missed spots or uneven coverage. Apply an additional coat if necessary.
Layout And Design Considerations
Exploring different mosaic tile layout patterns and designs
When it comes to installing mosaic tile in a shower, one of the key considerations is the layout and design of the tiles. Mosaic tiles offer endless possibilities for creating unique and visually appealing patterns. By exploring different layout patterns and designs, you can create a shower that reflects your personal style and enhances the overall aesthetic of your bathroom.
One popular layout pattern is the herringbone pattern, known for its distinctive V-shape. This pattern adds a touch of elegance and sophistication to any shower space. Another option is the diagonal layout, where tiles are placed at a 45-degree angle to create a dynamic and visually interesting design. Alternatively, you can opt for a simple grid layout for a clean and modern look, or mix and match different colors and shapes to create a mosaic masterpiece.
Creating a layout plan to ensure proper tile placement and alignment
Before diving into the tile installation process, it’s important to create a layout plan to ensure proper tile placement and alignment. This plan will serve as a guide and help you visualize how the tiles will look once installed. Start by measuring the shower area and sketching out a scaled drawing of the space. Consider the size and shape of the mosaic tiles, as well as any other design elements or fixtures in the shower.
Next, mark the layout lines on the walls and floor using a level and a pencil. This step is crucial to ensure that the tiles are installed in straight and even rows. You can use a chalk line to create horizontal and vertical guidelines that will act as reference points during the installation process. By carefully planning the layout and taking the time to mark the lines accurately, you can achieve a professional-looking tile installation.
Determining the starting point and focal point of the tile installation
When installing mosaic tile in a shower, it’s important to determine the starting point and focal point of the installation. The starting point is where you will begin laying the tiles, while the focal point is the area that draws the most attention and serves as a visual centerpiece. Typically, the starting point is at the bottom of the shower wall, near the floor, and the focal point can be a feature wall or the center of the shower.
To determine the starting point, consider the overall layout plan and the flow of the tiles. It’s important to start from a corner or edge, as this will create a cleaner and more seamless installation. Avoid starting in the middle of a wall, as it can be challenging to align the tiles properly. Once you’ve established the starting point, you can work your way up and across the shower walls, following the layout plan and ensuring each tile is properly aligned with the surrounding tiles.
Applying The Tile Adhesive
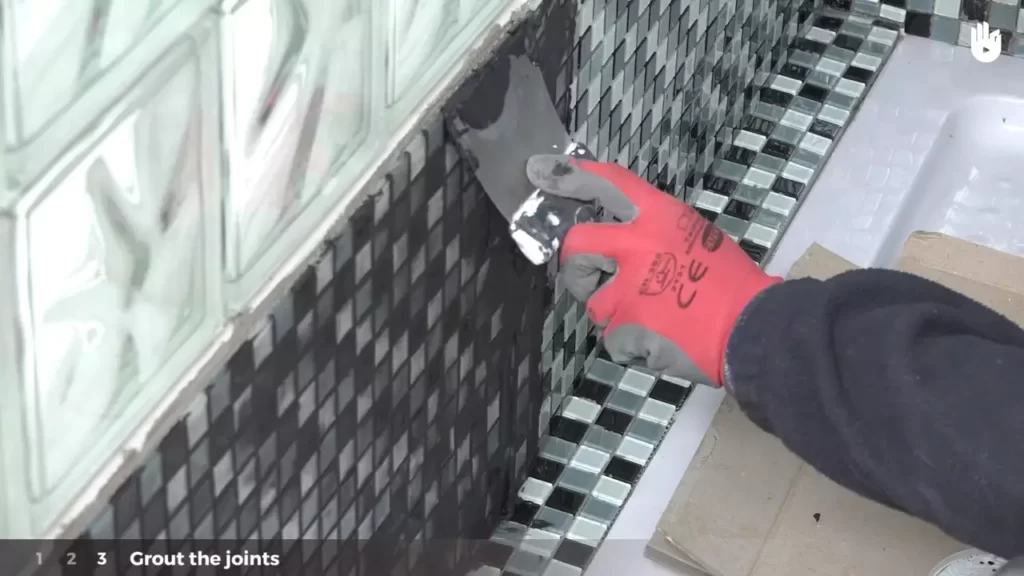
When it comes to installing mosaic tile in a shower, applying the tile adhesive is a crucial step that requires precision and attention to detail. Following the right technique ensures proper adhesion and a long-lasting finish. In this section, we will guide you through the process of preparing the tile adhesive according to the manufacturer’s instructions and applying it to the shower surface using a notched trowel. Let’s dive right in!
Preparing the tile adhesive according to the manufacturer’s instructions
Before you start applying the adhesive, it’s vital to prepare it correctly, following the instructions provided by the manufacturer. Each type of adhesive may have different mixing ratios or cure times, so it’s important to read and follow the guidelines. Here’s a step-by-step approach to preparing the tile adhesive for your shower project:
1. Gather all the necessary supplies, including the tile adhesive, mixing bucket, and a power drill with a mixing attachment.
2. Read the instructions on the packaging to determine the proper mixing ratio. Typically, the adhesive will require a specific amount of water to be added to the powder.
3. Measure the water according to the instructions and pour it into the mixing bucket.
4. Gradually add the tile adhesive powder to the water while stirring continuously. Use the power drill with the mixing attachment to create a smooth, lump-free consistency. Take care not to mix too quickly as it can introduce air bubbles into the adhesive mixture.
5. Continue mixing until the adhesive reaches a creamy, spreadable texture. The consistency may vary depending on the brand and type of adhesive, so refer to the manufacturer’s instructions for the desired result.
Applying a thin layer of adhesive to the shower surface using a notched trowel
Once you have prepared the tile adhesive, it’s time to apply it to the shower surface. A notched trowel is the ideal tool for achieving an even, thin layer of adhesive. Here’s a step-by-step guide to help you master this technique:
1. Begin by applying a thin layer of adhesive onto the shower surface using the flat side of the notched trowel. Hold the trowel at a 45-degree angle to create a consistent layer of adhesive.
2. Once you have spread the initial layer, go back over it with the notched side of the trowel. The notches in the trowel help to create ridges in the adhesive, ensuring better tile adhesion.
3. Hold the trowel at a 45-degree angle and apply even pressure as you comb the adhesive with the notches. This action creates uniform ridges and helps to prevent excessive adhesive buildup.
Ensuring even coverage and avoiding excessive adhesive buildup
To achieve a professional finish, it’s essential to ensure even coverage and avoid excessive adhesive buildup during the installation process. Here are a few tips to keep in mind:
1. As you apply the adhesive, periodically check for even coverage by lifting a few tiles and inspecting the backside. Make sure the ridges are consistent and fully reach the edges of the tile.
2. Avoid excessive adhesive buildup, as it can create unevenness and interfere with the tile’s appearance. If you notice excessive adhesive, use the flat side of the trowel to remove the excess and create a smooth surface.
3. Work in small sections to prevent the adhesive from drying out before you can install the tiles. It’s important to maintain a workable area that allows you to complete the installation efficiently.
By following these steps and techniques, you will be able to apply mosaic tile adhesive effectively, ensuring secure and long-lasting results in your shower. Remember, each manufacturer may have specific recommendations, so always refer to the instructions on the adhesive packaging. With proper preparation and attention to detail, you’ll be one step closer to achieving a beautiful mosaic tile shower.
Placing And Setting The Mosaic Tiles
Installing a mosaic tile shower can transform your bathroom into a visually stunning and luxurious space. Placing and setting the mosaic tiles require careful attention to detail to ensure a professional and polished finish. In this section, you will learn about positioning the first tile according to the layout plan, pressing each tile into the adhesive firmly, ensuring proper alignment and spacing, and using tile spacers to maintain consistent spacing between the tiles. Let’s dive in!
Positioning the first tile according to the layout plan
Before you start placing the mosaic tiles, it is crucial to have a well-thought-out layout plan. This plan will help you determine the most aesthetic and functional placement of the tiles. Positioning the first tile is a crucial step as it sets the foundation for the entire installation.
Start by finding the center point of the shower wall or floor where you want to begin your tile installation. Use a chalk line or ruler to create a reference line and mark the center on it. Now, apply a layer of tile adhesive along one side of the center reference point, using a notched trowel.
Next, carefully position the first tile on the adhesive, aligning it with the center reference line. Be sure to press it firmly into place to ensure proper adhesion. Use a level to check for both horizontal and vertical alignment. Once you are satisfied with the positioning, proceed to the next tiles, following the designated layout pattern.
Pressing each tile into the adhesive firmly, ensuring proper alignment and spacing
As you continue placing the mosaic tiles, it is important to press down each tile firmly into the adhesive to create a strong bond. This will prevent the tiles from coming loose or shifting over time. Use a grout float or your hands to press down on the tiles, ensuring even and consistent pressure.
Additionally, pay close attention to proper alignment and spacing. A neatly aligned and spaced tile installation enhances the overall aesthetic appeal of the shower. Continuously check the alignment using a level and adjust as necessary to maintain straight lines and uniformity.
Using tile spacers to maintain consistent spacing between the tiles
To achieve a professional-looking mosaic tile installation, it is essential to use tile spacers to maintain consistent spacing between the tiles. These small plastic or rubber devices come in various sizes and shapes.
Place the tile spacers at the corners where four tiles meet. They will help create even gaps between the tiles, which are necessary for proper grout application. Be sure to select the appropriate spacer size based on the desired spacing for your specific project. Once the tiles are set and the adhesive has cured, remove the spacers before applying grout.
Following these steps will ensure a successful installation of mosaic tiles in your shower. Take your time, pay attention to detail, and you’ll be rewarded with a beautiful and long-lasting tiled shower that adds charm to your bathroom.
Cutting And Shaping Tiles
One of the key steps in installing mosaic tiles in a shower is cutting and shaping them to fit the necessary spots. This requires precision and attention to detail, as each tile needs to be measured, marked, and cut accurately. In this section, we will discuss how to measure and mark tiles for necessary cuts or adjustments, the tools you can use to cut tiles accurately, and how to smooth the cut edges for a seamless finish.
Measuring and Marking Tiles for Necessary Cuts or Adjustments
Before cutting the tiles, it is important to measure and mark them correctly to ensure a perfect fit. Here’s how you can do it:
- Start by measuring the area where the tile needs to be placed. Use a tape measure to get accurate dimensions.
- Transfer the measurements onto the tile using a pencil or a marker. Make sure to mark the cutting lines clearly.
- If you need to make any adjustments, such as cutting around fixtures or corners, measure and mark those areas as well.
Using Tile Nippers or a Wet Saw to Cut Tiles Accurately
Once you have measured and marked the tiles, it’s time to cut them to the desired size. You have two main options for cutting tiles:
- Tile Nippers: Tile nippers are handy tools that allow you to make small, precise cuts in tiles. Simply position the nippers on the marked line and squeeze the handles to gradually remove small pieces of the tile until you achieve the desired shape.
- Wet Saw: A wet saw is a power tool specifically designed for cutting tiles. It utilizes a diamond-tipped blade and water to smoothly cut through the tiles. Place the tile on the wet saw’s cutting platform and carefully guide it along the marked line.
Smoothing the Cut Edges with a Tile File or Sandpaper, if Needed
After cutting the tiles, you may notice sharp or uneven edges. To ensure a clean and professional look, it’s essential to smooth out these edges. Here are the steps to follow:
- Inspect the cut edges of the tiles. If they are rough, use a tile file or sandpaper to gently smooth them down.
- Start by holding the file or sandpaper at a slight angle against the edge of the tile and apply light pressure while moving it back and forth.
- Continue working on the edge until it feels smooth to the touch. Be careful not to oversand and remove too much material from the tile.
By following these steps, you’ll be able to cut and shape your mosaic tiles with precision, ensuring a beautiful and seamless installation in your shower.
Grouting The Tile Installation
Choosing the Appropriate Grout Color and Type for the Mosaic Tiles
One of the final steps in installing mosaic tiles in a shower is grouting. This step not only fills in the gaps between the tiles but also ensures a tight seal, preventing water from seeping in and causing damage. Selecting the right grout color and type is essential to achieve the desired aesthetic and functionality.
When choosing the grout color, consider whether you want it to blend in with the tiles or provide a contrasting look. *Keep in mind that darker grout may require more maintenance to avoid visible staining over time. Check the manufacturer’s recommendations for the particular tile type and finish you’re using and find out if they offer any specific grout color suggestions.
Furthermore, you need to select the appropriate grout type based on the tile material and the level of moisture exposure in the shower area. Unsanded grout is suitable for narrow grout lines up to 1/8 inch and is commonly used with mosaic tiles. It is a finer texture that prevents scratching delicate tile surfaces. Sanded grout, on the other hand, is recommended for wider grout lines and areas prone to moisture, such as showers. The sand particles in sanded grout provide better resistance to cracking and shrinking.
Mixing the Grout According to the Manufacturer’s Instructions
Once you have chosen the grout color and type that best suits your mosaic tiles, it’s time to mix the grout. This step is crucial to ensure the grout has the right consistency for easy application and optimal bonding with the tiles.
Refer to the manufacturer’s instructions on the grout packaging for the correct water-to-grout ratio and any specific mixing instructions. Different grout brands may have slight variations in their recommended ratios, so it’s important to follow the specific guidelines for the product you are using.
Typically, you will need a clean container and a mixing tool, such as a margin trowel or a grout paddle. Add the required amount of water to the container, then gradually pour the grout powder into the water while stirring continuously. Mix until you achieve a smooth, lump-free consistency. Be cautious not to make the mixture too runny, as this can result in weak and easily crumbled grout.
Applying the Grout Evenly Between the Tiles Using a Grout Float
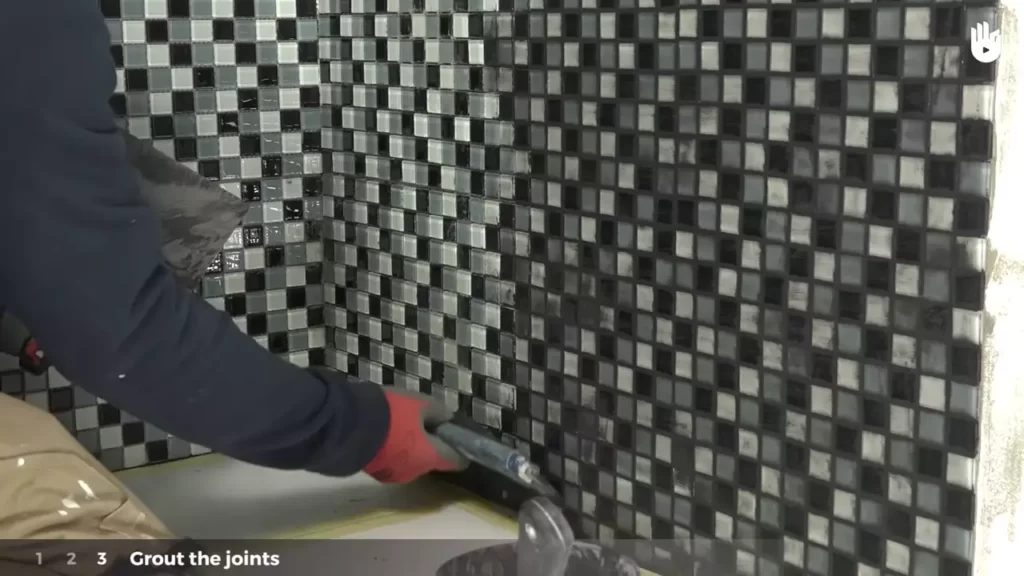
With the grout properly mixed, it’s time to apply it between the mosaic tiles. For this step, you will need a grout float, which is a specialized tool designed to facilitate the grout application process.
Starting at one corner of the shower, hold the grout float at a 45-degree angle and spread the grout diagonally across the tiles. Apply firm and even pressure to ensure the grout fills all the gaps completely. Work in small sections at a time to prevent the grout from drying before you can properly clean the excess.
Once a section is covered with grout, hold the float at a 90-degree angle and scrape off the excess grout from the tile surfaces. Make sure to maintain a seamless transition from one section to the next.
After allowing the grout to set for the recommended amount of time specified by the manufacturer (usually about 10-15 minutes), use a damp sponge to wipe away the excess grout from the tiles. Rinse the sponge frequently and be gentle to avoid pulling out the grout from the gaps. Continue this process until all the tiles are clean and the grout lines become smooth.
In conclusion, grouting the mosaic tile installation in your shower is an important step to achieve a visually appealing and water-tight finish. By carefully selecting the appropriate grout color and type, following the manufacturer’s instructions for mixing the grout, and using a grout float to apply it evenly, you can ensure a successful and long-lasting result.
Cleaning And Sealing The Tiles
Once you have installed mosaic tiles in your shower, it is essential to clean and seal them properly to maintain their beauty and durability. In this section, we will discuss the necessary steps to remove excess grout from the tile surface, allow the grout to cure, and apply a tile sealer for ultimate protection against moisture and stains.
Removing excess grout from the tile surface using a damp sponge
After completing the grouting process, you will notice a haze of grout on the surface of the tiles. To remove this excess grout, follow these simple steps:
- Dampen a clean sponge with water.
- Gently wipe the tiles using circular motions, ensuring not to disturb the grout lines.
- Rinse the sponge frequently to prevent smearing the grout.
- Repeat the process until the haze is completely removed.
Remember, it is crucial not to apply excessive pressure while cleaning the tiles, as this may disturb the newly applied grout.
Allowing the grout to cure before cleaning the tiles further
Before proceeding with any additional cleaning, it is important to allow the grout to cure completely. This curing period typically takes around 24 to 72 hours, depending on the type of grout used.
During this time, avoid any excessive moisture or direct water contact with the newly grouted tiles. This will allow the grout to set properly, ensuring long-term strength and durability.
Applying a tile sealer to protect the grout and tiles from moisture and stains
Once the grout has cured, it’s time to apply a tile sealer to provide an extra layer of protection. Here’s how:
- Ensure the tiles are clean and dry before sealing.
- Choose a suitable tile sealer based on the type of tiles you have installed.
- Using a clean cloth or brush, apply the sealer evenly over the tiles, focusing on the grout lines.
- Allow the sealer to penetrate the surface for the recommended time mentioned on the product’s instructions.
- Wipe off any excess sealer with a clean, dry cloth.
By applying a tile sealer, you are effectively safeguarding the grout and tiles against moisture, stains, and daily wear and tear. Regular resealing every year or two will ensure the continued protection of your shower tiles.
Following these steps to clean and seal your mosaic tiles will not only enhance their lifespan but also maintain the aesthetic appeal of your shower for years to come.
Installing Caulk And Trim
Applying Silicone Caulk to Seal Edges and Corners
After successfully laying the mosaic tiles in your shower, it’s time to add the finishing touches. One crucial step in this process is applying silicone caulk to seal the edges and corners. This will provide an added layer of protection against water damage, ensuring the longevity and durability of your newly installed tiles.
To begin, make sure you have a high-quality silicone caulk that is specifically designed for bathroom use. This type of caulk is moisture-resistant and mold-resistant, making it the perfect choice for sealing the joints in your shower.
- Prepare the area: Before applying the caulk, thoroughly clean the edges and corners of your mosaic tile installation. Use a mild detergent and warm water to remove any dirt or grime. Make sure to dry the area completely before proceeding.
- Load the caulk gun: Load the silicone caulk tube into a caulk gun. Cut the tip of the tube at a 45-degree angle, ensuring that the opening is small enough to provide precise application.
- Apply the caulk: Start by applying a thin bead of caulk along the edges and corners of the shower walls. Use steady pressure on the caulk gun, moving it smoothly and evenly for a consistent line. Avoid applying too much caulk, as it can create a messy appearance and take longer to dry.
- Smooth the caulk: Once the caulk is applied, use a caulk smoothing tool or your finger to smooth out any uneven areas. This will help create a neat and professional finish. Wipe away any excess caulk with a damp cloth.
- Allow the caulk to dry: Leave the caulk to dry according to the manufacturer’s instructions. This is typically around 24 hours, but it’s best to consult the packaging to be sure.
By following these steps, you’ll ensure that your mosaic tile installation is properly sealed and protected against moisture. This will not only enhance the overall appearance of your shower but also prolong its lifespan.
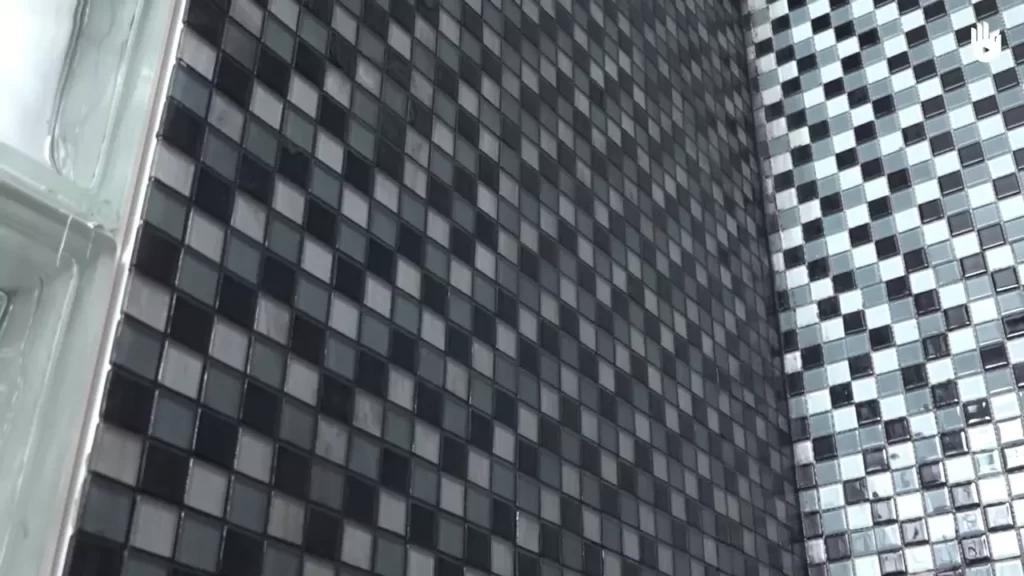
Installing Trim Pieces for a Polished and Finished Look
Now that the edges and corners are sealed, it’s time to give your shower a polished and finished look by installing trim pieces. Trim pieces serve both a decorative and functional purpose, providing a smooth transition between the tile and the surrounding areas, such as the shower curb or adjacent walls.
To install the trim pieces, follow these simple steps:
- Measure and cut: Measure the length of the area where the trim piece will be installed. Use a miter saw or tile cutter to cut the trim piece to the appropriate size. Ensure that the cut is precise and clean.
- Apply adhesive: Use a strong adhesive specifically designed for tile installation to adhere the trim piece to the wall. Apply the adhesive evenly along the back of the trim piece, ensuring full coverage.
- Press the trim piece into place: Carefully press the trim piece into place, ensuring that it is aligned correctly with the edge of the mosaic tiles. Apply gentle pressure to ensure a secure bond with the adhesive.
- Wipe away excess adhesive: Use a damp cloth or sponge to remove any excess adhesive that may have seeped out around the edges of the trim piece. This will help achieve a clean and professional finish.
- Allow the adhesive to dry: Give the adhesive ample time to dry and set according to the manufacturer’s instructions. This will ensure that the trim piece remains securely in place.
Installing trim pieces not only enhances the aesthetic appeal of your shower but also provides a protective edge that prevents water from seeping behind the tiles. This extra layer of protection helps to maintain the integrity of your tile installation for years to come.
Cleaning And Maintaining The Mosaic Tile Installation
Regular cleaning and maintenance tips to preserve the tile’s appearance and longevity
Keeping your mosaic tile installation clean and well-maintained is essential to ensure its long-lasting beauty and durability. Regular cleaning prevents the accumulation of dirt, grime, and soap scum, preserving the appearance and freshness of your shower area. By following a few simple cleaning and maintenance tips, you can easily keep your mosaic tile looking brand new for years to come.
Avoiding harsh chemicals and abrasive cleaning tools
When it comes to cleaning your mosaic tile, it’s important to avoid using harsh chemicals and abrasive cleaning tools that can damage the tile’s surface. These chemicals and tools can cause discoloration, scratches, and even etching on the tile. Instead, opt for gentle cleaners specifically formulated for mosaic tiles. These cleaners are mild yet effective, removing dirt and grime without causing any harm.
Ensuring proper cleaning techniques
To clean your mosaic tile properly, start by using warm water and a soft sponge or cloth to wipe away any loose dirt or debris. Then, apply a small amount of the recommended mosaic tile cleaner and gently scrub the tile using circular motions. Rinse with clean water and dry with a soft towel to prevent water spots or streaks. Remember to clean the grout lines as well to maintain a cohesive and fresh appearance.
Maintaining a regular cleaning schedule
Regular cleaning is critical in maintaining the longevity and aesthetics of your mosaic tile installation. Develop a cleaning schedule and stick to it to prevent dirt and grime from building up. Aim to clean your mosaic tile weekly or bi-weekly depending on the usage and traffic in your shower area. By incorporating regular cleaning into your routine, you can prevent stubborn stains and keep your mosaic tile looking pristine.
Simple tips for ongoing maintenance
In addition to regular cleaning, there are a few simple tips you can follow to further maintain your mosaic tile installation. Consider using a shower squeegee to remove excess water and prevent the development of water spots. Avoid leaving wet or damp items on the tile surface for extended periods to prevent potential damage. Additionally, place mats or rugs outside of the shower area to minimize tracking dirt and debris onto the mosaic tile.
Overall, regular cleaning and maintenance are vital to preserve the appearance and longevity of your mosaic tile installation in the shower. By using gentle cleaners, proper techniques, and sticking to a cleaning schedule, you can keep your mosaic tile looking impeccable for years to come.
Troubleshooting Common Tile Installation Issues
Installing mosaic tile in a shower can transform the space and add an elegant touch. However, like any home improvement project, it’s not without its challenges. Whether you’re a seasoned DIY enthusiast or a beginner, it’s essential to be prepared for any unexpected issues that may arise during the installation process. In this section, we’ll explore some common tile installation problems, and provide effective solutions to ensure a successful outcome.
Solutions for Common Issues
Uneven Tiles
One of the most common issues homeowners face when installing mosaic tiles in their showers is unevenness. This can result in an unsightly appearance and compromise the integrity of the installation. To address this problem, follow these steps:
- Before applying mortar or adhesive, ensure that the surface is leveled properly. Make necessary adjustments using a leveling compound or by sanding down any uneven areas.
- When laying the tiles, use a level or straight edge to check their alignment. Adjust as needed, ensuring that they’re evenly spaced and aligned.
- If individual tiles are slightly uneven, gently tap them with a rubber mallet to adjust their position.
- After the tiles have set, use a grout float to fill any gaps or uneven areas with grout. Wipe away excess grout with a damp sponge.
Adhesion Problems
Another common issue during tile installation is poor adhesion, which can result in tiles falling off or becoming loose over time. Here’s how to tackle this problem:
- Before applying adhesive, ensure that the surface is clean, dry, and free of any debris or residue that may affect adhesion. Use a mild detergent and a scrub brush to remove any dirt or oil.
- Choose a high-quality adhesive suitable for mosaic tiles and follow the manufacturer’s instructions for mixing and application.
- Apply adhesive evenly and with the correct amount of coverage, ensuring that the back of each tile is fully coated.
- Press each tile firmly into place, applying even pressure to ensure proper adhesion.
- Use spacers to maintain consistent spacing between tiles, allowing the adhesive to set according to the manufacturer’s recommended drying time.
Grout Discoloration
Grout discoloration can occur over time due to factors such as dirt, mold, or improper cleaning. To address this issue and maintain the aesthetics of your mosaic tile shower:
- Regularly clean the grout lines with a mild grout cleaner or a mixture of vinegar and water. Avoid harsh chemicals that may damage the tiles or grout.
- If there are stubborn stains or discoloration, consider using a grout sealer to protect the grout lines and make them easier to clean.
- Apply the sealer according to the manufacturer’s instructions, ensuring that the grout lines are adequately saturated.
- Wipe away any excess sealer from the tiles with a clean cloth or sponge.
- Regularly maintain and reseal the grout lines to prevent further discoloration and keep your shower looking fresh and clean.
By following these troubleshooting tips, you can overcome common tile installation issues and achieve a beautiful and long-lasting mosaic tile shower. Remember to consult any relevant product guidelines and seek professional advice if needed. With patience and attention to detail, your shower will become a stunning focal point in your bathroom.
Frequently Asked Questions For How To Install Mosaic Tile In A Shower
How Do You Install Mosaic Tile In A Shower?
To install mosaic tiles in a shower, start by preparing the surface, applying adhesive, and placing the tiles. Ensure proper spacing and use a rubber float to press the tiles into the adhesive. After the tiles have dried, grout them and wipe off any excess.
Finally, seal the grout to protect it from moisture.
What Tools Are Needed To Install Mosaic Tile In A Shower?
To install mosaic tile in a shower, you will need the following tools: trowel, adhesive, spacers, rubber float, grout, grout float, sponge, level, tile cutter, and a notched trowel. These tools will help you ensure a smooth and precise installation.
What Are The Benefits Of Using Mosaic Tile In A Shower?
Using mosaic tile in a shower can bring several benefits. They are versatile, allowing for various design options. They are also durable, resistant to water, and easy to clean. Additionally, mosaic tiles can create a visually appealing and luxurious look in your shower, adding value to your bathroom.
Conclusion
Installing mosaic tile in a shower can transform the look and feel of your bathroom. By following the step-by-step guide outlined in this blog post, you can confidently complete the installation process on your own. From prepping the surface to laying out the tiles and applying the grout, each stage contributes to a beautiful and durable mosaic tile shower.
With a little patience and attention to detail, your shower will become a stunning focal point in your home. Start your project today and enjoy the beauty and functionality of mosaic tile in your shower!


