How to Install Marble Tile Backsplash?
To install a marble tile backsplash, clean the surface, measure and cut the tiles, apply the adhesive, and set the tiles in place. A marble tile backsplash can add a touch of elegance and sophistication to your kitchen or bathroom.
Whether you are renovating your space or simply looking to update the look, installing a marble tile backsplash is a great option. With its timeless beauty and durability, marble has been a popular choice for backsplashes. In this guide, we will walk you through the steps to install a marble tile backsplash, from prepping the area to setting the tiles in place.
By following these simple instructions, you can enhance the aesthetic appeal of your space and create a stunning focal point that will impress anyone who enters the room. So, let’s get started!
Understanding The Basics Of Marble Tile Backsplash Installation
When it comes to enhancing the beauty and elegance of your kitchen or bathroom, installing marble tile backsplash can make a significant impact. Marble tiles not only add a touch of luxury to your space but also offer durability and easy maintenance. However, before you embark on the installation process, it’s important to understand the basics of marble tile backsplash installation. In this guide, we will take you through the essential steps starting from choosing the right marble tiles to preparing the surface for installation.
Choosing the Right Marble Tiles for Your Backsplash
The first step towards a successful marble tile backsplash installation is choosing the right tiles. With a wide range of options available, it’s essential to consider various factors such as the color, pattern, size, and finish of the marble tiles. Here are a few tips to help you make the right choice:
- Consider the existing color scheme and style of your kitchen or bathroom. Choose marble tiles that complement or contrast with the overall design.
- Decide on the size and shape of the tiles based on the dimensions and layout of your backsplash area.
- Take into account the finish of the marble tiles. Polished tiles offer a glossy, reflective surface, while honed tiles provide a matte finish.
- Avoid using porous marble tiles for backsplash installation, as they can be more susceptible to staining.
Gathering the Necessary Tools and Materials
Once you have chosen the perfect marble tiles for your backsplash, it’s time to gather the necessary tools and materials for the installation process. Here is a list of items you will need:
| Marble tiles | Tile adhesive |
| Tile spacers | Grout |
| Tile cutter or wet saw | Level |
| Notched trowel | Sponge |
| Bucket | Grout float |
Preparing the Surface for Installation
Before you can start installing the marble tiles, it’s crucial to prepare the surface to ensure proper adhesion and longevity of the backsplash. Follow these steps:
- Start by cleaning the wall thoroughly to remove any dirt, grease, or debris. Use a mild detergent and water solution, and let it dry completely.
- Inspect the wall for any damages or unevenness. Fill in any cracks or holes with a suitable filler and sand down any rough patches.
- If you have an existing backsplash, remove it carefully to create a smooth and even surface for the marble tiles to adhere to.
- Apply a primer or a sealant to the wall to ensure proper adhesion of the tile adhesive. Follow the manufacturer’s instructions for the specific product you choose.
By understanding the basics of marble tile backsplash installation and carefully following these steps, you can achieve a beautiful and durable backsplash that will elevate the aesthetic appeal of your kitchen or bathroom.
Preparing The Backsplash Area
Before installing a marble tile backsplash, it is important to properly prepare the area. This involves removing any existing backsplash (if applicable), cleaning and repairing the wall surface, and determining the layout and design of the new backsplash. By following these steps, you can ensure a smooth and successful installation process.
Removing Existing Backsplash (if applicable)
If there is already a backsplash in place, it needs to be removed before installing the new marble tile backsplash. Here are the steps to follow:
- Start by protecting the countertops and other nearby surfaces with drop cloths or plastic sheets.
- Use a utility knife to carefully cut through any caulk or adhesive that is holding the backsplash in place.
- Next, gently pry off the old backsplash using a putty knife or a crowbar. Be careful not to damage the wall surface in the process.
- Once the backsplash is removed, use a scraper or sandpaper to remove any remaining adhesive or grout residue.
Cleaning and Repairing the Wall Surface
After removing the old backsplash, it is important to clean and repair the wall surface. This will ensure a proper bond between the marble tiles and the wall. Follow these steps:
- Wipe down the wall surface with a mild detergent and water to remove any dirt, grease, or dust.
- If there are any cracks or holes in the wall, use a patching compound to fill them in. Allow the compound to dry completely before proceeding.
- Smooth out any rough areas or uneven spots on the wall using sandpaper.
- Once the wall surface is clean and repaired, make sure it is completely dry before moving on to the next step.
Determining the Layout and Design of the Backsplash
Before installing the marble tile backsplash, it is important to determine the layout and design. This will help you visualize how the final backsplash will look and ensure a cohesive and aesthetically pleasing result. Here’s how to do it:
- Measure the width and height of the area where the backsplash will be installed.
- Use a pencil and a level to draw horizontal and vertical lines on the wall, creating a grid that corresponds to the measurements.
- Experiment with different tile patterns and designs by arranging the tiles on the grid until you find the desired look. Consider factors such as tile size, color, and texture.
- Make any necessary adjustments to the layout until you are satisfied with the design.
By following these steps to prepare the backsplash area, you are setting the foundation for a successful marble tile installation. The next step is to gather the necessary materials and start tiling!
Installing The Marble Tiles
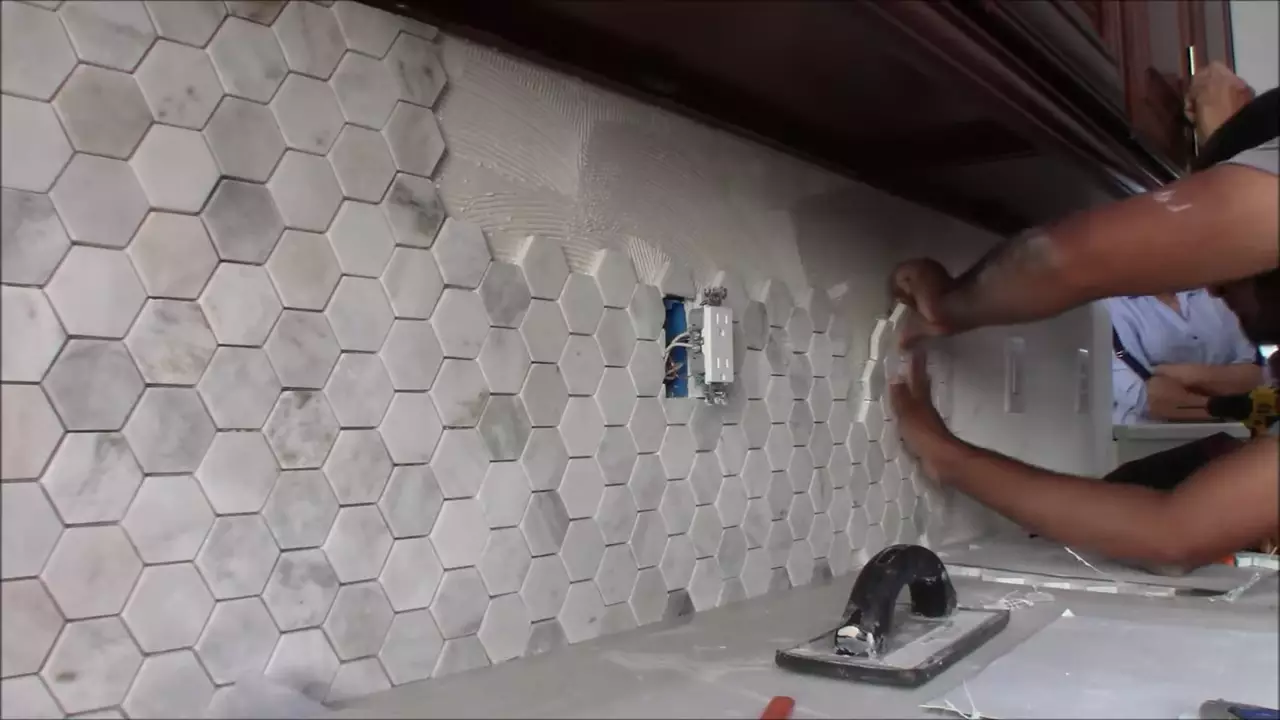
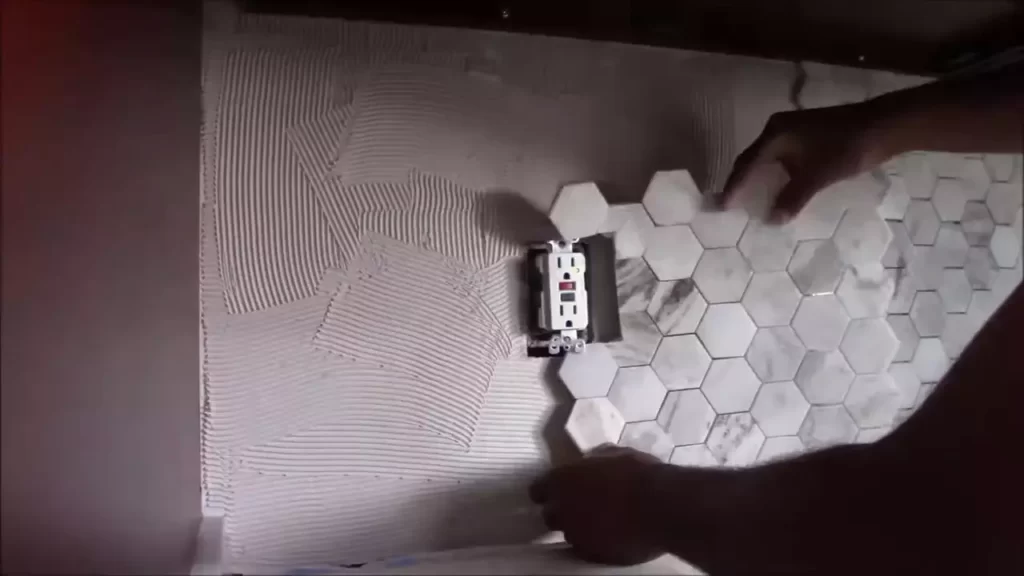
Now that you have prepared the wall and gathered all the necessary tools and materials, it’s time to start installing the marble tiles for your beautiful backsplash. This section will guide you through the step-by-step process of applying the thin-set adhesive, setting the tiles, cutting them to fit around obstacles, and ensuring they are level and aligned.
Applying the Thin-Set Adhesive to the Wall
The first step in installing the marble tiles is to apply the thin-set adhesive to the wall. This adhesive will act as a bonding agent, ensuring that the tiles stay in place securely. To do this:
- Clean the wall surface thoroughly to remove any dirt or debris.
- Prepare the thin-set adhesive according to the manufacturer’s instructions.
- Using a notched trowel, spread the adhesive onto the wall in a thin, even layer.
- Make sure to work in small sections to prevent the adhesive from drying out before you can set the tiles.
Setting the First Tile and Establishing the Layout
Once the adhesive is applied, it’s time to set the first tile and establish the layout for the rest of the backsplash. Follow these steps:
- Start by applying adhesive directly to the back of the first tile using a notched trowel.
- Press the tile firmly onto the wall, making sure it is level and aligned with your desired layout.
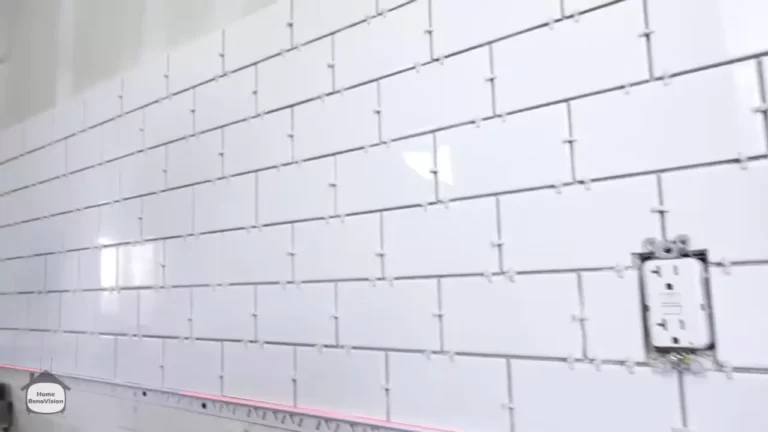
- Use tile spacers to create even gaps between the tiles for grouting.
- Continue setting the remaining tiles in the same manner, working in small sections at a time.
Spreading Thin-Set Adhesive and Setting the Remaining Tiles
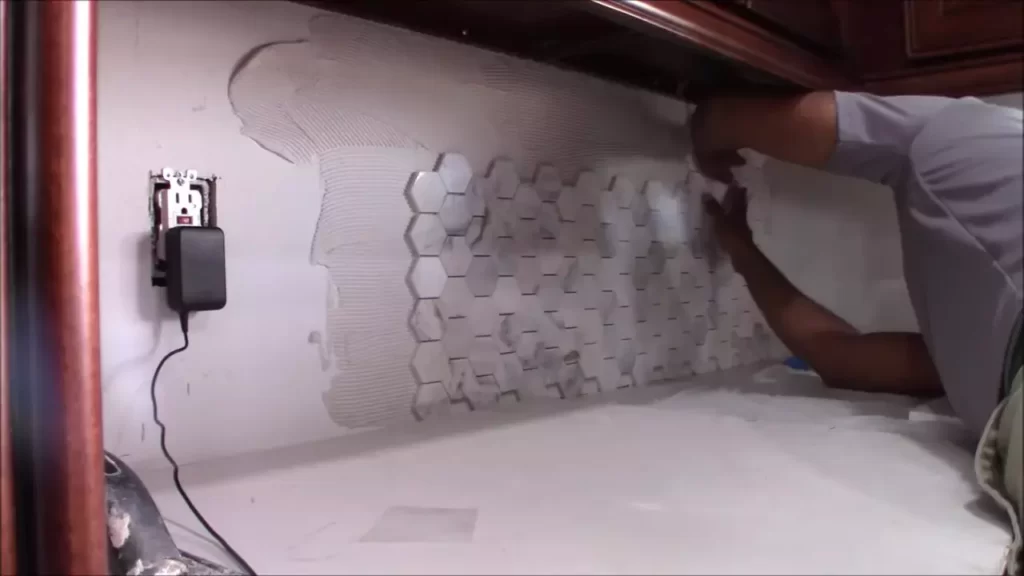
With the first tile set and the layout established, it’s time to spread thin-set adhesive and set the remaining tiles. Here’s what you need to do:
- Apply thin-set adhesive to the wall using a notched trowel, working in small sections.
- Set each tile in the adhesive, pressing it firmly and ensuring it is level and aligned with the other tiles.
- Continue this process until all the tiles are set, regularly checking for level and alignment as you go.
Cutting Tiles to Fit Around Obstacles
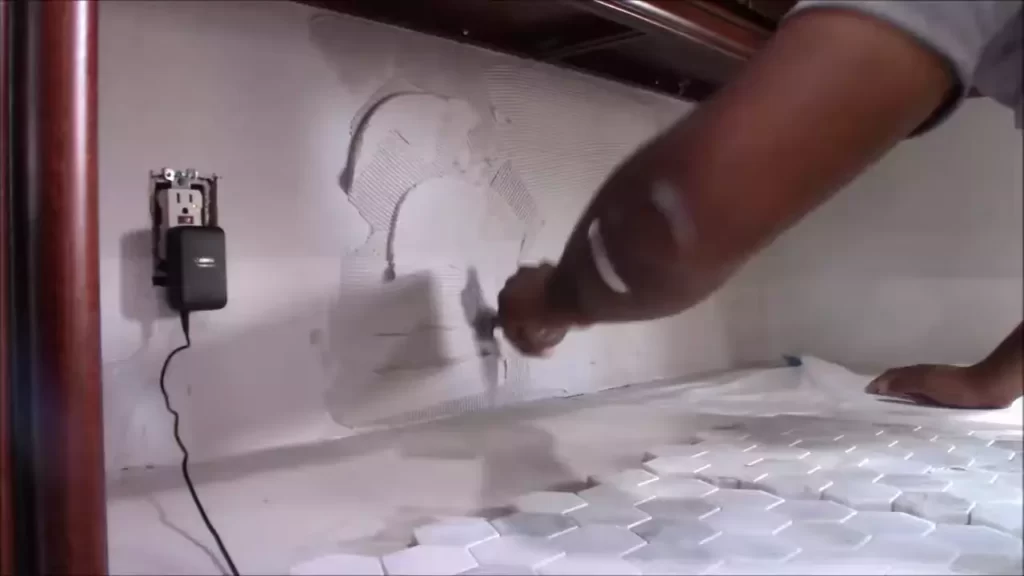
Chances are, you will encounter obstacles such as outlets or cabinets that require you to cut the tiles to fit. Follow these steps for cutting tiles:
- Measure the space where the tile needs to fit, allowing for a small gap for grouting.
- Using a wet saw or tile cutter, carefully cut the tile along the marked lines.
- Test the cut tile in the space to ensure it fits properly before applying adhesive and setting it.
- Repeat this process for any additional tiles that need to be cut for obstacles.
Checking and Adjusting the Tiles for Level and Alignment
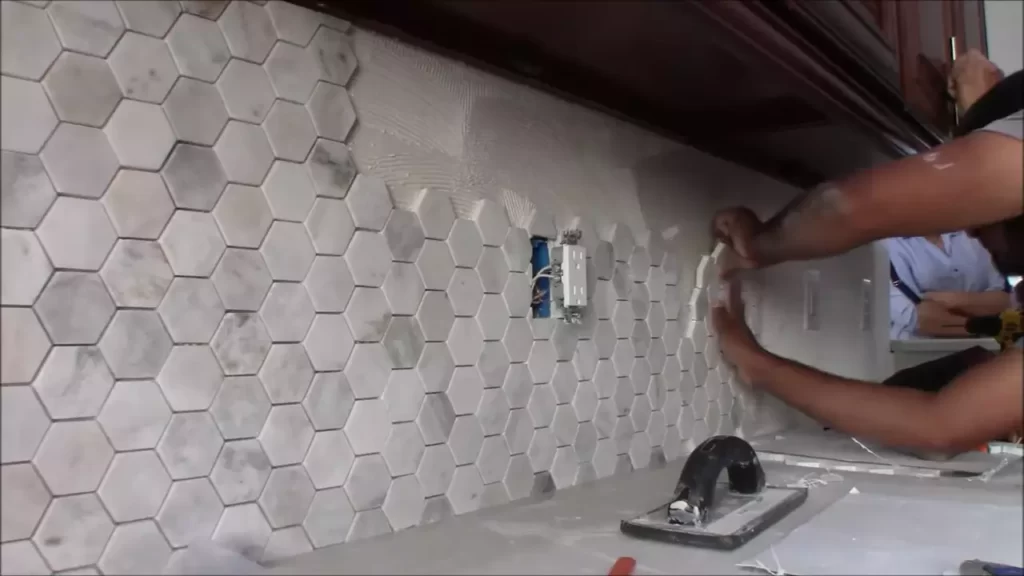
Once all the tiles are set, it’s crucial to check and adjust them for level and alignment. Here’s what you need to do:
- Place a level on top of the tiles to ensure they are even and not slanted.
- If you notice any tiles that are not level or aligned, use a rubber mallet to gently tap them into place.
- Regularly step back and check the overall appearance of the backsplash to make sure it is visually appealing.
By following these step-by-step guidelines, you can successfully install the marble tiles for your backsplash. The next section will cover the final steps, grouting and sealing, to complete your stunning marble tile backsplash.
Grouting And Sealing The Marble Tile Backsplash
One of the most crucial steps in installing a marble tile backsplash is grouting and sealing. This not only ensures that the tiles are properly joined and secured, but also protects them from stains and moisture. In this section, we will guide you through the process of mixing and applying the grout, cleaning excess grout and smoothing the joints, and sealing the marble tiles.
Mixing and Applying the Grout
Firstly, you need to mix the grout according to the manufacturer’s instructions. Ensure that you choose a grout color that complements your marble tiles. Using a grout float, apply the mixture diagonally across the tiles, pressing it into the spaces between them.
Make sure to hold the float at a 45-degree angle and push the grout firmly into the joints to ensure they are completely filled. Work in small sections at a time to prevent the grout from drying out.
Cleaning the Excess Grout and Smoothing the Joints
Once the grout has been applied, allow it to set for about 15-20 minutes. Then, using a damp sponge, gently wipe away the excess grout from the surface of the tiles. Be careful not to dig into the grout joints while cleaning.
After wiping away the excess grout, use a grout finishing tool or your finger to smooth the joints and create a neat and uniform appearance. Continue this process until all the joints are clean and properly smoothed.
Sealing the Marble Tiles to Protect from Stains and Moisture
Once the grout has fully cured, it’s time to seal the marble tiles. Sealing is essential to protect the porous marble from staining and absorbing moisture. Choose a high-quality marble sealer specifically designed for backsplashes.
Start by applying the sealer evenly across the tiles using a clean cloth or a sponge. Allow the sealer to penetrate the marble for the recommended time mentioned in the product instructions. After that, wipe off any excess sealer from the surface using a dry cloth.
Remember to follow the manufacturer’s guidelines regarding the number of coats required and the drying time between each coat. This will ensure maximum protection for your marble tiles against stains and moisture.
Congratulations! You have successfully grouted and sealed your marble tile backsplash. Now, all that’s left is to admire the beauty and durability of your newly installed backsplash. So go ahead and enjoy your stunning marble tile backsplash that will enhance the visual appeal and functionality of your kitchen or bathroom for years to come!
Maintaining And Caring For Your Marble Tile Backsplash
Maintaining and caring for your marble tile backsplash is essential to preserve its beauty and ensure its longevity. By following a few regular cleaning and maintenance tips, addressing common issues and repairs, and enhancing the overall look of your backsplash, you can keep it in impeccable condition for years to come.
Regular Cleaning and Maintenance Tips
To maintain the pristine appearance of your marble tile backsplash, it’s crucial to establish a regular cleaning routine. Here are some tips to help you keep your backsplash looking its best:
- Use a soft, non-abrasive cloth or sponge to wipe down the surface of the marble tile regularly. This will help remove any surface dirt or grime that may accumulate over time.
- Opt for a pH-neutral stone cleaner specifically formulated for marble. Avoid using harsh chemicals or abrasive substances, as they can damage the marble’s natural luster.
- Wipe up spills immediately to prevent staining. Marble is porous and can absorb liquids, leading to unsightly discoloration if left untreated.
- Consider sealing your marble tile backsplash periodically to provide added protection against stains and moisture. Consult with a professional or refer to the manufacturer’s guidelines for the appropriate sealing products and application techniques.
Addressing Common Issues and Repairs
Despite your best efforts, occasional issues and repairs may arise with your marble tile backsplash. Addressing these promptly will help maintain its beauty and functionality. Here are some common issues and suggested solutions:
- Scratches: Gently buff out minor scratches using fine-grade sandpaper or a specialized marble polishing compound. For deeper scratches, consult a professional marble restoration expert.
- Stains: Apply a poultice made of baking soda and water to draw out stubborn stains. Leave the poultice on the affected area for a few hours before removing and rinsing thoroughly.
- Chips or cracks: Fill in small chips or cracks with a color-matched epoxy adhesive specifically designed for marble. Follow the manufacturer’s instructions for proper application.
Enhancing the Longevity and Beauty of Your Backsplash
To enhance both the longevity and visual appeal of your marble tile backsplash, consider these additional tips:
- Avoid cutting or chopping directly on the marble surface: Use cutting boards or utensils to prevent scratching or damaging the marble tile.
- Use trivets or heat-resistant mats: Place hot pots, pans, or dishes on heat-resistant mats to protect the marble from thermal damage.
- Regularly check and reapply sealant: Over time, the sealant on your backsplash may wear off. Inspect the sealant periodically and reapply as needed to maintain optimal protection.
- Minimize exposure to acidic substances: Acidic substances such as vinegar, citrus juices, and harsh cleaning products can etch and damage the marble. Wipe up spills promptly and avoid using acidic cleaners on the marble tile.
- Consider installing a backsplash behind the cooktop: Heat and splatters from cooking can take a toll on your backsplash. Installing a dedicated backsplash behind the cooktop can protect the marble from potential damage.
By following these tips for regular cleaning and maintenance, addressing common issues and repairs promptly, and implementing measures to enhance the longevity and beauty of your marble tile backsplash, you can ensure that your backsplash remains a stunning focal point in your kitchen for years to come.
Frequently Asked Questions On How To Install Marble Tile Backsplash
What Tools Do I Need To Install A Marble Tile Backsplash?
To install a marble tile backsplash, you will need the following tools: tile cutter, trowel, sponge, grout float, level, tape measure, and notched trowel. These tools will help you achieve a precise and professional installation.
Is It Difficult To Install A Marble Tile Backsplash?
Installing a marble tile backsplash can be challenging, especially for beginners. However, with proper preparation, patience, and attention to detail, it is achievable. You may want to consider consulting a professional if you are unsure about your DIY skills.
Can I Install A Marble Tile Backsplash Over Existing Tile?
Yes, it is possible to install a marble tile backsplash over an existing tile. However, proper preparation is crucial. Ensure that the existing tile is clean, flat, and well-adhered. Apply a primer before installing the new tiles to ensure a strong bond.
Consulting a professional for guidance is recommended.
Conclusion
Installing a marble tile backsplash can elevate the aesthetic of your kitchen or bathroom. With the right tools and a step-by-step guide, you can complete this project efficiently. Remember to measure accurately, prepare the surface properly, and follow the manufacturer’s instructions closely.
By following these tips, you’ll have a stunning marble tile backsplash that adds both beauty and value to your home. Happy tiling!

