How to Install Lights in Ceiling?
To install lights in a ceiling, start by turning off the power to the area, then choose the locations for the lights and mark them. Cut holes for the lights using a saw or hole saw, and run electrical wire from the nearest power source to each location.
Connect the wires to the lights, secure them in the ceiling, and install the trim or cover. Finally, turn the power back on and test the lights. Adding lights to a ceiling can enhance the overall ambiance and functionality of a space.
Whether you are considering installing lights for the first time or replacing existing fixtures, knowing the essential steps can make the process smoother. We will provide a concise guide on how to install lights on a ceiling. By following these instructions, you can transform your room with beautiful and effective lighting arrangements. Before starting the installation, remember to take necessary safety precautions and make sure you have the proper tools and materials on hand. So, let’s delve into the step-by-step process of installing lights in a ceiling.
Choosing The Right Lighting Fixtures
Factors to consider when selecting ceiling lights
Choosing the right lighting fixtures for your ceiling is crucial for creating the perfect ambiance in your space. To ensure that you make the best decision, it’s important to consider several factors:
- Room Size: The size of the room plays a significant role in determining the type of lighting fixture you should choose. For smaller rooms, such as bathrooms or hallways, recessed lighting or flush mount fixtures are ideal to save space, while larger rooms may benefit from chandeliers or pendant lights.
- Functionality: Think about the purpose of the room and how you will be using it. If it’s a workspace, task lighting or adjustable track lighting might be the best option to provide focused illumination. If it’s a living room or bedroom, consider softer, dimmable lights for a cozy and relaxing atmosphere.
- Style and Aesthetics: Lighting fixtures can be a focal point in your decor, so think about the overall style of your room and choose a fixture that complements it. Whether your style is modern, traditional, industrial, or eclectic, there are endless options to match your taste.
- Energy Efficiency: Opt for energy-efficient lighting solutions, such as LED bulbs, to save on energy costs and reduce your environmental impact. These bulbs last longer and consume less power compared to traditional incandescent bulbs.

Popular types of lighting fixtures for ceilings
When it comes to selecting lighting fixtures for your ceiling, you have various options to choose from. Here are some popular types that you can consider:
| Type | Description |
|---|---|
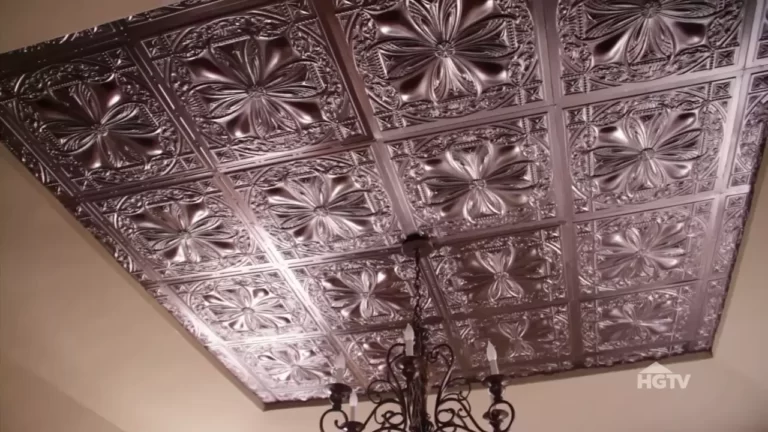
| Chandeliers | Elegant and elaborate fixtures that make a statement in larger rooms. They often feature multiple arms or branches with hanging crystals or shades, adding a touch of luxury to your space. |
| Pendant Lights | These versatile fixtures hang from the ceiling and provide both task and ambient lighting. They come in various styles and sizes, making them suitable for a wide range of spaces. |
| Recessed Lighting | Also known as can lights or pot lights, recessed lighting is installed flush with the ceiling, creating a seamless look. They are great for providing general or accent lighting and work well in any room. |
| Flush Mount Fixtures | Flush mount fixtures are installed directly against the ceiling, making them ideal for rooms with low ceilings. They provide a clean and streamlined look without sacrificing style. |
| Track Lights | These fixtures consist of a track with adjustable lights, allowing you to direct the light exactly where you need it. Track lights are perfect for highlighting artwork or creating a spotlight effect. |
Understanding the purpose and aesthetics of different lighting options
Each lighting option serves a specific purpose and contributes to the overall aesthetics of your space. By understanding these purposes and aesthetics, you can make an informed decision:
- Task Lighting: Task lighting is designed to provide focused illumination for specific tasks, such as reading or cooking. This type of lighting is often bright and directed, helping you perform tasks more effectively.
- Ambient Lighting: Ambient lighting creates a comfortable and inviting atmosphere in a room. It provides overall illumination, allowing you to move around and navigate the space safely.
- Accent Lighting: Accent lighting is used to highlight specific features or objects in a room, such as artwork or architectural details. It adds depth and visual interest to your space.
- Decorative Lighting: Decorative lighting fixtures, such as chandeliers or pendant lights, are primarily chosen for their aesthetic appeal. While they may also provide functional lighting, their main purpose is to enhance the overall design and style of the room.
By considering these factors and understanding the purpose and aesthetics of different lighting options, you can confidently select the right lighting fixtures for your ceiling, creating a well-lit and visually appealing space.
Planning The Installation Process
Planning the installation process for ceiling lights is crucial to ensure a seamless and efficient installation. This phase involves assessing the current wiring and electrical setup, measuring the ceiling for proper placement and spacing of lights, and gathering the necessary tools and materials for installation. By having a clear plan in place, you can save time and avoid potential issues. Let’s dive into each step in detail below.
Assessing the current wiring and electrical setup
Before installing any new lights in your ceiling, it’s essential to assess the current wiring and electrical setup. This step ensures that the existing electrical connections can support the additional lights and prevents any electrical overload. Here are the key points to consider:
- Consult a professional electrician to evaluate the capacity of your current electrical system.
- Determine if your circuit breaker can handle the additional load.
- Check for any signs of wear and tear or outdated wiring that may need replacement.
By thoroughly assessing the current wiring and electrical setup, you can address any potential issues and make necessary adjustments to accommodate the new lights.

Measuring the ceiling to determine the placement and spacing of lights
Accurate measurement of the ceiling is crucial to ensure proper placement and spacing of lights. This step helps create a balanced and aesthetically pleasing lighting arrangement. Here’s how you can measure your ceiling:
- Use a measuring tape to determine the height and width of the ceiling.
- Consider the size and dimensions of the lights you plan to install.
- Divide the ceiling area into sections and mark the ideal spots for each light.
- Ensure adequate spacing between lights to avoid overcrowding or uneven lighting.
By carefully measuring the ceiling and planning the placement and spacing of lights, you can achieve an optimal and visually appealing lighting design.
Gathering the necessary tools and materials for installation
Before starting the installation, it’s essential to gather all the necessary tools and materials. Having everything ready beforehand saves time and ensures a smooth process. Here’s a checklist of the tools and materials you may need:
| Tools | Materials |
|---|---|
| Screwdriver | Light fixtures |
| Wire strippers | Electrical wires |
| Electrical tape | Wire connectors |
| Drill | Ceiling anchors |
| Wire cutters | Mounting brackets |
By having all the necessary tools and materials readily available, you can complete the installation without delays or interruptions.
Preparing The Ceiling For Installation
Before you can install lights in your ceiling, it is essential to properly prepare the area. This involves turning off the power supply, removing any existing light fixtures or ceiling decorations, and patching and repairing any imperfections in the ceiling. Following these steps will ensure a smooth and seamless installation process. Let’s dive into each step in detail:
Turning off the power supply to the room
First and foremost, safety should always be your top priority. Before getting started, switch off the power supply to the room where you plan to install the lights. Locate the main circuit breaker for that area and turn it off to prevent any potential electrical accidents or injuries.
Removing any existing light fixtures or ceiling decorations
Once the power is off, it’s time to remove any existing light fixtures or ceiling decorations that may be in your way. Carefully unscrew and disconnect any lamps, chandeliers, or pendant lights from the ceiling. It’s important to handle them with caution to avoid damage or injury. If you encounter any difficulties or unsure about the process, consult a professional electrician to assist you.
Patching and repairing any ceiling imperfections
Next, take a closer look at your ceiling and inspect for any imperfections, such as cracks, holes, or damaged areas. These imperfections can affect the aesthetics and integrity of your installation. Using a putty knife, carefully apply spackling compound or putty to fill in the cracks or holes. Smooth it out and let it dry according to the manufacturer’s instructions.
If the ceiling has larger or more severe damages, such as water stains or structural issues, it’s advisable to consult a professional for a thorough assessment and repair. Properly addressing these imperfections will ensure a solid and stable base for your lights.
Wiring The Light Fixtures
Once you have selected the perfect lighting fixtures for your ceiling, it’s time to tackle the wiring. Understanding the electrical wiring and connections, running electrical cables through the ceiling or walls, and attaching the wiring to the light fixtures securely are crucial steps in ensuring a successful installation. In this section, we will guide you through each of these steps, providing you with the knowledge and confidence you need to complete the job effectively.
Understanding the electrical wiring and connections
Before diving into the installation process, it’s important to understand the electrical wiring and connections. This will help you work safely and efficiently. Here are a few key points to keep in mind:
- Make sure you have turned off the power to the circuit you will be working on. Always double-check by using a voltage tester to ensure there is no current flowing.
- Familiarize yourself with the color coding system for electrical wires. In most cases, black wires are hot, white wires are neutral, and green or bare copper wires are ground.
- Take note of the type of wiring you have in your home. Common types include NM (non-metallic sheathed) and BX (armored cable).
Running electrical cables through the ceiling or walls
Once you have a good understanding of the wiring system, you can begin running the electrical cables through the ceiling or walls. Follow these steps to do it correctly:
- Plan the path of the cables. Determine the best route from the light switch to the first light fixture, and then between the fixtures if you have multiple lights.
- Drill holes in the ceiling or walls as needed to run the cables through. Use a stud finder to avoid hitting any electrical or structural components.
- Feed the cables through the holes, ensuring they are securely attached to the ceiling or wall.
- Label the cables at each end to keep track of which wires are connected to each other.
Attaching the wiring to the light fixtures securely
With the cables in place, it’s time to attach the wiring to the light fixtures securely. Follow these steps to ensure a proper and safe connection:
- Strip the ends of the cables to expose the wires. Use a wire stripper to carefully remove the insulation without damaging the conductors.
- Identify the appropriate wires for connection. The black wire from the cable should be connected to the black wire from the fixture, the white wire to the white wire, and the ground wire to the ground wire.
- Secure the connections using wire nuts. Twist the exposed ends of the wires together, then cover the connection with a wire nut and tighten it firmly.
- Once all the connections are made, carefully tuck the wiring back into the electrical box and attach the light fixture following the manufacturer’s instructions.
By following these steps and paying attention to the electrical wiring and connections, running the cables through the ceiling or walls, and attaching the wiring to the light fixtures securely, you can confidently and safely install lights in your ceiling. Remember to always consult a professional electrician if you’re unsure or uncomfortable with any aspect of the process.
Installing The Light Fixtures
Once you have prepared the ceiling for installation, it’s time to start mounting the light fixtures. This step is crucial as it determines the stability and optimal illumination of your ceiling lights. By following these steps, you can ensure a successful installation process.
Mounting the light fixtures to the ceiling
To mount the light fixtures, you will need a ladder, a screwdriver, and the necessary hardware provided with the lights. Follow these steps:
- Carefully climb the ladder and position yourself at the desired spot on the ceiling where you want to install the light fixtures. Ensure safety by securely placing the ladder on a stable surface.
- Using a screwdriver, remove the cover plate of the fixture and attach the baseplate to the ceiling using the provided screws. Make sure to align the screw holes properly.
- Once the baseplate is securely in place, attach the fixture’s mounting bracket to the baseplate using the provided screws. This bracket will hold the light fixture in position.
- Gently lift the light fixture and connect the wires from the ceiling to the corresponding wires on the fixture. Secure the connections with wire nuts.
- Double-check all the connections to ensure they are tight and secure. This is essential for the proper functioning of the lights.
Adjusting the position and angle of the lights for optimal illumination
Properly adjusting the position and angle of the lights ensures that you achieve optimal illumination throughout the room. Here’s how to do it:
- Turn on the lights temporarily to check the initial positioning and angle. This will help you visualize how the illumination spreads in the room and identify any areas that need adjustment.
- Make necessary adjustments by loosening the screws that hold the fixture’s mounting bracket. You can rotate the fixture or tilt its position until you achieve the desired angle and coverage.
- Take into consideration the specific lighting needs of the room. For example, if it is a kitchen, you might want to direct the lights towards the countertop or the cooking area.
- Keep adjusting the position and angle until you are satisfied with the overall illumination. Remember to check from different angles and perspectives to ensure consistent lighting.
Securing the fixtures in place to ensure stability
After adjusting the lights to your liking, it’s crucial to secure the fixtures in place to ensure stability. Follow these steps:
- Tighten the screws on the fixture’s mounting bracket to secure it in its final position. This will prevent any accidental movement or misalignment.
- Ensure that all other screws and connections on the light fixture are properly tightened, including any decorative accessories or covers.
- If there are any additional clips or brackets provided with the light fixtures, make sure to install them according to the manufacturer’s instructions for added stability.
- Give the light fixtures a gentle tug to check if they are firmly secured. If there is any movement, tighten the screws further.
By following these steps, you can confidently install the light fixtures in your ceiling, allowing for optimal illumination and stability. Take your time during the installation process to ensure each step is done correctly, and enjoy the beautiful ambiance created by your newly installed ceiling lights.

Connecting The Light Fixtures To The Power Supply
After successfully working with electrical switches and outlets and connecting the light fixtures to the existing electrical system, it’s time to make sure everything is properly functioning and safely connected to the power supply. This crucial step will ensure your newly installed ceiling lights illuminate your space efficiently and provide the perfect ambiance for any room.
Working with electrical switches and outlets
Before connecting your light fixtures to the power supply, it’s important to have a good understanding of the electrical switches and outlets in your home. You need to familiarize yourself with the different types of switches and outlets, such as single-pole switches, three-way switches, and duplex outlets.
Here are some key points to keep in mind:
- Ensure the power is turned off at the circuit breaker before working with electrical switches and outlets.
- Identify the wires connected to the switches and outlets and make note of their colors – typically black for hot wires, white for neutral wires, and green or bare copper for ground wires.
- Remove the old switches and outlets carefully, ensuring you don’t damage any wires.
- Connect the wires to the new switches and outlets according to the manufacturer’s instructions, making sure to match the colors correctly.
- Test the switches and outlets with a voltage tester before proceeding to the next step.
Connecting the light fixtures to the existing electrical system
Once you have successfully worked with electrical switches and outlets, it’s time to connect the light fixtures to the existing electrical system. This step will involve wiring the light fixtures to the electrical box in the ceiling and making the necessary connections.
Follow these steps to ensure a proper connection:
- Start by removing the old light fixtures, if any, by unscrewing them from the electrical box.
- Position the new light fixtures over the electrical box and secure them using the provided hardware.
- Connect the black wires from the light fixtures to the black wires in the electrical box, using wire nuts to secure the connections.
- Connect the white wires from the light fixtures to the white wires in the electrical box, again using wire nuts.
- If there is a ground wire, usually green or bare copper, connect it to the grounding screw in the electrical box.
- Ensure that all wire connections are tight and secure.
Testing the connections and ensuring proper functionality
After connecting the light fixtures to the existing electrical system, it’s essential to test the connections and ensure everything is functioning correctly. This will help you identify any issues or loose connections that need to be addressed before completing the installation process.
Here’s what you should do to test the connections:
- Turn the power back on at the circuit breaker for the respective lights.
- Flip the switches on and off to verify that the lights turn on and off accordingly.
- Check if there are any flickering lights or dimming issues, which could indicate a poor connection.
- Inspect the connections once again to ensure they are secure.
By following these steps and properly testing the connections, you can ensure that your newly installed ceiling lights are working safely and effectively.

Finishing Touches And Final Steps
After successfully installing the lights in your ceiling, it’s time to focus on the finishing touches and final steps to ensure a clean and professional-looking installation. Paying attention to these details not only enhances the aesthetic appeal but also ensures safety and functionality. Let’s discuss the two crucial aspects of this stage: concealing the electrical wires and ensuring a clean installation, as well as cleaning up the work area and removing any debris. Finally, we’ll cover testing the lights and making any necessary adjustments to achieve the perfect lighting effect.
Concealing the Electrical Wires and Ensuring a Clean Installation
Concealing electrical wires is not only important for visual appeal but also for safety reasons. Exposed wires can pose a hazard and mar the overall look of your ceiling. To achieve a clean installation:
- Use cable management solutions: Utilize cable management solutions such as wire channel covers, raceways, or conduit systems to neatly hide the wires. These options are available in various colors and sizes to match your ceiling and blend seamlessly with the surroundings.
- Tuck the wires: Carefully tuck the wires into the spaces between the ceiling joists or use clips to secure them in place. This helps prevent potential damage and ensures a clean, clutter-free appearance.
- Secure the wires: Use electrical staples or clips specifically designed for securing wires. Be cautious not to overtighten or damage the wires while fastening them.
Cleaning up the Work Area and Removing any Debris
As you near the completion of the installation, it’s essential to tidy up the work area and remove any debris. This not only adds the final touch to your lighting project but also minimizes the risk of accidents or damage to the lights. Here’s what you need to do:
- Sweep and vacuum: Begin by sweeping the area to remove any large debris or dust. Follow up with a vacuum cleaner to ensure all the fine particles are thoroughly cleaned.
- Wipe down surfaces: Use a damp cloth or mild cleaning solution to wipe down any surfaces that may have become dirty during the installation process. This includes the ceiling itself, nearby walls, and any reachable fixtures.
Testing the Lights and Making Any Necessary Adjustments
With the electrical wires concealed and the work area cleaned, it’s time to test the lights and make any necessary adjustments to achieve the desired lighting effect. Follow these steps:
- Turn on the lights: Switch on the lights and ensure each of them illuminates properly. Check for any flickering or uneven brightness.
- Make adjustments: If you notice any issues with the lighting, you may need to make adjustments. This can include repositioning the lights, checking and tightening connections, or replacing bulbs with the correct wattage.
- Double-check safety: Verify that all connections are secure and there are no exposed wires. It’s crucial to prioritize safety during this final step.
By following these finishing touches and final steps, you can confidently conclude your ceiling light installation process. Not only will your ceiling lights illuminate your space effectively but the clean installation and attention to detail will ensure a professional and polished look.
Troubleshooting And Common Issues
Installing lights in the ceiling can instantly transform the look and ambiance of any space. However, like any home improvement project, it is not uncommon to encounter a few bumps along the way. In this section, we will discuss some of the common issues that may arise during the installation process and provide you with practical solutions to troubleshoot and resolve them.
Identifying and resolving common installation problems
During the installation of ceiling lights, certain problems may arise, which can be frustrating for any DIY enthusiast. Here are some of the common installation problems and their solutions:
- Incorrect wiring placement: One of the most common installation problems is incorrectly placed wiring connections. To resolve this issue, double-check the wiring connections, ensuring that the positive and negative terminals are properly matched.
- Loose or unstable fixture: If the light fixture feels loose or unstable after installation, it could be due to improper mounting. Make sure the fixture is securely attached to the electrical box using the provided screws or mounting bracket. If necessary, tighten any loose screws or bolts to ensure stability.
- Poor lighting coverage: Sometimes, installed ceiling lights may not provide adequate lighting coverage for the intended area. This could be due to positioning or the wattage of the bulbs. Experiment with different bulb brightness levels and consider repositioning the lights to achieve optimal lighting coverage.
Dealing with flickering lights or electrical issues
Flickering lights or electrical issues can be concerning when installing ceiling lights. Here are a few steps you can take to address these problems:
- Check the bulbs: Flickering lights are often an indication of a loose bulb or an incompatible wattage. Ensure that the bulbs are securely screwed in and are compatible with the fixture’s specifications.
- Inspect the wiring connections: Loose or faulty wiring connections can also cause flickering lights. Carefully inspect all the connections, ensuring that they are snug and free from any damage or corrosion.
- Consider voltage fluctuations: In some cases, flickering lights may be caused by voltage fluctuations in the electrical system. If you suspect this is the issue, it is advisable to consult with a licensed electrician to assess and resolve the problem.
Seeking professional assistance if necessary
While many installation problems can be resolved with simple troubleshooting, there may be instances where seeking professional assistance is necessary. If you encounter any of the following situations, it is recommended to consult a licensed electrician:
- Non-functional lights despite proper installation and troubleshooting attempts.
- Persistent electrical issues, such as tripping breakers or power surges.
- Uncertainty or lack of experience in dealing with electrical wiring and fixtures.
Remember, your safety and the well-being of your home should always be a top priority. Seeking professional help ensures that the installation is done correctly and minimizes the risk of any potential hazards.

Enhancing The Lighting Design
When it comes to creating a cozy and inviting atmosphere in any room, lighting plays a crucial role. Installing lights in the ceiling not only brings brightness and functionality to a space, but it also adds an element of visual appeal. To take your lighting design to the next level, consider incorporating some additional ideas that will enhance the overall ambiance of the room.
Additional ideas to enhance the overall lighting in the room
While ceiling lights are a necessity, there are other lighting options that can further elevate the overall look and feel of the room. By incorporating these additional ideas, you can create a layered lighting design that is both functional and aesthetically pleasing:
Incorporating dimmers, smart lighting, or accent lights
In addition to traditional ceiling lights, adding dimmers, smart lighting, or accent lights can instantly enhance the ambiance of any space. Dimmers allow you to adjust the brightness of the lights according to your mood or the time of day, creating a cozy and versatile atmosphere. Smart lighting, on the other hand, gives you the ability to control your lights remotely, either through a smart device or voice commands.
This not only adds convenience but also allows for unique lighting effects and scheduling options. Lastly, accent lights can be used to highlight specific areas or objects in the room, adding depth and visual interest.
Choosing the right bulbs for energy efficiency and aesthetics
When it comes to choosing the right bulbs for your ceiling lights, it’s important to consider both energy efficiency and aesthetics. Opting for energy-efficient LED bulbs not only helps reduce electricity consumption but also provides long-lasting and high-quality lighting. Additionally, LED bulbs come in various color temperatures, allowing you to create the desired ambiance in the room.
For a warm and cozy feel, choose bulbs with a lower color temperature, while higher color temperatures work well for a brighter and more energetic atmosphere. By selecting the right bulbs, you can ensure that your lighting design is not only visually appealing but also eco-friendly.
Maintenance And Care Of Ceiling Lights
Ceiling lights are an essential feature of any well-designed space, providing both functionality and aesthetic appeal. To ensure the longevity and safety of your installed lights, regular maintenance and care are crucial. This includes cleaning and maintaining the light fixtures, replacing bulbs, and addressing any functional issues that may arise.
Cleaning and maintaining the light fixtures regularly
Regular cleaning and maintenance of your ceiling light fixtures will not only enhance their appearance but also extend their lifespan. Follow these steps to keep your lights in optimal condition:
- Dust the fixtures using a soft cloth or a feather duster. This will help remove any surface dust or cobwebs that may have accumulated over time.
- For glass or transparent covers, use a mild glass cleaner or a mixture of water and vinegar to remove any smudges or fingerprints.
- Ensure that all screws and fastenings are tightened properly. Loose fixtures can lead to electrical hazards or the light falling from the ceiling.
- Inspect the wiring and connections regularly. If you notice any wear and tear or loose connections, it is important to address them immediately to prevent any electrical issues.
Replacing bulbs and addressing any functional issues
Over time, light bulbs can burn out or become dim, affecting the overall illumination of your space. It is important to replace them promptly to maintain a well-lit environment. Follow these guidelines:
- Turn off the power supply to the light fixture before replacing the bulb to avoid accidents.
- Remove the old bulb by gently twisting it counterclockwise. If the bulb is stuck, you can use a pair of rubber gloves or a bulb removal tool for a better grip.
- Insert the new bulb by aligning the base with the socket and twisting it clockwise until it is securely in place.
- If you encounter any functional issues, such as flickering lights or lights not turning on, check the circuit breaker and ensure that all connections are secure. If the problem persists, it is advisable to consult a qualified electrician.
Ensuring the longevity and safety of the installed lights
To ensure the longevity and safety of your installed ceiling lights, there are a few important considerations to keep in mind:
- Make sure that the wattage of the light bulbs used does not exceed the recommended wattage for the fixture. Higher wattage can lead to overheating and damage to the fixture.
- Inspect the ceiling for any signs of water leaks or moisture. Wet surroundings can cause electrical problems and even pose a risk of electric shock.
- Keep flammable objects away from the light fixtures to avoid any fire hazards. This includes curtains, draperies, and any combustible materials.
- If you notice any unusual smells, sparks, or smoke coming from the light fixture, turn off the power supply immediately and seek professional help.
Frequently Asked Questions For How To Install Lights In Ceiling
Can You Install Ceiling Lights Yourself?
Yes, you can install ceiling lights yourself. Ensure safety by turning off the power and following instructions carefully. Tools like a ladder, screwdriver, and wire stripper may be needed. If unsure, consult an electrician for expert help.
How Do You Attach Lights To The Ceiling?
To attach lights to the ceiling: – Choose the type of light fixture you want – Locate the electrical box in the ceiling – Install a mounting bracket to the electrical box – Connect the wiring to the light fixture – Attach the light fixture to the mounting bracket securely.
Is It Difficult To Install A Ceiling Light?
Installing a ceiling light is not difficult.
Can You Install A Ceiling Light Without Existing Wiring?
Yes, it is possible to install a ceiling light without existing wiring. You can use a wireless light fixture or choose a battery-powered light option. These options eliminate the need for complicated wiring and make installation easier and more flexible.
Conclusion
Installing lights in the ceiling can transform the look and feel of any room. By following the step-by-step guide in this blog post, you can easily install lights on your own without any professional help. From gathering the necessary tools to connecting the wiring and securing the fixture, every detail has been covered.
With this knowledge, you can now confidently illuminate your space and enjoy a well-lit and aesthetically pleasing environment.