How to Install Hanging Light?
To install a hanging light, start by turning off the power, measuring the height, marking the position, install the mounting bracket, wire the light, and attach the light fixture.
Tools And Materials You’Ll Need
Installing a hanging light can be an exciting and rewarding project that can instantly transform the look and feel of any room. Whether you’re replacing an old fixture or adding a new one, having the right tools and materials is essential to ensure a successful installation. Below is a comprehensive list of the tools and materials you’ll need to complete this project.
List of Tools Required
- A ladder or a step stool
- A pair of wire strippers
- A set of screwdrivers (flathead and Phillips-head)
- A voltage tester
- A wire cutter
- Electrical tape
- A drill with a drill bit suitable for your ceiling type
- A pencil or marker
- A stud finder
- A wrench or pliers
- A wire nut

List of Materials Required
- A hanging light fixture of your choice
- A mounting bracket
- A ceiling medallion (optional)
- Wire connectors
- A junction box
- A grounding screw
- Mounting screws
- Electrical wire
- A strain relief connector
- A lightbulb suitable for the fixture
- Plastic anchors (if necessary)
Make sure to gather all the necessary tools and materials before starting the installation process. This will allow you to work efficiently and prevent any delays or interruptions.
Preparing The Area
Before you can install a hanging light, it is important to properly prepare the area. This involves taking a few necessary steps to ensure the process goes smoothly and safely. In this section, we will guide you through the preparation process, step by step.
Measure and mark the position for the hanging light
Start by measuring and marking the exact position where you want to install your hanging light. This will help you determine the ideal height and location for the fixture. Use a measuring tape to ensure accurate measurements.
Once you have measured the desired position, mark it using a pencil or a small piece of tape. This will serve as a guide during the installation process and help you align the light accurately.
Turn off the power supply to the area
Safety should always be the top priority when working with electricity. Before you begin any electrical work, make sure to turn off the power supply to the area where you will be installing the hanging light fixture.
Locate the main electrical panel and switch off the circuit breaker that controls the power to the specific area. To be extra cautious, consider using a voltage tester to ensure that the power is completely off before proceeding with the installation.
Remove any existing light fixtures or accessories
If there are any existing light fixtures or accessories in the area where you plan to install the hanging light, they will need to be removed. This step is crucial to create a clean and properly wired space for your new fixture.
Carefully disconnect the wiring attached to the existing fixtures, taking note of how they were connected for reference later. Remove any screws or mounting brackets that hold the fixtures in place, and gently take them down.
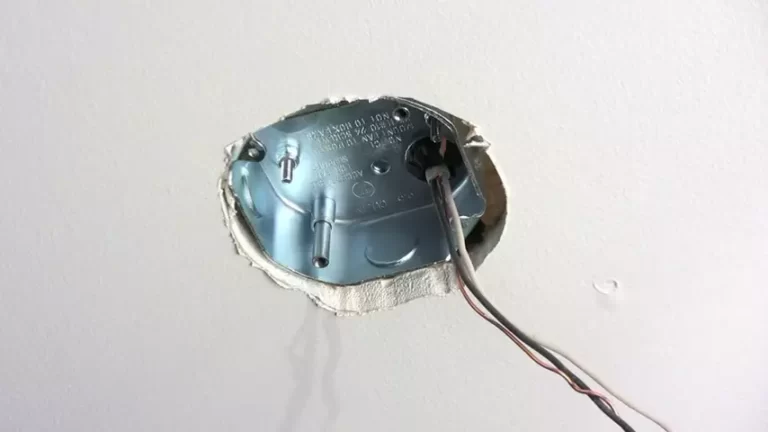
Ensure that the electrical wires are safely capped with wire nuts and separated from each other to prevent any potential accidents. Once the area is clear and free from any obstacles, you can proceed with the installation of your new hanging light.
Wiring And Electrical Connections
Disconnecting the old light fixture
Before you can install your new hanging light, you’ll need to disconnect the old light fixture. Make sure to turn off the power supply to the light fixture at the breaker box to avoid any accidents. It’s also a good idea to use a voltage tester to double-check that there is no electrical current running through the wires. Once you’ve confirmed that it’s safe, you can proceed with disconnecting the old light fixture.
Preparing the wires for the new hanging light
Once the old light fixture is disconnected, you can start preparing the wires for the new hanging light. Begin by stripping the ends of the wires using wire strippers, exposing about 1/2 inch of bare wire. This will ensure a clean connection when making the electrical connections.

Making electrical connections safely
To make the electrical connections for your new hanging light, you’ll need to match the wires accordingly. The black wire is the hot wire and should be connected to the black or colored wire from the light fixture. The white wire is the neutral wire and should be connected to the white wire from the light fixture. Finally, the bare copper or green wire is the ground wire and should be attached to the green or bare wire from the fixture.
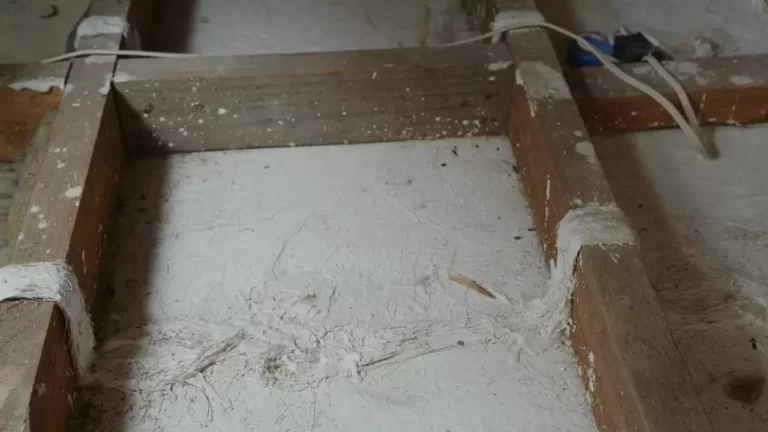
Installing a junction box if needed
If your new hanging light requires a junction box for installation, you’ll need to install it before proceeding. A junction box provides a safe and secure enclosure for the electrical connections. Follow the manufacturer’s instructions for proper installation and make sure the junction box is properly secured to the ceiling.
Securing and organizing the wires properly
After making the electrical connections, it’s important to secure and organize the wires properly. This ensures that the wires are not exposed and reduces the risk of any accidents. Use wire nuts to securely connect the wires together and wrap electrical tape around the wire nuts for added protection. Additionally, use cable ties or wire clips to neatly organize and secure the wires to the ceiling or junction box.
Mounting The Hanging Light
Mounting the hanging light is an essential step in the installation process. This involves assembling the light fixture components, mounting the ceiling plate or bracket, hanging the light fixture safely, and adjusting its height and position. By following these steps, you can ensure a secure and stylish installation for your hanging light fixture.
Assembling the light fixture components
Before you can mount the hanging light, you need to assemble its components. Start by carefully unpacking the fixture and removing any protective packaging. Lay out all the pieces to ensure that you have everything you need. Refer to the manufacturer’s instructions to identify each component and its purpose.
Next, follow the assembly instructions provided, which typically involve connecting the wires, attaching any decorative elements or shades, and securing the bulbs or LED modules. Take care to avoid overtightening screws or damaging delicate parts during this process. Once you have assembled the light fixture, you are ready to proceed to the mounting stage.
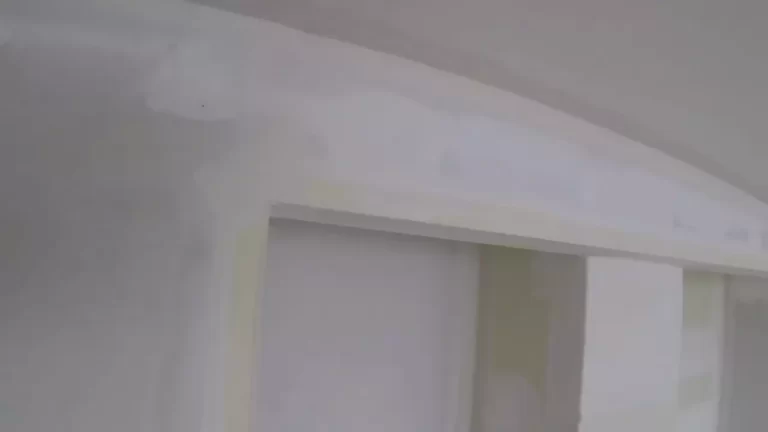
Mounting the ceiling plate or bracket
The next step in mounting your hanging light is to install the ceiling plate or bracket. This component serves as the anchor point for the fixture, ensuring its stability and secure attachment to the ceiling. Begin by locating the junction box in the ceiling where you plan to install the light.
Depending on the design of your light fixture, you may have a ceiling plate or a mounting bracket provided. Carefully align the plate or bracket with the junction box and use the provided screws or mounting hardware to secure it firmly in place. Ensure that the plate or bracket is level and flush with the ceiling surface.
Hanging the light fixture safely
Now that the ceiling plate or bracket is securely mounted, it’s time to hang the light fixture. First, make sure that the power to the circuit is turned off at the breaker panel to prevent any electrical mishaps. Attach the light fixture’s wires to the corresponding wires in the junction box, following the manufacturer’s instructions and any applicable electrical codes.
Once the wiring is properly connected, gently lift the light fixture and hang it onto the ceiling plate or bracket. Take care to ensure that the fixture is aligned and centered within the desired location. Use the provided screws or locking mechanisms to secure the fixture to the plate or bracket, ensuring a snug fit.

Adjusting the height and position
After hanging the light fixture, you may need to adjust its height and position to achieve the desired aesthetic and lighting effects. Some light fixtures come with adjustable suspension systems or chains that allow you to customize the hanging length. Follow the manufacturer’s instructions to adjust the height of your fixture accordingly.
If your light fixture does not have an adjustable suspension system, you may need to use additional hardware, such as hooks or extension rods, to achieve the desired height and position. Take measurements and make any necessary adjustments to ensure that the fixture is at the desired height and properly balanced.
Finally, step back and visually inspect the mounted hanging light. Ensure that it is securely attached, straight, and level. Make any necessary adjustments to avoid any wobbling or tilting. Test the light fixture by turning on the power and confirming that it functions as expected.
By following these steps for mounting a hanging light, you can successfully install a stylish and functional lighting fixture in your space. Remember to double-check all electrical connections and consult a professional if you have any doubts or concerns about the installation process.
Installing And Testing The Bulb
Now that you have successfully installed the hanging light fixture, it’s time to move on to the next step – installing and testing the bulb. This is a crucial step in ensuring that your hanging light not only looks great but also functions properly. In this section, we’ll guide you through the process of choosing the right bulb, installing it securely, and performing the necessary tests to ensure everything is working as it should.
Choosing the right bulb for your hanging light
Before you start installing the bulb, it’s important to choose the right one for your hanging light. The type of bulb you select will depend on various factors, including the fixture’s wattage limit and the desired brightness and ambiance you want to achieve. Consider opting for energy-efficient LED bulbs, which last longer and consume less electricity compared to traditional incandescent bulbs. Additionally, check the fixture’s specifications or consult the manufacturer’s guidelines to ensure compatibility.
Installing the bulb securely
Now that you have the right bulb, it’s time to install it securely. Start by turning off the power to the hanging light at the circuit breaker. This will eliminate any risk of electrical shock while you handle the bulb. Carefully remove the old bulb, if applicable, and gently insert the new one into the socket. Ensure that the bulb is aligned properly and securely tightened. Avoid overtightening, as it may damage the socket. Once installed, turn the power back on and proceed to the next step.
Checking the electrical connections and turning on the power
With the bulb securely installed, it’s important to check the electrical connections and ensure everything is properly connected. Inspect the wires for any signs of damage or fraying. Tighten any loose screws or wire nuts, and make sure all connections are secure. Once you’ve checked and secured the connections, turn on the power at the circuit breaker. This will provide electricity to the hanging light, allowing you to perform the necessary tests.
Testing the functionality of the hanging light
Now that everything is in place, it’s time to test the functionality of your hanging light. Flip the switch or use the designated control to turn on the light. Check if the bulb illuminates properly and produces the desired level of brightness. If the light doesn’t turn on, double-check the power connection and ensure the bulb is properly installed. If you encounter any issues, consult the manufacturer’s instructions or seek professional assistance if necessary.
By following these steps, you’ll be able to install and test the bulb in your hanging light fixture correctly. Remember to choose the right bulb, install it securely, check the electrical connections, and thoroughly test the functionality. And there you have it – a well-lit and functional hanging light to enhance the ambiance of your space.
Final Touches And Safety Measures
After installing a hanging light, it is important to pay attention to the final touches and safety measures to ensure proper operation and minimize any potential hazards. Taking the time to secure loose wires and components, adjust the light direction if possible, clean the light fixture and surrounding area, and ensure proper safety measures are in place will give you peace of mind and ensure the functionality of your hanging light. Let’s take a closer look at each step:
Securing any loose wires or components
Before considering the installation complete, carefully inspect the hanging light to check for any loose wires or components. Use a screwdriver or pliers to tighten any loose connection points. If you notice any damaged or frayed wires, it is crucial to replace them before proceeding. By securing all the components, you can prevent any potential malfunctions or accidents that may arise from loose parts.

Adjusting the light direction if possible
If your hanging light allows for adjustable light direction, take advantage of this feature to ensure optimal illumination. Rotate or adjust the lighting fixture based on your preference or to highlight specific areas in your space. By taking the time to adjust the light direction, you can create the desired ambiance and functionality that fits your needs.
Cleaning the light fixture and surrounding area
Regular cleaning of your hanging light fixture and its surrounding area is essential to maintain its appearance and functionality. Use a soft, damp cloth to wipe away any dust or dirt from the fixture itself. Additionally, clean the area around the fixture to prevent any accumulation of debris. By keeping the light fixture and its surroundings clean, you can prolong its lifespan and ensure its optimal performance.
Ensuring proper safety measures are in place
When dealing with electrical components, safety should always be a top priority. Take the necessary precautions to ensure a safe environment. Make sure the hanging light is securely mounted to the ceiling or supporting structure using the appropriate hardware. Use wire connectors to protect exposed wire ends, and avoid overloading the circuit by using the recommended wattage for the light fixture. Lastly, consider installing a ground fault circuit interrupter (GFCI) if the light is in a damp location, such as a bathroom or outdoor space. These safety measures will help prevent electrical accidents and ensure a safe operating environment for your hanging light.
By following these final touches and safety measures, you can ensure the successful installation of your hanging light while promoting longevity, functionality, and most importantly, safety.
Troubleshooting And Maintenance Tips
Even with proper installation, hanging lights can sometimes encounter issues. In this section, we will discuss common problems you may face and provide solutions to help you address them. Additionally, we will provide some regular maintenance tips that will keep your hanging light in optimal condition.
Common issues with hanging lights and their solutions
While hanging lights can add an elegant touch to any space, they may occasionally encounter problems. Here are some common issues you may come across:
| Issue | Solution |
|---|---|
| The light bulb keeps flickering or doesn’t turn on | 1. Check if the bulb is screwed in properly 2. Replace the bulb with a new one to see if it solves the problem 3. If the issue persists, check the socket for loose connections or damage and repair or replace as necessary |
| The light fixture is wobbling or feels unstable | 1. Ensure that the fixture is securely attached to the ceiling 2. Tighten any loose screws or connections 3. If the problem persists, consider consulting a professional electrician to ensure the fixture is properly installed and stable |
| The light switch doesn’t work | 1. Check the circuit breaker to ensure it hasn’t tripped 2. Replace the light switch if it appears faulty 3. If the issue persists, it may be a problem with the wiring and you should consult a professional electrician |
Regular maintenance tips to keep your hanging light in optimal condition
To ensure that your hanging light stays in top-notch condition, follow these maintenance tips:
- Regularly dust and clean the light fixture using a soft cloth to remove any dirt or grime.
- Inspect the electrical connections and wires periodically to ensure there are no loose or damaged parts.
- Replace burned-out bulbs promptly to prevent strain on the electrical components and to maintain consistent lighting.
- Check the tightness of screws and connections to ensure the fixture remains secure and stable.
By following these troubleshooting and maintenance tips, you can address common issues and keep your hanging light looking and functioning its best. Remember to always prioritize safety and consult a professional if you are unsure or uncomfortable with any electrical work.

Additional Considerations And Ideas
When it comes to installing a hanging light, there are a few additional considerations and ideas you should keep in mind to make your lighting fixture truly unique and functional. From adding dimmer switches to exploring different styles and designs, these ideas will help you customize your hanging light to suit your needs and personal style.
Adding dimmer switches or other accessories
One way to enhance the functionality of your hanging light is by installing a dimmer switch. With a dimmer switch, you can adjust the brightness of the light to create the perfect ambiance for any occasion. Whether you’re looking to set a relaxing mood or brighten up a room, a dimmer switch gives you the flexibility to customize your lighting experience.
In addition to dimmer switches, there are other accessories you can consider adding to your hanging light. For example, you can install a remote control system that allows you to control the light from anywhere in the room. This can be particularly useful if you have a large space or prefer the convenience of adjusting the light settings without getting up from your seat.
Choosing decorative elements for your hanging light
To add a touch of style and personality to your hanging light, consider choosing decorative elements that complement your overall interior design. From ornate lampshades to colorful glass shades, there are countless options to choose from.
When selecting decorative elements, keep in mind the theme and color scheme of the room. For a modern and minimalist look, consider sleek and simple designs. On the other hand, if you’re going for a more eclectic or vintage style, you can opt for unique and eye-catching lampshades with intricate patterns or textures.
Exploring different hanging light styles and designs
In addition to functionality and aesthetics, it’s essential to consider the different styles and designs available when installing a hanging light. From chandeliers to pendant lights, there are various options to suit every taste and interior design style.
Chandeliers are a classic choice for adding elegance and drama to a room. They often feature multiple arms or tiers and come in a range of styles, from crystal embellishments to modern metal designs. Pendant lights, on the other hand, are perfect for adding a contemporary touch to your space. These single-light fixtures can be hung alone or grouped together at different heights for a visually striking effect.
Remember to choose a hanging light style and design that complements the size and scale of your room. A large chandelier might overwhelm a smaller space, whereas a small pendant light might get lost in a larger room. Always consider the proportions and dimensions of your space when making your selection.
Frequently Asked Questions For How To Install Hanging Light
Is It Easy To Install Hanging Lights?
Yes, installing hanging lights is easy. Just follow the instructions, secure the fixture to the ceiling, and connect the wiring properly. It’s a straightforward process that can be done by most people without professional help.
How Do You Wire A Hanging Light?
To wire a hanging light:
1. Turn off the power at the breaker box.
2. Install a mounting bracket to the ceiling.
3. Connect the wires from the light fixture to the ceiling wires using wire nuts.
4. Secure the light fixture to the mounting bracket.
5. Turn the power back on and test the light.
How Do You Install A Pendant Light On A Ceiling?
To install a pendant light on a ceiling, first, turn off the power to the area. Remove the old fixture and install a ceiling bracket. Connect the pendant wires to the ceiling wires using wire connectors. Attach the pendant shade and bulb, then turn the power back on to enjoy your new light.
What Is The Best Way To Hang Pendant Lights?
To hang pendant lights, start by choosing a suitable location and ensuring the electrical wiring is safe. Use a ceiling-mounted junction box for support and stability. Position the pendant at the desired height, allowing for adequate clearance. Secure the pendant using a mounting bracket and screws.
Test the installation to ensure proper functioning.
Conclusion
Installing a hanging light can enhance the ambiance of any space. By following these easy steps, you can successfully install a hanging light fixture in your home. Remember to choose the right location, gather the necessary tools, and follow the manufacturer’s instructions.
With a little patience and careful attention, you can enjoy the beautiful and functional lighting that a hanging light provides. So go ahead and bring light to your space with confidence!