How to Install Gutter Extensions?
To install gutter extensions, measure the length needed, cut the extension to size, and attach it securely to the existing gutter downspout with screws. Gutter extensions help to direct water away from your foundation, preventing water damage.
Installing them is a straightforward process that can be completed in a few simple steps. By following these instructions, you can ensure that your gutter extensions are properly installed and working effectively to protect your home from potential water-related issues.
Tools And Materials You Will Need
When it comes to installing gutter extensions, having the right tools and materials is crucial. Here is a list of items you will need to complete the job:
Gutter extensions
- Measuring tape
- Marker or pencil
- Hacksaw or electric saw
- Drill and drill bits
- Screwdriver or wrench
- Sealant or caulk
- Screws or fasteners
- Safety goggles and gloves
Each of these tools and materials plays a specific role in the installation process, ensuring that your gutter extensions are properly installed and functioning effectively. Let’s take a closer look at each item:

Gutter extensions
The first item on the list is, of course, the gutter extensions themselves. These extensions are designed to divert rainwater away from your home’s foundation and prevent water damage. You can find gutter extensions in various lengths and materials, so choose the ones that best suit your needs.
Measuring tape
Before you start cutting and installing the gutter extensions, you’ll need to take accurate measurements. A measuring tape will help you determine the right length for each section of the extension and ensure a proper fit.
Marker or pencil
A marker or pencil is essential for marking the measurements and cutting lines on the gutter extensions. This will help you make precise cuts and ensure that the extensions fit seamlessly together.
Hacksaw or electric saw
To cut the gutter extensions to the correct length, you’ll need a hacksaw or an electric saw. Make sure to choose a saw that is suitable for the material of your extensions, whether it’s aluminum, vinyl, or another type of gutter material.
Drill and drill bits
A drill is necessary for creating pilot holes in the gutter and fascia board, as well as for attaching the extensions to your existing gutter system. Make sure you have a variety of drill bits to accommodate different sizes of screws and fasteners.
Screwdriver or wrench
You’ll need either a screwdriver or a wrench to tighten the screws or fasteners that secure the gutter extensions in place. Choose a tool that is comfortable for you to use and ensures a secure installation.
Sealant or caulk
To prevent any leaks or gaps between the gutter sections, it’s important to use a high-quality sealant or caulk. Apply the sealant to the joints and connections, creating a watertight seal that ensures proper drainage.
Screws or fasteners
Make sure you have an ample supply of screws or fasteners to attach the gutter extensions securely to your existing gutter system. Choose screws or fasteners that are compatible with your gutter material and resistant to rust and corrosion.
Safety goggles and gloves
Finally, don’t forget to prioritize safety during the installation process. Wear safety goggles to protect your eyes from any dust or debris, and gloves to keep your hands safe while handling tools and materials.
By gathering all the necessary tools and materials before you start installing gutter extensions, you’ll be well-prepared to complete the job efficiently and effectively. Keep in mind that the specific tools and materials may vary depending on your unique installation requirements, so adjust the list accordingly.
Assessing Your Gutter System
Before installing gutter extensions, it is important to assess your existing gutter system to ensure a smooth and successful installation. By checking the existing gutter condition, determining the necessary extension length, and identifying potential obstacles or challenges, you can address any issues and make necessary adjustments.
Checking the existing gutter condition
To begin, inspect your gutters for any signs of damage or wear and tear. Look for cracks, holes, or sagging sections that could affect the performance of your gutter extensions. Ensure that the gutters are securely fastened to the fascia and that there are no loose or missing parts. If you notice any issues, it is best to address them before proceeding with the installation.
Determining the necessary extension length
Next, measure the distance between your gutters and the desired location where the water should be directed. This will help you determine the necessary length of the gutter extensions. By using a tape measure, calculate the exact length needed, ensuring that the extensions will comfortably reach the desired spot while allowing for proper drainage. It is advisable to add a few extra inches to account for any unexpected variations or curves in your landscape.

Identifying potential obstacles or challenges
Lastly, take a closer look at the area surrounding your gutters to identify any potential obstacles or challenges that may affect the installation of the gutter extensions. Observe if some nearby trees or shrubs could obstruct the flow of water or create clogs. Additionally, consider any underground utilities or structures that may be present, such as gas lines or foundation drains. Make sure to plan the routing of the extensions accordingly, steering clear of any potential obstacles.
By thoroughly assessing your gutter system, you can ensure a seamless installation process for your gutter extensions. Checking the existing gutter condition, determining the necessary extension length, and identifying potential obstacles or challenges will help you address any issues and make the necessary preparations. Now that you have assessed your gutter system, you are ready to move on to the next step of installing the gutter extensions.
Preparing The Gutter Extensions
Before installing gutter extensions, it is essential to prepare them properly to ensure a seamless and efficient installation process. This involves measuring and marking the desired extension length, cutting the extensions to size, and trimming or adjusting them for corners and angles. Let’s take a closer look at each of these steps in detail:
Measuring and marking the desired extension length
The first step in preparing gutter extensions is to measure and mark the desired length for your project. This will depend on factors such as the distance between the downspout and the desired drainage area. To do this, follow these simple steps:
- Using a measuring tape, measure the length required for the gutter extension.
- Mark the measured length on the extension material using a permanent marker.
- Ensure the mark is clear and easily visible for accurate cutting in the next step.
Cutting the gutter extensions to size
Once you have marked the desired length of the gutter extension, it’s time to cut the material to size. Here’s how to do it:
- Prepare your cutting tools, such as tin snips or a hacksaw, ensuring they are sharp and in good working condition.
- Place the marked extension material on a stable surface, ensuring it is secure and won’t move during the cutting process.
- Using a steady hand, carefully cut along the marked line, applying even pressure to achieve a clean and precise cut.
- Repeat this process for any additional gutter extensions you need for your project.
Trimming or adjusting for corners and angles
Depending on the layout of your gutter system, you may encounter corners and angles that require special adjustments for the gutter extensions. To ensure a proper fit, follow these steps:
- Identify the corners or angles where the gutter extensions need to be adjusted.
- Measure the appropriate length required to fit around the corner or angle, taking into account any necessary overlap with adjacent sections.
- Mark the measured length on the extension material using a permanent marker.
- Carefully cut along the marked line using your cutting tools, making sure to maintain a straight and clean cut.
- Double-check the fit of the trimmed extension around the corner or angle, making any additional adjustments if needed.
By properly preparing the gutter extensions through measuring, marking, cutting, and adjusting for corners and angles, you can ensure a successful installation that effectively directs rainwater away from your property. Follow these steps carefully, and you’ll be well on your way to an efficient gutter extension installation!
Installing The Gutter Extensions
Properly installing gutter extensions is essential for directing rainwater away from your home’s foundation, preventing potential damage and flooding. In this section, we will guide you through the step-by-step process of installing gutter extensions, ensuring an effective and leak-free installation.
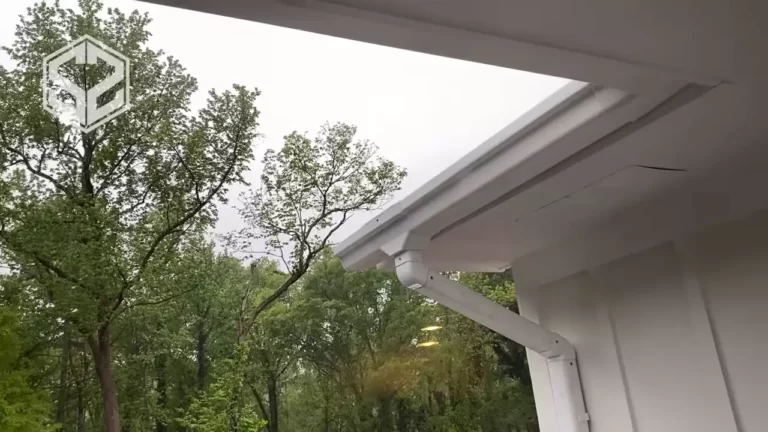
Positioning the Extensions at the Downspout Outlet
Before attaching the extensions, it is crucial to position them correctly at the downspout outlet. Start by measuring the distance from the downspout outlet to the desired location for the extension’s end. This will depend on your landscape and drainage needs. Use a tape measure to get an accurate measurement.
Once you have determined the length, carefully position the extensions at the downspout outlet, making sure they align with the existing gutter system. This will ensure a seamless flow of water from the downspout to the extension.

Attaching the Extensions to the Existing Gutter System
To secure the extensions to the existing gutter system, you will need appropriate tools, such as a drill and screws or fasteners. First, position the extension’s end against the gutter, aligning it precisely with the downspout outlet. Use a level to ensure the extension is straight and properly aligned.
Once the extension is in place, use a drill to create pilot holes through both the gutter and the extension. This will prevent any splitting or cracking when inserting the screws or fasteners. After drilling the pilot holes, insert the screws or fasteners through the holes, tightening them securely. Ensure that the extension is firmly attached to the gutter.
Securing the Extensions with Screws or Fasteners
Securing the gutter extensions with screws or fasteners is vital for stability and longevity. It is recommended to use galvanized screws or specialized fasteners that are resistant to rust and corrosion. Make sure to evenly space the screws or fasteners along the length of the extension to provide optimal support.
When attaching the screws or fasteners, be cautious not to overtighten them, as it may damage the gutter or extension. Ensure that they are tightened enough to hold the extension securely in place while allowing flexibility for expansion and contraction due to temperature variations.
Using Sealant or Caulk to Prevent Leaks
Lastly, to prevent leaks at the joints and connections between the gutter and extensions, it is recommended to use a high-quality sealant or caulk. Applying the sealant or caulk along these areas will create a watertight seal, ensuring that rainwater flows smoothly through the gutter system and extensions without any leaks.
Before applying the sealant or caulk, thoroughly clean and dry the gutter and extension surfaces. Use a caulking gun to apply a continuous bead of sealant or caulk along the joints, ensuring complete coverage. Smooth out the sealant or caulk with a putty knife or your finger for a seamless finish.
By following these steps, you can successfully install gutter extensions, effectively directing rainwater away from your home’s foundation and preventing potential damage. Remember to take proper measurements, securely attach the extensions, and use sealant or caulk to ensure a leak-free installation.
Testing And Maintaining The Gutter Extensions
Once you have successfully installed your gutter extensions, it is essential to regularly test and maintain them to ensure proper functionality and prevent any potential issues. By regularly checking, inspecting, clearing debris, and taking preventive measures, you can keep your gutter extensions in optimal condition, effectively redirecting water away from your property and protecting it from potential damage.
Checking the functionality of the installed extensions
It is crucial to periodically check the functionality of your installed gutter extensions to ensure that they are effectively redirecting water away from your home’s foundation. To check their functionality, follow these steps:
- Observe the water flow: During a rainstorm, visually inspect the water flow from the gutter extensions. Ensure that water is smoothly flowing away from your home’s foundation and not pooling or causing any overspill.
- Perform a water test: Take a hose and simulate rain by spraying water into the gutters. Observe how well the gutter extensions handle the water runoff. Ensure that no leaks or overflow occur and that water is directed away from your foundation and towards a safe drainage area.
Inspecting for any leaks or misalignments
Regular inspections are crucial to detect any leaks or misalignments in your gutter extensions. Here’s how to inspect for these issues:
- Visually inspect the gutters: Look for any visible cracks, holes, or separations in the gutter extensions. Repair or replace any damaged sections promptly.
- Check the connections: Examine the connections between the gutter extensions and the downspouts. Make sure they are securely fastened and properly aligned.
Clearing debris and maintaining regular gutter cleaning
Keeping your gutter extensions free of debris is essential for their proper function. Regular cleaning and debris removal prevent clogs and ensure smooth water flow. Here are some best practices for clearing debris:
- Safely climb a ladder and use gloved hands, a trowel, or a gutter scoop to remove leaves, twigs, and other debris from the gutter extensions.
- Use a hose to flush out any remaining debris. Ensure that water flows freely through the extensions.
- Consider installing gutter guards or screens to prevent debris from entering the gutter extensions in the first place.

Taking preventive measures to protect the gutters
Prevention is key to maintaining the longevity and performance of your gutter extensions. Here are some preventive measures to protect your gutters:
- Regularly trim nearby trees: Overhanging branches can lead to clogs and damage. Trim branches that are close to your gutters to minimize the risk of debris accumulation.
- Ensure proper drainage: Check that your downspouts are directing water away from your property’s foundation and towards a safe drainage area, preventing water buildup and potential damage.
- Perform seasonal inspections: Inspect your gutter extensions before each rainy season and after major storms to identify and address any issues promptly.
By following these guidelines and maintaining your gutter extensions, you can ensure they continue to function properly and protect your home from potential water damage. Regular testing, inspection, clearing debris, and preventive measures will help you maintain the optimal performance of your gutter extensions for years to come.
Additional Tips And Troubleshooting
Using extensions with built-in filters or screens
When installing gutter extensions, you may want to consider using ones with built-in filters or screens. These extensions can help prevent debris such as leaves, twigs, and other small particles from clogging up your gutter system. This can save you from the hassle of frequent cleaning and maintenance.
Dealing with insufficient slope or drainage issues
In some cases, you may encounter insufficient slope or drainage issues with your gutter extensions. This can lead to water pooling or overflowing, which can cause damage to your property. To address this problem, you can try adjusting the slope of the extensions to provide better drainage. Additionally, you can install downspout extensions to divert water away from areas prone to pooling.
Properly redirecting water flow away from the foundation
Redirecting water flow away from the foundation is essential to prevent water damage and structural issues. To ensure proper redirection, angle the gutter extensions away from your home’s foundation. You can also use splash blocks or downspout extensions to guide the water further away, keeping your foundation safe from potential problems.
Addressing freezing or icicle formation in winter
During the winter months, freezing or icicle formation can occur on gutter extensions, which can cause blockages and damage. To prevent this, consider installing heating cables along the extensions to melt away ice and keep the water flowing. Additionally, clearing any obstructions, such as leaves or debris, before winter arrives can help prevent ice buildup and ensure proper water drainage.
Frequently Asked Questions For How To Install Gutter Extensions
How Do Gutter Extensions Work?
Gutter extensions are designed to redirect water away from the foundation of your home. They attach to the downspout, providing a longer path for water to flow, ensuring it doesn’t pool around the foundation.
Why Are Gutter Extensions Important?
Gutter extensions play a crucial role in preventing water damage to your home. By redirecting water away from the foundation, they help protect against basement flooding, soil erosion, and foundation cracks, potentially saving you from costly repairs.
How Do I Install Gutter Extensions?
Installing gutter extensions is a straightforward process. Start by measuring and cutting the extension to the desired length. Attach it securely to the downspout using screws or brackets. Make sure it is sloped away from the foundation to ensure proper water flow.
Are Gutter Extensions Adjustable?
Yes, many gutter extensions are adjustable to accommodate different lengths. They often come with telescoping or flexible sections that can be adjusted to the desired length or angle. This flexibility makes it easier to customize the extensions to suit your specific needs.
Conclusion
Installing gutter extensions is a simple yet essential task that can protect your home from water damage. By following the steps outlined in this guide, you can ensure proper functioning of your gutters and prevent issues such as soil erosion and basement flooding.
Remember to regularly maintain and clean your gutters to keep them in optimal condition. Take action today and enjoy the peace of mind that comes with a well-functioning gutter system.