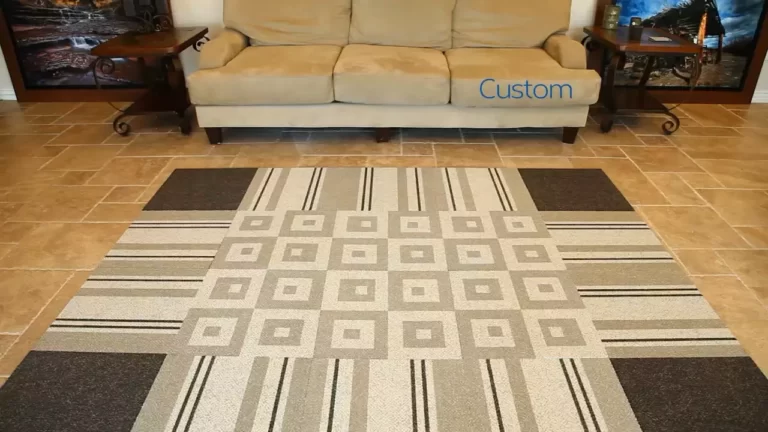
How to Install Floor Trim between Rooms?
To install floor trim between rooms, measure and cut the trim to fit, then secure it to the wall using a nail gun or adhesive. Installing floor trim between rooms is an important step in finishing your flooring project while also achieving a polished and professional look.
The trim not only covers the gaps between the floor and the wall but also adds a decorative touch to the overall appearance of the room. By following a few simple steps, you can easily install floor trim between rooms.
This article will provide you with a step-by-step guide on how to measure, cut, and secure the trim to achieve a seamless transition between rooms. So, let’s dive in and learn the process of installing floor trim like a pro.
Preparing The Tools And Materials
Before you start installing floor trim between rooms, it’s essential to gather all the necessary tools and materials. Having everything at hand will ensure a smooth and efficient installation process. Below, we have listed the essential tools and materials you will need:
- Measuring tape: This tool is crucial for accurate measurements. Make sure to have a measuring tape with clear markings and a suitable length for your project.
- Miter saw: A miter saw will be your best friend when it comes to cutting precise angles on the trim pieces. Ensure that you have a quality miter saw with a sharp blade for clean cuts.
- Pencil: Don’t forget to have a pencil on hand for marking the trim pieces and the walls. This will help you align the trim accurately during installation.
- Wood glue: Wood glue is necessary for securing the trim pieces together. Opt for a high-quality wood glue that provides excellent adhesive strength.
- Nail gun: To secure the trim to the wall and the floor, you will need a nail gun. Choose a nail gun suitable for your trim size and ensure it is loaded with appropriate nails.Trim pieces: Lastly, make sure to have the trim pieces ready for installation. Measure and cut the trim pieces to the desired length, ensuring they fit snugly between the two room walls.
Having all these tools and materials ready before you begin the installation will save you time and frustration during the process. Now that you have everything in place, it’s time to move on to the next steps of installing floor trim between rooms.

Measuring And Cutting The Trim
Installing floor trim between rooms is an essential step in achieving a polished and cohesive look for your flooring project. The process involves measuring and cutting the trim pieces to ensure a perfect fit and smooth corners. Let’s dive deeper into the two crucial steps – measuring the length of the trim pieces required and cutting the trim pieces at 45-degree angles.
Measuring the length of the trim pieces required
Before you start cutting the trim, it’s crucial to measure the length of the trim pieces required accurately. This step ensures that you have enough trim to cover the gaps between the flooring and the wall or between two flooring surfaces. To measure the length of the trim pieces, follow these simple steps:
- Use a tape measure to measure the length of the wall or the gap you need to cover. Be sure to measure from one endpoint to the other, accounting for any corners or obstacles along the way.
- Take note of the measurement and add a few inches as a margin for error and extra length. This additional length will allow you to make precise adjustments during installation and avoids having trim pieces that are too short.
- Repeat this measurement process for all the walls or gaps you need to install trim between.
- Once you have the measurements for all the trim pieces required, write them down or create a handy reference table to keep track of the lengths.
Cutting the trim pieces at 45-degree angles for smooth corners
When it comes to creating smooth corners for your floor trim, cutting the trim pieces at 45-degree angles is the key. This technique allows the two trim pieces to intersect seamlessly, creating a visually appealing and professional finish. Here’s how to cut the trim pieces at the correct angle:
- Using a miter saw or a coping saw, set the blade at a 45-degree angle.
- Position the first trim piece on the saw bed, ensuring that the longest side of the trim is aligned with the back of the saw.
- Hold the trim piece firmly and make a precise cut using a smooth motion, being careful not to rush or force the blade through.
- Repeat this cutting process for all the trim pieces that require a 45-degree angle.
By cutting the trim pieces at 45-degree angles, you’ll achieve elegant corners that seamlessly blend into your flooring, giving your project a polished and professional look.
Remember, accuracy is essential when measuring and cutting floor trim. Double-check your measurements and take the time to ensure each cut is precise. By following these steps, you’ll be well on your way to installing floor trim that enhances the beauty and durability of your flooring project.
Installing The First Piece Of Trim
When it comes to installing floor trim between rooms, one of the most important steps is installing the first piece of trim. This sets the foundation for the rest of the installation process and ensures a clean and professional finish. In this section, we will discuss the key steps involved in installing the first piece of trim, including choosing a starting point, applying wood glue, aligning the trim, and securing it with a nail gun. So, let’s get started with the installation process!
Choosing a starting point for the installation
Before you begin installing the first piece of trim, it’s crucial to choose a suitable starting point. Consider the layout and design of your rooms, as well as any existing flooring or obstacles that may affect the trim installation. Ideally, you want to start in a location that provides a seamless transition between rooms and ensures a balanced look.
Applying wood glue to the back of the trim
After you have determined your starting point, it’s time to apply wood glue to the back of the trim. Start by applying a thin, even layer of wood glue along the entire length of the trim. Be sure to use a quality wood glue that is specifically designed for trim installation. This will help to ensure a strong bond between the trim and the wall, preventing any movement or gaps over time.
Placing the trim against the wall and aligning it properly
Once the wood glue is applied, carefully place the trim against the wall, ensuring that it is aligned properly with the starting point. Take the time to make any necessary adjustments to achieve a seamless and flush fit. Use a level or a straight edge to ensure that the trim is perfectly vertical or horizontal, depending on the orientation of the installation.
Securing the trim with a nail gun
With the trim properly aligned, it’s time to secure it in place using a nail gun. Position the nail gun at a slight angle towards the wall, aiming for the thickest part of the trim. Carefully drive nails through the trim and into the wall, making sure to space them evenly along the length of the trim. Be mindful of any electrical wiring or plumbing that may be behind the wall to avoid any accidents.
Once the first piece of trim is securely attached, you can move on to installing the remaining trim pieces between the rooms. Repeat the above steps for each piece, ensuring a consistent and professional finish throughout your flooring project.

Installing The Remaining Trim Pieces
Once you have successfully installed the main floor trim pieces between rooms, it’s time to move on to installing the remaining trim pieces. This final step will bring the project to completion and give your rooms a polished and finished look.
Measuring and Cutting the Remaining Trim Pieces
To begin, measure the length needed for each remaining trim piece. Take accurate measurements and mark them on your trim material. Remember to add a small allowance for any corners or angles that need to be cut.
Next, use a miter saw or a miter box with a backsaw to cut the trim pieces to the appropriate length and angle. Make sure to follow your markings and use a steady hand for precise cuts. Take your time to ensure the cuts are clean and accurate.
Applying Wood Glue and Securing the Pieces with a Nail Gun
Once you have cut the trim pieces to the correct size, it’s time to apply wood glue to the backside of each piece. Squeeze a generous amount of glue along the length of the trim, ensuring it is evenly spread.
After applying the wood glue, carefully position the trim piece in place and press it firmly against the wall. Make sure it aligns correctly with the previously installed trim pieces. To secure the trim in place, use a nail gun and shoot nails at an angle through the trim and into the wall. Repeat this process for each remaining trim piece, ensuring they are all securely fastened.
Ensuring Proper Alignment and Tight Joints Between Pieces
To achieve a professional finish, it’s crucial to ensure proper alignment and tight joints between trim pieces. Use a carpenter’s square or a level to check that each trim piece is straight and aligned with adjacent pieces.
If there are any gaps between the trim pieces, use wood filler to fill them in. Apply the filler using a putty knife and smooth it out until it is flush with the surface of the trim. Let the wood filler dry completely before sanding and painting.
Finally, inspect the trim joints to ensure they are tight and gap-free. Adjust the trim pieces if necessary to achieve a seamless look.
With these steps, you can successfully install the remaining trim pieces between rooms. Taking the time to measure accurately, apply wood glue, secure with a nail gun, and ensure tight joints will result in a professional and visually appealing finish to your flooring project.
Filling Nail Holes And Gaps
When installing floor trim between rooms, it is essential to pay attention to the details to ensure a professional and seamless finish. One of the crucial steps in this process is filling nail holes and gaps to achieve a flawless look. In this section, we will discuss how to fill nail holes using wood filler, smooth the surface with a putty knife, and fill any gaps between trim pieces with caulk.
Using Wood Filler to Fill in the Nail Holes:
To start, you will need to gather some wood filler, a putty knife, and a damp cloth. Wood filler is an excellent option as it seamlessly blends in with the trim and can be stained or painted to match the surrounding surface. Follow these steps to fill in the nail holes:
- Clean the area around the nail holes using a damp cloth to remove any dust or debris.
- Scoop a small amount of wood filler onto the putty knife and apply it over the nail holes.
- Press the filler firmly into the holes, ensuring it is level with the trim surface.
- Once the filler is applied, allow it to dry completely according to the manufacturer’s instructions.
- After drying, lightly sand the filled areas to create a smooth and even surface.
- Finally, wipe away any remaining dust or debris with a clean cloth.
Smoothing the Surface with a Putty Knife:
Now that the nail holes are filled, the next step is to smooth the surface for an impeccable finish. This can be done using a putty knife. Follow these steps:
- Hold the putty knife at a slight angle and glide it over the filled nail holes, applying gentle pressure.
- Ensure that the putty knife scrapes off any excess filler, leaving the surface even and smooth.
- Continue this process until all the filled nail holes are level with the surrounding trim.
Filling any Gaps between Trim Pieces with Caulk:
In addition to filling nail holes, it is essential to address any gaps between the trim pieces. Caulk serves as an excellent solution for filling these gaps and ensuring a seamless appearance. Follow these steps to fill the gaps:
- Choose a high-quality caulk that matches the color of your trim.
- Load the caulk tube into a caulk gun and cut the tip at a 45-degree angle.
- Apply a thin bead of caulk along the gap between the trim pieces.
- Smooth the caulk using a caulk smoothing tool or your finger, ensuring it blends well with the surrounding surface.
- Wipe away any excess caulk using a damp cloth.
- Allow the caulk to dry completely, typically following the manufacturer’s instructions.
By following these steps and taking the time to fill nail holes with wood filler, smooth the surface with a putty knife, and fill gaps with caulk, you can achieve a professional and flawless finish when installing floor trim between rooms. Remember to pay attention to every detail, and the end result will be a seamless transition that enhances the overall look of your space.

Sanding And Finishing The Trim
Once you have installed the floor trim between rooms, it’s time to give it a final touch by sanding and finishing. This step is crucial to smoothen any rough edges or imperfections, as well as ensuring that the trim seamlessly blends with the surrounding walls. In this section, we will discuss how to sand the trim, apply a coat of primer or paint, and finish it off for a polished look.
Sanding the trim to smoothen any rough edges or imperfections
Before applying any paint or finishing coat, it’s essential to sand the trim to smoothen out any rough edges or imperfections. Sanding not only helps in achieving a flawless finish but also ensures that the trim sits flush with the walls. Here’s how you can sand the trim:
- Start by using a medium-grit sandpaper or sanding block to gently sand the surface of the trim.
- Make sure to sand in the direction of the wood grain for a more even result.
- Continue to sand until the trim feels smooth to the touch, and any rough spots or edges have been eliminated.
- Once you’re satisfied with the sanding, use a tack cloth or a damp cloth to remove any dust or debris from the surface of the trim.
Applying a coat of primer or paint to match the surrounding walls
After sanding the trim, the next step is to apply a coat of primer or paint to match the surrounding walls. This will help the trim blend seamlessly with the room and give it a finished look. Here’s how you can do it:
- If you prefer a natural wood finish, you can skip the primer and directly apply a clear coat or wood stain.
- If you want to paint the trim, start by applying a coat of primer. This will create a smooth surface for the paint to adhere to.
- Use a brush or a small roller to apply the primer evenly on the trim.
- Allow the primer to dry completely before moving on to the next step.
Adding a second coat for a more polished look
To achieve a more polished look, it’s recommended to add a second coat of paint or clear coat. This will not only enhance the appearance of the trim but also provide an extra layer of protection. Follow these steps to add a second coat:
- Once the first coat has dried completely, lightly sand the surface of the trim with a fine-grit sandpaper to create a smooth base for the second coat.
- Remove any dust or debris with a tack cloth or a damp cloth.
- Apply a second coat of paint or clear coat using the same technique as before.
- Allow the second coat to dry completely before moving furniture back into the room.
With the second coat applied and completely dried, your floor trim is now ready to showcase its polished and finished look. Remember to handle the trim with care during the entire sanding and finishing process to prevent any damage. By following these steps, you’ll be able to achieve a professional-looking installation that seamlessly connects the rooms.
Final Touches And Clean-Up
Inspecting the installed trim for any touch-ups or adjustments needed
Now that the floor trim installation is complete, it’s time to take a closer look and make sure everything is perfect. Inspecting the installed trim is an essential step in ensuring a flawless final result. Carefully walk around each room and examine the trim for any imperfections, gaps, or areas that may require touch-ups. Fixing any small issues now will prevent bigger headaches down the line.
Cleaning up any excess glue or paint
It’s common for a bit of glue or paint to make its way onto the surface of the trim during installation. Don’t worry; this is easily remedied with a few simple steps. First, protect the floor by laying down a drop cloth or some old newspapers to catch any debris. Next, grab a damp cloth and gently wipe away any excess glue or paint. Be careful not to scrub too hard, as this could damage the trim. Remember to be thorough and leave the trim looking clean and neat.
Removing any protective coverings from the floors
Throughout the installation process, it’s common practice to lay protective coverings over the floors to prevent damage. Once the trim is securely in place, it’s time to remove these coverings. Start at one end of the room and carefully peel back the covering, making sure not to damage the freshly installed trim in the process. Take your time to avoid any mishaps or scratches.
Admiring the finished floor trim between rooms
With the final touches and clean-up complete, it’s time to step back and admire your handiwork. Stand in the middle of each room and take in the beautiful transition that the floor trim provides. Appreciate the smooth lines and meticulous craftsmanship. It’s a satisfying feeling to see the rooms come together so seamlessly, thanks to the careful installation of the floor trim. Be proud of your accomplishment and enjoy the finished product!

Troubleshooting Common Installation Issues
Installing floor trim between rooms can be a great way to give your home a finished and polished look. However, it is not uncommon to encounter some challenges during the installation process. In this section, we will discuss some common issues that you may face and provide solutions to help you achieve a professional and flawless installation.
Common challenges during floor trim installation
When it comes to installing floor trim, you may encounter a few challenges along the way. These challenges can include gaps, uneven corners, or trim not fitting properly. Understanding how to identify and troubleshoot these issues can make the installation process much smoother.
Solutions for gaps, uneven corners, or trim not fitting properly
If you notice gaps between the wall and the trim or uneven corners, there are several solutions you can try. Here are a few techniques you can use to address these common issues:
- Use wood shims: If you encounter gaps between the wall and the trim, you can use wood shims to fill them. Simply place the shims in the gaps and secure the trim over them. This will help create a seamless and uniform look.
- Scribe the trim: In the case of uneven corners, scribing the trim can be a useful technique. Scribing involves tracing the shape of the wall onto the trim, allowing you to cut it to fit precisely. This will help you achieve a tight and seamless corner joint.
- Resize the trim: If the trim does not fit properly, you may need to resize it. Carefully measure and cut the trim to the correct length using a miter saw or a hand saw. This will ensure a snug fit and a clean finish.
Tips for ensuring a professional and flawless installation
To ensure a professional and flawless installation of floor trim, consider the following tips:
- Accurate measurements: Take accurate measurements of the walls and the trim to ensure a perfect fit. Remember to account for any corners, angles, or doorways.
- Proper cutting techniques: Use a miter saw or a hand saw to cut the trim at the correct angles. Take your time and make precise cuts to ensure a tight fit.
- Preparation is key: Prepare the walls by removing any old trim, sanding rough surfaces, and filling in any gaps or holes. This will create a smooth and even surface for the new trim to be installed.
- Secure the trim: Use finishing nails or a brad nailer to secure the trim to the wall. Make sure to place the nails at regular intervals and countersink them for a professional look.
- Paint or stain: After the trim is installed, consider painting or staining it to match the surrounding decor. This will give your installation a cohesive and polished appearance.
By following these tips and troubleshooting common installation issues, you can achieve a professional and flawless installation of floor trim between rooms. Take your time, be patient, and enjoy the process of transforming your space with this finishing touch.
Frequently Asked Questions For How To Install Floor Trim Between Rooms
What Is Floor Trim And Why Is It Important For Room Transitions?
Floor trim, or molding, is a decorative element that covers the gap between two types of flooring in adjoining rooms. It serves both a functional and aesthetic purpose, providing a smooth transition and ensuring a finished look.
Conclusion
Installing floor trim between rooms is a task that can enhance the overall aesthetics of your home. By following the steps mentioned in this blog post, you can successfully complete this project on your own. Remember to measure accurately, use the right tools, and take your time to ensure a professional finish.
With a little patience and attention to detail, you can achieve beautiful and seamless transitions between your rooms. Happy trimming!