How to Install Floor Heating under Tile?
Installing floor heating under tile is a straightforward process that involves preparing the subfloor, installing the heating elements, and laying the tiles on top. It’s a popular choice for adding warmth and comfort to tiled floors, especially in cold climates.
Choosing The Right Floor Heating System
Choosing the right floor heating system is crucial for ensuring optimal comfort and efficiency in your home. With a variety of options available, it’s important to consider certain factors before making a decision. In this section, we will discuss the considerations for floor heating under tile and the benefits of installing such a system.
Considerations for floor heating under tile
When considering floor heating for tiles, there are a few key factors to keep in mind:
- Type of heating system: There are two main types of floor heating systems – electric and hydronic. Electric systems are easier to install as they consist of heating cables or mats that are directly installed under the tile. Hydronic systems, on the other hand, use heated water to warm the floor and require a boiler or water heater.
- Installation method: Depending on your preference and budget, you can choose either a loose wire system or a mat system for electric floor heating. Loose wire systems offer more flexibility in terms of coverage, while mat systems provide a more uniform heat distribution.
- Thermostat control: Consider whether you want a programmable thermostat for precise temperature control. This allows you to set different heating schedules throughout the day, ensuring maximum energy efficiency.
- Insulation: Proper insulation is crucial for minimizing heat loss and maximizing the effectiveness of your floor heating system. Make sure to invest in high-quality insulation materials to reduce energy consumption and enhance overall performance.
- Support and warranty: Check for warranties and support offered by the manufacturer or supplier of the floor heating system. This ensures that you have assistance in case of any issues or need for repairs.
Benefits of installing floor heating
There are several benefits to installing floor heating under tile:
- Comfort: Floor heating provides a consistent and luxurious warmth throughout your living spaces. Say goodbye to cold floors and welcome cozy comfort in every room.
- Energy efficiency: With proper insulation and an efficient heating system, floor heating can be an energy-efficient solution for warming your home. It allows for zoned heating, meaning you can choose to heat only the areas you use, reducing unnecessary energy consumption.
- No visible radiators: Unlike traditional heating systems, floor heating is hidden beneath the tiles, eliminating the need for bulky radiators or vents. This allows for more freedom in interior design and maximizes floor space usage.
- Health benefits: Radiant floor heating minimizes heat circulation and air movement, reducing the likelihood of dust, allergens, and bacteria being circulated throughout your home. This can lead to improved indoor air quality and a healthier living environment.
- Increased property value: Installing floor heating can add value to your home, making it an attractive feature for potential buyers in the future. It is a desirable and luxurious addition that sets your home apart.
Considering these factors and benefits will help you choose the right floor heating system for your tile floors. Whether you prioritize comfort, energy efficiency, or a combination of both, floor heating can transform your home into a cozy retreat.
Preparing The Room For Installation
Installing Underfloor Heating System
Installing an underfloor heating system is a fantastic way to add comfort and luxury to your home. It not only keeps your floors warm during those chilly winter months but also ensures a consistent temperature throughout the room. If you’re planning to install floor heating under tile, you’re in for a treat. This guide will take you through the process, step by step, making it easier for you to bring this cozy addition to your home.
Marking the Layout of the Heating Cables or Mats
The first step in installing an underfloor heating system is to mark the layout of the heating cables or mats on your subfloor. This will ensure proper distribution of heat across the floor and prevent any cold spots. You can use a marker or chalk to create the layout, following the manufacturer’s instructions. Take care to avoid any obstacles or areas where the heating elements should not be placed, such as beneath permanent fixtures or cabinets.
Preparing the Subfloor for Installation
Preparing the subfloor is crucial to ensure a smooth and efficient installation of the underfloor heating system. Start by cleaning the subfloor thoroughly, removing any debris or dust. Next, check for any uneven spots or cracks and repair them if necessary. If you have a concrete slab subfloor, it’s recommended to apply a self-leveling compound to create a perfectly flat surface. For wooden subfloors, ensure they are dry and stable to avoid any issues with warping or movement.
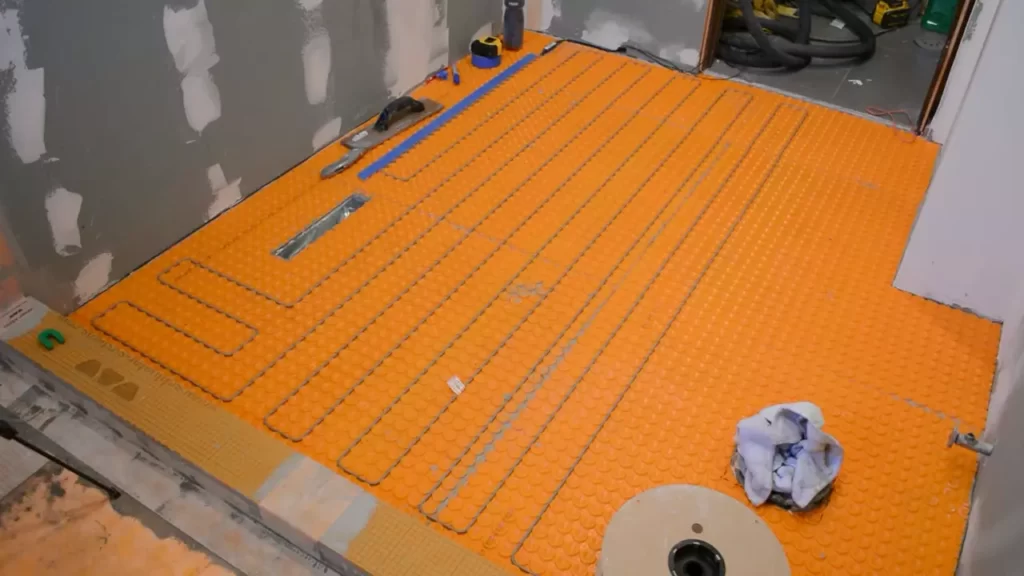
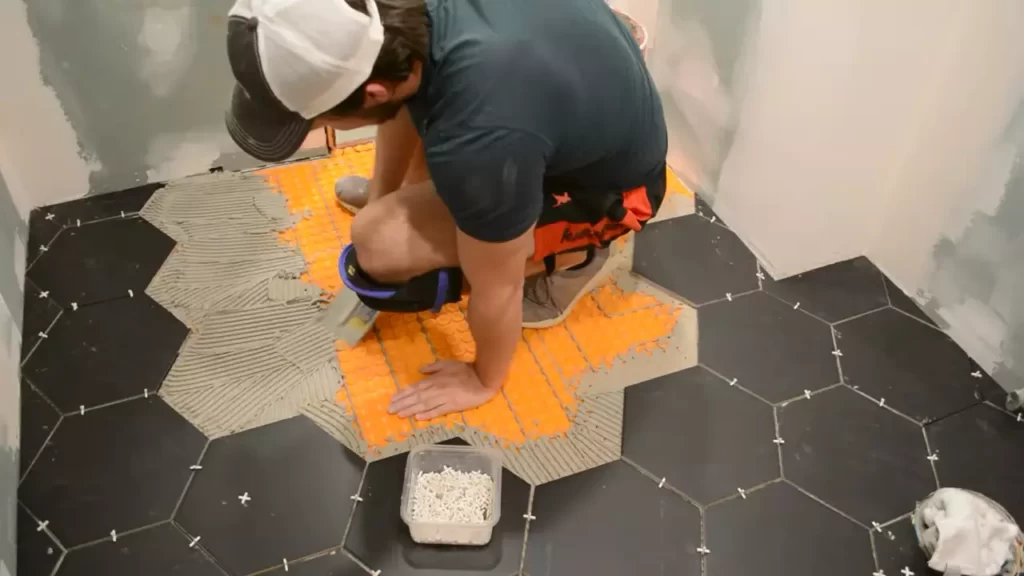
Laying and Securing the Heating Elements
Now it’s time to lay and secure the heating elements onto the subfloor. Whether you’re using heating cables or mats, follow the manufacturer’s instructions for proper placement. If using heating cables, loop them back and forth evenly across the floor, ensuring consistent spacing between each loop. For heating mats, simply roll them out and cut to fit the desired area. Once laid out, use adhesive or tape to secure the heating elements to the subfloor, ensuring they won’t shift during the tiling process.
Connecting the Cables to the Thermostat
The final step in installing your underfloor heating system is connecting the heating cables to the thermostat. Consult the manufacturer’s instructions for the specific wiring details. Typically, this involves connecting the cold leads of the heating cables to the thermostat and ensuring proper insulation of the connections.
Once connected, carefully cover the cables with a layer of thin-set mortar or leveling compound to protect them during the tiling process. Once the mortar is dry, you’re ready to proceed with the tile installation.
By following these steps, you can successfully install an underfloor heating system under your tiles. Enjoy the warmth and comfort of heated floors in your home, all while adding value and luxury to your living space.

Ensuring Proper Insulation And Protection
When it comes to installing floor heating under tile, ensuring proper insulation and protection is essential for the longevity and efficiency of the system. Proper insulation helps to prevent heat loss and evenly distribute warmth across the floor, while protection ensures the heating system is shielded from potential damage during the tiling process. In this section, we will cover the key steps you need to take to ensure proper insulation and protection when installing floor heating under tile.
Installing an insulation layer
Before laying down the heating system, it is crucial to install an insulation layer. This layer serves multiple purposes, contributing to both energy efficiency and comfort. It acts as a barrier, preventing heat from escaping downward and resulting in heat loss. Additionally, it helps to distribute the heat evenly across the floor, avoiding hot and cold spots.
One effective method of insulation is using a specialized insulation mat. These mats are specifically designed for floor heating systems and are easy to install. They are typically made of a highly conductive material that ensures efficient heat transfer.
To install the insulation layer, follow these steps:
- Begin by thoroughly cleaning the subfloor to ensure proper adhesion.
- Roll out the insulation mat, covering the entire area where the floor heating will be installed.
- Secure the mat in place using adhesive or tape, ensuring it is completely flat and free from creases.
- Trim any excess insulation mat using a utility knife.
Testing the heating system before tiling
Before proceeding with the tiling process, it is crucial to test the heating system to ensure it is functioning properly. This step is essential for identifying any potential issues or malfunctions before they become costly problems.
To test the heating system, follow these steps:
- Connect the heating system to a power source.
- Set the thermostat to a low temperature.
- Allow the system to run for a few hours, monitoring the temperature and ensuring consistent heat output.
- Check for any unusual sounds or odors, as they could indicate a problem with the system.
If you notice any issues during the testing phase, it is important to address them before proceeding with the tiling process. This includes troubleshooting, consulting the manufacturer’s instructions, or seeking professional assistance.
Securing the heating system with self-leveling underlayment
To provide an additional layer of protection and ensure the heating system stays in place, it is recommended to use self-leveling underlayment. This material helps to even out the floor surface and creates a smooth base for the tile installation.
Here’s how to secure the heating system with self-leveling underlayment:
- Mix the self-leveling underlayment according to the manufacturer’s instructions.
- Pour the mixture onto the floor, starting from one corner and working your way across the entire area.
- Use a trowel or a squeegee to spread the mixture evenly, ensuring it covers the heating system and fills any gaps or irregularities.
- Allow the underlayment to dry completely before proceeding with the tiling process.
By following these steps and ensuring proper insulation and protection, you can confidently proceed with the tiling process, knowing that your floor heating system is well-protected and ready to provide efficient and comfortable warmth.
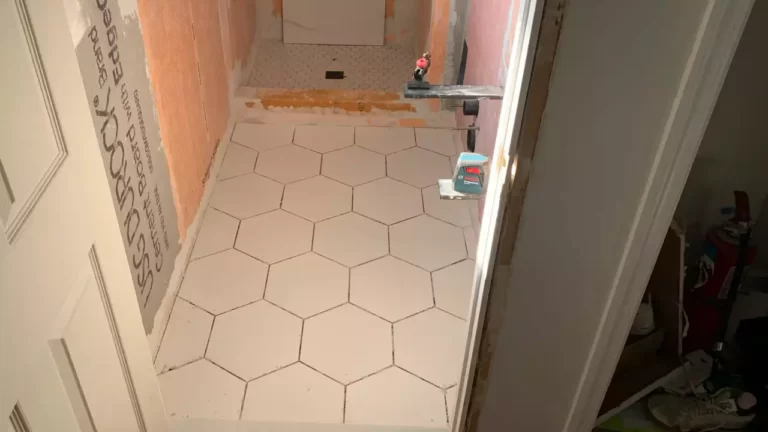
Tiling Over The Underfloor Heating
Installing floor heating under tile can enhance the comfort and warmth of your living space. Once you have successfully installed the underfloor heating, the next step is to tile over it. Tiling over the underfloor heating requires careful consideration and proper installation techniques to ensure a professional and long-lasting result.
In this section, we will guide you through the process of tiling over the underfloor heating, including choosing the right type of tile, applying the tile adhesive, and grouting the tiles.
Choosing the right type of tile
When tiling over the underfloor heating, it is essential to select a tile that can withstand the heat generated by the system. Certain types of tiles, such as ceramic and porcelain, are excellent options as they are heat-resistant and durable. Natural stone tiles, like granite and marble, are also suitable for use with underfloor heating, but it is important to check with the manufacturer to ensure they are compatible.
Applying the tile adhesive and setting the tiles
Before applying the tile adhesive, make sure to clean the surface of the underfloor heating system to remove any dust or debris. Next, prepare the tile adhesive according to the manufacturer’s instructions. Using a trowel, spread the adhesive over a small section of the floor, making sure to create an even layer. Press the tiles firmly into the adhesive, starting from one corner and working your way outward.
An important consideration when setting the tiles is to leave a small gap between each tile. These gaps, known as grout lines, allow for expansion and contraction of the tiles with changes in temperature. Use tile spacers to ensure consistent spacing between the tiles.
Grouting the tiles
Once the tile adhesive has dried and the tiles are firmly in place, it’s time to grout the tiles. Grout helps secure the tiles in position, provides a finished look, and prevents dirt and moisture from penetrating the gaps between the tiles.
To grout the tiles, mix the grout according to the manufacturer’s instructions. Using a grout float, apply the grout mixture diagonally across the tiles, ensuring that the gaps are completely filled. Remove any excess grout from the tile surface using a grout sponge or cloth.
Allow the grout to dry for the recommended time before wiping away any remaining haze. Finally, clean the tiles thoroughly to reveal the full beauty of your newly tiled floor.
By following these steps and taking the necessary precautions, you can successfully tile over the underfloor heating system, creating a beautiful and functional flooring solution for your home.

Testing And Fine-Tuning The Heating System
Once you have completed the installation of floor heating under tile, it is important to perform a final test and fine-tune the heating system to ensure optimal performance and comfort. This involves conducting a thorough check of the heating system, adjusting thermostat settings, and continuously monitoring the heating performance.
Performing a final test of the heating system
Before you start fine-tuning the heating system, it is crucial to perform a final test to ensure everything is functioning as expected. This test involves turning on the heating system and checking if all the heating elements are working properly.
You can start by activating the thermostat and gradually increasing the temperature. Walk over the tiles and feel for any cold spots or uneven warming. If you notice any issues, it is essential to identify and resolve them before proceeding further.
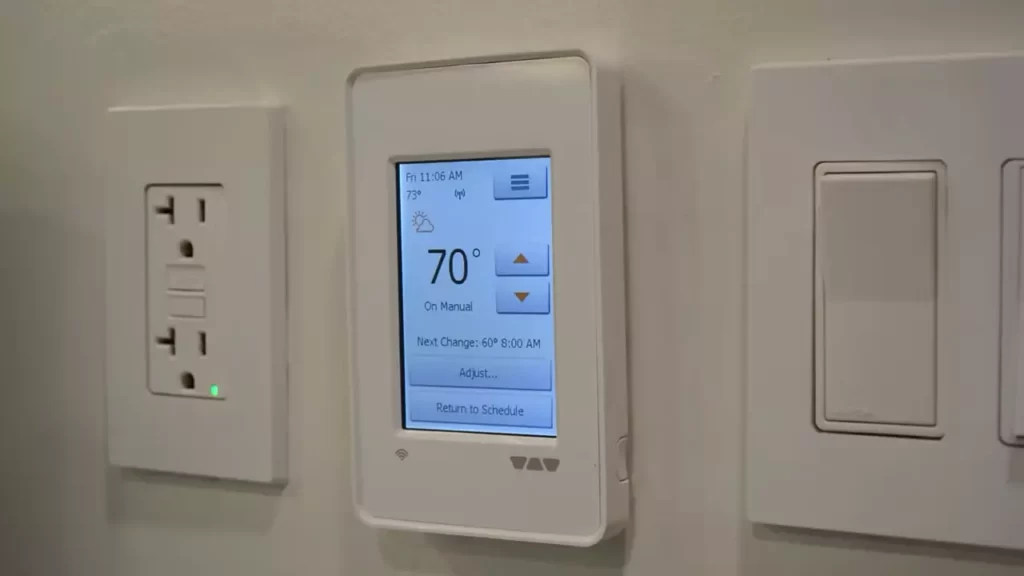
Adjusting the thermostat settings
Once the final test is completed successfully, it is time to adjust the thermostat settings according to your desired comfort level. Most thermostats come with various programming options to suit individual preferences and schedules.
Refer to the manufacturer’s instructions to set the desired temperature and programming schedule. Consider factors such as the room size, insulation, and personal preferences when determining the ideal thermostat settings. Take note that setting the temperature too high can not only lead to discomfort but also result in unnecessary energy consumption.
Monitoring the heating performance
After adjusting the thermostat settings, it is essential to continuously monitor the heating performance to ensure everything is working optimally. Keep an eye on the temperature and observe if the heating system maintains a consistent warmth throughout the tiled space.
Regularly check for any unusual signs such as unusual noises or fluctuations in temperature. If you notice any issues, consider contacting a professional to inspect and resolve the problem promptly. Additionally, keep track of your energy consumption to ensure the heating system is operating efficiently.
By performing a final test, adjusting the thermostat settings, and monitoring the heating performance, you can ensure that your floor heating system provides the desired comfort and efficiency. Take the time to fine-tune the system, and you’ll be able to enjoy the benefits of warm tiles throughout the year.
Maintenance And Troubleshooting Tips
Proper maintenance and regular troubleshooting are essential for ensuring the optimal performance of your floor heating system under tile. By following these tips, you can prevent potential issues and keep your heating system in top shape.
Regular maintenance of the heating system
Maintaining your floor heating system is key to its longevity and efficiency. Here are some regular maintenance steps to keep in mind:
- Check the thermostat regularly to ensure it is set at the desired temperature.
- Inspect the floor heating cables or mats for any signs of damage, such as frayed wires or exposed elements. If any issues are detected, contact a professional for repairs.
- Keep the floor surface clean by regularly vacuuming or sweeping away dust and debris.
- Avoid placing heavy furniture or objects on top of the heated floors, as this can cause damage to the heating elements.
- Test the system periodically to ensure it is working properly. Turn up the thermostat to verify that the floors are warming up as expected.
Common issues and troubleshooting solutions
Despite regular maintenance, occasional issues may still arise with your floor heating system. Here are some common problems and their respective troubleshooting solutions:
| Issue | Troubleshooting Solution |
|---|---|
| No heat | Check if the thermostat is set to the correct temperature and turned on. Ensure that the power supply to the system is uninterrupted. If the issue persists, consult a professional for further diagnosis. |
| Inconsistent heat distribution | Inspect the flooring surface for any obstructions, such as rugs or furniture, blocking the heat flow. Make sure the heating cables or mats are evenly distributed. If the problem persists, it may indicate an issue with the system’s installation or design. |
| Thermostat malfunction | Reset the thermostat by turning it off and on again. If the problem continues, check the wiring connections to ensure they are secure. Consider replacing the thermostat if necessary. |
| Excessive energy consumption | Check for any leaks or damage to the system that may be causing energy waste. Adjust the thermostat settings to a lower temperature if the floors are consistently too warm, as this can help save energy. |
Remember, if you encounter any issues with your floor heating system that you are unsure how to handle, it is always best to contact a professional for assistance. Regular maintenance and proactive troubleshooting will help ensure the longevity and efficiency of your floor heating system, allowing you to enjoy warm, comfortable tile floors throughout your home.
Frequently Asked Questions On How To Install Floor Heating Under Tile
How Much Does It Cost To Install Floor Heating Under Tile?
Installing floor heating under tile can cost anywhere from $5 to $20 per square foot, depending on factors such as the size of the room, type of system, and labor costs. It’s best to consult with a professional to get an accurate estimate for your specific project.
How Does Floor Heating Under Tile Work?
Floor heating systems under tile work by using electric coils or water-filled tubes to generate heat. These systems are installed beneath the tile and provide even, radiant heat that warms the floor and the room. They can be controlled through a thermostat for customized comfort.
Can I Install Floor Heating Under Existing Tile?
It is possible to install floor heating under existing tile, but it can be more challenging and may require additional work. The existing tile would need to be carefully removed, the floor prepared, and the heating system installed before replacing the tile.
It’s best to consult with a professional to determine the feasibility of retroactive installation.
Conclusion
Installing floor heating under tile can provide a comfortable and luxurious experience in your home. With the right tools and techniques, you can easily complete this project. By following the step-by-step guide mentioned above, you will have the knowledge and skills needed to install floor heating under tiles successfully.
So, why wait? Start transforming your floors today and enjoy the warmth and comfort in every step.