How to Install Drop Ceiling Tiles?
To install drop ceiling tiles, measure the ceiling grid, cut the tiles to fit, and place them in the grid. Align the tiles carefully and secure them using the appropriate clips or adhesive.
Drop ceiling tiles are a popular choice for homeowners and businesses looking to improve the aesthetic appeal of their spaces. These versatile tiles not only enhance the overall look but also provide sound insulation and accessibility to hidden electrical components.
If you’re considering installing drop ceiling tiles, this guide will walk you through the process step by step. From measuring the ceiling grid to cutting and securing the tiles, you’ll learn everything you need to know to complete the installation with ease and precision. So let’s dive in and get started on transforming your space with beautiful drop ceiling tiles.
Planning Your Drop Ceiling Tile Installation
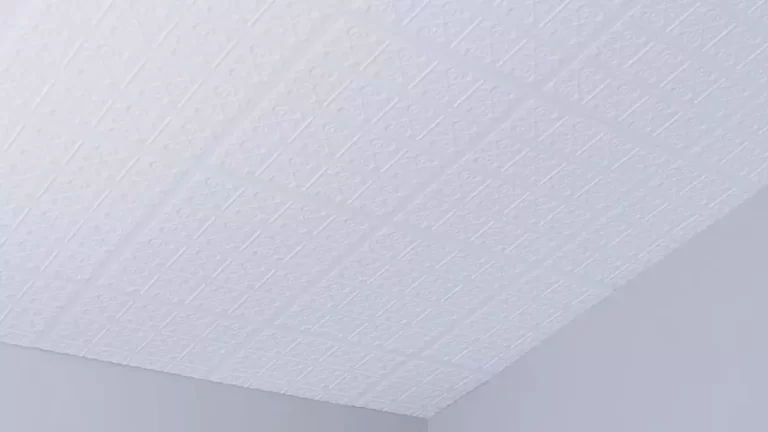
Choosing the Right Tiles
One of the first steps in planning your drop ceiling tile installation is selecting the right tiles for your space. With a wide variety of options available, it’s important to consider both the aesthetic appeal and functionality of the tiles you choose.
- Look for ceiling tiles that complement the overall design and style of your room. Whether you prefer a more traditional or modern look, there are tiles available to suit every taste.
- Consider the material of the tiles. Choose from options such as mineral fiber, PVC, or metal, each with its own advantages and disadvantages.
- Ensure that the tiles you select are suitable for your specific installation requirements, including the size and dimensions of your space.

Measuring your Ceiling
Accurate measurements are crucial for a successful drop ceiling tile installation. Before you begin, take the time to measure your ceiling to determine the number of tiles you’ll need.
- Start by measuring the length and width of your room. Multiply these measurements to find the total square footage.
- Next, determine the size of the ceiling tiles you plan to use. Divide the total square footage of your room by the area covered by one tile. This will give you the total number of tiles required.
- Account for any obstacles such as vents or lighting fixtures that may require special attention or additional tiles.
Gathering the Necessary Tools and Materials
Before beginning your drop ceiling tile installation, it’s essential to gather all the necessary tools and materials. Having everything at hand will help streamline the process and ensure a smooth installation.
| Tools | Materials |
|---|---|
|
|
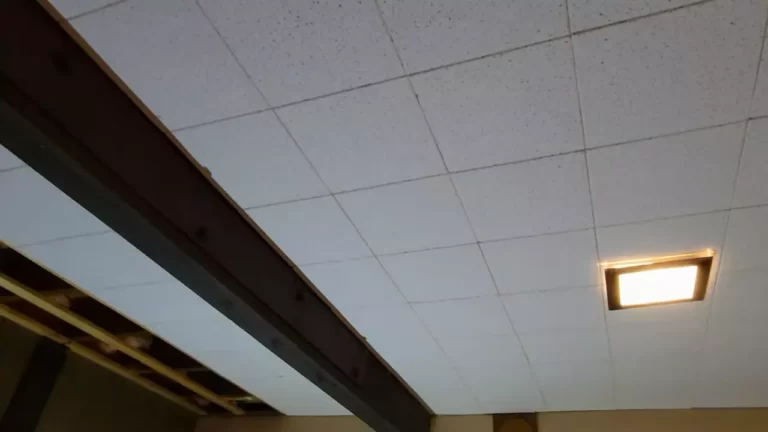
Installing A Suspended Ceiling Grid
When it comes to installing drop ceiling tiles, one crucial step is installing a suspended ceiling grid. This grid system not only provides the structural framework for the tiles but also ensures a professional and polished finish for your ceiling. In this section, we will walk you through the step-by-step process of installing the suspended ceiling grid, from determining the grid layout to securing the grid system.
Determining the Grid Layout
The first step in installing a suspended ceiling grid is determining the layout of the grid. This involves measuring the dimensions of your space and dividing it into equally spaced sections. The size and shape of your ceiling tiles will influence the layout, so be sure to choose a grid layout that best complements your tiles.
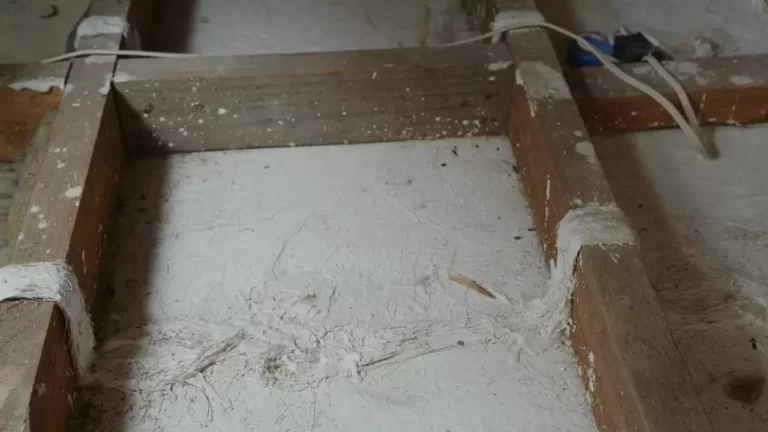
Attaching the Vertical Hangers
With the grid layout determined, it’s time to attach the vertical hangers. These hangers will provide the support for the main tees and cross tees. Start by locating the main joists or beams in your ceiling. Then, using ceiling anchors or screws, attach the vertical hangers to the joists, ensuring that they are leveled and evenly spaced.
Installing the Main Tees
Once the vertical hangers are securely in place, it’s time to install the main tees. These are the long, horizontal pieces that will run perpendicular to the joists. Start by inserting the main tee into the top slots of the vertical hangers, making sure they are level. Secure the main tees by attaching them to the hangers using screws or clips. Pay close attention to the alignment and spacing of the main tees, as this will determine the stability and appearance of the grid system.
Adding Cross Tees
With the main tees installed, it’s time to add the cross tees. These are the shorter pieces that will interlock with the main tees, forming a grid pattern. Begin by inserting the cross tees into the slots on the main tees, ensuring a snug fit. Make sure the cross tees are perpendicular to the main tees and evenly spaced. Trim any excess length if necessary.
Securing the Grid System
Once all the main and cross tees are in place, it’s important to secure the grid system to ensure its stability. Use additional screws or clips to reinforce the connections between the main tees and cross tees at every intersection. This will prevent any movement or sagging of the grid system over time. Take the time to double-check the alignment and spacing of the entire grid to ensure a professional and visually appealing result.

Placing The Ceiling Tiles
If you’re looking to upgrade the look of your space, installing drop ceiling tiles is a great option. Not only do they provide a clean and polished finish, but they also have the added benefit of improving acoustics and hiding unsightly wires and pipes. In this section, we will guide you through the process of placing the ceiling tiles, from cutting them to size to filling in the remaining space.
Cutting the Tiles to Size
Before you start placing the ceiling tiles, you’ll need to measure and cut them to fit your space properly. This step is crucial to ensure a seamless and professional-looking installation.
Here are the steps to cut the tiles to size:
- Measure the dimensions of the space where the tiles will be placed. Use a tape measure to accurately record the width and length.
- Transfer the measurements onto the tiles using a pencil or marker. Make sure to mark both the width and length.
- Using a utility knife, carefully cut along the marked lines. Apply firm pressure but be cautious not to apply too much force that could damage the tile.
- Repeat this process for each tile that needs to be cut.
Cutting the tiles accurately will help ensure a snug fit and a professional finish. Take your time and double-check your measurements before making any cuts.
Starting at a Corner
Once you have your tiles cut to size, it’s time to start placing them. Begin at one corner of the room, as this will allow you to work in a systematic manner.
Here’s how to start at a corner:
- Locate the corner of the room where you want to begin the installation.
- Apply adhesive or attach clips to the back of the first tile, following the manufacturer’s instructions.
- Align the tile with the corner of the room, making sure it is level and square.
- Press the tile firmly into place, ensuring it adheres securely.
- Continue installing the tiles row by row, working your way across the ceiling.
Starting at a corner will help you maintain a consistent and balanced installation. Check for levelness and symmetry as you progress to ensure a professional result.
Inserting the Tiles
As you place the ceiling tiles, you will need to insert them into the grid system. This step is relatively straightforward and doesn’t require any special tools.
Here’s how to insert the tiles:
- Hold the tile at a slight angle.
- Insert one edge of the tile into the corresponding slot in the grid system.
- Rotate the tile upward until it is flush with the rest of the ceiling.
- Ensure that the tile is securely seated in the grid system by lightly pressing on it.
Inserting the tiles correctly will ensure they stay in place and create a seamless appearance. Take care not to force the tile into the grid as it could damage both the tile and the grid system.
Filling in the Remaining Space
Once you have installed the majority of the ceiling tiles, you may find that there are some spaces left at the edges or corners of the room. Filling in these remaining spaces will complete the installation and give your ceiling a polished look.
Here are some tips for filling in the remaining space:
- Measure the remaining space precisely to determine the size of the tile needed.
- Cut the tile to fit using the same method mentioned earlier.
- Place the cut tile into the remaining space, ensuring it aligns properly with the surrounding tiles.
- Press the tile into place, making sure it is secure.
By following these steps, you will be able to seamlessly fill in the remaining space and complete your drop ceiling tile installation.
Installing drop ceiling tiles can transform your space, providing both aesthetic appeal and practical benefits. Now that you have learned how to place the ceiling tiles, you’re well on your way to achieving a professional-looking finish. Remember to measure accurately, start at a corner, insert the tiles correctly, and fill in the remaining space for a flawless result.

Adding Additional Features
As you install drop ceiling tiles in your home or office space, you have the opportunity to enhance the functionality and aesthetics of your ceiling by adding additional features. These features can bring in more light, improve ventilation, and ensure easy maintenance. In this post, we will walk you through how to install light fixtures, incorporate air or ventilation vents, and include access panels for easy maintenance.
Installing Light Fixtures
Light fixtures are an essential part of any ceiling, as they not only provide illumination but also add a touch of style and ambiance to the space. Here’s how you can install light fixtures in your drop ceiling:
- Choose the type of light fixture that suits your space and preferences. Consider factors such as the size, style, and lighting capacity.
- Locate the desired position for the light fixture on the ceiling grid. Ensure it aligns with the design and layout of your drop ceiling.
- Follow the manufacturer’s instructions to mount the light fixture securely onto the ceiling grid, making sure the electrical connections are properly set up.
- After installation, test the light fixture to ensure it is working correctly. Make any necessary adjustments to the height or angle for optimal lighting.
Incorporating Air or Ventilation Vents
To maintain proper air circulation and ventilation in your space, it’s important to incorporate air or ventilation vents into your drop ceiling. Here’s how you can do it:
- Assess the airflow needs of your space and determine the appropriate number and size of air or ventilation vents required.
- Identify the locations on the drop ceiling where the vents should be installed. Consider areas that require better airflow, such as kitchens or bathrooms.
- Using a measuring tape, mark the dimensions of each vent opening on the drop ceiling tiles.
- Carefully cut out the marked sections using a utility knife or a specialized ceiling tile cutter.
- Securely attach the air or ventilation vents into the openings you created, following the manufacturer’s instructions.
Including Access Panels for Easy Maintenance
Access panels provide a convenient way to access pipes, wires, or other components that may be hidden behind your drop ceiling. Here’s how you can include access panels:
- Determine the size and number of access panels needed based on the components you plan to access.
- Select the appropriate access panel style, such as hinged, removable, or sliding panels.
- Identify the ideal locations for the access panels on the drop ceiling grid, considering ease of access and overall aesthetics.
- Securely install the access panels according to the manufacturer’s instructions, making sure they are flush with the surrounding ceiling tiles.
- Finally, test the accessibility of the access panels to ensure they can be easily opened and closed for maintenance purposes.
By adding these additional features, you can improve the functionality and convenience of your drop ceiling installation. Whether it’s better lighting, enhanced ventilation, or easy access for maintenance, these features will enhance your overall ceiling experience.
Finishing Touches
When it comes to installing drop ceiling tiles, focusing on the finishing touches is crucial to achieving a professional and polished look. This final stage of the installation process involves a few key steps that will make all the difference in the appearance and overall aesthetic of your ceiling. In this section, we will explore how to add crown molding for a polished look, ensure proper alignment and leveling, conceal any gaps and imperfections, and finally, paint or decorate the ceiling tiles to complete the project.

Adding Crown Molding for a Polished Look
One way to elevate the appearance of your drop ceiling is by adding crown molding. Crown molding not only enhances the visual appeal but also provides a seamless transition between the ceiling and walls. To add crown molding, follow these steps:
- Measure the lengths of the walls where the crown molding will be installed.
- Cut the crown molding to the appropriate lengths based on your measurements. Ensure accurate angles for corners.
- Attach the crown molding using construction adhesive or finishing nails. Ensure it is securely fastened to the wall studs or ceiling grid.
- Fill any visible gaps or nail holes with wood filler and sand it smooth for a seamless finish.
Ensuring Proper Alignment and Leveling
Proper alignment and leveling are essential for achieving a professional-looking drop ceiling. Here’s how to ensure the tiles are aligned and level:
- Use a laser level or a long straightedge to establish a level reference line around the perimeter of the room.
- Begin installing the tiles along this reference line, ensuring they are aligned and level.
- Check the alignment and levelness of each tile as you progress, making adjustments as necessary.
- Ensure the main runners and cross tees are level using a spirit level or laser level.
Concealing Gaps and Imperfections
In some cases, there may be gaps or imperfections between the ceiling tiles that need to be concealed. Follow these steps to achieve a seamless appearance:
- Use acoustical sealant to fill any gaps between the ceiling tiles, ensuring a tight and secure fit.
- If needed, install filler strips or trim pieces along the edges to cover larger gaps.
- Sand down any rough edges or imperfections on the tiles to create a smooth surface.
- Apply a layer of primer or paint to the tiles to further conceal any imperfections and ensure a cohesive look.
Painting or Decorating the Ceiling Tiles
The final step in finishing your drop ceiling installation is to paint or decorate the ceiling tiles according to your desired aesthetic. Here are some tips:
- If you choose to paint the tiles, use a high-quality paint specifically designed for ceiling applications.
- Consider using a roller with a medium nap for smooth and even coverage.
- If you prefer a decorative finish, consider using wallpaper, fabric, or even decorative ceiling decals.
- Ensure proper ventilation during the painting or decorating process to allow for adequate drying time.
Completing these finishing touches will not only enhance the visual appeal of your drop ceiling but also contribute to a more cohesive and polished overall look. By adding crown molding, ensuring proper alignment and leveling, concealing any gaps or imperfections, and applying the appropriate finish, your drop ceiling will be transformed into a stunning focal point in any room.
Maintenance And Troubleshooting
Maintaining and troubleshooting your drop ceiling tiles regularly is essential to maintain their appearance and functionality. In this section, we will discuss the proper cleaning and maintenance techniques, replacing damaged tiles, fixing sagging or loose panels, and addressing noise issues.
Cleaning and Maintaining Drop Ceiling Tiles
To keep your drop ceiling tiles looking their best, regular cleaning is necessary. Follow these simple steps to clean and maintain your tiles:
- Dust the tiles gently with a soft-bristle brush or use a vacuum with a brush attachment to remove any loose debris.
- Mix a mild detergent with warm water in a bucket.
- Dampen a soft cloth or sponge in the cleaning solution and wring out the excess water.
- Gently wipe the surface of the tiles in a circular motion to remove any dirt or stains.
- Rinse the cloth or sponge and wipe the tiles again with clean water to remove any soapy residue.
- Allow the tiles to air dry completely before reattaching them to the grid.
By following these cleaning steps regularly, you can prevent the accumulation of dirt and stains on your drop ceiling tiles, keeping them looking fresh and free from unsightly marks.
Replacing Damaged Tiles
If you notice any damaged or broken tiles, it is crucial to replace them promptly. Here’s how you can efficiently replace damaged drop ceiling tiles:
- Identify the damaged tile by checking for cracks, chipped edges, or any noticeable damage.
- Remove the adjacent tiles by carefully sliding them out of the grid or by pushing them upward.
- Take out the damaged tile by gently twisting it and pulling it down from the grid.
- Slide the replacement tile into the grid, aligning it with the surrounding tiles.
- Reattach the adjacent tiles by sliding them back into the grid or pushing them downward.
By promptly replacing damaged tiles, you can maintain the aesthetic appeal of your drop ceiling while also ensuring the structural integrity of the entire installation.

Fixing Sagging or Lose Panels
Sagging or loose panels in your drop ceiling can compromise its appearance and stability. Here’s a simple method to fix sagging or loose panels:
- Identify the sagging or loose panel by checking for noticeable gaps or drooping appearance.
- Locate the corresponding cross tee that supports the panel.
- Insert a screwdriver or a similar tool into the slot of the cross tee.
- Gently lift the sagging or loose panel until it aligns with the surrounding panels and is level.
- Secure the panel in place by tightening the affected cross tee with the screwdriver.
By fixing sagging or loose panels promptly, you can maintain the uniformity and structural integrity of your drop ceiling.
Addressing Noise Issues
If you’re experiencing noise issues with your drop ceiling, there are a few steps you can take to address this problem:
- Inspect the ceiling for any loose or rattling panels.
- Tighten any loose screws or hooks that may be causing the noise.
- Apply acoustic insulation pads or foam tape to the back of the panels to reduce vibrations and noise.
- If noise persists, consider installing a suspended sound barrier to absorb sound waves and minimize noise transmission.
By addressing noise issues in your drop ceiling, you can create a quieter and more peaceful environment.
Frequently Asked Questions On How To Install Drop Ceiling Tiles
Is It Hard To Install A Drop Ceiling?
Installing a drop ceiling is not difficult. It can be done easily with a little guidance and basic tools. With the right materials and instructions, anyone can install a drop ceiling without professional help. Follow the steps carefully for a successful installation.
Achieve a professional look without the hassle.
What Is The Best Way To Cut Drop Ceiling Tiles?
The best way to cut drop ceiling tiles is to use a utility knife or a tile cutter. Make sure to measure and mark the tile, then carefully cut along the marked line. Use a utility knife to score the tile and snap it along the score line for a clean cut.
Remember to wear safety goggles and gloves for protection.
Can I Nail Drop Ceiling Tiles?
No, you should not nail drop ceiling tiles. It can damage the tiles and compromise the integrity of the ceiling. Instead, use the appropriate methods like clips or adhesive for installation.
What Is Under A Drop Tile Ceiling?
Under a drop tile ceiling, you will typically find a space filled with various materials like HVAC ductwork, electrical wiring, and plumbing pipes. It provides access to these systems and allows for easy maintenance and repairs.
Conclusion
Updating your space with a drop ceiling can be a simple and effective way to enhance the aesthetics and functionality of any room. With the step-by-step guide provided in this blog post, you now have the knowledge and confidence to successfully install drop ceiling tiles.
Remember to properly measure and prepare the space, select the right tiles for your needs, and follow the installation instructions closely. By following these guidelines, you’ll be well on your way to achieving a professional-looking drop ceiling that will transform your space.