How to Install Cup Hooks Without Drill?
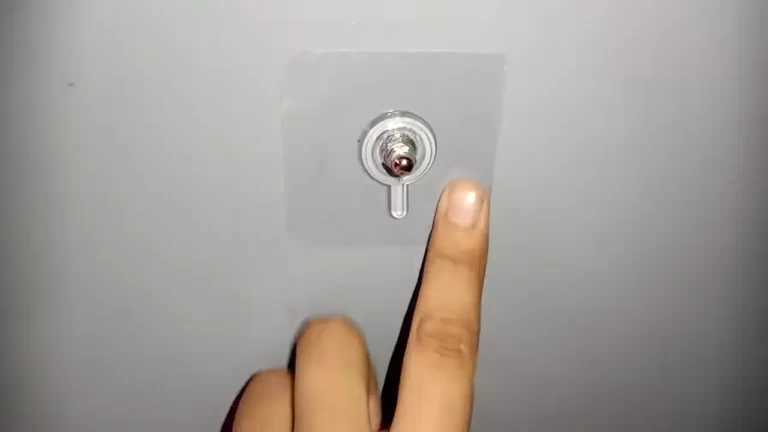
To install cup hooks without a drill, use adhesive hooks designed for heavy-duty applications. These hooks have strong adhesive backing that sticks to various surfaces, providing a secure hold for hanging cups and other items.
Simply clean the surface, peel off the backing from the adhesive hook, press it firmly onto the desired location, and allow it to cure for the recommended time. Once cured, the adhesive hook can safely support the weight of the cups.
This method eliminates the need for drilling holes and is ideal for renters or situations where drilling is not possible or desired.
Gather The Necessary Tools And Materials
To install cup hooks without a drill, you will need a few key tools and materials. Gathering everything you need before you start will help ensure a smooth and efficient installation process. Here is a list of the required tools and materials:
Identify the Required Tools and Materials
Before you begin, it is important to have the right tools and materials at hand. Here are the essential items you will need for installing cup hooks without a drill:
- Cup hooks: These are the main components of your installation. Ensure you have cup hooks that are suitable for your desired use and are the appropriate size for the task at hand.
- Measuring tape: Accurate measurements are crucial for proper cup hook placement. Use a measuring tape to determine the exact distances between hooks and any other relevant measurements.
- Pencil or marker: Marking the areas where you will install the cup hooks will help guide your installation process and ensure accurate placement.
- Screwdriver: While you won’t be using a drill for this installation method, a screwdriver can come in handy for twisting and securing the cup hooks firmly in place.
- Level: To ensure your cup hooks are straight and aligned, use a level. This will guarantee a professional-looking installation.
- Hammer: If you’re working with wooden surfaces, a hammer can be useful for creating a pilot hole before twisting the cup hook in place.
- Optional adhesive: If you want to provide additional support for your cup hooks, you can consider using adhesive designed for heavy-duty applications. Make sure it is suitable for the type of surface you are working with.
Explore Alternative Options for Cup Hook Installation
In addition to the traditional installation method using a drill, there are alternative options available for installing cup hooks. These methods can be particularly helpful if you don’t have access to a drill or if you are working with delicate or unconventional materials. Here are a couple of alternatives worth considering:
- Adhesive hooks: These hooks are designed to stick to various surfaces without the need for drilling or damaging the material. They can be a convenient choice for renters or individuals looking for a temporary storage solution.
- Tension rods: If you’re looking to hang cups or mugs in a cabinet or pantry, using tension rods can be an effective solution. Simply adjust the rod to fit the desired space and hang your cups on its extended arms.
- Suction cup hooks: These hooks are commonly used for temporary installations on smooth surfaces such as glass or tile. They create a vacuum seal and can hold lightweight items such as cups and utensils.
Remember, each installation method has its advantages and limitations. Choose the one that best suits your needs and the specific requirements of your cup hook installation project. By gathering the necessary tools and materials and exploring alternative options, you are now ready to embark on your cup hook installation journey.
Preparing The Surface
Before installing cup hooks without a drill, it’s important to properly prepare the surface to ensure a secure and long-lasting hold. This involves assessing the surface for cup hook installation and cleaning it to ensure proper adhesion. Follow these steps to get your surface ready for cup hook installation:
Assess the surface for cup hook installation
Assessing the surface is the first step in preparing it for cup hook installation. Here’s how you can do it:
- Check the material: Determine if your surface is made of wood, drywall, or any other material. This will help you determine the type of cup hooks that are suitable for your surface.
- Choose the right location: Decide where you want to install the cup hooks and make sure the area is clear of any obstructions. Look for a sturdy spot that can support the weight of the items you plan to hang.
- Consider the weight: Take into account the weight capacity of the cup hooks and ensure that the surface can handle the load. Heavier items may require additional support or reinforcement.
Clean the surface to ensure proper adhesion
Cleaning the surface is crucial to ensure that the cup hooks adhere properly. Follow these steps to clean the surface effectively:
- Remove any dirt or debris: Use a clean cloth or brush to remove any dirt, dust, or debris from the surface. This will create a clean and smooth area for the cup hooks to adhere to.
- Wipe with a mild detergent: Dampen a cloth with a mild detergent solution and gently wipe the surface. This will remove any grease or oil that could hinder the adhesive.
- Dry the surface: Allow the surface to air dry completely before proceeding. Avoid using any heat or drying methods, as they may affect the adhesive strength.
By properly assessing the surface and cleaning it thoroughly, you’ll set the stage for a successful cup hook installation without a drill. Now that your surface is ready, you can move on to the next step of installing the cup hooks.
Install Using Adhesive Hooks
When it comes to installing cup hooks without a drill, the adhesive hook method is a popular choice. This method allows you to easily hang your cup hooks without the need for any power tools or drilling. In this guide, we will walk you through the step-by-step process of installing cup hooks using adhesive hooks.
Choose suitable adhesive hooks for cup hook installation
The first step in installing cup hooks using adhesive hooks is to choose the right adhesive hooks for the job. Not all adhesive hooks are created equal, and it’s important to select hooks that are strong enough to hold the weight of your cups. Look for adhesive hooks that are specifically designed for heavy-duty applications and have a high weight capacity. Additionally, consider the surface you will be applying the hooks to. If you’re working with a smooth and non-porous surface, such as glass or tile, choose adhesive hooks that are designed for these types of surfaces.
Determine the placement of the adhesive hooks
Before applying the adhesive hooks, take some time to determine the placement of the hooks. Consider the layout of your cups and the overall aesthetic you’re aiming for. It’s important to space the hooks evenly and in a way that allows your cups to hang without touching each other. Use a measuring tape or ruler to ensure accurate spacing between the hooks. Additionally, consider the height at which you want the cups to hang and mark the desired placement with a pencil or tape.
Apply the adhesive hooks to the surface
Once you have determined the placement of the adhesive hooks, it’s time to apply them to the surface. Start by cleaning the surface with a mild cleanser to remove any dust or debris that might interfere with the adhesion. Dry the surface thoroughly before proceeding. Peel off the backing of the adhesive hooks and firmly press them onto the marked spots. Apply steady pressure for a few seconds to ensure a strong bond. Depending on the adhesive hooks you’re using, you may need to wait a certain amount of time before hanging anything on them. Refer to the manufacturer’s instructions for the recommended wait time.
Test the strength and stability of the adhesive hooks
Before hanging your cups on the adhesive hooks, it’s important to test their strength and stability. Gently tug on each hook to make sure it is securely attached to the surface. If any of the hooks feel loose or unstable, reapply them using a fresh adhesive strip. Additionally, hang a lightweight object on each hook and observe if it stays in place without any signs of slipping or falling. This will give you a good indication of whether the hooks can support the weight of your cups. If the hooks pass the test, you’re ready to hang your cups and enjoy your newly installed cup hooks!
Install Using Tension Rods
When it comes to hanging cup hooks without a drill, one effective method is by using tension rods. These versatile rods can be easily adjusted and installed on various surfaces without causing any damage. Here’s a step-by-step guide on how to install cup hooks using tension rods.
Select appropriate tension rods for cup hook installation
Before you begin the installation process, it’s important to choose the right tension rods. Ensure that the rods are strong and durable enough to hold the weight of your cups. Consider the length and thickness of the rods as well, making sure they fit perfectly in the desired location while providing stability.
Measure and determine the placement of the tension rods
In order to properly install the tension rods, you’ll first need to measure and determine the ideal placement. Use a tape measure to accurately measure the width or height of the surface where you intend to hang your cups. Take note of the measurements to ensure the tension rods will fit securely.
Install the tension rods on the surface
Once you have determined the placement, it’s time to install the tension rods. Begin by adjusting the rods to the desired length, making them slightly shorter than the measured width or height. Insert one end of the rod into the designated area and apply light pressure to create tension. Slowly extend the rod until it fits snugly in place.
Test the stability and adjust if necessary
After installing the tension rods, it’s crucial to test the stability by gently pulling on them. Ensure that the rods are secure and can adequately support the weight of the cups. If you notice any instability or movement, adjust the rods accordingly by either tightening or lengthening them until they provide a stable hold.
Install Using Removable Hooks
Choose the right type of removable hooks for cup hook installation
When it comes to installing cup hooks without a drill, using removable hooks is a convenient and practical option. There are various types of removable hooks available in the market, each with its own weight capacity and adhesive strength. To ensure a successful cup hook installation, it’s important to choose the right type of removable hooks. Here are a few options to consider:
1. Adhesive hooks: Adhesive hooks are known for their strong adhesive backing, making them ideal for hanging lightweight items like cups. Look for adhesive hooks specifically designed for smooth surfaces such as glass or tile.
2. Command hooks: Command hooks are another popular choice for removable hook installation. They come in various sizes and weight capacities, making it easier to find the perfect fit for your cup hooks. Command hooks offer a strong hold and are easy to remove without damaging the surface.
3. Suction cup hooks: If you’re looking for a removable hook option that doesn’t require adhesive, suction cup hooks are a great choice. These hooks use suction to stick to smooth surfaces and can be easily repositioned or removed without leaving residue.
Identify the ideal placement for the removable hooks
To ensure proper installation and maximum stability, it’s crucial to identify the ideal placement for the removable hooks. Here are a few considerations to keep in mind:
1. Height: Determine the desired height for your cup hooks by considering the size and shape of the cups you plan to hang. Aim for a height that is convenient and easily accessible.
2. Spacing: Consider the spacing between each cup hook to ensure that there is enough room for the cups to hang without touching or overlapping. It’s recommended to measure and mark the desired spacing before attaching the hooks.
3. Surface: Ensure that the surface where you plan to install the removable hooks is clean and dry. Avoid surfaces that are uneven or have textured finishes, as they may compromise the adhesive strength or suction of the hooks.
Attach the hooks securely to the surface
Once you have identified the ideal placement for the removable hooks, it’s time to attach them securely to the surface. Follow these steps:
1. Clean the surface: Before attaching the hooks, clean the surface with a mild detergent or rubbing alcohol to remove any dirt, grease, or residue. This will ensure optimal adhesive strength or suction.
2. Remove adhesive backing: If using adhesive or command hooks, remove the adhesive backing to expose the sticky surface. Hold the hook firmly and press it against the surface, ensuring full contact for maximum hold.
3. Apply pressure: Apply firm pressure to the hook for a few seconds to ensure proper attachment. This will help activate the adhesive or create a strong suction seal.
4. Wait for curing time: Some hooks may require a curing time before they can bear weight. Refer to the manufacturer’s instructions for specific guidelines and wait for the recommended period before hanging any cups on the hooks.
Validate the strength and adjust as needed
After attaching the hooks, it’s important to validate their strength and adjust as needed. Here’s how:
1. Test the hooks: Gently tug on the hooks to ensure that they are securely attached to the surface. If any hooks feel loose or unstable, reapply pressure or consider using a stronger type of removable hook.
2. Adjust spacing: If you find that the spacing between the hooks is not ideal for your cups, carefully remove the hooks and adjust their placement accordingly. Make sure to clean the surface and reattach the hooks securely.
3. Monitor over time: Keep an eye on the cup hooks over time to ensure that they continue to hold the weight of your cups. If you notice any signs of weakening or loosening, it’s important to readjust or replace the hooks to maintain a secure installation.
By following these steps and choosing the right type of removable hooks, you can easily install cup hooks without a drill. Not only will this allow you to hang your cups conveniently, but it also helps to avoid any damage to your walls or surfaces.

Alternative Methods For Cup Hook Installation
When it comes to installing cup hooks without drilling, there are a few creative solutions you can explore. Whether you’re renting a space, prefer not to damage your walls, or simply don’t have a drill on hand, these alternative methods can provide a convenient and hassle-free option. In this article, we will discuss two effective alternatives that you can consider.
Explore creative solutions using alternative materials
If you want to avoid drilling holes altogether, you can get creative with alternative materials. One innovative option is to repurpose small adhesive hooks or clips that are designed for hanging lightweight items. These hooks typically feature a sticky backing that adheres to surfaces such as tile, glass, or metal. Simply clean the area where you want to install the cup hook, peel off the backing from the adhesive hook, and firmly press it against the surface. Make sure to choose hooks that can handle the weight of the cup or mug you intend to hang. These adhesive hooks often come in various sizes and designs, allowing you to choose an option that suits your aesthetic preferences.
Another alternative material you can explore is magnetic hooks. These hooks utilize powerful magnets to adhere to metal surfaces, eliminating the need for drilling. Magnetic hooks are available in different sizes and styles, providing versatility for various cup sizes and designs. To install a magnetic hook, ensure that the surface you’re working with is magnetic-friendly, such as a refrigerator or a metal backsplash. Simply place the magnetic hook against the surface, and it will attach securely, ready to hold your cups or mugs.
Consider using adhesive strips or hooks that don’t require drilling
If you prefer a more temporary solution, adhesive strips can be an excellent choice. These strips are specifically designed to create a strong bond between the wall and the hook without causing any damage. Adhesive strips typically come in sets and consist of two parts: one part sticks to the wall, while the other adheres to the back of the cup hook. Follow the instructions provided by the manufacturer to ensure proper application. Adhesive hooks are available in various weight capacities, so be sure to choose one that can support the weight of your cups.
In addition to adhesive strips, there are also innovative hooks available in the market that don’t require drilling. These hooks use advanced suction technology to maintain a strong grip on smooth surfaces such as glass or tile. To install these hooks, press the suction cup firmly against the desired surface and tighten the hook mechanism until it locks in place. These hooks often come with adjustable angles or multiple hooks, making them perfect for hanging multiple cups in one area.
Evaluate the pros and cons of each alternative method
Like any installation method, alternative options have their pros and cons. Before deciding which method to use, it is essential to evaluate each option carefully. Here is a table summarizing the advantages and disadvantages of each alternative:
| Method | Pros | Cons |
|---|---|---|
| Alternative Materials – Adhesive Hooks and Magnetic Hooks |
|
|
| Adhesive Strips and Hooks that Don’t Require Drilling |
|
|
By considering these pros and cons, you can choose the alternative cup hook installation method that best suits your needs and preferences.
Tips And Tricks For Successful Cup Hook Installation
Installing cup hooks without a drill can be a convenient option for those who may not have access to power tools or want to minimize damage to delicate surfaces. With a few simple tips and tricks, you can achieve a secure and reliable cup hook installation.
1. Ensure proper weight distribution
Before installing your cup hooks, it’s important to consider the weight and load-bearing capacity of the surface you’ll be mounting them on. Cup hooks are designed to hold lightweight items such as small plants, mugs, or kitchen utensils. If you plan on hanging heavier objects, it’s recommended to use a different type of mounting hardware.
2. Use a level to maintain alignment
Proper alignment is crucial for cup hook installation to ensure that your items hang straight and look aesthetically pleasing. To achieve this, use a leveler to ensure that your cup hooks are properly aligned. This will prevent any tilting or swaying of the items you hang, giving a clean and professional appearance.
3. Take precautions when installing on delicate surfaces
Delicate surfaces such as plaster walls, tile, or glass require extra care during installation to avoid causing damage. One way to protect these surfaces is by pre-drilling a small pilot hole before inserting the cup hook. This will create a guide for the hook, reducing the chances of cracking or chipping.
Another precaution to consider is using adhesive hooks instead of cup hooks. Adhesive hooks are a great alternative for delicate surfaces as they provide a secure hold without the need for drilling. However, always make sure to check the weight limitations of the adhesive hooks and choose a suitable option for your hanging needs.
When installing cup hooks, always take a gentle and steady approach. Applying too much force or twisting the hooks excessively can lead to damage. Remember to use a screwdriver or pliers for better grip and control during installation.
By following these tips and tricks, you can confidently install cup hooks without a drill, ensuring a successful and secure hanging solution for your lightweight items. Whether you’re organizing your kitchen, sprucing up your bathroom, or adding a touch of greenery to your home, cup hooks can be an effortless way to create functional and stylish storage. Happy hooking!
Maintenance And Removal Of Cup Hooks
Keeping your cup hooks clean and well-maintained is essential to ensure their longevity and functionality. Additionally, safely removing cup hooks without damaging the surface they are attached to is crucial, especially if you decide to rearrange or replace them. In this article, we will explore the best practices for cleaning, maintaining, and removing cup hooks without the need for a drill.
Clean and maintain the cup hooks regularly
Regular cleaning and maintenance of cup hooks not only keep them looking fresh and presentable but also prevent dust and debris from building up, which could hinder their performance over time. Here are some tips to help you keep your cup hooks in top shape:
- Dust the hooks: Use a soft cloth or a feather duster to regularly remove dust and dirt particles from the surface of the cup hooks. This simple step will help maintain their appearance and prevent any accumulation that could affect smooth operation.
- Wash with soapy water: For cup hooks that have grease or stubborn stains on them, consider washing them with a mild soapy water solution. Gently scrub the hooks with a sponge or a soft brush, then rinse them thoroughly. Ensure that the hooks are completely dry before reusing them.
- Inspect for damage: During the cleaning process, take a moment to inspect the cup hooks for any signs of damage such as bends, cracks, or rust. If you notice any issues, it is best to replace the hooks to avoid any accidents or compromised strength.
Safely remove cup hooks without damaging the surface
When it comes to removing cup hooks without a drill, it is important to follow the right technique to ensure a smooth and damage-free process. Here’s how you can safely remove cup hooks:
- Locate the hook: Before removal, locate the position of the cup hook. This will help you plan the removal process and prevent any accidental damage.
- Protect the surface: To avoid causing any scratches or dents on the surface, place a cloth or a piece of cardboard between the hook and the wall. This protective barrier will cushion the impact and minimize any potential damage.
- Apply pressure: Using a pair of pliers or gripping tools, firmly hold the hook’s base while applying gentle pressure in a counterclockwise direction. This should loosen the hook’s grip and facilitate its removal from the surface.
- Finishing touches: Once the hook is removed, inspect the wall or surface for any marks or residue left behind. If there are any, gently wipe them away with a damp cloth.
By adhering to these guidelines, you can maintain your cup hooks in excellent condition and safely remove them when needed, without causing any harm to the surface they are attached to. Regular cleaning and vigilant maintenance practices will extend the lifespan of your cup hooks, ensuring they continue to serve their purpose effectively.
Frequently Asked Questions For How To Install Cup Hooks Without Drill
Can I Install Cup Hooks Without A Drill?
Yes, you can install cup hooks without a drill by using adhesive hooks or magnetic hooks. Adhesive hooks are easy to install and can hold lightweight cups, while magnetic hooks can be attached to any metal surface.
How Do I Install Cup Hooks Without Damaging The Wall?
To install cup hooks without damaging the wall, use adhesive hooks or removable hooks. Adhesive hooks can be easily attached to the wall and removed without leaving any marks. Removable hooks can be installed and removed without causing any damage to the wall surface.
What Is The Weight Limit For Cup Hooks Without Drilling?
The weight limit for cup hooks without drilling depends on the type of hook used. Adhesive hooks typically have a weight limit of around 2 to 4 pounds, while magnetic hooks can hold up to 5 pounds. It’s important to check the weight limit of the specific hooks you are using to ensure they can support your cups securely.
Conclusion
To wrap it up, installing cup hooks without a drill is a handy trick that can save you time and effort. By using adhesive hooks or alternative techniques like tension rods or magnetic hooks, you can easily hang cups and other small items without the need for power tools.
Remember to choose the right method for your surface and follow the instructions carefully to ensure a secure hold. With these tips, you can organize your kitchen or workspace with ease!

