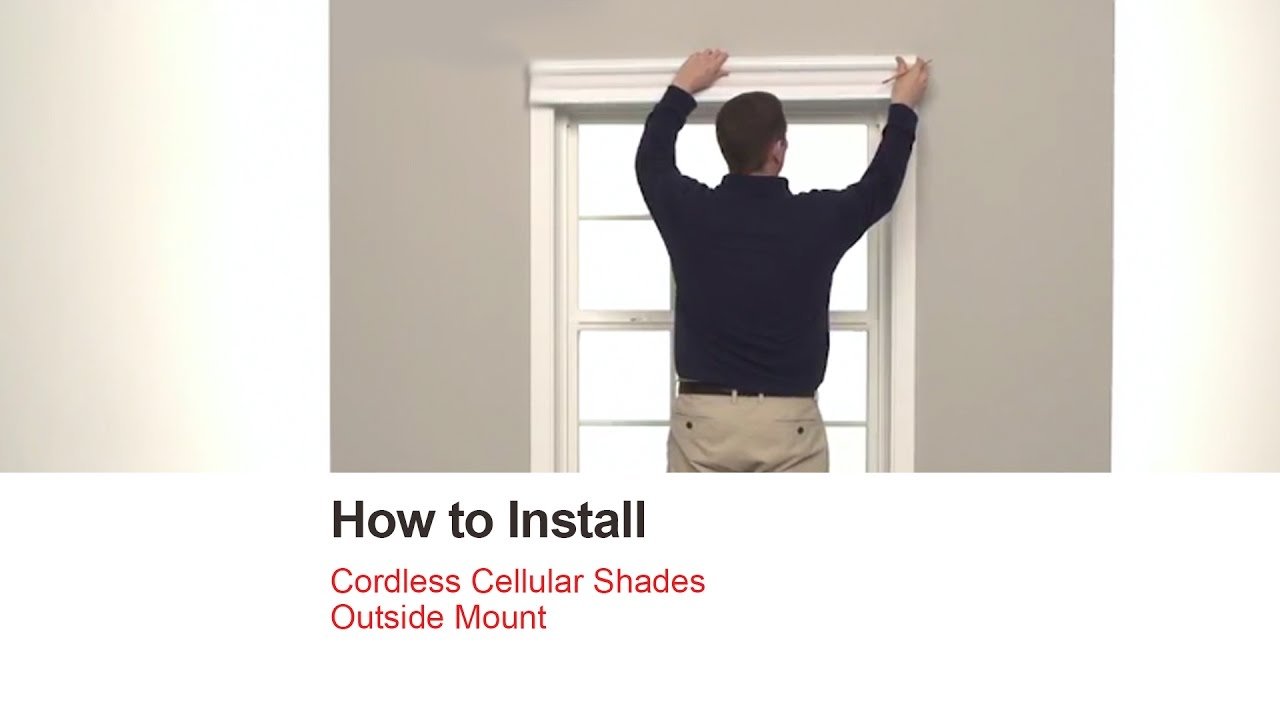
How to Install Cordless Cellular Shades – Outside Mount
To install cordless cellular shades in an outside mount, first, measure the desired width and height for the shades. Next, attach the mounting brackets to the outside of the window frame using screws or adhesive.
Finally, insert the shade into the brackets and secure it in place.
Understanding Cordless Cellular Shades
Understanding Cordless Cellular Shades Cordless cellular shades are an excellent choice for those seeking both style and functionality in their window treatments. These shades are designed with a unique honeycomb structure that not only enhances the appearance of any room but also provides insulation and light control. In this section, we will explore what cordless cellular shades are, the benefits of using them, and why outside mount installation is often the preferred choice.What are Cordless Cellular Shades?
Cordless cellular shades, also known as honeycomb shades, are window coverings that consist of pleated fabrics designed in a hexagonal or honeycomb pattern. This unique structure traps air within the cells, creating a layer of insulation that helps regulate the temperature inside your home, keeping it warm in the winter and cool in the summer. These shades are highly versatile and come in various fabrics, colors, and opacities, allowing you to customize them to suit your style and light control preferences.Benefits of Cordless Cellular Shades
Cordless cellular shades offer a plethora of benefits that make them a popular choice among homeowners. Here are some key advantages of choosing these shades for your windows: 1. Improved energy efficiency: The honeycomb structure of cellular shades traps air, providing a layer of insulation that reduces heat transfer, ultimately leading to energy savings on your utility bills. 2. Enhanced privacy: Cellular shades are available in different opacities, ranging from sheer to blackout, allowing you to control the amount of light and privacy you desire in your space. 3. Sound absorption: The cellular design of these shades can effectively absorb sound, making them an ideal choice for homes located in noisy environments or near busy streets. 4. UV protection: Cordless cellular shades block harmful UV rays, protecting your furniture, flooring, and artwork from fading and sun damage. 5. Clean and sleek appearance: The cordless design of these shades eliminates the need for unsightly cords, resulting in a streamlined and modern look. This also makes them safer for homes with children and pets.Why Choose Outside Mount Installation?
When installing cordless cellular shades, you have the option of either inside mount or outside mount. Outside mount installation involves mounting the shades on the wall or window frame surrounding the window, while inside mount installation fits the shades within the window frame itself. Here are a few reasons why outside mount installation may be preferred: 1. Greater light control: Outside mount installation allows the shades to fully cover the window frame, minimizing light gaps and providing better light control compared to inside mount installation. 2. Optimal privacy: With outside mount installation, the shades can be positioned to cover the entire window, ensuring maximum privacy and preventing any unwanted peeks from outside. 3. Enhanced visual appeal: Installing cellular shades with an outside mount creates the illusion of larger windows, adding visual depth and making your windows appear larger. 4. Window frame coverage: Outside mount installation helps hide any imperfections or inconsistencies in the window frame, giving your windows a polished and finished look. In conclusion, cordless cellular shades are a stylish and practical choice for your windows. They offer numerous benefits including improved energy efficiency, enhanced privacy, sound absorption, UV protection, and a clean appearance. When it comes to installation, outside mount can provide better light control, optimal privacy, enhanced visual appeal, and coverage for window frame imperfections. Consider cordless cellular shades with outside mount installation to transform your windows into a stunning focal point while enjoying the functional advantages they bring to your space.Preparing For The Installation
Before diving into the installation process of cordless cellular shades, it’s crucial to ensure that you are well-prepared. This involves measuring your windows accurately, gathering the necessary tools and materials, and preparing your workspace. Taking these preliminary steps will ensure a smooth and successful installation.
Measuring the Windows
The first step in preparing for the installation of cordless cellular shades is to correctly measure your windows. This will help you determine the size and quantity of shades you will need. Here’s a step-by-step guide for measuring your windows accurately:
- Start by using a steel tape measure for precise measurements. Avoid using a cloth or plastic tape measure as they may not provide accurate results.
- Measure the width of each window from the inside edge of the window frame. Take the measurement at three different points: at the top, in the middle, and at the bottom. Record the narrowest measurement for each window.
- Next, measure the height of each window from the inside edge of the window frame. Again, take three measurements: on the left, in the center, and on the right. Keep the longest measurement for each window.
- When noting down your measurements, ensure that you write down the width first, followed by the height. Use inches as the unit of measurement.
- Double-check your measurements to ensure accuracy. It’s always better to measure twice than to make a mistake and order the wrong size.
Gathering the Necessary Tools and Materials
Once you have accurate measurements of your windows, gather all the tools and materials required for the installation process. Having everything ready beforehand will save you time and prevent any unnecessary interruptions. Here’s a list of the basic tools and materials you will need:
- Cordless cellular shades (make sure they match the size and style of your windows)
- Steel tape measure
- Pencil or marker
- Level
- Screwdriver or drill
- Screws or brackets (depending on the mounting style)
- Mounting brackets (if not included with the shades)
- Wall anchors (if needed)
- Step ladder or stool (for reaching high windows, if necessary)
Preparing the Workspace
Before starting the installation, it’s important to prepare your workspace properly. This includes clearing any clutter or obstacles that may hinder the process. Follow these steps to ensure a safe and efficient workspace:
- Remove any existing window treatments or coverings from the windows.
- Ensure that the installation area is clean and free of dust or debris. This will help to maintain the adhesive strength and overall quality of the shades.
- If necessary, clean the windows thoroughly to remove any dirt or grime that may affect the adherence of the shades.
- Protect your flooring or furniture by placing a drop cloth or old newspaper beneath the windows. This will catch any falling debris or dust during the installation process.
- If required, have a stepladder or stool nearby to access higher windows safely.
By measuring your windows accurately, gathering the essential tools and materials, and preparing your workspace diligently, you’re setting the foundation for a successful installation of cordless cellular shades. With everything in place, you can now move on to the exciting part: actually installing the shades and transforming your living space.
Step 1: Mounting The Brackets
When it comes to installing cordless cellular shades with an outside mount, the first step is crucial: Mounting the brackets correctly. The brackets are what hold the shades in place and ensure they function properly. In this step, we will guide you through determining the bracket placement, marking the bracket positions, and installing the brackets securely.
Determining the Bracket Placement
To start, you need to determine the ideal placement for the brackets. The main goal is to ensure that the cordless cellular shades are centered and aligned properly on your window frame. Here’s how you can do it:
- Measure the width of your window frame. Divide this measurement by two to find the center point.
- Using a pencil, mark the center point on the top of your window frame.
- Measure the depth of the window frame and add at least 1 inch for clearance. This will determine how far out the brackets should be placed from the window frame.
- Make marks on both sides of the window frame according to the depth measurement you obtained. These marks will represent the outer edges of the brackets.
Marking the Bracket Positions
Next, you will need to mark the exact positions of the brackets on your window frame. Follow these steps:
- Measure the distance between the outer edges of the brackets you marked earlier. This will help ensure that the brackets are evenly spaced.
- Starting from the center mark, measure half of the bracket spacing measurement towards both sides of the window frame.
- Using a pencil, make small marks at these points. These marks will indicate where the brackets will be positioned.
Installing the Brackets Securely
Now it’s time to install the brackets securely on your window frame to support the cordless cellular shades. Follow these guidelines:
- Hold one bracket against the mark you made on the left side of the window frame.
- Using a drill, insert a screw through one of the bracket holes into the window frame. Repeat this step for the other hole in the bracket.
- Repeat the process for the bracket on the right side of the window frame.
- Ensure that the brackets are level and securely attached to the window frame. Use a level to double-check their alignment.
Congratulations! You have successfully completed step 1 of installing cordless cellular shades with an outside mount. The brackets are now securely installed, ready to hold the shades in place. Stay tuned for the next step, where we will guide you through the process of attaching the shades to the brackets.
Step 2: Attaching The Headrail
Now that you have successfully measured and prepared the window frame for your cordless cellular shades, it’s time to move on to the next step – attaching the headrail. The headrail is the horizontal part of the shade that houses the mechanism responsible for raising and lowering the shades. Properly installing the headrail ensures that your cordless cellular shades operate smoothly and securely. Here’s what you need to do:Inserting the shade into the brackets
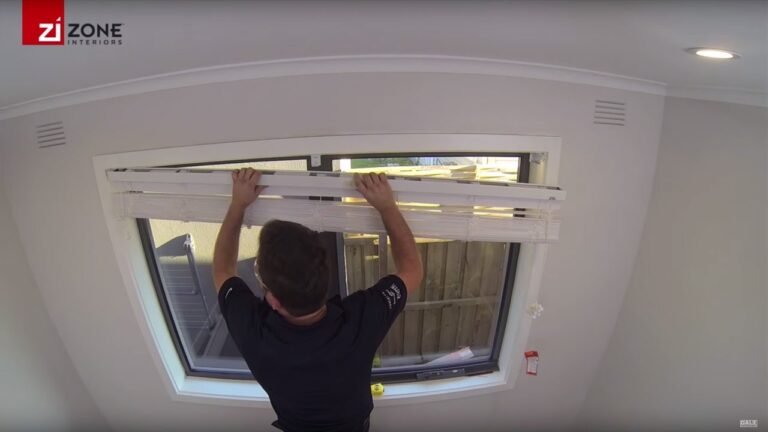
To begin, place the headrail of the cordless cellular shade in front of the window, ensuring that the shade is in the fully raised position. Take note of the brackets that you previously installed on the upper corners of the window frame. Next, carefully insert the headrail into the brackets. Ensure that the front lip of the headrail is securely seated in the brackets, preventing any wobbling or movement.Aligning the headrail with the brackets
Once the headrail is in place, it’s important to check its alignment. Take a moment to ensure that the headrail is level and evenly aligned with the top edge of the window frame. This step is crucial for both the aesthetics and functionality of your cordless cellular shades. Use a leveler to check the alignment, adjusting the position of the headrail if necessary. Keep in mind that a properly aligned headrail will ensure that the cordless cellular shades operate smoothly without any unnecessary friction. Securing the headrail in place Now that the headrail is inserted and aligned, it’s time to secure it in place. While pressing the headrail against the brackets, locate the small locking screws or levers provided with your cordless cellular shades. These are typically found on the sides of the headrail. Tighten the locking screws or engage the levers to secure the headrail firmly in place. Ensure that each side of the headrail is secure to prevent any accidental dislodging or movement of the shades. With the headrail securely attached, take a moment to test the operation of your cordless cellular shades. Lower and raise the shades a few times to confirm that they move smoothly and evenly. Once you’re satisfied with the installation and operation of the cordless cellular shades, move on to the next step of your window treatment project.Step 3: Adjusting The Shade
Once you have successfully installed your cordless cellular shades on the outside of your window frame, it is time to adjust them for optimal performance. Adjusting the shade involves lowering and raising it, adjusting the tension, and ensuring smooth operation. Follow these steps to make sure your shades look great and function effectively.
Lowering and Raising the Shade
To lower the shade, simply pull it down gently using your hand. The cordless design allows for easy operation without the need for any cords or chains. Once the shade is lowered, you can adjust it to your preferred position to control the amount of sunlight that enters the room.
To raise the shade, grasp the bottom rail and lift it upwards. The shade will smoothly glide upwards, thanks to the cordless mechanism. Raise it to your desired height, whether it’s partially covering the window or fully open to allow maximum light.
Adjusting the Tension
If you find that the shade is not raising or lowering smoothly, you may need to adjust the tension. Locate the tension screw on the bottom rail of the shade. Using a screwdriver, turn the screw clockwise to increase the tension or counterclockwise to decrease it. Make small adjustments, testing the shade’s operation after each turn, until you achieve the desired tension.
Keep in mind that the tension should be just enough to ensure smooth and effortless operation. Avoid over-tightening the screw, as it may cause the shade to become difficult to maneuver.
Ensuring Smooth Operation
To ensure the smooth operation of your cordless cellular shades, periodically inspect the shade for any debris or obstructions that may hinder its movement. Clean the shade by gently wiping it with a damp cloth to remove any dust or dirt that may have accumulated over time.
Additionally, check the bottom rail for any signs of wear or damage. If you notice any issues, such as loose components or misaligned tracks, contact the manufacturer or a professional for assistance. Ensuring that your shade is in optimal condition will prolong its lifespan and enhance its performance.
Now that you have adjusted your cordless cellular shades for optimal operation, you can enjoy their energy-efficient properties, privacy benefits, and aesthetic appeal. Sit back, relax, and revel in the perfect combination of style and functionality that these shades bring to your space.
Step 4: Securing The Bottom Rail
After carefully positioning the cordless cellular shades to your desired height and marking the position of the bottom rail, it’s time to secure the bottom rail in place. This step ensures that your shades stay securely in position and function properly.
Positioning the shade to desired height
To begin securing the bottom rail, you’ll first need to position the shade to your desired height. Gently lift the shade from the bottom and raise or lower it until it aligns with your preferred level on the window frame.
Marking the position of the bottom rail
Once you have positioned the shade at the desired height, take a pencil or a marker and mark the location where the bottom rail meets the window frame. This marking will serve as a reference point to ensure accurate installation.
Securing the bottom rail in place
Now that you have marked the position of the bottom rail, it’s time to secure it in place. Locate the brackets that came with your cordless cellular shades and position them at the marked spots on the window frame. Use a screwdriver to secure the brackets in place, ensuring they are tightly fastened.
Next, place the bottom rail of the shade onto the brackets. Make sure it fits securely and aligns perfectly with the marked spots on the window frame. Double-check to ensure that the shade is level and straight.
Once the bottom rail is correctly aligned, attach it to the brackets by carefully sliding it into the designated slots. Give it a gentle push downward to ensure a tight fit.
Finally, test the functionality of the cordless cellular shades by raising and lowering them a few times. This will help ensure that the bottom rail is securely attached and that the shades operate smoothly.
By following these simple steps, you can successfully secure the bottom rail of your cordless cellular shades. This will not only enhance the appearance of your windows but also provide you with the desired level of privacy and light control.
Step 5: Final Touches And Maintenance Tips
Cleaning the Shade
Keeping your cordless cellular shades clean is essential for maintaining their appearance and functionality. Here are a few simple steps to ensure your shades stay fresh and free from dust:
- Dust regularly: Use a feather duster or a vacuum cleaner with a brush attachment to gently remove any dust particles from the surface of the shade. Start from the top and work your way down to avoid pushing the dust back onto the shade.
- Spot clean stains: If you notice any stains on your shades, tackle them immediately. Dampen a clean cloth with mild detergent mixed with water and gently blot the stained area. Avoid using harsh chemicals or abrasive cleaners, as they may damage the fabric.
- Avoid excess moisture: While cordless cellular shades have some resistance to moisture, it’s best to avoid excessive contact with water. If your shades do get wet, simply blot them gently with a clean, dry cloth and allow them to air dry completely before raising or lowering them.
Troubleshooting Common Issues
Occasionally, you may encounter some issues with your cordless cellular shades. Here are a few common problems and their quick solutions:
- Sagging shades: If your shades are sagging in the middle, adjust the tension of the cordless mechanism. Use a flathead screwdriver to turn the tension adjuster clockwise to tighten the shade, or counterclockwise to loosen it.
- Fabric alignment: Sometimes, the fabric of the shade may appear misaligned or uneven. To fix this, gently push and adjust the fabric with your hands until it is evenly distributed across the width of the shade.
- Sticky operation: If you find that your cordless cellular shades are difficult to raise or lower, it may be due to dirt or debris accumulating in the mechanism. Use a soft brush or compressed air to clean any obstructions, ensuring smooth operation.
Enjoying Your Newly Installed Cordless Cellular Shades
Now that you have successfully installed your cordless cellular shades and learned how to clean and troubleshoot them, it’s time to enjoy the benefits they bring to your home. These shades provide privacy, insulation, and a stylish aesthetic that enhances any room. Take a moment to appreciate the enhanced comfort, energy efficiency, and beauty these shades bring into your living space.
Remember, regular maintenance and occasional troubleshooting will keep your cordless cellular shades looking and functioning at their best for years to come. Follow the cleaning tips and quick fixes mentioned above, and you will continue to enjoy the many benefits of your newly installed cordless cellular shades.

Credit: www.homedepot.com
Frequently Asked Questions On How To Install Cordless Cellular Shades – Outside Mount
How Do You Mount A Cordless Cellular Shade?
Mounting a cordless cellular shade is easy. Measure the window, mark the screw holes, drill pilot holes, align the brackets, and secure them with screws. Push the shade into the brackets until it snaps into place. Enjoy your stylish and functional window treatment!
How To Install Levolor Cordless Cellular Blinds Outside Mount?
To install Levolor cordless cellular blinds outside mount, follow these steps: 1. Measure the width and height of the window frame. 2. Mark the mounting brackets’ positions and align them with the frame. 3. Secure the brackets using screws and a drill.
4. Attach the headrail to the brackets. 5. Test the blinds by raising and lowering them.
How Do You Install Window Shades Outside Mount?
To install window shades outside mount, follow these steps: 1. Measure the width and height of the window. 2. Purchase shades that are slightly wider and longer than the window. 3. Mark the installation points on the wall or window frame.
4. Install brackets and secure them using screws. 5. Attach the shades to the brackets and adjust as needed.
How Do You Install Side Mount Cellular Shades?
To install side mount cellular shades, follow these steps: 1. Measure the window width and height accurately. 2. Attach the mounting brackets to the side of the window frame. 3. Align the shade with the brackets and insert the shade’s headrail.
4. Secure the headrail using screws or clips provided. 5. Test the shade by raising and lowering it to ensure proper installation.
Conclusion
To sum up, installing cordless cellular shades in an outside mount is a fairly simple process that can be accomplished with a few basic tools and some patience. By following the step-by-step instructions outlined in this blog post, you can quickly and easily transform the look and functionality of your windows.
Remember to carefully measure and align the shades, ensuring a snug fit for optimal light control and privacy. Enjoy the benefits of these stylish and efficient window treatments for years to come.


