How to Install Ceramic Tile on Wall?
To install ceramic tile on a wall, start by preparing the surface and gathering all necessary tools. Then, apply adhesive to the wall using a notched trowel and press the ceramic tiles firmly into place.
Tile Installation Basics
Installing ceramic tile on a wall can be a challenging yet rewarding project that can transform the look and feel of any room. Whether you’re adding tile to a bathroom, kitchen, or even a feature wall, these tile installation basics will guide you through the process to ensure a professional and lasting result. From gathering the necessary tools and materials to preparing the wall for tile installation, we’ll cover everything you need to know to get started.
Tools and Materials Needed for Ceramic Tile Installation
Before embarking on your tile installation project, it’s important to gather all the necessary tools and materials. Having everything on hand will not only save you time but also ensure a smooth and efficient installation process. Here’s a checklist of the essential items you’ll need:
| Tools | Materials |
|---|---|
|
|

Preparing the Wall for Tile Installation
Properly preparing the wall is crucial to ensure a successful ceramic tile installation. Follow these steps to get your wall ready:
- Clean the wall thoroughly by removing any dirt, grease, or flaking paint. Use a mild detergent and water solution to wipe down the surface, and allow it to dry completely.
- Inspect the wall for any holes or imperfections. Fill in any cracks or gaps with a suitable wall filler, and sand the patched areas smooth.
- Apply a primer if necessary. Some walls may require a primer to ensure proper tile adhesion. Check the manufacturer’s instructions and apply the primer accordingly.
- Plan the layout of the tiles. Use a level and a measuring tape to create a guideline for installing the tiles. This will help ensure that the tiles are evenly spaced and aligned.
- Apply tile adhesive to the wall using a notched trowel. Start in a small section and work your way out, applying the adhesive evenly and consistently.
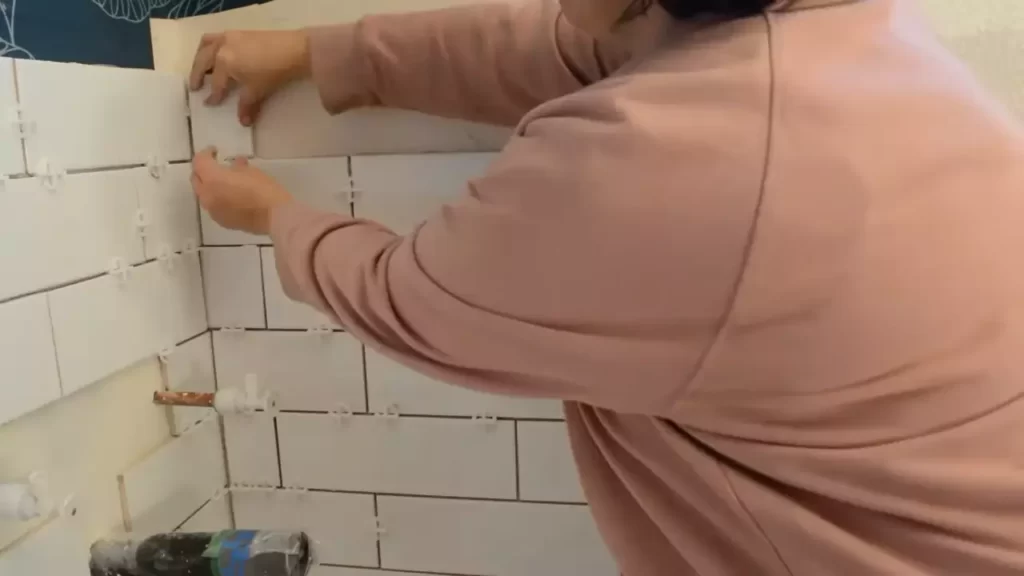
- Begin installing the tiles, pressing them firmly into the adhesive and using tile spacers to maintain consistent gaps between tiles.
- Allow the adhesive to dry according to the manufacturer’s instructions. Once dry, remove the tile spacers.
- Mix the grout according to the package instructions and apply it to the tile joints using a grout float.
- Clean any excess grout off the tiles with a damp sponge or cloth, being careful not to remove grout from the joints.
- Allow the grout to dry and cure fully before applying any sealant or cleaning the tiles.
By following these tile installation basics, you’ll be well on your way to achieving a beautiful ceramic tile finish on your wall. Remember to take your time, work methodically, and don’t hesitate to seek professional advice if needed. Good luck with your project!
Steps For Installing Ceramic Tile On Wall
Installing ceramic tile on a wall can be a great way to enhance the aesthetics of any space. Whether you’re looking to update your bathroom or create a stunning kitchen backsplash, following the right steps will ensure a successful installation. In this guide, we will walk you through the process of installing ceramic tile on a wall, from marking the layout to finishing touches.
Marking the layout of the tiles on the wall
Before diving into the installation process, it’s crucial to plan and mark out the layout of your tiles on the wall. This step will ensure that you achieve a symmetrical and visually appealing result. Start by measuring the wall and dividing it into equal sections using a level and a pencil. Mark the starting point of your tile installation, usually at the center of the wall, and work outward from there, making sure to account for any obstacles or patterns you want to create.
Mixing the tile adhesive
Once you have your layout marked out, it’s time to mix your tile adhesive. Note: Make sure to follow the manufacturer’s instructions for mixing ratios, as different adhesives may require different amounts of water. Use a mixing paddle and a mixing bucket to combine the adhesive and water until you achieve a smooth and lump-free consistency.
Applying the adhesive to the wall
With your adhesive mixed, it’s time to start applying it to the wall. Begin by using a trowel to spread a thin layer of adhesive onto the wall, making sure to create ridges with the notched edge of the trowel. This will help create a strong bond between the tiles and the wall. Work in small sections to ensure that the adhesive does not dry out before you can place the tiles.
Setting the first row of tiles
Once the adhesive is applied, it’s time to start setting the tiles. Begin with the first row, using spacers to ensure even gaps between the tiles. Press each tile firmly into the adhesive, making sure it is level and straight. Use a tile cutter or wet saw to cut the tiles as needed to fit around any obstructions or edges.

Installing subsequent rows of tiles
After the first row is set, continue installing subsequent rows of tiles, following the same process. Apply adhesive, set the tiles, use spacers for even gaps, and cut tiles as needed. Make sure to check the level and alignment of each tile as you go to ensure a professional-looking installation.
Cutting tiles to fit around obstacles
As you reach obstacles such as outlets, switches, or corners, you’ll need to cut the tiles to fit. Measure and mark the area to be cut on the tile, and use a tile cutter or wet saw to make precise cuts. Take your time and be careful to avoid chipping or cracking the tile. Test the cut tile for fit before applying adhesive and setting it in place.
Applying grout to the tile joints
Once all the tiles are set and the adhesive has dried, it’s time to apply grout to the tile joints. Mix the grout according to the manufacturer’s instructions and use a grout float to spread it over the tiles, ensuring that the joints are filled completely. Remove any excess grout from the surface of the tiles using a damp sponge, being careful not to remove grout from the joints. Allow the grout to dry according to the manufacturer’s instructions.
Cleaning the tiles and finishing the installation
After the grout has dried, use a clean, soft cloth to wipe away any remaining haze or residue from the surface of the tiles. This will ensure a clean and polished final look. Take the time to inspect the entire installation for any loose tiles or grout that may need attention. Make any necessary repairs and leave the installation to dry and cure completely before using or applying any additional finishes.
Tips For Successful Ceramic Tile Installation
Installing ceramic tiles on walls can transform the look of any space. Whether you’re updating your kitchen backsplash or adding a decorative accent to your bathroom, proper installation is crucial for a long-lasting and visually appealing result. Here are some essential tips to help you achieve a successful ceramic tile installation.
Choosing the right type of ceramic tile for the wall
Before embarking on your ceramic tile installation project, it’s important to select the right type of tile for the wall. The choice of tile will depend on factors such as the room’s function, desired aesthetics, and maintenance requirements. You can choose from ceramic, porcelain, or natural stone tiles. Ceramic tiles are durable and available in a variety of colors and patterns. Porcelain tiles are highly resistant to moisture and stains, making them suitable for bathrooms and kitchens. Natural stone tiles offer a unique and natural look, but require regular sealing to prevent staining.
Properly measuring and estimating the quantity of tiles needed
Accurate measurements are essential to ensure you have enough ceramic tiles for your installation. Start by measuring the height and width of the wall, taking into account any obstacles such as windows or electrical outlets. It is recommended to add an extra 10% to the calculated quantity to account for any cutting or breakage. Use a tile calculator or consult with a professional to determine the exact quantity of tiles needed.
Ensuring even tile spacing and alignment
Proper spacing and alignment of ceramic tiles can greatly enhance the overall look of the installation. It is crucial to use tile spacers to maintain consistent spacing between each tile. These spacers will ensure that the grout lines are evenly sized throughout the wall. Additionally, using a level or laser tool will help ensure that the tiles are properly aligned and leveled, giving your wall a clean and professional appearance.
Taking care of the adhesive drying time and curing process
Allowing the adhesive to fully dry and cure is essential for the longevity of your ceramic tile installation. Follow the manufacturer’s instructions on the adhesive package to determine the appropriate drying time. Once the tiles are installed, avoid putting any weight or pressure on them until the adhesive is completely cured. This may take anywhere from 24 to 48 hours, depending on the adhesive used. Patience during this phase will prevent any premature damage to your newly installed tiles.
Applying the grout correctly for a professional finish
Grouting is the final step in ceramic tile installation and can greatly impact the overall appearance. Start by mixing the grout according to the manufacturer’s instructions. Using a grout float, apply the grout at a 45-degree angle, ensuring that it fills in the gaps between the tiles. Work in small sections and remove any excess grout using a damp sponge. It’s important to constantly rinse the sponge to prevent smearing excess grout over the tiles. This will result in a clean and professional finish.
Properly sealing the grout to prevent moisture damage
To protect your grout from moisture and staining, it’s essential to apply a grout sealer after the installation is complete. A grout sealer helps to prevent water penetration and keeps the grout looking fresh and clean for years to come. Follow the manufacturer’s instructions for applying the sealer, ensuring that the grout is fully dry before sealing. Regularly maintain the grout sealer by reapplying it every few years to ensure maximum protection.
By following these tips, you can achieve a successful ceramic tile installation that adds beauty and value to your space. Whether you’re an experienced DIYer or a first-time tile installer, these guidelines will help you create a professional-looking finish that will stand the test of time.
Common Mistakes To Avoid During Ceramic Tile Installation
When it comes to installing ceramic tile on walls, there are some common mistakes that people often make. These mistakes can lead to uneven tiles, poor adhesive bonding, and a less-than-perfect finish. To ensure a successful and hassle-free tile installation, it is important to be aware of the common pitfalls and avoid them at all costs.
1. Not properly preparing the wall surface
One of the most crucial steps in ceramic tile installation is preparing the wall surface. Neglecting this step can result in tiles that don’t adhere properly, leading to loose or cracked tiles down the line. To avoid this, make sure to thoroughly clean the wall surface by removing any dirt, dust, or debris. Fill in any cracks or holes with an appropriate filler, and ensure that the surface is smooth and level. Taking the time to prepare the wall surface will ultimately result in a more professional-looking and long-lasting tile installation.
2. Using an incorrect adhesive for the tile type
Selecting the right adhesive for your ceramic tiles is essential for a successful installation. Using an incorrect adhesive can lead to tiles that don’t bond properly or that eventually come loose. Before starting the installation, it’s important to understand the type of tiles you are working with and choose an adhesive specifically designed for that tile type. This will ensure proper adhesion and minimize the risk of tile failure over time.
3. Neglecting to measure and plan the tile layout
One of the most common mistakes people make during ceramic tile installation is simply diving right in without a proper plan. Neglecting to measure and plan the tile layout can result in uneven tile placement, awkward cuts, or even running out of tiles midway through the installation. Take the time to measure the wall space, determine the layout and pattern of the tiles, and plan for any necessary cuts or adjustments. This way, you can ensure a visually pleasing and symmetrical tile installation.
4. Rushing the installation process
When it comes to ceramic tile installation, patience is key. Rushing the installation process can lead to mistakes, such as uneven tiles or improper adhesive bonding. Take your time to carefully apply the adhesive, place each tile precisely, and ensure proper alignment and spacing. Allow the recommended drying and curing time before grouting, to ensure a strong and durable tile installation that will stand the test of time.
5. Incorrectly spacing the tiles or using inconsistent grout lines
Proper spacing and consistent grout lines are essential for a professional-looking ceramic tile installation. Incorrectly spacing the tiles or using inconsistent grout lines can detract from the overall appearance of your project. To achieve a clean and uniform look, use spacers between each tile to maintain consistent spacing. Take care to align the grout lines and ensure they are straight throughout the installation. This attention to detail will result in a visually appealing tile installation that adds value and beauty to your space.

Troubleshooting And Maintenance Tips
Dealing with Cracked or Damaged Tiles
If you notice any cracked or damaged tiles on your ceramic tile wall, it’s important to address the issue as soon as possible to prevent further damage and ensure the wall remains aesthetically pleasing. Here are a few tips to help you tackle this problem:
- Assess the damage: Carefully examine the cracked or damaged tile to determine the severity of the problem. Is it a small hairline crack or a larger, more significant break?
- Remove the damaged tile: Use a chisel and hammer to carefully remove the cracked or damaged tile from the wall. Be cautious not to damage the surrounding tiles in the process.
- Prepare the surface: Clean the area where the damaged tile was removed, making sure to remove any debris or adhesive. Smooth the surface using a putty knife or sandpaper if necessary.
- Replace the tile: Apply a thin layer of tile adhesive to the back of the new tile and firmly press it into place. Use tile spacers to ensure even spacing between the tiles.
- Allow the adhesive to dry: Follow the manufacturer’s instructions for drying time. Once dry, you can remove the tile spacers and grout the area.
Repairing Grout Issues
Over time, grout on a ceramic tile wall can develop issues such as cracking or the growth of mold. Here’s how to address these problems:
- Repairing cracks: Use a grout saw to carefully remove the cracked grout. Clean the area thoroughly and allow it to dry. Apply new grout using a grout float, making sure to fill the joints completely. Wipe away any excess grout with a damp sponge.
- Dealing with mold growth: Mix a solution of equal parts water and white vinegar. Apply the solution to the moldy grout and let it sit for a few minutes. Scrub the grout with a soft-bristled brush and rinse with clean water. Repeat if necessary.
Proper Cleaning and Maintenance Techniques for Ceramic Tile Walls
To ensure the longevity and beauty of your ceramic tile walls, regular cleaning and maintenance are crucial. Follow these tips:
- Sweep or vacuum regularly: Use a soft broom or vacuum with a brush attachment to remove loose dirt and debris from the tile surface.
- Wipe spills immediately: Promptly clean up any spills or stains to prevent them from penetrating the grout or tile surface.
- Use mild cleaners: Avoid harsh chemicals that can damage the tile or grout. Instead, opt for mild detergents or specially formulated tile cleaners.
- Scrub gently: When cleaning the tiles, use a soft sponge or cloth to avoid scratching the surface.
- Protect high-traffic areas: Consider using rugs or mats in areas of heavy foot traffic to minimize wear and tear on the tile.
Preventing Water Damage and Moisture Penetration
Preventing water damage and moisture penetration is essential for maintaining the integrity of your ceramic tile walls. Here are some preventive measures you can take:
- Apply a sealant: After installing the ceramic tiles, apply a quality sealant to the grout lines. This will help repel water and protect against moisture penetration.
- Use caulk in wet areas: Apply a waterproof caulk around areas prone to water exposure, such as the edges of the tile wall near a bathtub or shower.
- Ensure proper ventilation: Proper air circulation can help prevent excess moisture buildup. Use exhaust fans in bathrooms or kitchens to remove steam and humidity.
- Repair any leaks: If you notice any water leaks in the vicinity of the ceramic tile wall, address them promptly to prevent water damage.
By following these troubleshooting and maintenance tips, you can keep your ceramic tile wall in excellent condition for years to come.
Frequently Asked Questions Of How To Install Ceramic Tile On Wall
How Do You Prepare A Wall For Ceramic Tile Installation?
To prepare a wall for ceramic tile installation, start by removing any old wallpaper or loose paint. Repair any cracks and ensure the wall is clean and flat. Apply a primer to help the tile adhesive adhere to the wall, and mark the layout of the tiles before starting the installation process.
What Tools Are Needed For Installing Ceramic Tile On A Wall?
You will need a few specific tools for installing ceramic tile on a wall. These include a trowel for spreading adhesive, a tile cutter for cutting tiles to size, a level for ensuring a straight and even installation, and a grout float for applying grout.
Don’t forget safety goggles, gloves, and a dust mask.
How Do You Select The Right Adhesive For Ceramic Tile Installation?
When selecting adhesive for ceramic tile installation, consider the type of wall surface, such as drywall or cement board. Look for adhesives specifically designed for ceramic tiles. Consider factors like the size and weight of the tiles, as well as any special environmental conditions, such as a wet or high-temperature area.
Always follow the manufacturer’s instructions for the specific adhesive you choose.
Conclusion
Installing ceramic tiles on a wall may seem like a daunting task, but with the right tools and techniques, it can be a rewarding DIY project. By following the step-by-step guide discussed in this blog post, you can enhance the aesthetic appeal of your space and create a durable and long-lasting surface.
Remember to properly prepare the wall, use the appropriate adhesive and grout, and carefully apply the tiles. With patience and attention to detail, you can achieve professional-looking results that will impress both yourself and your guests. Happy tiling!