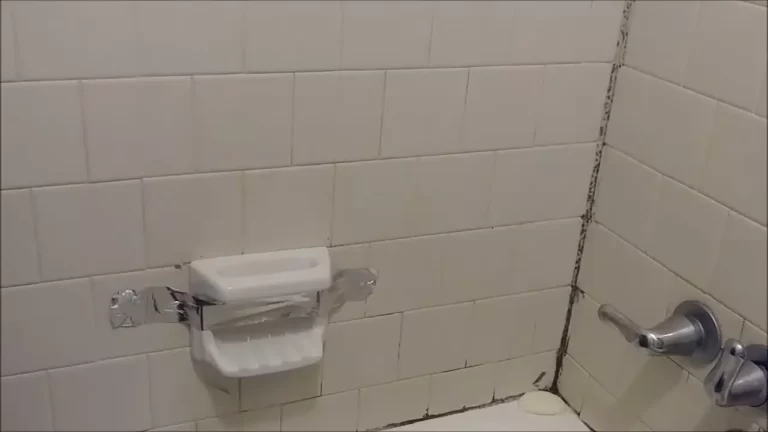
How to Install Cement Tile Backsplash?
To install a cement tile backsplash, first prepare the surface by cleaning it thoroughly and ensuring it is dry. Apply a thin layer of tile adhesive using a notched trowel, and then press the tiles into place, ensuring they are level and evenly spaced.
Allow the adhesive to dry completely, and then apply grout between the tiles using a grout float. Finally, wipe away any excess grout with a damp sponge to create a clean finish. Adding a cement tile backsplash is a great way to enhance the beauty and functionality of your kitchen or bathroom.
With just a few simple steps, you can have a stylish and durable backsplash that will transform the look of any space.
Choosing The Right Cement Tile Design
Research popular cement tile designs
When it comes to choosing the right cement tile design for your kitchen backsplash, it’s important to do your research. By understanding what designs are currently popular, you can make a stylish choice that will stand the test of time. Take the time to browse through design magazines, visit home improvement stores, and explore online resources to get a sense of the different cement tile designs available.
Consider the overall aesthetic of your kitchen
When choosing a cement tile design, it’s important to consider the overall aesthetic of your kitchen. Think about the style of your cabinets, countertops, and appliances. Do you have a modern kitchen with clean lines? Or perhaps a farmhouse-inspired space with rustic elements? By considering the overall look and feel of your kitchen, you can choose a cement tile design that complements the existing elements and creates a cohesive and visually pleasing space.
Match the color scheme to your existing decor
One key aspect of choosing the right cement tile design is matching the color scheme to your existing decor. Take a look at the colors present in your kitchen, including the walls, cabinets, and accents. Consider whether you want to create a cohesive look by selecting cement tiles that match the existing color palette, or if you’d prefer to add a pop of contrasting color for visual interest. Remember to take into account the natural light in your kitchen, as it can greatly impact how the colors of the tiles appear in the space.
Measuring And Calculating The Amount Of Tiles Needed
Before starting the installation process for your cement tile backsplash, it is crucial to accurately measure the dimensions of the backsplash area. This step will help you determine the exact amount of tiles needed for the project. By following the steps below, you can ensure that you have the right quantity of tiles, while also accounting for any cuts or waste that may occur during the installation process.
Use a tape measure to measure the dimensions of the backsplash area
The first step in calculating the amount of tiles required is to measure the dimensions of the backsplash area using a tape measure. Start by measuring the width and height of the space where the tiles will be installed. Be sure to measure any areas that may require special cuts, such as corners or outlets. Write down these measurements for future reference.
Calculate the square footage to determine the number of tiles required
Once you have measured the dimensions of the backsplash area, you can calculate the square footage to determine the number of tiles required. To do this, multiply the width by the height of the area. For example, if the backsplash area measures 3 feet wide by 2 feet high, the square footage would be 6 square feet (3 ft x 2 ft = 6 sq ft).
Bear in mind that it is always a good idea to purchase some extra tiles to account for any breakage or future repairs. It’s better to have a few extra tiles than to run out and have to order more, which could result in a delay in the project. As a general rule of thumb, add 10% to 15% to the square footage calculation to account for cuts and waste.
Account for any cuts or waste when ordering the tiles
When ordering the tiles for your cement tile backsplash, it is crucial to account for any cuts or waste that may occur during the installation process. This will ensure that you have enough tiles to complete the project without running out. Based on the square footage calculation, determine the number of tiles required and then add the additional percentage to account for cuts and waste. Round up the final number to the nearest whole number to ensure you have enough tiles.
In addition to considering the quantity of tiles, you may also want to consider ordering some extra tiles for future repairs. Cement tiles are durable, but accidents can happen, and having a few spare tiles on hand can save you time and effort in the future.
By following these steps and accurately measuring and calculating the amount of tiles needed, you can ensure a successful installation of your cement tile backsplash. Taking the time to measure properly and account for any cuts or waste will help you complete the project with ease and confidence.
Gathering The Necessary Tools And Materials
Before you start installing a cement tile backsplash, it is important to gather all the necessary tools and materials. By having everything prepared and within reach, you can make the installation process smoother and more efficient. Here is a list of tools and materials you will need:
List of tools needed:
- Tile cutter
- Trowel
- Notched trowel
- Tile spacers
- Bucket
- Mixing paddle
- Grout float
- Tile saw
- Wet saw (recommended for cutting cement tiles)
- Level
- Measuring tape
- Pencil
- Sponge
- Bucket for water
Purchase the cement tiles and any necessary adhesives:
Once you have gathered the tools, it’s time to purchase the cement tiles and any necessary adhesives. Visit your nearest home improvement store or tile supplier to find a wide selection of cement tiles. Make sure to measure your backsplash area beforehand to determine the number of tiles you need. Additionally, consider purchasing a high-quality tile adhesive that is specifically designed for cement tiles. This will ensure the tiles adhere properly and withstand the test of time.
Gather safety equipment:
Prioritize your safety during the installation process by gathering the necessary safety equipment. This includes gloves to protect your hands from sharp edges and adhesives, as well as goggles to shield your eyes from any flying debris. Safety should always be a top priority during any DIY project.
By gathering all the necessary tools, purchasing the right cement tiles and adhesives, and ensuring you have the proper safety equipment, you are well-prepared to begin the installation process. This thorough preparation will help you achieve a successful and visually stunning cement tile backsplash.
Cleaning And Prepping The Backsplash Area
Before installing a cement tile backsplash, it’s crucial to properly clean and prep the area to ensure a smooth and successful installation. This step will not only ensure proper adhesion but also help in identifying and repairing any cracks or imperfections in the wall. In this section, we will guide you through the process of cleaning and prepping the backsplash area, ensuring a solid foundation for your cement tile installation.
Remove any existing tiles or wallpaper
If you have any existing tiles or wallpaper on the wall where you plan to install the cement tile backsplash, it needs to be removed before proceeding. Removing old tiles or wallpaper can be a tedious process, but it is essential to ensure a clean and flat surface for the new installation.
To remove existing tiles, start by using a hammer and chisel to gently break them and then pry them off using a putty knife. Take your time and work carefully to avoid damaging the wall underneath. If you have wallpaper, use a scoring tool to create small punctures in the surface. Then, apply warm water with a sponge or wallpaper stripper and carefully peel off the wallpaper.
Clean the wall surface thoroughly to ensure proper adhesion
After removing any existing tiles or wallpaper, it’s time to clean the wall surface thoroughly. This step is vital to ensure proper adhesion of the cement tiles. Start by using a mild detergent or a cleaning solution specifically designed for tile surfaces. Dilute the detergent in water as per the instructions on the packaging.
Apply the diluted cleaning solution to the wall using a sponge or a soft cloth, working in circular motions. Pay special attention to any areas with grease, dirt, or stains. For stubborn stains, you may employ a non-abrasive brush or a grout brush to gently scrub the surface.
Once you have cleaned the entire wall surface, rinse it thoroughly with clean water and wipe away any excess moisture with a clean, lint-free cloth. Allow the wall to dry completely before moving on to the next step.
Repair any cracks or imperfections in the wall, ensuring each H3 heading adheres to HTML syntax
While cleaning the wall, it’s crucial to keep an eye out for any cracks or imperfections that may affect the installation of the cement tile backsplash. If you spot any cracks or damaged areas, take the time to repair them before proceeding.
To repair cracks in the wall, first, use a scraper or a putty knife to remove any loose or crumbling material. Clean the cracked area using a brush or compressed air to ensure it is free from dust and debris. Apply a concrete patching compound or a wall repair product, following the manufacturer’s instructions. Use a putty knife to fill the crack and smooth out the surface. Allow the repair compound to dry completely before continuing with the installation.
In addition to cracks, if you notice any other imperfections in the wall, such as uneven areas or bumps, sand them down using coarse sandpaper or a sanding block. This will create a level surface for the cement tile backsplash.
Once you have completed these steps of cleaning, removing existing tiles or wallpaper, and repairing any cracks or imperfections in the wall, you are now ready to move on to the next phase of installing your beautiful cement tile backsplash.
Applying A Bonding Agent
Applying a bonding agent is an essential step in installing a cement tile backsplash. A bonding agent helps create a strong adhesion between the wall surface and the tiles, ensuring they stay in place for years to come. Here’s a helpful guide on how to apply a bonding agent effectively:
Apply a bonding agent to the wall surface
To start the process, make sure the wall surface is clean and free from any dust or debris. Use a mix of water and mild soap to clean the surface thoroughly. Rinse the wall and allow it to air dry completely before proceeding. Once the surface is clean and dry, it’s time to apply the bonding agent.
Begin by wearing gloves and a face mask for protection. Open the bonding agent container and give it a thorough stir to ensure it’s well-mixed. Then, using a paintbrush or a roller, start applying the bonding agent onto the wall surface. Make sure to cover the entire area where the tiles will be installed, ensuring a smooth and even application.
Allow the bonding agent to dry according to the manufacturer’s instructions
Now that the bonding agent has been applied, it’s crucial to allow it to dry completely before moving on to the next step. The drying time may vary depending on the brand and type of bonding agent used. Refer to the manufacturer’s instructions for the recommended drying time.
While the bonding agent is drying, make sure to keep the workspace free from any dust or debris. This will help ensure a clean and smooth surface for the tiles to adhere to.
Ensure the surface is smooth and free from any debris
Once the bonding agent has dried as per the manufacturer’s instructions, carefully inspect the wall surface. Check for any rough patches, bumps, or debris that may hinder the proper adhesion of the tiles. If needed, use sandpaper or a sanding block to smooth out any imperfections.
Additionally, run a hand across the surface to check for any remaining dust or particles. Wipe away any debris with a clean, dry cloth to create a clean and debris-free surface for the installation of the cement tiles.
By following these steps and properly applying a bonding agent, you’ll ensure a strong bond between the wall surface and the cement tile backsplash. This will not only enhance the longevity of your backsplash but also provide a visually appealing addition to your kitchen or bathroom.
Dry Fitting The Tiles
Lay out the cement tiles on the backsplash area without adhesive
Dry fitting the tiles is an essential step before installing a cement tile backsplash. This process allows you to visualize how the tiles will look and make any necessary adjustments before permanently adhering them to the wall. To begin, lay out the cement tiles on the backsplash area without adhesive. This will help you determine the best placement for each tile and ensure that the pattern flows seamlessly.
Arrange the tiles in the desired pattern and make any necessary adjustments
Once the tiles are laid out on the backsplash area, arrange them in the desired pattern. Cement tiles offer endless design possibilities, so take this opportunity to get creative and experiment with different arrangements. Whether you prefer a traditional checkerboard pattern or a more intricate design, make sure each tile is properly aligned and evenly spaced.
If you notice any tiles that don’t fit correctly or gaps between the tiles, now is the time to make adjustments. Simply remove the tiles, trim them if necessary, or shift them slightly to achieve a seamless appearance. This step may require patience and attention to detail, but the end result will be well worth it.
Take measurements for cuts and corners
Before you can permanently install the cement tiles, it’s important to take measurements for cuts and corners. Using a measuring tape, carefully measure the distance between the last full tile and the end of the backsplash area. This will give you the dimensions for the tile that needs to be cut.
Additionally, if your backsplash has any corners, measure the angle of the corner to ensure accurate cuts. It’s crucial to get precise measurements to avoid any gaps or overlaps once the tiles are installed.
Once you have the measurements, mark them on the cement tiles using a pencil or marker. Be sure to account for any necessary allowances, such as grout lines. This will help you achieve a clean and professional finish.
To make the cuts, use a wet tile saw or a tile nipper, depending on the complexity of the cut. Remember to wear protective goggles and gloves while cutting the tiles for safety.
After the necessary cuts are made, dry fit the newly cut tiles in their respective positions. Confirm that they fit snugly and align perfectly with the surrounding tiles.
By following these steps to dry fit the cement tiles, you’ll be one step closer to creating a stunning and functional backsplash. Take your time during this process and don’t rush, as accuracy is key. Once you’re satisfied with the layout and measurements, you can move on to the next step of the installation process – applying adhesive and installing the tiles permanently.
Applying Tile Adhesive
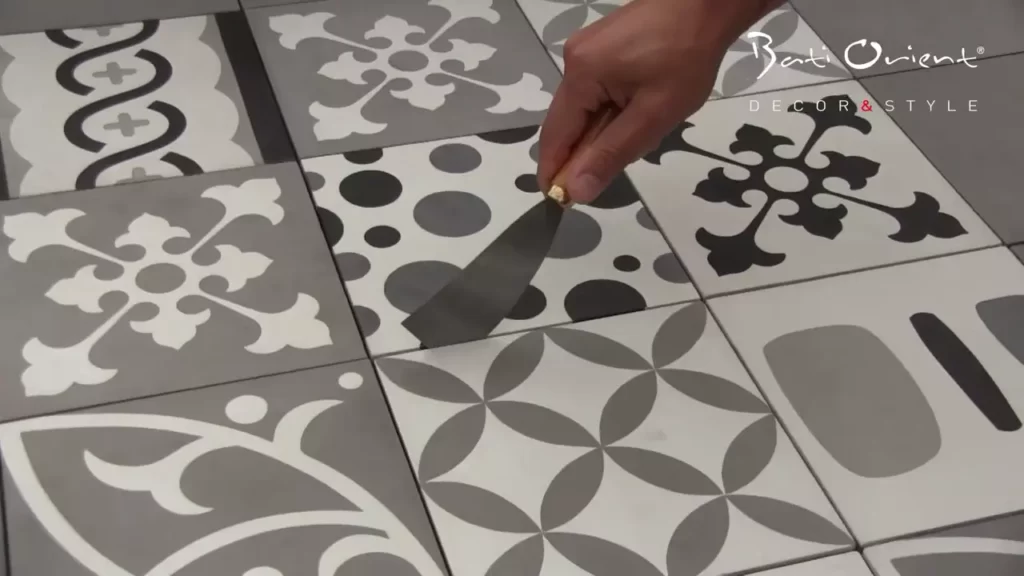
Once you have prepared the wall and gathered all the necessary materials for your cement tile backsplash installation, it’s time to apply the tile adhesive. This step is crucial to ensure that your tiles adhere securely to the wall, providing a long-lasting and beautiful backsplash for your kitchen or bathroom. Follow these steps to apply the tile adhesive correctly:
Mix the tile adhesive according to the manufacturer’s instructions
Before you start applying the adhesive, it’s essential to mix it correctly. The specific instructions may vary depending on the brand and type of adhesive you are using, so be sure to read the manufacturer’s guidelines carefully. In general, the process involves combining the adhesive powder with water in a clean bucket or container. Use a stirring stick or a drill with a mixing attachment to achieve a smooth and consistent paste. Whether your adhesive requires a specific mixing ratio or a specific amount of water, be sure to follow the instructions precisely to yield the best results.
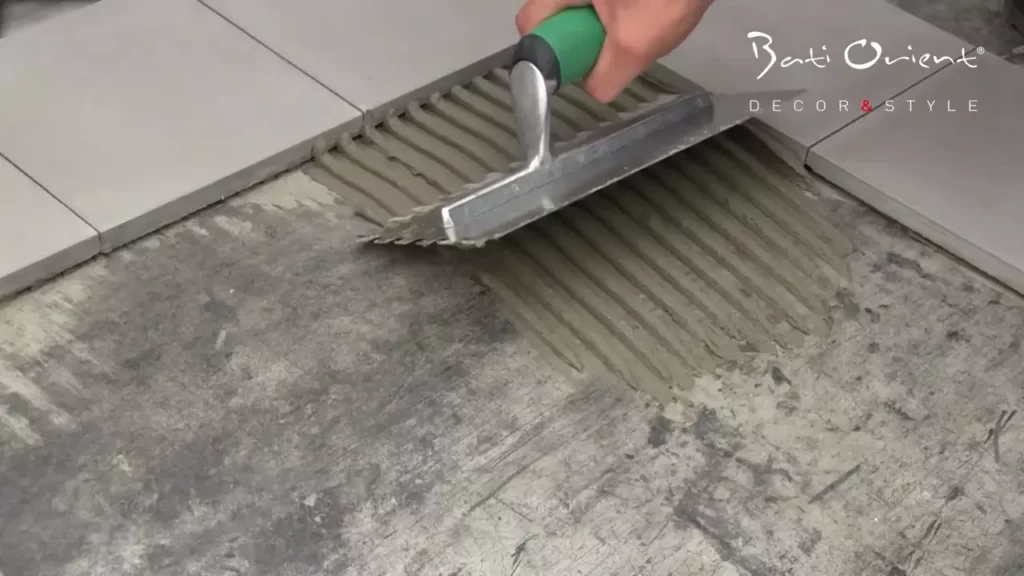
Apply the adhesive to the wall using a notched trowel
Once the adhesive is properly mixed, it’s time to apply it to the wall. Using a notched trowel is the most efficient way to achieve an even and consistent coat of adhesive. Start by holding the trowel at a 45-degree angle and apply the adhesive to the wall in small sections. The notches on the trowel will create ridges that help with tile adhesion. It’s important to apply the adhesive in small sections to prevent it from drying before you have a chance to install the tiles. Work in an area that you can comfortably reach without rushing.
Spread the adhesive evenly, ensuring full coverage
As you apply the adhesive to the wall, make sure to spread it evenly using the flat side of the trowel. This step ensures that the adhesive covers the entire surface area and provides a solid foundation for the tiles. The layer of adhesive should be uniform, without any gaps or thick accumulations. Take your time to ensure full coverage, especially along the edges and corners of the backsplash area. Remember to work in small sections, as the adhesive may start to dry quickly.
Once you have spread the adhesive, you are ready to proceed with installing your cement tiles. It’s important to work efficiently but carefully, placing each tile into the adhesive and pressing it firmly to ensure proper adhesion. Take breaks only when necessary, ensuring that the adhesive remains fresh and tacky. By following these steps, you are on your way to successfully installing a beautiful and durable cement tile backsplash.
Placing The Tiles
When it comes to installing a cement tile backsplash, properly placing the tiles is essential for achieving a polished and professional look. This step requires precision and attention to detail to ensure that the tiles adhere securely to the adhesive and maintain consistent spacing throughout. In this section, we will explore two important aspects of placing the tiles: pressing them firmly into the adhesive and using spacers for consistent spacing.
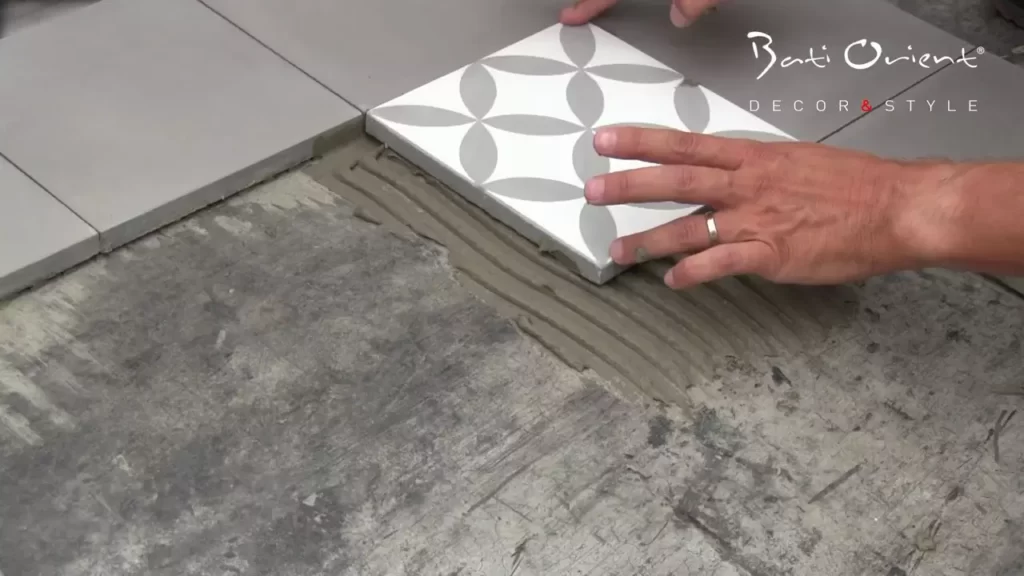
Press each cement tile firmly into the adhesive, starting from the bottom row
To ensure that your cement tiles adhere properly to the adhesive, it’s essential to press each tile firmly into place. This step helps to create a strong bond between the tiles and the wall, preventing any potential movement or shifting later on. Starting from the bottom row and working your way up will allow you to build a solid foundation for the entire backsplash.
As you press each tile into the adhesive, make sure to apply even pressure to ensure a secure bond. Use your hands or a rubber grout float to press down firmly. This will help to eliminate any air bubbles or gaps between the tile and adhesive.
Use spacers to maintain consistent spacing between tiles
Consistency is key when it comes to the spacing between your cement tiles. Using spacers will help you achieve a uniform and professional-looking backsplash. These small plastic pieces are available in different sizes and can be easily inserted between the tiles to maintain the desired spacing.
Start by placing spacers at the corners of each tile, ensuring a consistent gap around all edges. As you continue to lay the tiles, insert spacers along the sides to maintain even spacing between each tile. This will ensure that your backsplash has a clean and cohesive appearance.
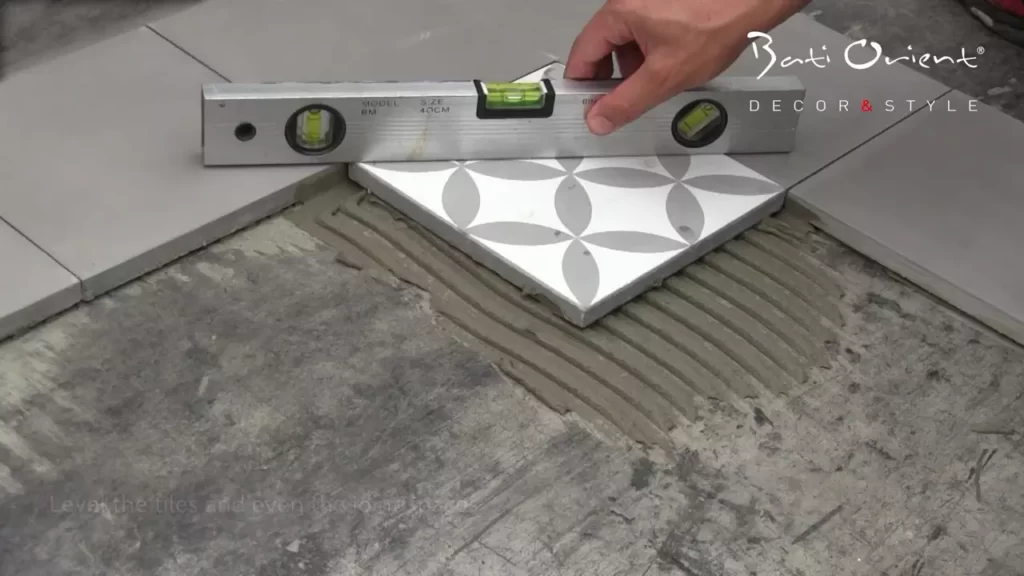
Regularly check your work as you progress, making sure that the tiles are level and aligned properly. If you notice any inconsistencies or unevenness, make the necessary adjustments to ensure a flawless installation.
In conclusion, placing the tiles for your cement tile backsplash requires attention to detail and precision. By pressing each tile firmly into the adhesive and using spacers to maintain consistent spacing, you can achieve a beautiful and cohesive finished product.
Cutting And Installing Edge Tiles
Installing a cement tile backsplash can greatly enhance the look of your kitchen or bathroom. When it comes to creating a seamless finish, installing edge tiles is crucial. In this section, we will guide you through the process of measuring, cutting, and installing edge tiles for your cement tile backsplash. Follow these steps to ensure a precise and professional-looking installation.
Measure and mark the tiles that need to be cut for the edges or corners
Before beginning the cutting process, it is essential to measure and mark the tiles that need to be cut. This ensures accurate cuts and a seamless fit. Here’s how you can do it:
- Place the cement tile on the surface where it will be installed, aligning it with the adjacent tiles.
- Using a measuring tape, measure the space between the edge of the tile and the wall or corner.
- Mark the measurement on the tile using a pencil or a washable marker.
- Repeat this process for each tile that requires cutting.
Use a tile cutter to make precise cuts
Once you have marked the tiles, it’s time to make precise cuts using a tile cutter. Follow these steps for accurate cutting:
- Place the marked tile onto the tile cutter, aligning the marked line with the cutting wheel.
- Hold the tile firmly and apply gentle pressure as you push the cutting wheel across the tile.
- Repeat the process if necessary to ensure the entire marked line has been cut.
- Once the cut is complete, gently break the tile along the scored line.
Remember to wear safety goggles and gloves while cutting tiles to protect yourself from any potential injuries.
Install the edge tiles using adhesive and spacers
Now that you have the cut edge tiles ready, it’s time to install them using adhesive and spacers. Follow these steps for a secure installation:
- Apply a thin layer of tile adhesive to the back of the cut tile using a notched trowel.
- Place the tile onto the wall or corner, aligning it with the adjacent tiles and the marked guideline.
- Insert tile spacers between the tiles to ensure an even and consistent gap.
- Press the tile firmly onto the wall, making sure it adheres properly to the adhesive.
- Repeat the process for each cut edge tile, leaving the recommended gap between them.
- Allow the adhesive to dry according to the manufacturer’s instructions before grouting the tiles.
Congratulations! You have successfully cut and installed the edge tiles for your cement tile backsplash. With careful measurements and precise cutting, you can achieve a professional-looking finish that complements your overall design.
Allowing The Adhesive To Cure
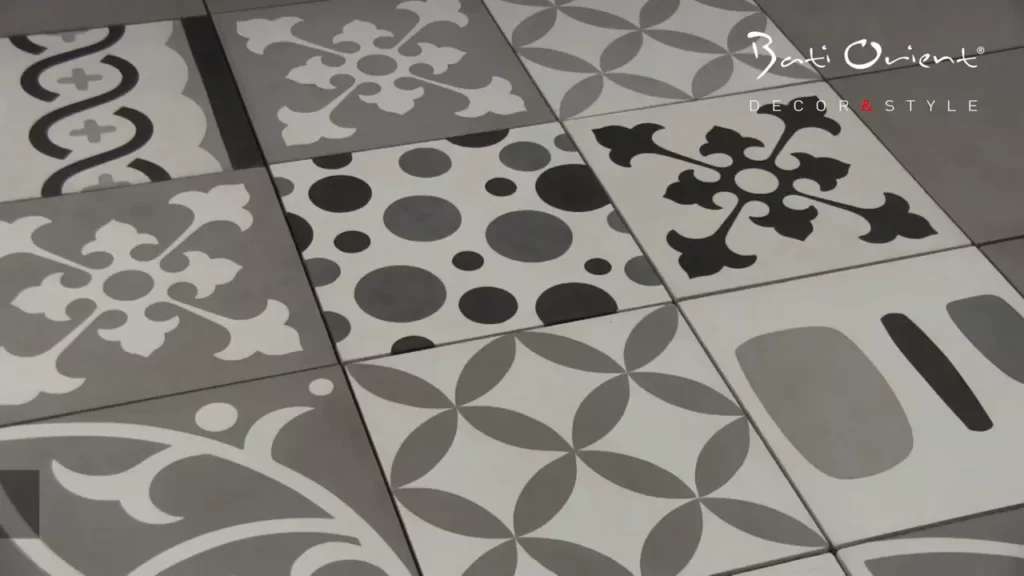
After you have successfully installed your beautiful cement tile backsplash, it’s crucial to allow the adhesive to cure properly. Curing is an essential step in the installation process as it ensures that the tiles bond securely to the wall, providing long-lasting durability. By following the recommended curing time and manufacturer’s instructions for drying, you can rest assured that your cement tile backsplash will be solid and ready to withstand daily use.
Leave the cement tile backsplash undisturbed for the recommended curing time
Once you have successfully installed your cement tile backsplash, it’s important to resist the temptation to touch or disturb it for the recommended curing time. This period allows the adhesive to fully set and bond with the surface, ensuring a strong and reliable installation.
Different adhesives may have different curing times, so it’s essential to refer to the manufacturer’s instructions for your specific adhesive. Typically, the recommended curing time can vary from 24 to 48 hours, but it’s always best to verify this information before proceeding.
During this curing period, it’s crucial to avoid any excessive humidity or moisture in the area. These can hinder the curing process and lead to a weaker bond between the tile and the wall. Additionally, avoid applying any pressure or weight on the backsplash to prevent any potential movement or displacement of the tiles.
Follow the adhesive manufacturer’s instructions for drying time
To ensure a successful installation, it’s important to follow the adhesive manufacturer’s instructions precisely when it comes to drying time. Different adhesives may require different durations to dry fully, so consulting the specific guidelines for your chosen adhesive is crucial to achieve the desired results.
Generally, it is recommended to allow the adhesive to dry for around 24 hours before grouting the cement tiles. This drying time allows the adhesive to fully set and create a strong bond with the tiles and the wall surface. By patiently waiting for the adhesive to dry, you’ll ensure that your grout will adhere properly and provide a polished finishing touch to your cement tile backsplash.
Remember, rushing through the curing and drying process can compromise the integrity of the installation. Patience during this stage will pay off in the long run, as it will ensure the longevity and durability of your cement tile backsplash.
In conclusion, allowing the adhesive to cure properly is vital for a successful cement tile backsplash installation. By leaving the backsplash undisturbed for the recommended curing time and following the adhesive manufacturer’s instructions for drying time, you can rest assured that your backsplash will be strong, durable, and beautiful for years to come.
Mixing And Applying Grout
Mix the grout according to the manufacturer’s instructions
Before you can start applying the grout, you need to properly mix it to achieve the right consistency. This step is crucial as it determines the strength and durability of your backsplash. Follow the manufacturer’s instructions on the grout packaging to ensure you get the proportions right.
First, gather all the necessary materials, including the grout powder, a mixing container, and a stirring stick. Measure out the appropriate amount of grout powder based on the manufacturer’s recommendations.
Next, gradually add water to the powder while stirring continuously. Aim for a thick paste-like consistency, similar to peanut butter. It’s important to add water slowly and mix thoroughly to avoid lumps.
Once you’ve achieved the desired consistency, let the grout sit for a few minutes. This allows the ingredients to fully activate before application. Avoid overmixing the grout, as it can introduce air bubbles and affect its adhesion.
Use a grout float to apply the grout to the tile joints
Now that you have properly mixed the grout, it’s time to apply it to the tile joints using a grout float. A grout float is a tool with a rubber base that helps spread the grout evenly into the gaps between the tiles.
Start by loading the grout onto the float. Scoop up a generous amount of grout from the mixing container and spread it onto the surface of the tiles at a 45-degree angle. Press firmly into the joints while applying a slight downward pressure to ensure proper coverage.
Hold the float at a diagonal angle and move it diagonally across the tiles to push the grout into the joints. Make sure to work the grout into all the spaces and completely fill the gaps. As you go, periodically check that each joint is evenly filled.
Work in small sections and remove any excess grout
To ensure a clean and professional finish, it’s essential to work in small sections when applying grout. This approach prevents the grout from drying out too quickly, giving you enough time to remove any excess before it becomes difficult to handle.
Using a diagonal motion, remove the excess grout from the surface of the tiles using the grout float. Be gentle to avoid removing grout from the joints. As you move along, periodically clean the grout float to prevent any dried grout from getting transferred onto the tiles.
Once you’ve removed the excess grout, allow it to set for the recommended time specified by the manufacturer. This usually ranges from 10 to 30 minutes. Avoid touching or disturbing the grout during this time to prevent any unevenness or damage to the finish.
| Mixing and Applying Grout Tips: |
|---|
| Follow the manufacturer’s instructions for the proper grout-to-water ratio. |
| Use an appropriate grout float to ensure even distribution of the grout. |
| Work in small sections to prevent the grout from drying too quickly. |
| Remove excess grout gently to avoid affecting the filled joints. |
| Allow the grout to set for the recommended time before cleaning. |
By following these steps and tips for mixing and applying grout to your cement tile backsplash, you’ll achieve a professional-looking finish that not only enhances the aesthetic appeal but also ensures the longevity of your installation.
Cleaning And Sealing The Tiles
Before completing your cement tile backsplash installation, it is crucial to clean and seal the tiles properly. This step not only enhances the appearance of the tiles but also protects them from stains and water damage, ensuring their longevity. In this section, we will guide you through the process of cleaning and sealing the tiles so that you can achieve a beautiful and durable backsplash in your home.
Clean the tile surface with a damp sponge to remove grout residue
Once you have finished grouting your cement tile backsplash, it is essential to remove any grout residue that may have been left behind on the tile surface. To do this, take a damp sponge and gently wipe the tiles in a circular motion. The water on the sponge will help loosen and remove the grout residue, revealing the true beauty of your cement tiles.
Allow the grout to dry completely before sealing the tiles
After cleaning the tiles, it is important to give the grout enough time to dry completely before applying the sealer. This typically takes around 24 to 48 hours, depending on the type of grout and the humidity levels in your home. Ensure that the area is well-ventilated during the drying process to accelerate the drying time and achieve optimal results.
Apply a sealer to protect the cement tiles from stains and water damage
Sealing your cement tiles is essential for their protection against stains and water damage. A sealer acts as a barrier, preventing liquids from penetrating the porous surface of the tiles. To apply the sealer, follow the instructions provided by the manufacturer and use a brush or roller to evenly coat the tiles. Be sure to apply the sealer in a well-ventilated area and allow it to dry completely before using the backsplash.
By cleaning and sealing your cement tiles, you can ensure that they maintain their beauty and durability for years to come. Remember to follow these steps carefully to achieve the best results and enjoy your stunning cement tile backsplash for a long time.

Regular Cleaning And Maintenance
Proper cleaning and maintenance of your cement tile backsplash is essential to keep it looking fresh and beautiful for years to come. By following a few simple steps, you can ensure that your backsplash remains in good condition and retains its original charm.
Use a pH-neutral cleaner to clean the tiles regularly
One of the best ways to clean cement tiles is by using a pH-neutral cleaner. This type of cleaner is gentle on the surface of the tiles and effectively removes dirt and grime without causing any damage. Avoid harsh chemicals or acidic cleaners, as they can etch or discolor the tiles over time.
When cleaning your cement tile backsplash, mix the pH-neutral cleaner with water according to the manufacturer’s instructions. Apply the solution to the tiles using a soft sponge or cloth, working in gentle circular motions. Rinse thoroughly with clean water and pat dry with a soft towel.
Avoid using abrasive cleaners or scrub brushes that can damage the tiles
While it may be tempting to use abrasive cleaners or scrub brushes for tougher stains, it’s best to avoid them when it comes to cement tiles. These abrasive materials can scratch and erode the surface of the tiles, causing irreversible damage. Instead, opt for gentle cleaning methods to preserve the integrity of the tiles.
If you encounter stubborn stains that won’t come off with a pH-neutral cleaner, try using a soft cloth or sponge and a mild soap solution. Be sure to rinse the area thoroughly to remove any soap residue.
Wipe up spills immediately to prevent staining
Whether it’s a splash of tomato sauce or a droplet of red wine, it’s important to wipe up spills on your cement tile backsplash immediately. Cement tiles are porous, which means they can easily absorb liquids and become stained if not cleaned promptly.
To prevent staining, have a clean cloth or paper towel handy in the kitchen and wipe up spills as soon as they occur. Blot the area gently to soak up the liquid, rather than rubbing it, which could spread the stain. Follow up with a mild soap and water solution to ensure that any residue is completely removed.
By regularly cleaning and maintaining your cement tile backsplash, you can keep it looking pristine and prolong its lifespan. Remember to use a pH-neutral cleaner, avoid abrasive materials, and wipe up spills promptly to prevent staining. With these simple steps, you can preserve the beauty of your backsplash for years to come.
Repairing Minor Tile Damage
Use a cement repair kit to fix any minor cracks or chips in the tiles
If you notice any minor cracks or chips in your cement tile backsplash, don’t fret! With the right tools and techniques, you can easily repair these damages and restore the beauty of your backsplash. To get started, you’ll need a cement repair kit, which can be easily obtained from your local hardware store or online. This kit typically includes all the necessary materials, such as cement filler, a mixing container, and a putty knife, to fix the damaged tiles.
Follow the instructions on the repair kit for best results
Once you have your repair kit ready, it’s essential to carefully read and follow the instructions provided. Each repair kit may have slightly different guidelines, so it’s crucial to adhere to the specific recommendations for the best results. The instructions will typically guide you on how to mix the cement filler to the right consistency and how to apply it to the damaged area. Following these guidelines will ensure that the repair is done correctly and that the damaged tiles are restored to their original condition.
Blend the repaired area with the surrounding tiles for a seamless finish
After applying the cement filler to the cracked or chipped tiles, it’s important to blend the repaired area with the surrounding tiles for a seamless and natural finish. You can achieve this by carefully smoothing out the repaired area with a putty knife or a similar tool. Make sure to blend the edges of the repaired area with the rest of the tile surface to avoid any noticeable differences. Taking the time to blend the repaired area properly will result in a backsplash that looks as good as new.
To summarize, using a cement repair kit is an excellent solution for fixing any minor cracks or chips in your cement tile backsplash. By following the instructions included with the repair kit, you can ensure that the repairs are done correctly. Additionally, blending the repaired area with the surrounding tiles will help create a seamless finish. With these simple steps, you can easily address minor tile damage and maintain the beauty of your cement tile backsplash for years to come.
Frequently Asked Questions For How To Install Cement Tile Backsplash
Can I Install A Cement Tile Backsplash Myself?
Yes, with the right tools and guidance, installing a cement tile backsplash can be a DIY project. However, it’s important to ensure proper preparation, following the installation instructions, and taking necessary precautions to achieve the best results.
What Materials Do I Need To Install A Cement Tile Backsplash?
To install a cement tile backsplash, you will need cement tiles, adhesive mortar, a trowel, tile spacers, a wet saw or tile cutter, grout, a grout float, and a sponge for cleanup. It’s important to gather all the necessary materials beforehand to ensure a smooth installation process.
How Do I Properly Prepare The Surface For A Cement Tile Backsplash Installation?
Before installing a cement tile backsplash, you need to ensure that the surface is clean, dry, and smooth. Remove any existing tile, clean the surface thoroughly, patch any cracks or imperfections, and apply a primer or sealer as necessary. This will create a stable and suitable surface for the cement tile installation.
Can I Install A Cement Tile Backsplash Over Existing Tiles?
Yes, it is possible to install a cement tile backsplash over existing tiles. However, it’s important to ensure that the surface is clean, dry, and smooth. Roughen the existing tiles for better adhesion, apply adhesive mortar, and then install the cement tiles using tile spacers.
Grouting should be done carefully to ensure a seamless look.
Conclusion
Installing a cement tile backsplash is a manageable DIY project that can add a touch of elegance and character to your kitchen or bathroom. By following the step-by-step instructions provided in this blog post, you can achieve professional-looking results. Remember to prepare the surface, properly cut the tiles, and use a quality adhesive to ensure a long-lasting and beautiful backsplash.
With a little patience and attention to detail, you can transform your space into a stunning focal point. Start your project today and enjoy the benefits of a stylish cement tile backsplash in your home.

