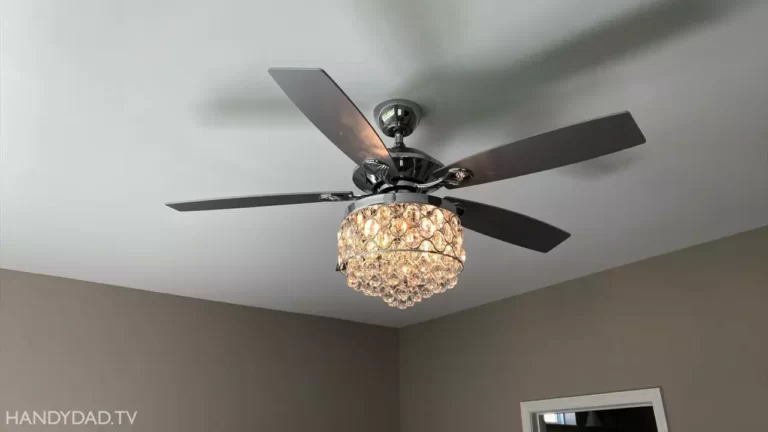
How to Install Ceiling Fan Remote?
To install a ceiling fan remote, follow these steps: Turn off the power to the fan at the breaker box, remove the fan’s canopy and locate the receiver, connect the receiver’s wires to the fan’s existing wires, attach the remote’s wall mount and battery, and finally, pair the remote with the receiver. Installing a ceiling fan remote is a simple and straightforward process that requires basic electrical knowledge and tools.
By following these steps, you can easily control your ceiling fan with the convenience of a remote. Ceiling fans offer a cost-effective and energy-efficient way to cool and circulate air in your home. However, manually controlling a ceiling fan can be inconvenient, especially if it is installed in a high ceiling or hard-to-reach area.
With the installation of a ceiling fan remote, you can effortlessly control your fan speed and lighting settings from the comfort of your couch or bed. Whether you’re installing a new ceiling fan or upgrading an existing one, understanding how to install a ceiling fan remote is a valuable skill that can enhance your overall comfort and convenience. This article will guide you through the simple steps required to install a ceiling fan remote.
Planning Your Ceiling Fan Remote Installation
Installing a ceiling fan remote can be a game-changer when it comes to convenience and comfort, allowing you to control your ceiling fan from anywhere in the room. Whether you’re looking to upgrade your current fan or install a new one, proper planning is essential for a successful installation. In this guide, we’ll walk you through the first steps of planning your ceiling fan remote installation, including choosing the right location for the remote receiver, gathering the necessary tools and materials, and switching off the power to the fan. By following these steps, you’ll be well on your way to enjoying the benefits of a ceiling fan remote in no time!

Choosing the Right Location for the Remote Receiver
Before you begin your ceiling fan remote installation, it’s important to determine the best location for the remote receiver. This receiver acts as the “brain” of the system, receiving signals from the remote control and sending them to the fan to control its functions. The receiver should be placed in a location where it can easily receive signals from the remote control without any obstructions. Here’s how to choose the right location:
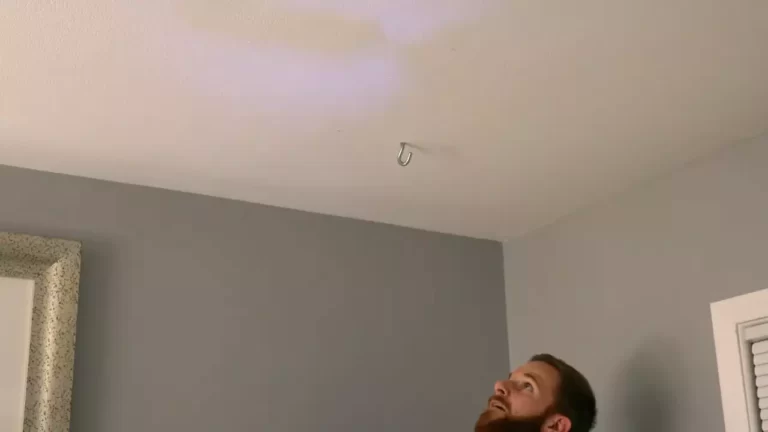
- Start by identifying a suitable location near the fan where the receiver can be installed. This is usually in the ceiling canopy, where the fan is mounted.
- Ensure the receiver can fit comfortably in the chosen location without interfering with the fan’s operation or the installation of any other components.
- Check that there is a power source nearby, as the receiver will need to be connected to the fan’s electrical wiring.
- Consider the aesthetics of the room and choose a location that is visually appealing and doesn’t disrupt the overall design.
By carefully selecting the ideal location for the remote receiver, you’ll ensure optimal performance and seamless operation of your ceiling fan remote.
Gathering the Necessary Tools and Materials
Now that you have a suitable location for the remote receiver, it’s time to gather the necessary tools and materials for the installation. Having everything you need beforehand will save you time and frustration during the process. Here’s a list of tools and materials you’ll likely need:
| Tools | Materials |
|---|---|
| Screwdriver | Ceiling fan remote kit |
| Wire strippers | Electrical tape |
| Wire nuts | Wire connectors |
| Needle-nose pliers | Wire strippers |
| Utility knife | Mounting hardware |
Make sure you have these tools and materials readily available before starting the installation process, as they will be essential for a smooth and successful installation.
Switching Off Power to the Fan
Prior to working on any electrical components of your ceiling fan, it is crucial to switch off the power to the fan to prevent any accidents or injuries. Follow these steps to turn off the power:
- Locate your electrical panel or circuit breaker box in your home.
- Identify the circuit breaker that controls power to the ceiling fan.
- Switch off the circuit breaker by flipping the corresponding switch to the “off” position.
- Test that the power has been properly switched off by trying to operate the ceiling fan using the remote control or wall switch.
By taking the necessary precautions and switching off the power before starting the installation, you’ll ensure a safe and secure environment to work in.
Now that you have planned your ceiling fan remote installation, choosing the right location for the remote receiver, gathered the necessary tools and materials, and switched off power to the fan, you’re ready to move on to the next steps of installing the remote. Stay tuned for our upcoming blog posts that will guide you through the rest of the installation process and help you enjoy the benefits of remote-controlled ceiling fan operation.
Step-By-Step Guide To Installing The Ceiling Fan Remote
Installing a remote control for your ceiling fan can greatly enhance your comfort and convenience. With a remote control, you can easily adjust the fan’s speed, change the direction of the blades, and turn the fan on or off without having to get up from where you are. In this step-by-step guide, we’ll walk you through the installation process, from removing the fan canopy cover to installing batteries in the remote control. So let’s get started!
Removing the Fan Canopy Cover
The first step in installing the ceiling fan remote is to remove the fan canopy cover. This cover is located at the top of the fan, where the electrical wires are connected. Follow these steps to remove the canopy cover:
- Turn off the power to the fan at the circuit breaker.
- Use a ladder or step stool to reach the fan.
- Locate the screws or clips that are holding the canopy cover in place.
- Use a screwdriver or pliers to remove the screws or release the clips.
- Carefully lift the canopy cover off the fan, exposing the wiring.
Once the canopy cover is removed, you’ll need to connect the receiver to the fan’s wiring. The receiver is the device that will receive signals from the remote control and control the fan’s operation. Here’s how to connect the receiver:
- Identify the wires coming from the ceiling and the ones coming from the fan.
- Match the colors of the wires: black to black, white to white, and green or copper to the grounding wire.
- Use wire nuts to secure the connections, making sure they are tight.
- Carefully tuck the wires into the wiring housing, ensuring that they are not pinched or damaged.
With the receiver connected, you can now mount the remote control holder to the wall or another convenient location. The remote control holder will keep the remote control within easy reach, so you can control the fan from anywhere in the room. Follow these steps to mount the remote control holder:
- Select a suitable location for the remote control holder, ensuring it is within range of the receiver.
- Use screws or adhesive to attach the remote control holder to the wall or other surface.
- Make sure the holder is secure and level.
Once the remote control holder is mounted, all that’s left to do is install the batteries in the remote control. The batteries power the remote control and allow you to send signals to the receiver. Here’s how to install the batteries:
- Open the battery compartment on the back of the remote control.
- Insert the batteries, following the polarity markings inside the compartment.
- Close the battery compartment securely.
Congratulations! You have successfully installed the ceiling fan remote. Now you can sit back, relax, and enjoy the convenience of controlling your fan with just a press of a button.

Connecting The Receiver To The Fan’S Wiring
Identifying the receiver’s wires and matching them with the fan’s wires
Before connecting the receiver to the fan’s wiring, it’s important to identify the different wires and properly match them. This step ensures a secure and functional connection between the remote receiver and the fan itself.
Here’s a simple breakdown of how to identify and match the receiver’s wires with the fan’s wires:
- L1 and L2: These wires are typically the line and load wires, responsible for providing power to the receiver and the fan respectively. Refer to the manufacturer’s instructions to accurately identify these wires.
- Neutral wire: This wire should be connected to the neutral terminal on the receiver. It is usually color-coded as white or gray. Likewise, locate the neutral wire coming from the fan and connect it to the appropriate terminal.
- Fan wire: The receiver will also have a wire specifically designated for the fan. This wire is responsible for controlling the fan’s functions, such as speed and direction. Connect this wire to the corresponding wire from the fan.
- Light wire: If your fan has a light fixture, there will be a separate wire for the lights. Connect this wire to the light wire coming from the fan, ensuring a secure connection.
Remember to always refer to the specific instructions provided by the manufacturer, as wire colors and configurations may vary depending on the model and brand of the ceiling fan.
Using wire connectors to secure the connections
Once you’ve identified and matched the receiver’s wires with the fan’s wires, it’s time to secure the connections using wire connectors. Wire connectors are designed to ensure a safe and reliable electrical connection. Follow these steps to use wire connectors effectively:
- Strip the wires: Use wire strippers to carefully remove the insulation from the ends of the wires, exposing about 1/2 inch of bare wire.
- Twist the wires together: Take the corresponding wires from the receiver and the fan and twist them tightly together. This creates a stronger connection and makes it easier to secure the wire connector.
- Attach the wire connector: Choose an appropriately sized wire connector for the gauge of the wires and insert the twisted wires into the connector. Twist the wire connector clockwise until it is firmly secured.
- Tug test: Give the wires a gentle tug to ensure they are securely connected. If the wires come loose, disconnect and reconnect them, ensuring a tighter connection.
Repeat this process for each wire connection, ensuring all connections are properly secured and tight. Inspect the connections visually to confirm that none of the wires are exposed and that the wire connectors are fully covering the twisted wires.
Once all connections are secured, you’re ready to move on to the next step in the installation process. With the receiver now successfully connected to the fan’s wiring, you’ll soon be able to enjoy the convenience and comfort of controlling your ceiling fan with a remote.
Mounting The Remote Control Holder
Finding an accessible and convenient location for the remote control holder
Before mounting the remote control holder for your ceiling fan, you’ll want to take some time to find the perfect location. You’ll want to ensure that it is easily accessible and conveniently placed. This will allow you to effortlessly control the fan, without having to search for the remote.
To find the right location, consider the following:
- Place the remote control holder within arm’s reach from where you typically sit or stand near the fan. This will allow you to easily grab the remote whenever you need to adjust the fan settings.
- Choose a spot that is easily visible. You don’t want to struggle to locate the remote control holder or accidentally overlook it.
- Avoid placing the holder too close to any light sources, as the glare could make it difficult to read the buttons on the remote.
Using screws or adhesive to attach the holder
Once you’ve found the perfect spot for your remote control holder, it’s time to mount it securely. There are two common methods for attaching the holder: using screws or adhesive. Each method has its own benefits, so choose the one that works best for you.
Attaching the holder with screws
To mount the holder using screws, follow these steps:
- Gather your screwdriver and the screws that come with the holder.
- Hold the holder against the wall or another flat surface in the chosen location.
- Insert the screws through the holes in the holder and into the wall or surface.
- Tighten the screws, ensuring that the holder is securely fastened.
Attaching the holder with adhesive
If you prefer to avoid drilling holes or if the surface doesn’t allow for screws, you can use adhesive to mount the holder. Here’s how:
- Clean the surface where you plan to attach the holder with a mild cleaner or rubbing alcohol to remove any dirt or grease.
- Remove the adhesive backing from the holder.
- Press the holder firmly against the cleaned surface, applying steady pressure for a few seconds to ensure proper adhesion.
- Allow the adhesive to fully cure before placing the remote control in the holder to avoid any accidental detachment.
No matter which method you choose, be sure to follow the manufacturer’s instructions that come with the remote control holder. This will ensure that you mount it correctly and securely, giving you easy access to your ceiling fan remote whenever you need it.

Installing Batteries In The Remote Control
Opening the battery compartment
To install batteries in your ceiling fan remote control, you’ll need to open the battery compartment. This is usually located on the back of the remote. Look for a small latch or tab that can be slid or flipped open. Depending on the model of your remote control, the design may vary, so refer to the user manual provided by the manufacturer for specific instructions.
Inserting the batteries correctly
Once you have accessed the battery compartment, it’s time to insert the batteries. Most remote controls use AA or AAA batteries, but again, check the user manual to confirm the battery type required for your specific remote control model.
- Remove the battery cover, if applicable, by using your fingers or a small screwdriver to pry it open gently.
- Take note of the polarity markings inside the battery compartment. Usually, there will be a (+) and (-) sign indicating how the batteries should be placed.
- Match the positive (+) and negative (-) ends of the batteries with the corresponding markings in the battery compartment.
- Insert the batteries one by one, making sure they fit snugly into their positions.
Closing the battery compartment securely
After you’ve inserted the batteries correctly, it’s essential to close the battery compartment securely to ensure proper functioning of the remote control.
- Carefully align the battery cover with the remote control’s body.
- Press down firmly until you hear a click or feel it snap into place.
- Give the remote control a gentle shake to ensure the batteries are secured and there is no rattling sound.
- If the battery compartment has a latch, slide or flip it back into position, making sure it locks properly.
Remember, a properly closed battery compartment not only prevents the batteries from falling out but also ensures a reliable connection for the remote control to work effectively.
By following these simple steps, you can easily install batteries in your ceiling fan remote control and enjoy the convenience of controlling your fan from a distance. Make sure to dispose of old batteries responsibly and replace them with new ones as needed to maintain optimal performance.
Testing And Troubleshooting
Once you have successfully installed a ceiling fan remote, it’s important to test and troubleshoot to ensure everything is working correctly. This step is crucial to avoid any potential issues or malfunctions down the line. In this section, we will guide you through the process of restoring power to the fan, testing both the fan and the remote control, as well as providing common troubleshooting tips and solutions.
Restoring power to the fan
Before moving forward with testing and troubleshooting, it is essential to restore power to the ceiling fan. To do so, follow these steps:
- Turn on the circuit breaker or flip the wall switch that controls the ceiling fan.
- Make sure the fan’s power switch is in the “on” position.
- Check the fan’s wiring connections to ensure they are properly secured and tight.
By restoring power to the fan, you are now ready to move on to the next step of testing the fan and remote control.
Testing the fan and remote control
Testing the fan and remote control will help determine if the installation was successful and if any adjustments or troubleshooting is necessary. Follow these steps to test both components:
- Stand a few feet away from the fan and press the various buttons on the remote control.
- Observe if the fan responds accordingly, such as changing speed, turning on or off, and controlling the lights (if applicable).
- If the fan does not respond, check if the batteries in the remote control need to be replaced.
- Inspect the remote control’s programming instructions to ensure you have properly synced it with the fan. Follow the manufacturer’s guidelines if reprogramming is necessary.
By following these steps, you can verify if both the fan and remote control are functioning correctly. If any issues persist, proceed to the next section for some common troubleshooting tips and solutions.
Common troubleshooting tips and solutions
Even with proper installation and testing, there are instances when issues arise with ceiling fan remote controls. Here are some common troubleshooting tips and solutions:
| Issue | Solution |
|---|---|
| The fan and the remote control are not syncing. | Refer to the fan’s instruction manual or the manufacturer’s website for specific programming instructions. Follow the steps carefully to reprogram the remote control. |
| The fan is not responding to any remote control commands. | Check if the batteries in the remote control are functioning properly. Replace them if necessary. If the issue persists, ensure the remote control is within the specified range of the fan and that there are no obstructions blocking the signal. |
| The fan is operating erratically or making unusual noises. | Inspect the fan’s blades, brackets, and mountings to ensure they are securely in place. Tighten any loose screws or connections. If the issue persists, consult the manufacturer or a professional electrician for further assistance. |
By following these troubleshooting tips and solutions, you can address common issues that may arise with your ceiling fan remote control. Remember to always consult the manufacturer’s guidelines and seek professional assistance if necessary.

Additional Tips And Safety Precautions
When installing a ceiling fan remote, there are a few additional tips and safety precautions to keep in mind. These steps will not only ensure a smooth installation process but also help maintain the safety and functionality of your ceiling fan in the long run.
Tucking Away Any Excess Wiring
After wiring the ceiling fan remote, it’s important to tidy up any excess wiring to avoid potential hazards. Leaving loose wires hanging can not only be unsightly but also increase the risk of accidents. To tuck away any excess wiring:
- Use cable ties or electrical tape to secure and bundle the wires neatly together.
- Locate a suitable spot near the fan’s mounting bracket or ceiling canopy to hide the excess wiring.
- Ensure the wiring is secure and not obstructing the fan’s movement or interfering with other electrical components.
Ensuring Proper Grounding for the Fan
Proper grounding is crucial to ensure the safe operation of your ceiling fan remote. Grounding helps protect against electrical shocks and plays a vital role in preventing electrical fires. To ensure proper grounding:
- Consult the manufacturer’s instructions or refer to the fan’s wiring diagram to identify the grounding wire.
- Connect the grounding wire securely to the designated grounding terminal or screw on the fan’s mounting bracket.
- Use a grounding wire connector to ensure a solid and reliable connection.
- Test the fan after installation to confirm that it’s functioning properly and that the grounding is effective.
Following Safety Guidelines While Working with Electricity
Working with electricity requires caution to prevent accidents and ensure personal safety. Here are some essential safety guidelines to adhere to:
- Always turn off the power at the circuit breaker before starting any electrical work.
- Double-check that the power is off by using a voltage tester on the wires you’ll be working with.
- Wear protective gear, such as insulated gloves and safety glasses, to protect yourself from electrical hazards.
- Avoid working in wet or damp conditions to reduce the risk of electric shocks.
- If you’re unsure about any step, consult a qualified electrician to ensure a safe and accurate installation.
Frequently Asked Questions For How To Install Ceiling Fan Remote
Can You Add A Remote To An Existing Ceiling Fan?
Yes, you can add a remote to an existing ceiling fan. Simply purchase a compatible remote control and follow the manufacturer’s instructions for installation. Enjoy the convenience of controlling your ceiling fan from a distance.
How Do You Wire A Remote Control For A Ceiling Fan?
To wire a remote control for a ceiling fan, follow these steps:
1. Turn off the power to the fan.
2. Install the remote receiver inside the fan’s canopy.
3. Connect the receiver’s wires to the fan’s wires using wire nuts.
4. Attach the antenna to the receiver.
5. Install batteries in the remote control and program it.
Can You Program a Universal Ceiling Fan Remote?
Yes, you can program a universal ceiling fan remote. It’s a simple process where you follow the instructions provided with the remote.
Why Is My Ceiling Fan Not Responding To Remote?
The ceiling fan might not respond to the remote due to dead batteries, signal interference, or a faulty remote. Check the batteries, ensure the remote is within range, and try resetting the remote. If the problem persists, consult the user manual or contact customer support for further assistance.
Conclusion
Installing a ceiling fan remote can be a simple and convenient way to control your fan from a distance. By following the step-by-step guide outlined in this blog post, you can easily install a ceiling fan remote in your home.
From identifying the appropriate wiring to syncing the remote with the fan, you now have the knowledge needed to tackle this DIY project. Enjoy the comfort and convenience of adjusting your ceiling fan with just the push of a button!