How to Install Cathedral Ceiling Support Box?
To install a cathedral ceiling support box, follow these steps: Determine the location, cut a hole in the ceiling, assemble the support box, secure it in place, and wire the electrical connections. Now, let’s dig deeper into the process of installing a cathedral ceiling support box.
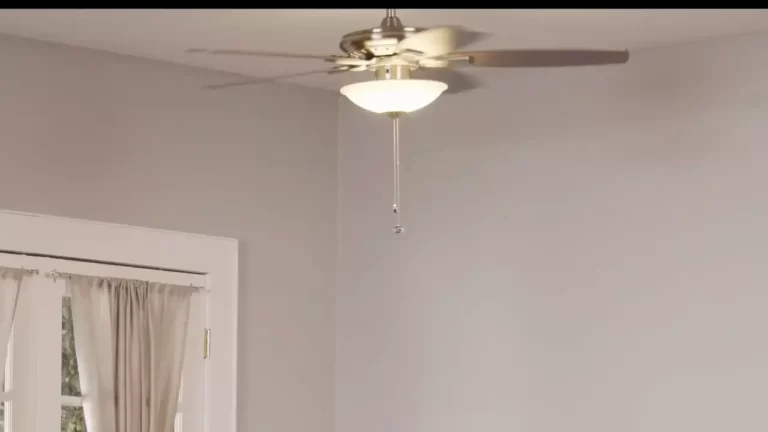
A cathedral ceiling adds visual appeal and spaciousness to a home, but it can present some challenges when it comes to installing ceiling fixtures. One such challenge is installing a support box for light fixtures or ceiling fans. A cathedral ceiling support box provides a secure mounting point for these fixtures, ensuring their stability and safety.
In this guide, we will walk you through the steps to successfully install a cathedral ceiling support box, so you can enjoy your desired lighting fixtures in your cathedral ceiling space without any worries.
What Is A Cathedral Ceiling Support Box And Its Importance
A cathedral ceiling support box, also known as a ceiling fan mounting box or electrical box, is an essential component for safely installing a ceiling fan or light fixture on a cathedral or sloped ceiling. This support box is designed to provide stability and rigidity to the fan or fixture, ensuring it stays securely in place.

Definition and function of a cathedral ceiling support box
| Definition | Function |
|---|---|
| A support box that is specifically designed | To support and stabilize ceiling fans and light fixtures |
| It is typically made of metal | Ensuring durability and safety |
| The support box is installed securely | In the ceiling joists or rafters |
The primary function of a cathedral ceiling support box is to provide a secure mounting point for ceiling fans and light fixtures in spaces with sloped or cathedral ceilings. This type of ceiling presents a unique challenge due to the angle and height, making it challenging to attach traditional electrical boxes. By utilizing a support box specifically designed for cathedral ceilings, you can eliminate any safety concerns and ensure that your ceiling fan or light fixture remains stable and secure.
Benefits of using a support box for cathedral ceilings
- Stability: A cathedral ceiling support box is built to securely mount ceiling fans and fixtures, preventing any risks of wobbling or detachment. This stability ensures the safety of your ceiling installation.
- Durability: These support boxes are typically made of metal, providing exceptional durability and longevity. They are designed to withstand the weight and movement of ceiling fans or light fixtures, assuring long-term reliability.
- Safety: Installing a ceiling fan or light fixture on a cathedral ceiling involves electrical connections, and a support box helps to ensure safe and proper wiring. This reduces the risk of electrical mishaps or fires.
- Code Compliance: Many building codes require the use of a ceiling fan support box for cathedral ceilings. By adhering to these guidelines, you can ensure that your installation meets safety standards and passes inspections with ease.
- Easy Installation: Despite the complexity of a cathedral ceiling, support boxes are designed for straightforward installation. They are compatible with various ceiling designs and provide clear instructions to help you complete the installation efficiently.
In conclusion, a cathedral ceiling support box is a vital component when installing ceiling fans or light fixtures on sloped or cathedral ceilings. Its purpose is to ensure stability, durability, safety, code compliance, and ease of installation. By choosing a high-quality support box and following proper installation procedures, you can enjoy the benefits of a secure and functional ceiling installation.
Essential Tools And Materials Needed
Before you begin installing a cathedral ceiling support box, it is crucial to ensure that you have all the necessary tools and materials at your disposal. This will help facilitate a smooth and efficient installation process, saving you time and frustration in the long run. Here is a comprehensive list of tools required for the installation process, as well as an overview of the materials you will need for the support box:
List of tools required for the installation process
- Power drill: An essential tool for making holes and securing screws.
- Screwdriver: Necessary for attaching screws and tightening various components.
- Measuring tape: Used to accurately measure and mark the dimensions for installation.
- Stud finder: Helps locate the ceiling joists for proper support.
- Pencil: Used to mark the spots where you will be drilling or cutting.
- Safety goggles: Protects your eyes from any potential hazards during the installation process.
- Ladder or scaffolding: Provides safe access to the ceiling area.
Overview of the materials needed for the support box
When it comes to the materials needed for the support box, it is important to choose high-quality components that can withstand the weight and stress of the cathedral ceiling. Here are the essential materials you will need:
| Material | Description |
|---|---|
| Support box | A sturdy box that will be used to house electrical connections and provide support for light fixtures or ceiling fans. |
| Ceiling fan brace | A metal brace that attaches to the ceiling joists and provides additional support for heavy ceiling fans. |
| Electrical wire | High-quality electrical wire that meets the necessary safety standards and can handle the load of your light fixtures or ceiling fans. |
| Wire connectors | These connectors are used to join and secure electrical wires together, ensuring a safe and reliable connection. |
By having the right tools and materials on hand, you can streamline the installation process and ensure the longevity and functionality of your cathedral ceiling support box. So, gather your tools, prepare your materials, and let’s dive into the installation process!

Planning And Preparation
Before installing a cathedral ceiling support box, it’s essential to carefully plan and prepare for the installation process. This includes measuring the ceiling height, checking the electrical code and regulations, and turning off the power supply. By following these steps, you can ensure a safe and successful installation.
Measuring the ceiling height to determine the location of the support box
In order to install a cathedral ceiling support box properly, you need to accurately measure the ceiling height. This will help you determine the appropriate location for the support box. Start by using a tape measure to measure the distance from the floor to the highest point of the ceiling. Write down this measurement and keep it handy as you proceed with the installation.
Checking the electrical code and regulations for compliance
Prior to installing the cathedral ceiling support box, it’s important to check the electrical code and regulations to ensure compliance. These codes and regulations are in place to ensure safety and prevent any potential hazards. Consult your local building codes or electrical inspector to verify the requirements for installing a support box in a cathedral ceiling. Adhering to these guidelines will help you avoid any potential violations and ensure the installation meets the necessary standards.
Turning off the power supply before beginning the installation
Before you start the installation process, it’s crucial to turn off the power supply to the area where you will be working. This will help prevent any electrical accidents or injuries during the installation. Locate the circuit breaker or fuse box that controls the power to the area and switch it off. Test the circuit with a voltage tester to confirm that the power is indeed off before proceeding with the installation. Safety should always be a top priority when working with electrical installations.
Installing The Support Box
When it comes to installing a cathedral ceiling support box, there are a few key steps you’ll need to follow to ensure a safe and secure installation. In this guide, we’ll walk you through each step of the process, from choosing the right type of support box to properly connecting the electrical wires. Let’s get started!
Choosing the right type of support box for the ceiling structure
Before you begin the installation process, it’s important to choose the right type of support box for your cathedral ceiling. There are a few different options to consider, depending on the weight and size of the fixture you plan to install. Here are some common types:
| Type | Description |
|---|---|
| Octagonal box | This versatile box is commonly used for ceiling fans or heavy light fixtures. |
| Pancake box | Low-profile box suitable for lightweight fixtures or recessed lighting. |
Choose a support box that best matches your needs and the weight requirements of your fixture. Once you have the right support box, you can move on to the next step.

Cutting a hole in the ceiling for the support box installation
Now that you have your support box, it’s time to cut a hole in the ceiling for its installation. Use a stud finder to locate the ceiling joists and mark their positions. Measure and mark the center of the desired location for the support box.
Next, use a reciprocating saw or a keyhole saw to carefully cut along the marked lines. Take your time to ensure a clean and precise cut. Once the hole is cut, remove any debris and rough edges to create a smooth opening for the support box.
Securing the support box to the ceiling joist properly
With the hole in place, it’s time to secure the support box to the ceiling joist. Insert the support box into the hole, aligning it with the opening. If necessary, use adjustable brackets or support clips to provide additional stability.
Once the support box is in position, use screws or appropriate fasteners to secure it to the ceiling joist. Ensure that the support box is flush with the ceiling surface and securely attached to prevent any wobbling or movement.
Properly connecting the electrical wires to the support box
Now that the support box is securely installed, it’s time to connect the electrical wires. Start by turning off the power to the circuit you’ll be working on from the main electrical panel. It’s crucial to follow proper safety precautions and turn off the power to avoid any electrical accidents.
Inside the support box, you’ll find screw terminals or wiring connectors. Carefully strip the insulation from the ends of the electrical wires, and then connect them to the appropriate terminals or connectors, following the manufacturer’s instructions.
After the wires are connected, gently tuck them into the support box, making sure there is enough slack for the fixture to be easily installed. Double-check that all connections are secure and tight, and then restore power to the circuit.
With the support box properly installed and the electrical connections made, you’re now ready to safely and confidently proceed with installing your cathedral ceiling fixture. By following these steps, you can ensure a successful installation that meets all safety standards.
Installing The Junction Box And Cover Plate
Installing the junction box and cover plate is an important step in the process of installing a cathedral ceiling support box. This is where you will attach the electrical wires and conceal the support box and junction box for a seamless look. In this guide, we will walk you through each step of this process.
Attaching the junction box to the support box
Once you have properly installed the support box in the desired location on your cathedral ceiling, it’s time to attach the junction box. The junction box provides a secure housing for the electrical connections.
To attach the junction box to the support box:
- Remove the cover plate from the support box. This will expose the inside of the support box.
- Position the junction box over the opening of the support box, ensuring that it fits securely.
- Using screws or other appropriate fasteners, attach the junction box to the support box. Make sure to tighten the screws securely but not overly tight to avoid damaging the support box or the junction box.
Connecting the electrical wires to the junction box
With the junction box securely attached, the next step is to connect the electrical wires to the junction box. This step requires caution and attention to ensure safety and proper functioning.
To connect the electrical wires to the junction box:
- Carefully strip the insulation from the ends of the electrical wires, exposing the copper conductors.
- Insert the stripped ends of the wires into the appropriate terminals or wire connectors inside the junction box.
- Tighten the terminals or connectors to secure the wires in place. Ensure that the connections are tight to prevent any loose wires.
- Double-check all connections to ensure they are secure and properly aligned.

Installing the cover plate to conceal the support box and junction box
Once the electrical wires are connected, it’s time to install the cover plate to hide the support box and junction box and achieve a polished look.
To install the cover plate:
- Take the cover plate and align it with the opening of the support box and junction box.
- Securely fasten the cover plate to the support box using the screws provided.
- Make sure the cover plate sits flush against the ceiling and is evenly tightened.
By following these steps, you can successfully install the junction box and cover plate for your cathedral ceiling support box. This final installation step not only ensures the proper functionality of your electrical connections but also adds a finishing touch to your ceiling.
Testing And Finalizing The Installation
When it comes to the installation of a cathedral ceiling support box, testing and finalizing the installation is a crucial step. This is the stage where you ensure that everything is properly installed and in working order before completing the project. In this section, we will guide you through the necessary steps to test the stability, check for any loose connections or potential problems, and fix any issues if necessary to ensure the support box is secure and functional.
Turning the Power Supply Back On and Testing the Stability of the Support Box
Once you have completed the installation of the cathedral ceiling support box, the first step is to turn the power supply back on. Before doing so, double-check that all electrical connections have been correctly made and that the wiring is secure.
After turning on the power supply, observe the support box closely for any signs of instability. Look for any movement or sagging, as these could indicate that the box is not properly supported. If you notice any instability, it is crucial to address the issue before proceeding further.
Checking for Any Loose Connections or Potential Problems
Now that the power supply is back on and the stability of the support box has been ensured, it is time to check for any loose connections or potential problems. Carefully inspect the electrical wiring and make sure all connections are secure and tightly fastened.
Additionally, examine the support box itself for any signs of damage or defects. Look for any cracks, loose screws, or other potential issues that could compromise the functionality and safety of the support box.
Fixing Any Issues and Ensuring the Support Box is Secure and Functional
If during the inspection you come across any loose connections or potential problems, it is crucial to fix them before finalizing the installation. Tighten any loose screws or connections, replace any damaged or defective parts, and ensure that everything is properly secured.
Once you have fixed any issues, retest the stability of the support box to confirm that all adjustments and repairs have been successful. Gently apply pressure to the box to check for any movement or instability.
In conclusion, testing and finalizing the installation of a cathedral ceiling support box is a critical step to ensure safety and functionality. By following these steps, you can confidently complete the installation process and enjoy the benefits of a secure and reliable support box for your cathedral ceiling.
Additional Tips And Safety Precautions
When installing a cathedral ceiling support box, it’s important to prioritize safety and ensure a successful installation. Following the correct safety precautions and troubleshooting any common installation problems can help you complete the project smoothly. In this section, we’ll outline some essential safety measures to follow during the installation process and provide tips for troubleshooting any issues that may arise.

Safety precautions to follow during the installation process
Installing a cathedral ceiling support box involves working with electrical wiring and heavy fixtures. It’s crucial to prioritize your safety throughout the entire process. Here are some safety precautions to keep in mind:
- Always turn off the power supply to the area where you’ll be working. This protects you from electric shock and prevents damage to the electrical system.
- Before starting the installation, ensure that you have the proper tools and equipment. This includes protective gloves, safety glasses, and a sturdy ladder or scaffolding if needed.
- Read and follow the manufacturer’s instructions carefully. Each support box may have specific installation requirements, and deviating from these instructions could lead to improper installation.
- Avoid overloading the support box. Check the maximum weight capacity specified by the manufacturer and ensure that the fixtures you’re installing will not exceed it.
- If you’re unsure of any step or encounter unexpected issues, consult a professional electrician or contractor for assistance. It’s better to seek help than to risk making mistakes that could compromise your safety.
Tips for troubleshooting common installation problems
Despite your best efforts, you may encounter some common installation problems while installing a cathedral ceiling support box. Here are some tips to help you troubleshoot these issues:
| Problem | Solution |
|---|---|
| The support box is not flush with the ceiling | Check if the bracket or mounting hardware is securely attached. Adjust or tighten as necessary to ensure proper alignment with the ceiling. |
| The electrical wiring is too short | If the wiring is not long enough, use wire connectors or junction boxes to extend it. Make sure to follow the appropriate wiring regulations. |
| The support box is not stable | Ensure that the support box is properly anchored to a structural element, such as a ceiling joist. If necessary, use additional braces or supports for added stability. |
By following these safety precautions and utilizing these troubleshooting tips, you can ensure a safe and successful installation of a cathedral ceiling support box. Remember, when in doubt, it’s always best to seek professional assistance to avoid any potential risks or errors.
Frequently Asked Questions Of How To Install Cathedral Ceiling Support Box
Do You Need A Chimney Support Box?
Yes, a chimney support box is necessary for proper support and stability of the chimney. It helps to prevent structural damage and ensures the safety of the chimney system.
What Does A Ceiling Support Box Do?
A ceiling support box is used to provide stability and support when installing a ceiling fan or light fixture. It ensures that the weight and movement of the fan or fixture are properly distributed, preventing damage to the ceiling and ensuring safety.
How Can I Support A Cathedral Ceiling In My Home?
To support a cathedral ceiling, you can install a ceiling support box. This box provides stability and structural support to the ceiling, preventing any sagging or damage over time. It is important to follow the manufacturer’s instructions and hire a professional if needed to ensure proper installation.
What Is A Cathedral Ceiling Support Box?
A cathedral ceiling support box is a structural component that helps support the weight of a cathedral ceiling. It is typically made of heavy-duty metal and is installed between the ceiling joists. This box helps distribute the weight evenly, reducing the risk of sagging and ensuring the ceiling’s stability.
Conclusion
Installing a cathedral ceiling support box may seem like a daunting task, but with the right guidance and a few essential tools, you can easily accomplish it. By following the steps outlined in this guide, you can ensure the safety and stability of your ceiling while adding a touch of elegance to your space.
Remember to measure accurately, use proper supports, and consult professional assistance if needed. With a little patience and attention to detail, you’ll have a beautifully installed cathedral ceiling support box in no time. Achieve a stunning and secure ceiling upgrade effortlessly!