How to Install Bathroom Vent Through Roof?
To install a bathroom vent through the roof, mark the location on the roof, cut a hole, and install the vent pipe using roof flashing. Proper installation of a bathroom vent through the roof is important to ensure that moisture and odors are expelled from the bathroom effectively.
Proper ventilation is essential in a bathroom to remove moisture and prevent the buildup of unpleasant odors. One way to achieve this is by installing a bathroom vent through the roof, which allows for the efficient expulsion of air to the exterior of the house.
This article will provide a step-by-step guide on how to install a bathroom vent through the roof, ensuring that the process is undertaken accurately and effectively. By following these guidelines, you can improve the air quality in your bathroom and enhance the overall comfort and cleanliness of your home.
Factors To Consider Before Installing A Bathroom Vent Through The Roof
When it comes to proper bathroom ventilation, installing a vent through the roof can be an effective solution. However, before you start drilling holes and making modifications to your home, there are several important factors you need to consider. From assessing the bathroom layout and location to understanding local building codes and regulations, these factors will help ensure a successful and efficient installation.
In this article, we will delve into each of these considerations and provide you with the necessary information to make informed decisions. So, let’s get started!

Assessing the Bathroom Layout and Location
Before installing a bathroom vent through the roof, it’s crucial to assess the bathroom layout and location. The placement of the vent will depend on the specific characteristics of your bathroom, including its size, configuration, and proximity to external walls. Consider the following:
- The distance between the bathroom and the roof: Determine the approximate distance between the bathroom ceiling and the roof. This will help you better understand the length of the vent pipe required.
- Obstructions: Identify any potential obstructions, such as electrical wiring, plumbing pipes, or structural components that may hinder the installation process. Plan the vent route accordingly to avoid interference.
- Moisture-prone areas: Take note of areas in the bathroom that are more prone to moisture accumulation, such as near the shower or bathtub. Ensure the location of the vent promotes efficient air extraction from these high-moisture areas.
- Aesthetic considerations: Consider the visual impact of the vent placement, both from the inside and outside of the house. Choose a location that blends harmoniously with the overall design of your home.
Choosing the Right Ventilation System for Your Bathroom
Once you’ve assessed the bathroom layout and location, the next step is to choose the right ventilation system for your bathroom. The ventilation system you select should meet your specific needs in terms of airflow capacity, noise level, and energy efficiency. Here are a few considerations to guide your decision:
- Airflow capacity: Calculate the required airflow capacity based on the volume of your bathroom. This will ensure proper ventilation and prevent moisture-related issues.
- Noise level: Look for a ventilation system that operates quietly, providing optimal comfort during use.
- Energy efficiency: Opt for an energy-efficient ventilation system that helps reduce energy consumption and lowers utility bills.
- Additional features: Consider extra features such as built-in humidity sensors, timers, or motion-activated controls that enhance the functionality of the ventilation system.
Understanding Local Building Codes and Regulations
Before proceeding with the installation of the bathroom vent through the roof, it’s important to understand and comply with local building codes and regulations. Each region may have specific requirements regarding vent sizing, insulation, fire safety, and permits. Here are some steps to follow:
- Research local codes: Familiarize yourself with the specific building codes and regulations in your area pertaining to bathroom ventilation.
- Permit requirements: Determine if obtaining a permit is necessary for the installation, and if so, ensure you apply for the appropriate permits.
- Consult with a professional: Seek advice from a professional if you are unsure about any code requirements or regulations.
By considering the bathroom layout and location, choosing the right ventilation system, and understanding local building codes and regulations, you are well-prepared to install a bathroom vent through the roof. Take the time to carefully plan and execute the installation process to ensure optimal ventilation and a comfortable bathroom environment for years to come.
Gathering The Necessary Tools And Materials
Welcome to the next step of installing a bathroom vent through the roof – gathering the necessary tools and materials. This crucial phase ensures that you have everything on hand to successfully complete the project. By having the proper ventilation system components, roofing tools, and safety equipment, you’ll be well-prepared to tackle this task.
Ventilation System Components
Before you begin installing a bathroom vent through the roof, it’s essential to have the necessary ventilation system components. These components will ensure an efficient and effective ventilation system that helps remove excess moisture and control odors. Here are the key components you’ll need:
| Components | Description |
|---|---|
| Exhaust Fan | This fan is the heart of the ventilation system, responsible for drawing out the stale air and moisture from the bathroom. |
| Vent Duct | The vent duct connects the exhaust fan to the roof opening, allowing the expelled air to exit the bathroom. |
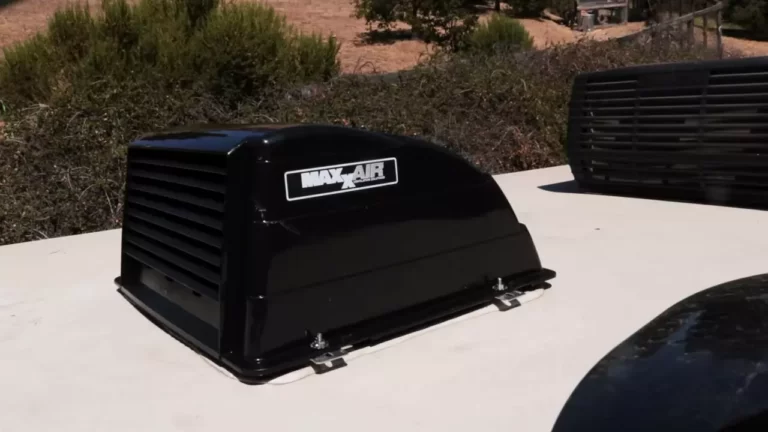
| Vent Cap | The vent cap is installed at the roof opening to prevent rain, debris, and pests from entering the duct. |
Roofing Tools
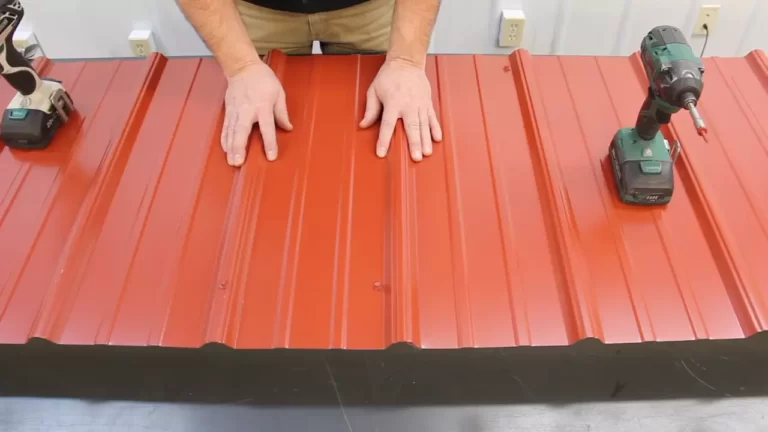
Installing a bathroom vent through the roof requires specific roofing tools to ensure a proper and secure installation. These tools will help you navigate the roof without causing any damage and enable you to create a watertight seal around the vent. Here are the essential roofing tools you’ll need:
- Roofing Safety Harness: Ensure your safety by using a roofing safety harness while working on the roof. This will provide added protection against falls.
- Roofing Hammer: A roofing hammer, also known as a roofing hatchet, is essential for removing shingles and driving nails into place.
- Roofing Nails: Use galvanized roofing nails to secure the vent cap and ensure a durable attachment.
- Utility Knife: A utility knife will come in handy for cutting through roof shingles, creating the necessary opening for the vent.
- Caulking Gun: A caulking gun will help you apply roofing sealant around the vent to prevent leaks and drafts.
- Roofing Adhesive: Consider using a roofing adhesive to provide an additional layer of protection against moisture.
Safety Equipment
Ensuring your safety should be a top priority when installing a bathroom vent through the roof. By using the proper safety equipment, you can minimize the risk of accidents and work with confidence. Here is the essential safety equipment you’ll need:
- Safety Goggles: Protect your eyes from debris and falling objects by wearing safety goggles throughout the installation process.
- Dust Mask: To avoid inhaling dust or insulation particles, wear a dust mask to protect your respiratory system.
- Gloves: Working with roofing materials can be rough on your hands, so wear gloves to shield them from sharp edges and preventing any cuts or injuries.
- Non-Slip Shoes: Roof surfaces can be slippery, especially when they’re wet. Wear non-slip shoes or boots to maintain stability and prevent accidents.
By gathering these necessary tools and materials, you’ll be equipped to install a bathroom vent through the roof efficiently and effectively. Remember to prioritize your safety throughout the project and take necessary precautions to ensure a successful installation.
Preparing The Bathroom For Installation
Before installing a bathroom vent through the roof, there are several important steps you need to take to prepare the bathroom. This includes shutting off the power and water supply, removing the old ventilation system (if applicable), and identifying the optimal vent location in the ceiling.
Shutting Off the Power and Water Supply
First and foremost, ensure your safety by shutting off the power supply to the bathroom. Locate the circuit breaker for the bathroom and switch it off to prevent any accidental electrocution during the installation process. This step is crucial and should not be skipped.
Next, it’s time to turn off the water supply. Locate the shut-off valve for the bathroom and close it to prevent any water leakage or damage while installing the vent. This will also ensure a dry and safe working environment.

Removing the Old Ventilation System (if applicable)
If your bathroom already has an existing ventilation system, it’s important to remove it before installing the new vent. Start by turning off the system and disconnecting any electrical connections. Then, carefully remove the cover or grille and unscrew the fasteners that hold the ventilation system in place.
Once the old system is removed, inspect the area for any damage or debris. Clean the surrounding area thoroughly to ensure a clean and smooth installation process for the new bathroom vent.
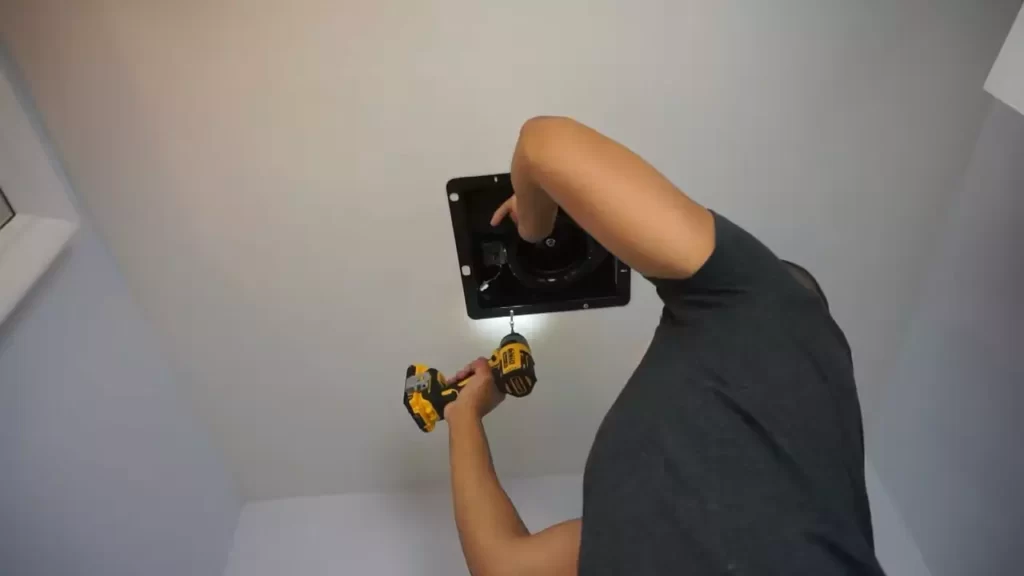
Identifying the Optimal Vent Location in the Ceiling
The next step is to find the optimal location for your new bathroom vent in the ceiling. This will ensure efficient ventilation and minimize any potential damage to the roof structure.
Consider the following factors when selecting the vent location:
- Choose a central location in the bathroom to ensure maximum coverage and proper air circulation.
- Avoid placing the vent near any obstructions such as beams or pipes.
- Ensure there is enough clearance for the vent duct to pass through the ceiling and roof.
Take measurements and mark the chosen vent location on the ceiling for reference during the installation process.
By properly preparing your bathroom for vent installation, you can ensure a smooth and successful project. Remember to shut off the power and water supply, remove any existing ventilation system, and carefully select the optimal vent location. With these steps complete, you’ll be ready to move on to the next phase of installing the bathroom vent through the roof.
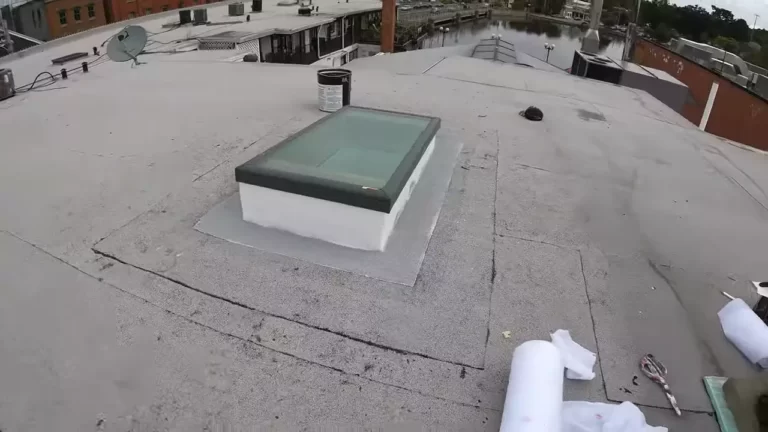
Preparing The Roof For Installation
Installing The Bathroom Vent Through The Roof
When it comes to bathroom ventilation, it’s important to ensure proper installation of the vent in order to effectively remove moisture and odors from your bathroom. One of the ways to achieve this is by installing the bathroom vent through the roof. In this section, we will guide you through the process of cutting a hole in the roof for the vent, ensuring proper roof flashing installation, and connecting the ventilation duct to the roof vent.
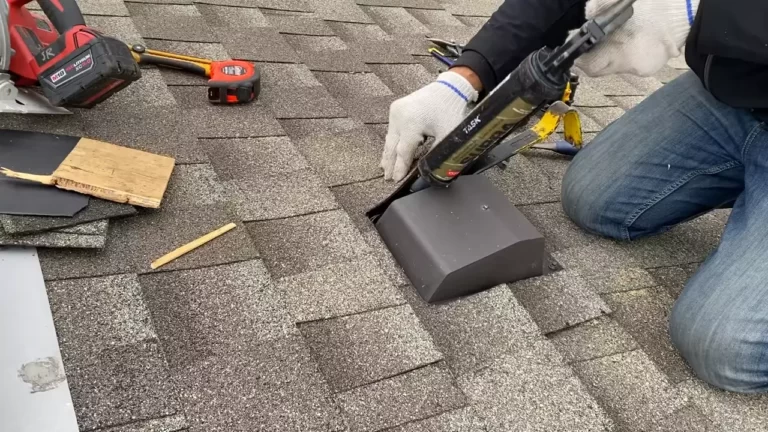
Cutting a Hole in the Roof for the Vent
The first step in installing a bathroom vent through the roof is cutting a suitable hole for the vent. Follow these steps for a successful installation:
1. Measure the location: Determine the ideal placement for the vent on your roof. It is recommended to position it towards the back of your bathroom to maximize its efficiency.
2. Mark the hole: Using a pencil or marker, mark the dimensions of the vent on the roof. Ensure that you have enough space to accommodate the vent and the flashing.
3. Preparing the roof: Before cutting the hole, make sure to remove any shingles or roofing material that may obstruct the vent’s placement. Take extra care not to damage the underlying roof structure.
4. Cut the hole: Using a reciprocating saw or a jigsaw, carefully cut along the marked lines. Take your time and work slowly to ensure a clean and precise cut.
5. Clean the debris: Once the hole is cut, carefully remove any debris or roofing materials from the area. This will prevent any obstruction during the installation process.

Ensuring Proper Roof Flashing Installation
Proper roof flashing installation is crucial to prevent leaks and water damage. Follow these steps to ensure a secure and watertight installation:
1. Apply a layer of roofing cement: Before placing the flashing, apply a layer of roofing cement around the perimeter of the hole. This will provide an extra layer of protection against water infiltration.
2. Install the flashing: Carefully place the flashing over the hole, ensuring that it covers the edges and extends beyond the dimensions of the hole. Nail the flashing into place, making sure it is secure.
3. Seal the edges: Apply another layer of roofing cement over the edges of the flashing, ensuring a tight seal. This will further protect against water entry and improve the longevity of your installation.
Connecting the Ventilation Duct to the Roof Vent
Once the roof flashing is properly installed, it’s time to connect the ventilation duct to the roof vent. Follow these steps for a successful connection:
1. Attach the duct to the roof vent: Using metal foil tape or clamps, securely attach the ventilation duct to the roof vent. Ensure that the connection is tight and there are no gaps for air to escape.
2. Insulate the duct: To prevent condensation and improve energy efficiency, consider insulating the ventilation duct. This will help maintain the desired temperature and reduce the risk of moisture buildup.
3. Secure the duct: Use zip ties or straps to secure the duct in place, ensuring that it is properly supported and doesn’t sag. This will prevent any damage to the duct and maintain a smooth airflow.
Securing And Sealing The Bathroom Vent System
Securing and sealing the bathroom vent system is an essential step in ensuring proper ventilation and preventing any leaks or damage. In this section, we will guide you through the process of attaching the vent cap to the roof vent, insulating and sealing the duct connections, and testing the ventilation system for proper operation.
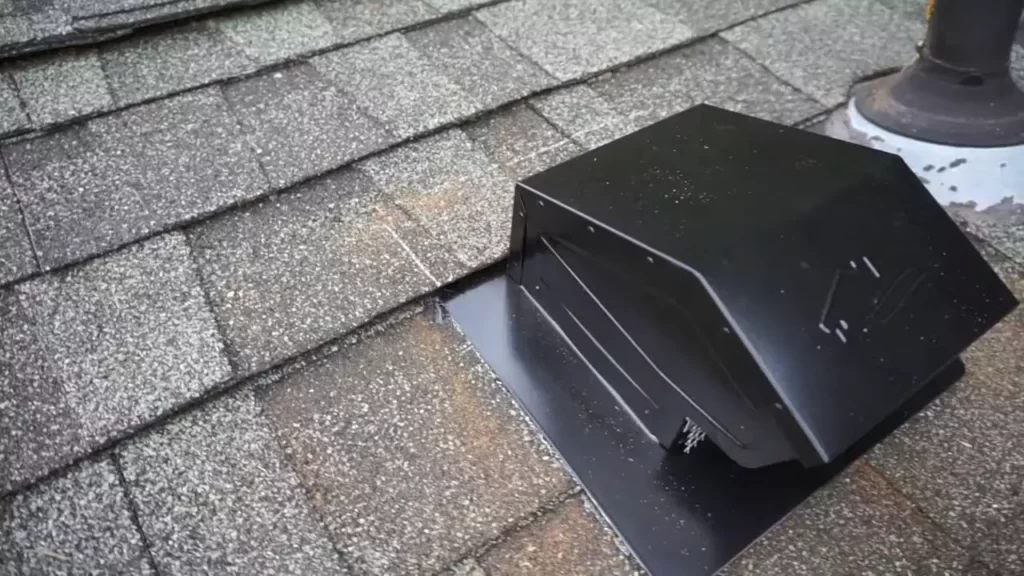
Attaching the Vent Cap to the Roof Vent
Once you have installed the roof vent, it’s time to secure the vent cap to it. This small but crucial component prevents rainwater or debris from entering the vent system.
To attach the vent cap, follow these steps:
- Place the vent cap over the roof vent.
- Align the screw holes on the vent cap with those on the roof vent.
- Insert screws through the holes and tighten them using a screwdriver.
- Ensure that the vent cap is securely attached and there are no gaps that can allow water or debris to enter.
Insulating and Sealing the Duct Connections
Proper insulation and sealing of the duct connections are vital for preventing air leaks, condensation, and energy loss. Follow these steps to insulate and seal the duct connections:
- Start by applying a layer of insulation around the joint where the duct connects to the bathroom vent.
- Secure the insulation with tape or zip ties to ensure a tight fit.
- Next, use duct sealant or mastic to seal any gaps or joints in the duct connections.
- Apply the sealant generously and spread it evenly using a brush or your fingers.
- Make sure to cover all the seams and connections thoroughly.
Testing the Ventilation System for Proper Operation
Once you have secured and sealed the bathroom vent system, it’s crucial to test it to ensure proper operation. Follow these steps to test the ventilation system:
- Turn on the bathroom exhaust fan and wait for a few minutes to let it run.
- Feel around the duct connections and vent cap to check for any air leaks.
- Listen for any unusual noises or vibrations that may indicate issues with the system.
- If you notice any leaks or problems, go back and recheck the connections and seals.
By securing and sealing the bathroom vent system properly, you can ensure efficient and effective ventilation while keeping your bathroom free from moisture and air leaks. Follow these steps carefully to ensure a job well done.
Maintaining And Troubleshooting The Bathroom Vent Through Roof
A properly functioning bathroom ventilation system is crucial for maintaining a clean and healthy environment in your home. The bathroom vent, particularly when installed through the roof, plays a vital role in removing excess moisture, odors, and pollutants. However, like any other system, regular maintenance and troubleshooting are necessary to ensure optimal performance. In this section, we will explore some vital aspects of maintaining and troubleshooting your bathroom vent through the roof.
Regular Cleaning and Inspection
One of the most important tasks in maintaining a bathroom vent through the roof is regular cleaning and inspection. Over time, dust, dirt, debris, and even mold can accumulate in the vent ducts, obstructing the airflow and reducing the system’s efficiency. To prevent this, it is essential to clean the vent regularly.
Here are some steps to follow for regular cleaning:
- Start by turning off the vent and unplugging it from the power source.
- Remove the vent cover carefully, keeping an eye out for any screws or fasteners that need to be loosened.
- Use a vacuum cleaner with a long attachment or a brush to remove any visible debris from the vent cover, fan, and ducts.
- For a more thorough cleaning, detach the vent duct from the fan and use a brush or cloth to wipe away any residue.
- Inspect the vent for any signs of damage, such as cracks, loose joints, or frayed wiring. Replace or repair any faulty parts as necessary.
- Finally, reassemble the vent, ensuring everything is securely in place, and turn it back on to test its functionality.
Addressing Common Ventilation System Issues
While regular cleaning goes a long way in preventing problems, it is essential to address common ventilation system issues promptly. Failure to do so can lead to a host of problems, including excessive humidity, condensation, and even mold growth. Here are some common issues you may encounter and their solutions:
| Common Ventilation System Issues | Solutions |
|---|---|
| Fan not working or not functioning optimally | Check the power supply, replace the fan motor if necessary, or clean the fan blades. |
| Excessive noise or vibration | Inspect and tighten any loose parts or consider replacing worn-out components, such as the fan blades or motor. |
| Leaks or water damage | Inspect the vent connections and seals for any leaks. Replace damaged parts or reseal as needed. Additionally, ensure that the vent is installed at the correct pitch to allow water to flow away from the roof. |
Seeking Professional Help When Needed
While regular maintenance and troubleshooting can rectify many issues with your bathroom vent, certain problems require professional expertise. For complex electrical or mechanical problems, or if you are unsure about the cause of a specific issue, it is advisable to seek assistance from a qualified professional.
A professional can accurately diagnose the problem, provide expert solutions, and ensure the safety and proper functioning of your bathroom vent system.
Remember, by regularly cleaning, inspecting, and promptly addressing any issues, you can extend the lifespan and optimize the performance of your bathroom vent through the roof.
Frequently Asked Questions On How To Install Bathroom Vent Through Roof
How Do I Install A Bathroom Vent Through The Roof?
To install a bathroom vent through the roof, first choose the vent location on the roof. Then, using a reciprocating saw, cut a hole in the roof for the vent pipe. Connect the vent pipe to the bathroom fan and secure it with roofing cement and screws.
Finally, seal the edges with roofing caulk for a watertight installation.
What Tools Do I Need To Install A Bathroom Vent Through The Roof?
To install a bathroom vent through the roof, you’ll need a reciprocating saw, a ladder, a drill with a hole saw attachment, roofing cement, roofing screws, a vent pipe, duct tape, and roofing caulk. These tools will help you cut the hole in the roof, connect the vent pipe, and secure it in place.
How Long Does It Take To Install A Bathroom Vent Through The Roof?
The time it takes to install a bathroom vent through the roof can vary depending on your experience and the complexity of the project. On average, it can take anywhere from a few hours to a full day to complete the installation.
It’s important to take your time and follow the installation steps carefully to ensure a proper and safe installation.
Conclusion
Installing a bathroom vent through the roof may seem like a daunting task, but with the right guidance, it can be done smoothly. By following the steps outlined in this blog post and taking the necessary precautions, you can ensure proper ventilation in your bathroom.
Remember to consult a professional if needed. With a well-installed bathroom vent, you’ll be able to enjoy improved air quality and prevent mold and moisture damage in your home. Breathe easy knowing you’ve taken the necessary steps to keep your bathroom fresh and clean.