How to Install Acoustic Panels on Ceiling?
To install acoustic panels on the ceiling, first, choose the desired placement area. Then, use a stud finder to locate the ceiling joists.
Attach panels directly to the joists using screws or adhesive.
Essential Materials For The Installation Process
In order to successfully install acoustic panels on your ceiling, you will need to gather a few essential materials beforehand. These materials will not only make the installation process easier but also ensure that the panels are properly secured and well-aligned. Here is a list of the key materials you will need:
1. Acoustic Panels
The most important material for this project is, of course, the acoustic panels themselves. These panels are specifically designed to absorb sound and improve the acoustic qualities of a room. When selecting acoustic panels, be sure to choose ones that are suitable for ceiling installation. These panels are usually lightweight and come in various sizes and designs to suit different aesthetic preferences.
2. Measuring Tape
In order to install the panels accurately, you will need a measuring tape. This will help you determine the correct placement and alignment of the panels on the ceiling. It is essential to measure the available space and mark the exact positions where the panels will be installed.
3. Pencil or Marker
Having a pencil or marker at hand will allow you to mark the measurements and positions accurately on the ceiling. This step is crucial as it ensures that the panels are installed in the correct locations without any errors.
4. Level
A level is an essential tool for ensuring that the panels are installed horizontally. It will help you maintain a straight and even line while positioning the panels. Using a level at different stages of the installation process will ensure a professional-looking and well-aligned result.
5. Drill
A drill is necessary for attaching the panels securely to the ceiling. It is recommended to use a power drill for this task, as it will make the process quicker and more efficient. Make sure to use appropriate drill bits according to the type of ceiling material you are working with.
6. Screws or Adhesive
Depending on the type of acoustic panels and the specific requirements of your installation, you will need either screws or adhesive to fix the panels to the ceiling. If your panels come with pre-drilled holes or mounting hardware, screws would be the preferred method. On the other hand, adhesive can be used for panels without pre-drilled holes or if you prefer a screw-less installation.
7. Ladder or Step Stool
Lastly, you will need a ladder or step stool to safely reach and install the panels on the ceiling. Make sure the ladder or stool is stable and secure before attempting to climb it. Safety should always be a top priority during any DIY project.
Before you begin the installation process, ensure that you have gathered all the necessary materials mentioned above. This will not only save you time but also ensure that the installation is carried out smoothly and efficiently.
Optional Materials For Enhanced Installation
When it comes to installing acoustic panels on the ceiling, there are a few optional materials that can take your installation to the next level. These materials can enhance the stability and customization of your panels, ensuring that you achieve optimal soundproofing and aesthetics in your space. In this section, we will explore four optional materials that can greatly enhance your acoustic panel installation.
Stud Finder
A stud finder is an invaluable tool when it comes to installing acoustic panels on the ceiling. It helps you locate the wooden studs behind the drywall, which are essential for a secure and sturdy installation. By using a stud finder, you ensure that your panels are anchored to the strongest part of the ceiling, minimizing the risk of them falling off over time.
Wall Anchors
Wall anchors, also known as drywall anchors, provide extra support when there are no studs available in the desired installation location. These anchors help distribute the weight of the panels evenly across the drywall, preventing any damage or sagging. There are various types of wall anchors available, such as toggle anchors or plastic expansion anchors, which offer different load capacities and installation methods.
Ceiling Anchors
Similar to wall anchors, ceiling anchors provide added support when there are no ceiling joists or studs present in the installation area. These anchors are designed specifically for overhead installations and are capable of holding heavier loads compared to regular wall anchors. Ceiling anchors come in different types, including toggle bolts and heavy-duty screw-in anchors, ensuring a secure attachment of the acoustic panels to the ceiling.
Paint or Fabric for Panel Customization
While acoustic panels come in various finishes, you may want to customize them to match your existing décor or personal preference. In such cases, using paint or fabric can transform your panels into visually appealing elements of your space. With paint, you can choose a color that complements the room’s color scheme or create a statement piece by adding patterns or designs. On the other hand, fabric allows you to fully personalize your panels with different textures, patterns, and colors.
By incorporating these optional materials into your acoustic panel installation, you can elevate both the functionality and aesthetics of your space. The use of a stud finder ensures a secure attachment to the ceiling, while wall anchors and ceiling anchors provide additional support when needed. Lastly, the option to customize your panels with paint or fabric allows you to create a visually appealing environment tailored to your style. Take advantage of these optional materials for an enhanced acoustic panel installation that not only improves sound quality but also adds a touch of personalization to your space.
Measuring The Ceiling Dimensions Accurately
Determining the ceiling area to cover
Before installing acoustic panels on your ceiling, it is crucial to measure the dimensions accurately. This step ensures that you will have the correct amount of panels to cover the entire ceiling area effectively. To determine the ceiling area to cover, follow these simple steps:
- Start by measuring the length of the ceiling. Use a measuring tape and measure from one end to the other. Make sure to record this measurement in either inches or feet.
- Next, measure the width of the ceiling using the same method. Again, ensure that you record this measurement accurately.
- Now, multiply the length and width measurements together to calculate the total area of the ceiling. For example, if the length is 10 feet and the width is 12 feet, the total area would be 120 square feet.
By determining the exact ceiling area, you will have a clearer idea of the number of panels needed for complete coverage. Let’s move on to the next step to calculate the number of panels.
Calculating the number of panels needed for complete coverage
Now that you have determined the ceiling area, you can calculate the number of acoustic panels required for complete coverage. To ensure the desired outcome, follow these steps:
- Firstly, check the dimensions of the acoustic panels you have chosen to install. This information is typically provided by the manufacturer.
- Divide the total ceiling area by the area covered by each panel. For instance, if each panel covers 5 square feet, and the total ceiling area is 120 square feet, dividing these values would indicate that you need 24 panels for complete coverage.
- Remember to round up to the nearest whole number to ensure you have enough panels to cover the entire ceiling area effectively. In this example, rounding up to 25 panels would ensure complete coverage without any gaps.
By accurately measuring the ceiling dimensions and calculating the number of panels needed, you can proceed with the installation confidently, knowing that your ceiling will be properly covered for optimum acoustic enhancement.
Locating Ceiling Joists And Studs
Before you start installing acoustic panels on your ceiling, it’s important to locate the ceiling joists and studs. This ensures that your panels are securely attached and will provide optimal sound absorption. Here’s how you can do it:
Using a stud finder to find ceiling studs
One of the easiest ways to locate ceiling studs is by using a stud finder. These handy devices use magnets or sensors to detect the presence of nails or screws, which are often used to attach drywall to the studs. To find the studs using a stud finder, follow these steps:
- Turn on your stud finder and hold it against the ceiling, starting from one end.
- Slowly move the stud finder in a straight line across the ceiling.
- Once the stud finder detects a stud, it will usually indicate it with a beep or a light.
- Mark the location of the stud with a pencil or a small piece of masking tape.
- Continue moving the stud finder along the ceiling to locate other studs.
Marking the exact locations of the studs for panel placement
After locating the ceiling studs, it’s important to mark their exact locations to ensure accurate panel placement. This will help you avoid accidentally installing the acoustic panels in the wrong spots. Here’s how you can mark the locations:
- Using a tape measure, measure the distance between the first stud you marked and the next one.
- Transfer this measurement to the adjacent studs, marking their locations accordingly.
- Repeat this process for all the studs along the ceiling.
By marking the exact locations of the studs, you can easily map out where each panel should be placed. This will help you achieve a balanced and aesthetically pleasing arrangement of acoustic panels on your ceiling.
Planning The Panel Arrangement And Layout
When it comes to installing acoustic panels on the ceiling, careful planning of the panel arrangement and layout is essential. This will ensure maximum effectiveness in sound absorption and create an aesthetically pleasing design. In this section, we will discuss how to create a panel layout plan based on the ceiling dimensions and consider any architectural features or obstructions.
Creating a panel layout plan based on the ceiling dimensions
Before you start installing acoustic panels on the ceiling, it is crucial to create a panel layout plan that takes into account the dimensions of the ceiling. This plan will help you determine the number of panels you need and their placement to achieve optimal sound absorption.
To create a panel layout plan, first, measure the length and width of your ceiling. Then, calculate the total square footage of the ceiling by multiplying the length and width. Divide this figure by the square footage of each panel to determine the number of panels required.
| Ceiling Dimensions | Panel Dimensions | Number of Panels Required |
|---|---|---|
| Length: [insert length here] | Length: [insert panel length here] | [insert number of panels required] |
| Width: [insert width here] | Width: [insert panel width here] | |
| Total Square Footage: [insert total square footage here] | Square Footage per Panel: [insert square footage per panel here] |
Once you have determined the number of panels required, you can start planning their layout. Consider dividing the ceiling into equal sections and distributing the panels evenly across these sections. This arrangement will help achieve balanced sound absorption throughout the room.
Considering any architectural features or obstructions
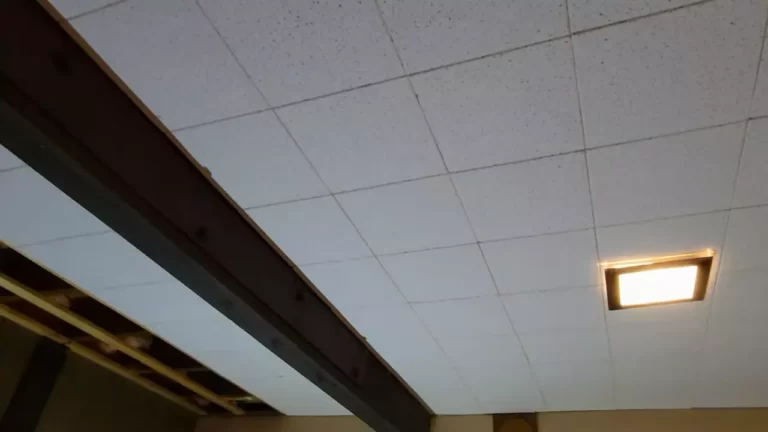
In addition to the ceiling dimensions, it is essential to take into account any architectural features or obstructions that may affect the placement of acoustic panels. These could include light fixtures, air vents, or ceiling beams.
Make sure to measure the distance between these features and plan your panel layout accordingly. You may need to adjust the placement of panels or choose smaller panels to accommodate these obstructions. By considering architectural features, you can ensure a seamless installation that enhances both the acoustics and the aesthetics of the room.
With a well-thought-out panel layout plan, you can efficiently install acoustic panels on the ceiling, maximizing their effectiveness and creating a visually appealing space with superior sound quality.
Choosing The Installation Method
Deciding between adhesive or screw installation based on panel type and ceiling material
When it comes to installing acoustic panels on the ceiling, one of the most important decisions you need to make is choosing the installation method. This will depend on factors such as the type of panel you are using and the material of your ceiling. Two common installation methods are adhesive and screw installation. Let’s explore both options so you can make an informed decision.
Adhesive Installation
Adhesive installation involves using a strong adhesive to secure the panels to the ceiling. This method is great for lightweight panels and can be a quick and hassle-free option. It is important to choose the right adhesive for your specific panel type and ceiling material to ensure a strong bond.
- Ensure the adhesive you choose is compatible with both the panel material and the ceiling material.
- Thoroughly clean the ceiling surface before applying the adhesive to ensure maximum adhesion.
- Follow the manufacturer’s instructions for applying the adhesive, including the recommended drying and curing times.
- Apply the adhesive in a consistent pattern, ensuring proper coverage for secure adhesion.
- Press the panels firmly against the ceiling, making sure they are properly aligned and evenly spaced.
Screw Installation
Screw installation involves attaching the acoustic panels to the ceiling using screws. This method offers a more secure and permanent solution, making it ideal for heavier panels or environments where panels might be subject to more movement or vibration.
- Identify the panel mounting points on the ceiling and mark them accurately.
- Pre-drill holes at the marked points to prevent any damage or splitting of the panels.
- Select appropriate screws based on the material of your ceiling and the thickness of the panels.
- Position the panels over the pre-drilled holes and carefully drive the screws through the panels into the ceiling.
- Ensure the screws are snugly tightened, but be careful not to overtighten as this may damage the panels or the ceiling.
It is important to note that adhesive installation methods allow for easy removal and flexibility in panel placement, while screw installation is more permanent and may leave visible holes if panels need to be relocated.
In conclusion, when choosing the installation method for your acoustic panels on the ceiling, consider the type of panel, the material of your ceiling, and the level of permanence you desire. Both adhesive and screw installations have their benefits and drawbacks, so make sure to assess your specific requirements to achieve the best outcome.
Adhesive Installation Method
One of the most convenient and popular methods of installing acoustic panels on the ceiling is the adhesive installation method. This method involves attaching the panels directly to the ceiling using a strong adhesive. Not only does this provide a secure and durable installation, but it also eliminates the need for additional hardware or tools.
Preparing the panels for adhesive installation
Before applying the adhesive to the back of the panels, it is important to properly prepare them. This includes ensuring that the panels are clean and free from any dust or debris. Wipe them down with a damp cloth or use a mild cleaning solution if necessary. Additionally, make sure to measure and mark the desired placement of the panels on the ceiling. This will help in achieving proper alignment and spacing.
Applying the adhesive to the back of the panels
Once the panels are prepared, it’s time to apply the adhesive. Choose a high-quality adhesive that is specifically designed for acoustic panels and ceiling applications. Following the manufacturer’s instructions, apply the adhesive evenly on the back of the panels. Make sure to cover the entire surface area, paying extra attention to the edges and corners for a secure bond.
Pressing the panels firmly against the ceiling
After the adhesive has been applied, carefully position the panels against the marked spots on the ceiling. Begin by pressing one corner firmly against the ceiling surface, ensuring it is aligned with the marks. Slowly work your way across the panel, pressing it firmly against the ceiling while smoothing out any air bubbles or wrinkles. Use a clean cloth or roller to provide even pressure and ensure maximum adhesion.
Ensuring proper alignment and spacing between panels
As you continue installing each panel, it is crucial to maintain proper alignment and spacing for a seamless and professional look. Use a level and measuring tape to check that each panel is perfectly horizontal and evenly spaced from one another. This will help create a symmetrical and visually appealing installation.
To summarize, the adhesive installation method offers a simple and effective way to install acoustic panels on the ceiling. By properly preparing the panels, applying the adhesive correctly, pressing them firmly against the ceiling, and ensuring proper alignment and spacing, you can achieve a secure and visually pleasing installation that enhances the acoustics of the space.
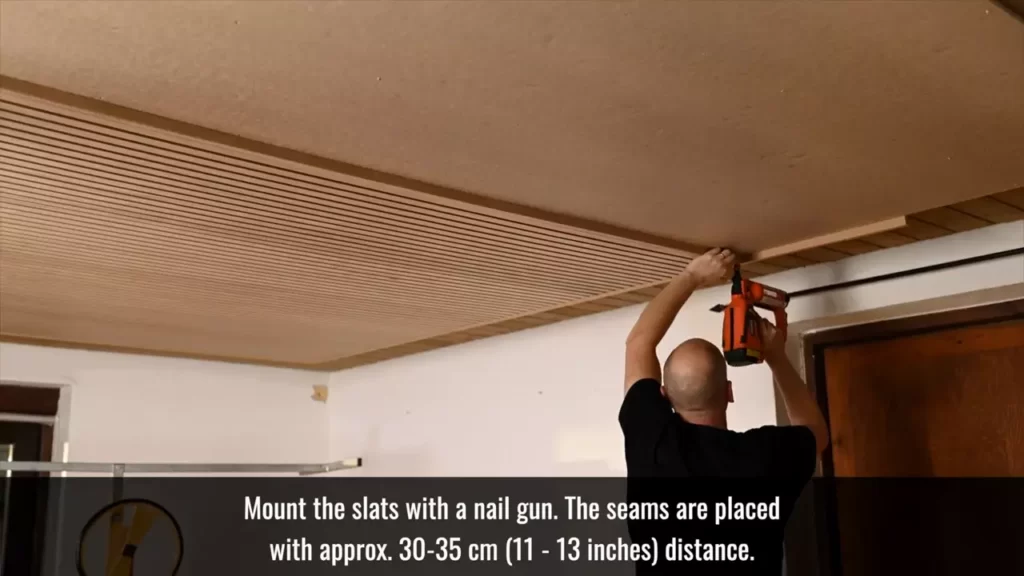
Screw Installation Method
The screw installation method is one of the most common and effective ways to install acoustic panels on a ceiling. This method ensures a secure and long-lasting attachment, allowing the panels to effectively absorb and control sound reflections in a room. Here’s a step-by-step guide on how to install acoustic panels using screws:
Pre-drilling holes for screws
Before installing acoustic panels, it’s essential to pre-drill holes in the ceiling. This step ensures smooth and easy installation, minimizing the risk of damaging the panels or the ceiling. Here’s how you can pre-drill holes:
- Measure and mark the locations where you want to install the panels on the ceiling.
- Using a drill bit slightly smaller than the diameter of the screws, carefully drill holes at the marked locations.
- Make sure to drill the holes deep enough to accommodate the length of the screws.
- Clear away any debris or dust from the drilled holes, ensuring a clean surface for installation.
Aligning the panels with the pre-marked stud locations
Once you have pre-drilled the holes, the next step is to align the acoustic panels with the pre-marked stud locations. This ensures a secure attachment to the ceiling and prevents the panels from sagging or falling over time. Here’s how to align the panels:
- Identify the stud locations on the ceiling by using a stud finder or by tapping the ceiling and listening for a solid sound.
- Using a measuring tape, mark the stud locations on the backside of the acoustic panels.
- Align the marked stud locations on the panels with the corresponding marked stud locations on the ceiling.
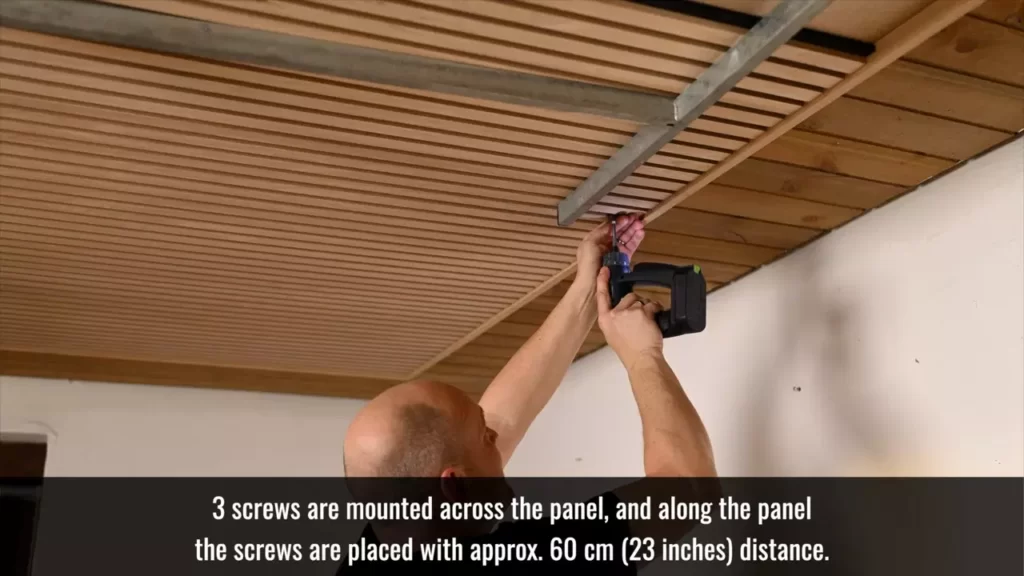
Attaching the panels securely to the ceiling using screws
With the holes pre-drilled and the panels aligned with the studs, it’s time to attach the panels securely to the ceiling using screws. This step ensures a strong and stable installation. Here’s how to attach the panels:
- Take a screw and insert it through the pre-drilled hole.
- Using a screwdriver or a drill, carefully drive the screw into the pre-drilled hole, securing the panel to the ceiling.
- Repeat this process for all the pre-drilled holes and panels, ensuring each screw is tightened securely.
- Check the panels to ensure they are flat against the ceiling and firmly attached.
By following these steps, you can effectively install acoustic panels on your ceiling using the screw installation method. This method provides a secure and durable installation, allowing the panels to improve the acoustic properties of a room. Take your time when installing the panels to ensure a professional and visually pleasing result.
Customizing The Panels With Paint Or Fabric
Customizing your acoustic panels with paint or fabric not only adds a personal touch to your space but also enhances their visual appeal. With a few simple steps, you can transform plain acoustic panels into vibrant decorative pieces that seamlessly integrate with your existing decor. In this article, we will guide you through the process of choosing the desired paint or fabric, preparing the panels for customization, and applying paint or fabric to the panels according to your personal preference.
Choosing the desired paint or fabric
When it comes to selecting the perfect paint or fabric for your acoustic panels, there are several factors to consider. First and foremost, think about the overall theme and color scheme of your room. It’s essential to choose a paint color or fabric design that complements the existing elements in your space. Whether you opt for a bold, vibrant color or a subtle, neutral hue, ensure that it adds depth and character to the panels.
Moreover, consider the acoustic properties of the paint or fabric. While some paints may affect the sound absorption capabilities of the panels, certain fabrics can enhance it. Take time to research and choose a paint or fabric that strikes the right balance between aesthetics and functionality.
Preparing the panels for customization
Before you start customizing your acoustic panels, it’s vital to ensure that they are properly prepared. Begin by removing any dust or debris on the surface, ensuring a clean and smooth canvas for customization. You can use a soft brush or a cloth to gently remove any dirt or particles.
In addition, inspect the panels for any imperfections or damages. If you notice any cracks or dents, consider repairing them before moving forward with the customization process. A smooth surface will yield better results and provide a professional finish.
Applying paint or fabric to the panels according to personal preference
Once you have chosen the perfect paint or fabric and prepared the panels, it’s time to bring your customization vision to life. Depending on your preference and the material you have selected, the application process may vary.
If you opt for painting the panels, start by applying a primer to ensure good paint adhesion. Use even strokes and apply multiple thin coats to achieve a smooth and uniform finish. Allow sufficient drying time between each coat to avoid any unwanted drips or smudges.
On the other hand, if you choose fabric customization, begin by measuring and cutting the fabric according to the panel dimensions. Using a suitable adhesive, carefully apply the fabric to the surface, ensuring there are no wrinkles or bubbles. Smooth out any creases and let the adhesive set as per the manufacturer’s instructions.
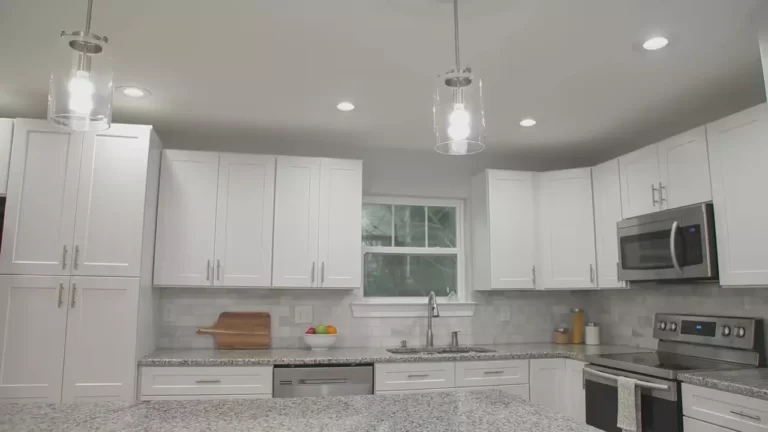
Additionally, consider the placement of any wall fixtures or lighting that might interact with the panels. Ensure that each panel is positioned correctly and securely fixed to the ceiling, allowing for optimal sound absorption and visual impact.
In conclusion, customizing acoustic panels with paint or fabric provides an opportunity to create a unique and aesthetically pleasing environment. By carefully choosing the desired paint or fabric, preparing the panels adequately, and applying the customization according to personal preference, you can effectively transform your ceiling while maintaining excellent acoustic performance.
Concealing Panel Edges For A Seamless Look
Installing acoustic panels on the ceiling is a great way to improve the sound quality in a room and enhance its overall aesthetics. However, one challenge that many people face is how to hide the panel edges for a seamless look. In this article, we will explore one effective method of concealing panel edges using trim or molding. By following these steps, you can achieve a professional-looking result that blends seamlessly with your ceiling.
Using trim or molding to hide the panel edges
One of the most popular and effective ways to conceal the edges of acoustic panels on the ceiling is by using trim or molding. This not only provides a finished look to the installation but also ensures that the panels blend seamlessly with the existing ceiling. Here’s how you can utilize trim or molding to achieve this:
- Measure the dimensions: Begin by measuring the length and width of the acoustic panels that you want to install on the ceiling. This will help you determine the amount of trim or molding you will need.
- Choose the right trim or molding: There are various types of trim and molding available in the market. Select one that matches the style and color of your ceiling, ensuring a cohesive look. Consider the material, size, and shape of the trim or molding to ensure a perfect fit.
- Cut the trim or molding: Using a saw or a miter box, cut the trim or molding into the desired lengths that correspond to the sides of your acoustic panels. Make sure to measure accurately to achieve a seamless fit.
- Attach the trim or molding: Apply a strong adhesive or use finishing nails to secure the trim or molding to the edges of the acoustic panels. Take care to align the trim or molding with the edges of the panels, ensuring a clean and flush finish.
Securing the trim or molding to the surrounding ceiling
Once you have attached the trim or molding to the edges of the acoustic panels, it is crucial to secure it to the surrounding ceiling for a seamless look. Here are some steps you can follow:
- Clean the ceiling: Before attaching the trim or molding, clean the surrounding ceiling to remove any dust or debris. This will ensure a strong bond and a neat appearance.
- Apply adhesive: Use a suitable adhesive or construction glue to attach the trim or molding to the ceiling. Apply it evenly along the back of the trim or molding, and press firmly against the ceiling. Alternatively, you can use finishing nails to anchor the trim or molding into place.
- Smooth out the joints: Once the trim or molding is secured, run a bead of caulk along the joints between the trim or molding and the ceiling. This will create a seamless transition and fill any gaps or imperfections.
- Paint or finish: Finally, paint or finish the trim or molding to match the color and texture of the ceiling. This will further enhance the cohesive appearance and ensure that the panel edges are completely concealed.
With these steps, you can achieve a professional-looking installation of acoustic panels on the ceiling, with concealed edges that seamlessly blend with the surrounding ceiling. Remember to measure accurately, choose the right trim or molding, and secure it meticulously for the best results. Enjoy improved sound quality and a visually pleasing space with this simple yet effective technique.
Adding Additional Soundproofing Measures
If you really want to take your soundproofing game to the next level, there are a couple of additional measures you can implement when installing acoustic panels on your ceiling. These measures will help maximize the effectiveness of your panels and create a truly soundproof space. Here are two important steps you should consider:
Installing insulation behind the panels for enhanced sound absorption
When it comes to soundproofing, insulation plays a crucial role in absorbing and reducing airborne noise. Installing insulation behind your acoustic panels can significantly enhance their sound-absorption capabilities. The insulation acts as an additional barrier, preventing sound waves from bouncing back into the room.
To install insulation behind the panels, follow these steps:
- Start by removing any existing ceiling tiles or panels.
- Measure the dimensions of the space behind the panels and cut the insulation accordingly.
- Secure the insulation to the ceiling using adhesive or staples, ensuring it covers the entire area behind the panels.
- Once the insulation is in place, you can proceed with installing the acoustic panels over it.
By taking the extra step to install insulation, you will create an extra layer of soundproofing and enhance the overall performance of your acoustic panels.
Applying soundproofing caulk or sealant around panel edges
Another important measure to consider is the application of soundproofing caulk or sealant around the edges of your acoustic panels. This will help create a tight seal and prevent any sound leakage between the panels and the ceiling.
To apply soundproofing caulk or sealant, follow these steps:
- Carefully apply a thin layer of caulk or sealant along the edges of each panel, ensuring complete coverage.
- Smooth out the caulk or sealant using a caulking gun or your finger.
- Allow the caulk or sealant to dry completely before proceeding with any further installation or finishing touches.
Adding soundproofing caulk or sealant not only ensures a tight and secure installation but also eliminates any potential gaps that sound could travel through. This step will greatly contribute to the overall soundproofing effectiveness of your ceiling.
By taking these additional soundproofing measures, you can enhance the performance of your acoustic panels and create a truly soundproof environment. Whether you’re setting up a home recording studio, a private theater, or simply looking to minimize noise disturbance, these steps are worth considering for optimum soundproofing results.
Frequently Asked Questions For How To Install Acoustic Panels On Ceiling
How Do You Mount Acoustic Panels To The Ceiling?
To mount acoustic panels to the ceiling, follow these steps. First, locate the optimal placement for the panels. Then, use appropriate hardware, such as hooks or brackets, to secure the panels to the ceiling. Ensure that the panels are evenly spaced and tightly attached for effective sound absorption.
Can You Put Soundproof Panels On Ceiling?
Yes, soundproof panels can be installed on the ceiling to reduce noise. They effectively absorb sound waves and improve the acoustics of the room. Installing soundproof panels on the ceiling can help create a quieter and more peaceful environment.
Should I Put Acoustic Panels On The Ceiling?
Yes, installing acoustic panels on the ceiling can be beneficial for sound absorption and noise reduction in a room. It helps improve the acoustics by reducing echoes, reverberation, and overall sound reflections.
How Do You Attach Foam Sound Panels To The Ceiling?
Attach foam sound panels to the ceiling by using adhesive or double-sided tape. Clean the ceiling surface before applying the adhesive. Start at one corner and press the panel firmly onto the ceiling, ensuring it is secure. Repeat the process for each panel, leaving a small gap between them for a better acoustic effect.
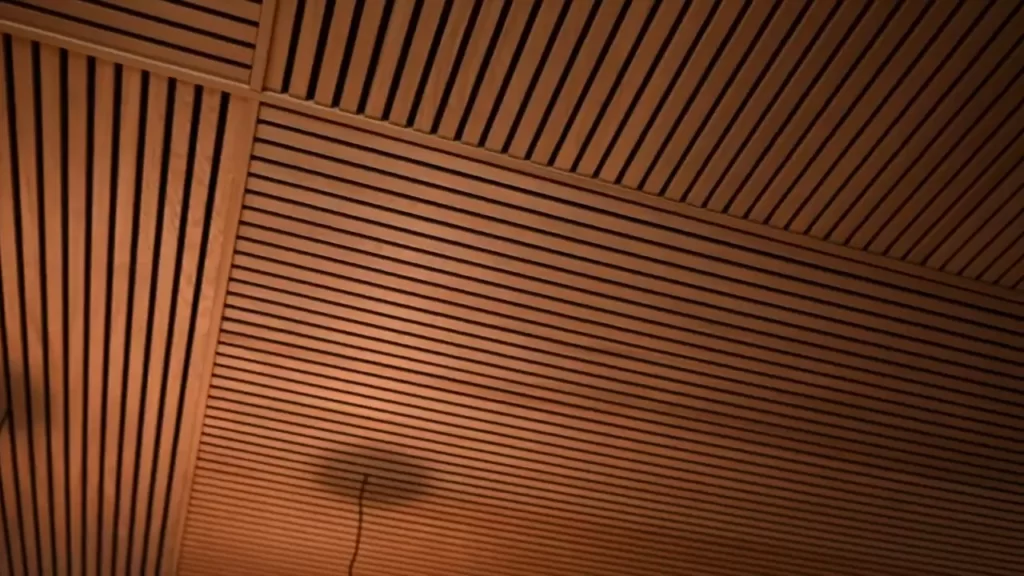
Conclusion
Installing acoustic panels on the ceiling is an effective way to enhance sound quality in any space. By following these step-by-step instructions, you can easily transform your room into an acoustically optimized environment. From measuring and marking positions to attaching the panels securely, this process is both simple and rewarding.
With proper installation, you can enjoy reduced echoes and improved sound clarity for a truly immersive experience. So, get ready to create a well-balanced acoustic space that suits your needs perfectly.