How to Install a Windshield With Rope?
To install a windshield with rope, you need to follow specific steps for a successful installation. Here’s a concise guide on how to do it.
Installing a windshield with rope can be a daunting task if you’re not familiar with the process. However, with the right approach and careful execution, you can ensure a seamless installation. We will guide you through the step-by-step process of installing a windshield using a rope.
Whether you’re a DIY enthusiast or a professional, this guide will provide you with the necessary information to complete the task efficiently and effectively. So, let’s dive in and learn how to install a windshield using rope with ease.
Preparing The Necessary Tools And Materials
Before beginning the installation of a windshield using the rope method, it is important to gather all the essential tools and materials required for the task. This will ensure a smooth and successful installation process. In this section, we will discuss the essential tools and materials needed for windshield installation, as well as the reasons why rope is a preferred method for this process.

Essential Tools and Materials for Windshield Installation
To install a windshield using the rope method, you will need the following tools and materials:
| Tools | Materials |
|---|---|
|
|
Why Rope is a Preferred Method for Windshield Installation
When it comes to windshield installation, using rope as a method has several advantages. Not only is it a reliable and effective method, but it also ensures a secure and tight fit. Here are some reasons why using rope is preferred for windshield installation:
- Rope provides even pressure distribution: By using rope, you can distribute pressure evenly across the windshield, ensuring a tight and secure fit. This helps in preventing any gaps or leaks.
- Rope helps in proper positioning: The rope method allows for precise positioning of the windshield, ensuring that it is aligned correctly. This is crucial for the overall aesthetics and functionality of the vehicle.
- Rope is cost-effective: Compared to other installation methods, using rope is a cost-effective option. You can avoid the need for expensive tools or equipment, making it a budget-friendly choice.
- Rope reduces the risk of damage: When properly executed, the rope method minimizes the risk of damaging the windshield or the vehicle body during installation. This is especially important when dealing with delicate or expensive windshields.
By following these guidelines and using the essential tools and materials, you can ensure a successful windshield installation using the rope method. It is important to take your time, follow each step carefully, and prioritize safety throughout the process.
Removing The Old Windshield
Ensuring Safety Measures are in Place
When it comes to removing an old windshield, safety should always be the top priority. Before starting the process, make sure to take the following measures to ensure a safe work environment:
- Put on a pair of thick gloves to protect your hands from any potential glass shards.
- Wear safety goggles to shield your eyes from debris.
- Position a tarp or drop cloth over the seats and floor of your vehicle to catch any broken glass or other materials.
Step-by-Step Guide to Removing the Old Windshield Using Rope Technique
Now that you have prepared for safety, follow these step-by-step instructions to remove the old windshield using the rope technique:
- Start by taking a sturdy, non-stretch rope and cutting it to a length that easily fits around the perimeter of the windshield.
- Securely tie the ends of the rope together to form a loop.
- Position the looped rope at the bottom edge of the windshield, ensuring it is snugly wrapped around the glass.
- With one person holding onto each end of the rope, begin applying gentle, even pressure to both sides of the windshield.
- As you apply pressure, carefully and gradually move the rope in a sawing motion from one side of the windshield to the other.
If the windshield doesn’t start to loosen, add some lubricant between the glass and the car frame to help facilitate the removal process.
Continue sawing and applying pressure until the windshield is fully detached from the frame. Be cautious to avoid sudden movements that could cause the glass to shatter.
Once the windshield is free, have an additional person outside the vehicle gently push it from the outside to completely remove it.
Preparing The New Windshield
Cleaning and preparing the new windshield for installation
Before installing a new windshield, it is important to properly clean and prepare it to ensure a secure and long-lasting installation. Here are the steps to follow:
Cleaning the windshield
The first step in preparing the new windshield is to clean it thoroughly. Use a gentle glass cleaner or a mixture of water and mild dish soap to remove any dust, dirt, or debris from the surface. Be sure to clean both the interior and exterior of the windshield for a crystal-clear finish.
Inspecting for imperfections
Once the windshield is clean, closely inspect it for any imperfections. Look for chips, cracks, or scratches that may affect the overall integrity of the glass. If you notice any damage, it is crucial to replace the windshield rather than installing a compromised one.
Applying necessary adhesives and primers
To ensure a strong bond between the windshield and the vehicle, it is essential to apply the appropriate adhesives and primers. Here is how to do it:
- Apply a thin layer of primer along the perimeter of the windshield’s edges. This will promote adhesion and help prevent leaks.
- Next, apply a bead of adhesive along the edges of the windshield where the primer was applied. Use a windshield adhesive recommended by the manufacturer or follow the vehicle’s specifications.
- Use a windshield setting tool to evenly distribute the adhesive along the edges, ensuring complete coverage for maximum strength.
- After applying the adhesive, carefully place the windshield into position. Make sure it is aligned correctly with the vehicle’s frame.
- Apply pressure evenly across the entire surface of the windshield to ensure proper adhesion. This can be done using a windshield setting tool or by using your hands wrapped in a soft cloth.
Once the windshield is securely in place, allow the adhesive to cure as per the manufacturer’s instructions. This typically takes several hours, so be sure to provide ample time for the adhesive to fully set before driving the vehicle.
By cleaning the windshield thoroughly and applying the necessary adhesive and primers, you can ensure a successful installation and a clear view of the road ahead.
Setting Up The Rope
Choosing the Right Type and Thickness of Rope
Before you begin installing a windshield with rope, it is important to select the right type and thickness of rope. The rope you choose should be strong, durable, and able to withstand the tension required for windshield installation.
When selecting rope, consider using a synthetic rope such as nylon or polypropylene. These materials are known for their strength and resistance to degradation from exposure to sunlight and moisture. Avoid using natural fiber ropes like cotton or hemp, as they can weaken over time and may not provide the necessary strength for windshield installation.
The thickness of the rope also plays a crucial role in ensuring a secure windshield installation. Aim for a rope with a diameter between 3/8 inch to 1/2 inch. This thickness provides the right balance of strength and flexibility, allowing for easy maneuvering during the installation process.

Properly Attaching and Positioning the Rope for Windshield Installation
Once you have chosen the right rope for the job, the next step is to properly attach and position it for windshield installation. Follow these steps to ensure a smooth and secure installation:
- Measure and cut the rope: Begin by measuring the circumference of the windshield frame. Add an additional 6-12 inches to account for knot tying and easy handling. Use a sharp knife or scissors to cut the rope to the appropriate length.
- Create a loop: Take one end of the rope and create a loop, leaving a tail of rope approximately 6-8 inches long. This loop will serve as the anchor point for attaching the rope to the windshield frame.
- Secure the loop: Once you have created the loop, secure it tightly using a knot such as a bowline or a figure-eight knot. Ensure the knot is secure and will not slip or come undone during the installation process.
- Position the rope: With the loop securely attached, position the rope along the windshield frame, ensuring it is evenly distributed around the perimeter. This will help distribute the tension evenly during installation and prevent any undue stress on the windshield.
Following these steps for attaching and positioning the rope will help to ensure a successful windshield installation. Remember to always prioritize safety by wearing protective gloves and eyewear during the installation process.
Positioning The Windshield
Positioning the windshield correctly is crucial for a successful installation. Without proper alignment, you may encounter difficulties in securing the windshield in place and risk compromising its integrity. In this section, we will explore two essential aspects of positioning the windshield: ensuring it is aligned correctly with the vehicle frame and utilizing reference points for accurate positioning.
Ensuring the windshield is aligned correctly with the vehicle frame
Before you begin the installation process, it is essential to make sure that the windshield is aligned correctly with the vehicle frame. To achieve this, follow these steps:
- Ensure the vehicle frame is clean and free of any debris. This will allow the windshield to sit flush against the frame, ensuring a secure fit.
- Position the windshield in place and align it with the frame, ensuring that it sits evenly on both sides. Take your time to ensure the alignment is perfect.
- Check the levelness of the windshield. A level windshield is essential for proper fitment and aesthetics. You can use a spirit level to check if the windshield is parallel to the ground.
- Verify that the windshield is centered within the frame. A misaligned windshield can affect the overall appearance of the vehicle and may cause additional fitting issues.
Using reference points to achieve proper positioning
In addition to aligning the windshield with the vehicle frame, reference points can help you achieve accurate positioning. Here are some techniques to consider:
- Use the vehicle’s hood or roof as a reference point. By aligning the bottom edge of the windshield with a consistent point on the hood or roof, you can ensure the windshield is positioned at the correct height.
- Take note of any existing marks or indicators on the vehicle frame. These can serve as reference points when positioning the windshield.
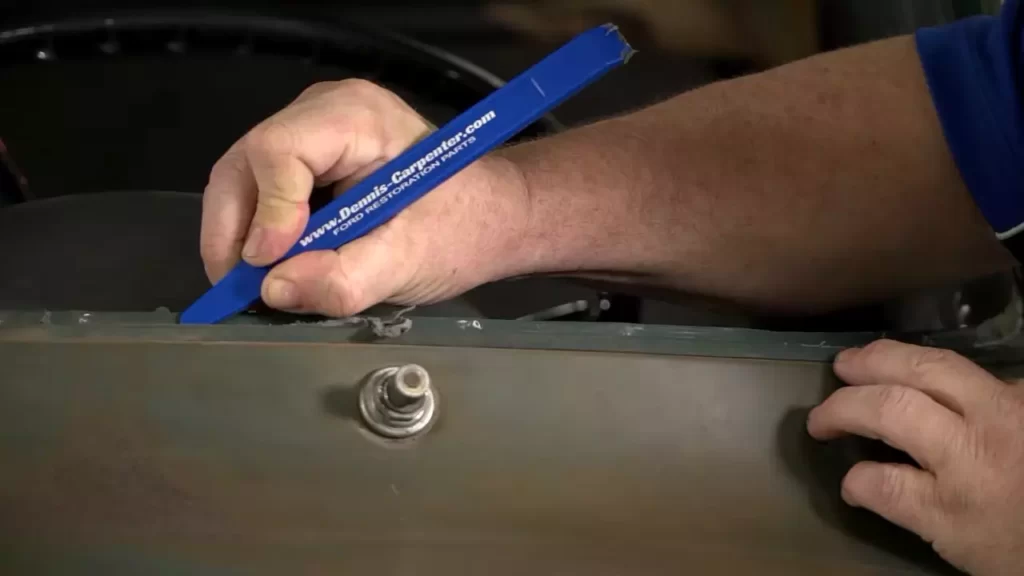
- Consider using masking tape to mark the desired position of the windshield on the vehicle frame. This can act as a visual guide during the installation process.
By paying attention to both the alignment with the vehicle frame and utilizing reference points, you can position the windshield accurately. Remember, proper positioning is key to a successful windshield installation and ensures the windshield’s longevity and functionality.

Rope Technique For Installation
Installing a windshield using the rope technique is an efficient and reliable method that ensures a secure and snug fit. Unlike other installation methods, the rope technique helps to evenly distribute the pressure of the windshield against its frame, reducing the risk of cracks or breaks. In this step-by-step guide, we will walk you through the process of using a rope to install your windshield, ensuring proper tensioning and securing at every stage.
A step-by-step guide to using the rope to install the windshield
Follow these simple steps to use the rope technique for installing your windshield:
- Start by applying a thin layer of windshield adhesive around the edges of the frame where the windshield will sit. Make sure the frame is clean and free of any dirt or debris that may affect the bonding process.
- Next, position the windshield over the frame, ensuring the adhesive contacts the frame evenly. Gently slide the windshield into place, making sure it is centered and aligned correctly.
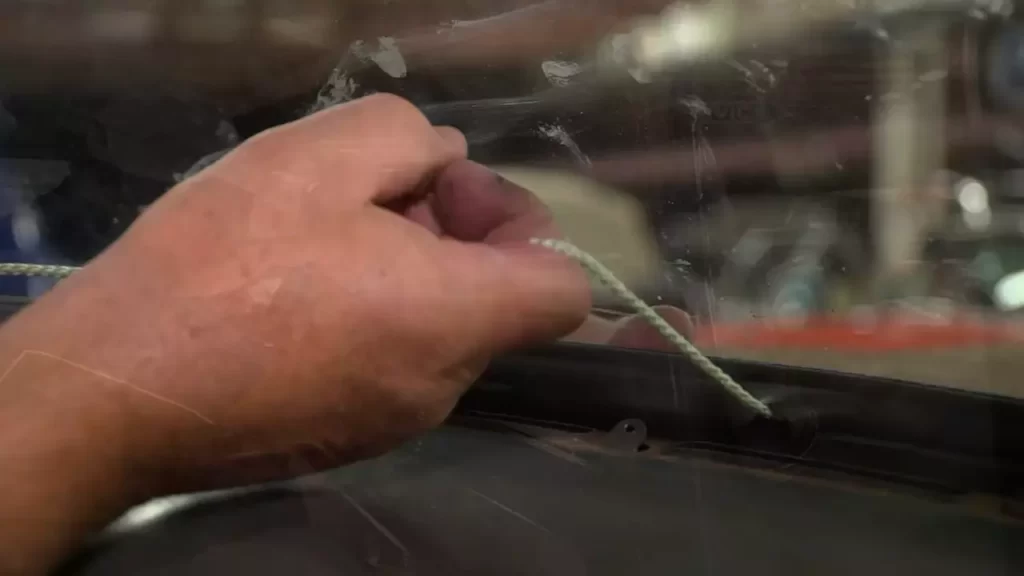
- With the windshield in position, take a length of rope and thread it through the gap between the windshield and the frame, starting at the top center point. Leave enough rope on each end to provide a comfortable grip.
- Once the rope is threaded through, create a loop at each end by tying a knot. This will serve as a handle for pulling and applying tension to the rope.
- Now, on one side of the windshield, pull the rope outwards, away from the center, while simultaneously applying inward pressure on the windshield. The rope will act as a lever, gradually pressing the windshield against the adhesive and the frame. Repeat this process on the other side.
- Continue pulling and applying pressure alternately on each side of the windshield, gradually moving from the top towards the bottom, until the entire windshield is securely in place. This ensures even distribution of pressure, avoiding any high-stress areas that could lead to cracks or breaks.
- Once the windshield is fully installed, check the alignment and make any necessary adjustments. Ensure that the windshield sits flush against the frame, and there are no visible gaps or misalignments.
- Finally, allow the adhesive to cure according to the manufacturer’s instructions. This usually involves leaving the vehicle undisturbed for a designated period, allowing the adhesive to bond firmly.
- Clean any excess adhesive around the edges of the windshield using a suitable solvent, taking care not to damage the glass or the frame. Now, your windshield is securely installed and ready for use!
Proper tensioning and securing of the rope during the installation process
Ensuring proper tensioning and securing of the rope during the windshield installation process is crucial for a reliable and long-lasting fit. Here are some tips to help you achieve this:
- Use a sturdy and flexible rope that can withstand the tension applied during the installation process.
- Regularly check the tension as you pull the rope, ensuring it remains firm and secure without excessive slack.
- Apply inward pressure on the windshield while pulling the rope to help evenly distribute the pressure and adhesive bonding between the windshield and the frame.
- Be cautious not to apply too much force or tension, as it may result in cracks or damage to the windshield.
- Observe the position of the rope handles during the installation, making sure they do not interfere with the windshield’s alignment or cause any stress points.
- While pulling the rope, ensure your grip is comfortable and firm, enabling you to exert adequate force without straining your hands or wrists.
- Take your time during the installation process, ensuring each step is carried out carefully and without rushing.
By following these guidelines, you can ensure a successful installation of your windshield using the rope technique, providing a secure and reliable fit.
Applying Sealant And Adhesive
Choosing the Appropriate Sealant and Adhesive for Windshield Installation
When it comes to installing a windshield with rope, choosing the appropriate sealant and adhesive is crucial for a successful installation. The sealant and adhesive work together to create a strong bond between the windshield and the vehicle, ensuring a watertight and secure fit.
There are several factors to consider when selecting the right sealant and adhesive:
- The type of vehicle: Different vehicles may require different sealants and adhesives based on their construction and materials. It is important to consult the vehicle’s manufacturer specifications or seek professional advice to ensure compatibility.
- Weather conditions: If you live in an area with extreme temperatures or frequent temperature fluctuations, it is necessary to choose a sealant and adhesive that can withstand these conditions without compromising the bond.
- Drying time: Some sealants and adhesives may require a longer drying time, which could delay the installation process. Consider the time restrictions you have and choose a product that works within your timeframe.
Once you have selected the appropriate sealant and adhesive, it’s time to move on to the next step: applying and spreading the sealant for a watertight seal.
Properly Applying and Spreading Sealant to Ensure a Watertight Seal
Proper application and spreading of the sealant are essential to achieve a watertight seal and prevent any leaks or damage. Follow these steps to ensure a successful installation:
- Clean the windshield and the vehicle’s frame thoroughly to remove any dirt, grease, or old adhesive residue. This will help the sealant adhere better to the surfaces.
- Apply a continuous bead of sealant along the edge of the windshield. Make sure to cover the entire perimeter, leaving no gaps.
- Use a windshield tool or a plastic spatula to evenly spread the sealant along the edge, ensuring it is uniformly distributed. This will help create a strong bond and prevent any weak spots.
- Press the windshield firmly against the vehicle’s frame, applying even pressure to ensure a tight seal. Check for any excess sealant oozing out from the edges and clean it off promptly.
- Allow the sealant to cure as per the manufacturer’s instructions. This may involve keeping the vehicle stationary for a certain period or avoiding moisture exposure.
By following these steps and using the appropriate sealant and adhesive, you can install a windshield with rope successfully. Remember to always prioritize safety and consult professionals if you are unsure about any part of the installation process.
Cleaning Up And Quality Checks
After successfully installing the windshield using rope, it’s crucial to pay attention to the final steps of the process – cleaning up and conducting thorough quality checks. These steps are essential to ensure that the installation is completed correctly and that the windshield functions properly.
Removing Excess Adhesive and Sealant
Once the windshield is securely in place, you’ll want to remove any excess adhesive and sealant to give the installation a clean and finished look. Use a suitable adhesive remover and a clean cloth to carefully wipe away any excess material. Be thorough in your cleaning to avoid any potential issues down the road.
To remove excess adhesive and sealant:
- Apply the adhesive remover to a clean cloth.
- Gently rub the cloth over the areas where adhesive and sealant are visible.
- Continue to wipe until all excess material is removed.
Conducting Thorough Quality Checks
Ensuring that the windshield is installed correctly is paramount for your safety and the functionality of your vehicle. To conduct thorough quality checks, follow these steps:
- Inspect the windshield for any visible defects or damage.
- Check for proper alignment and fit by visually comparing the windshield to the surrounding frame.
- Tap gently on the windshield glass to ensure it feels secure.
- Perform a water test by spraying water onto the windshield and observing for any leaks or water seepage.
- Test the windshield wipers to ensure they glide smoothly across the glass surface without any obstructions or skipping.
- Finally, take your vehicle for a test drive to assess the windshield’s stability and resistance to wind noise.
By following these cleaning up and quality check steps, you can rest assured that your windshield installation is complete and meets the necessary standards. Remember, if you notice any issues during the quality check process, it’s essential to address them promptly to prevent any further complications.
Frequently Asked Questions For How To Install A Windshield With Rope
How Do You Install A Windshield With Rope?
To install a windshield with rope, start by removing the old windshield and cleaning the frame. Apply adhesive to the frame and lay the rope on top of it. Carefully position the new windshield on the frame, making sure it lines up properly.
Use the rope to gently pull the windshield into place, ensuring a tight seal.
What Type Of Rope Is Best For Windshield Installation?
When installing a windshield with rope, it’s best to use a strong and durable rope, such as nylon or polypropylene. These ropes offer excellent strength and resistance to UV rays and weather conditions, ensuring a secure installation. Avoid using natural fiber ropes, as they may deteriorate over time and compromise the windshield’s stability.
Can I Install A Windshield With Rope Myself?
While it is possible to install a windshield with rope by yourself, it is a complex and highly technical process. It requires a good understanding of the installation technique and the right tools. It is recommended to seek professional help to ensure a proper and safe installation, as any mistakes can result in a compromised windshield and potential safety hazards.
Conclusion
Installing a windshield with rope may seem intimidating, but with the right knowledge and technique, it can be a straightforward process. By following the steps outlined in this guide, you can confidently replace your windshield using rope. Remember to be patient, take your time, and prioritize safety throughout the installation.
With practice, you’ll become proficient in this DIY task and save yourself the cost of professional installation. Get started today and enjoy a clear and secure windshield for your vehicle.