How to Install a Track Light?
To install a track light, first, switch off the power, then attach the mounting bracket to the ceiling electrical box using screws. Connect the track and feed wires, securing them with wire connectors.
Slide the track onto the mounting bracket and secure it. Finally, attach the light fixtures to the track by twisting them into place. Are you looking to add a modern and versatile lighting solution to your home or office? If so, track lights are an excellent choice.
The installation process may seem daunting at first, but with a few simple steps, you can have your track lights up and running in no time. In this guide, we will walk you through the process of installing a track light, from attaching the mounting bracket to connecting the light fixtures. So, let’s get started and shed some light on how to install a track light.
Understanding Track Lighting Systems
When it comes to creating the perfect lighting design for your space, track lighting systems offer both versatility and functionality. With their sleek design and adjustable features, track lights have become a popular choice for homeowners and designers alike. In this section, we will explore the overview of track lighting and its benefits, different types of track lighting systems, and how to choose the right track lighting system for your space.

Overview of Track Lighting and its Benefits
Track lighting is a type of lighting system that uses a track or rail system to mount and power multiple light fixtures. Unlike traditional lighting fixtures that are fixed in one position, track lights can be adjusted and moved along the track to focus light on specific areas of a room.
This flexibility makes track lighting an excellent choice for highlighting artwork, accentuating architectural features, or providing task lighting in a kitchen or workspace. The ability to easily reposition the lights allows you to change the ambiance and functionality of a space based on your needs.
Some key benefits of track lighting include:
- Better illumination: Track lights provide bright and even illumination throughout a room, reducing shadows and creating a more visually pleasing environment.
- Flexible and adjustable: The movable heads of track lights allow you to direct the light exactly where it is needed, making them suitable for various lighting scenarios.
- Space-saving: With track lighting, you can eliminate the need for multiple individual fixtures, freeing up valuable ceiling space.
- Modern and stylish: The sleek design of track lights adds a touch of contemporary elegance to any room.
- Easy installation: Installing track lighting is relatively straightforward, making it a popular DIY project for homeowners.
Different Types of Track Lighting Systems
Track lighting systems come in various designs and configurations. The three main types are:
- Halo Track Lighting: This type of track lighting features a halo-shaped track with a single electrical feed point. Halo track lighting is easy to install and compatible with a wide range of fixtures.
- Junotrack Lighting: Junotrack lighting is a two-circuit system that allows you to control multiple sets of lights separately. It offers greater flexibility and control over the lighting in your space.
- Monorail Track Lighting: Monorail track lighting systems consist of a flexible rail that can be bent and shaped to fit your specific lighting needs. This type of track lighting is perfect for curved or irregular ceiling layouts.
Choosing the Right Track Lighting System for Your Space
When selecting a track lighting system for your space, it’s essential to consider factors such as the layout of the room, the desired lighting effect, and your specific needs. Here are a few key points to keep in mind:
- Determine the purpose: Decide whether you need track lighting for general lighting, accent lighting, or task lighting. This will help you determine the number of fixtures and the direction of light required.
- Consider the room layout: Take into account the size and shape of the room, the ceiling height, and any potential obstacles that may affect the placement of the track lighting.
- Choose the appropriate track type: Based on your specific lighting requirements and the overall aesthetic of the room, select the type of track lighting system that best suits your needs.
- Select compatible fixtures: Consider the type of fixtures you want to use, whether it’s adjustable spotlights, pendant lights, or decorative fixtures. Ensure that the fixtures you choose are compatible with your chosen track lighting system.
- Plan the electrical arrangement: Before installation, plan the position of the track, the location of the electrical feed, and any additional wiring required. It’s recommended to consult a professional electrician for any complex electrical work.
- Install and test: Follow the manufacturer’s instructions to install the track lighting system securely. Once installed, test the lights to ensure they are working correctly and adjust the heads as needed.
Preparing For Installation
Before installing a track light, it’s important to make the necessary preparations to ensure a successful and safe installation. This includes assessing the installation area, gathering the necessary tools and materials, and turning off the power supply.
Assessing the Installation Area
Begin by assessing the area where you want to install the track light. Consider factors such as the ceiling height, the structure of the ceiling, and the location of any obstructions like beams or vents. Make sure the area is clear of any obstructions that may interfere with the installation or the functionality of the track light.

Gathering the Necessary Tools and Materials
Once you have assessed the installation area, gather all the necessary tools and materials needed for the installation. This will save you time and frustration later on. Some of the essential tools and materials you will need include:
- Track light kit
- Mounting brackets and screws
- Wire connectors
- Wire strippers
- Screwdriver (Phillips or flathead, depending on the screws used)
- Wire nuts
- Electrical tape
- Ladder (if necessary)
Turning off the Power Supply
Before you begin any electrical work, it is crucial to turn off the power supply. Locate the circuit breaker or fuse box and switch off the breaker or remove the fuse that controls the relevant area of the house. This will prevent any accidental electrical shocks or short circuits during the installation process. Always double-check that the power is off by testing the existing light switch or using a non-contact voltage tester.
By assessing the installation area, gathering the necessary tools and materials, and turning off the power supply, you are now well-prepared to proceed with the track light installation. It’s essential to follow these steps carefully to ensure a safe and successful installation.
Remember, if you are unsure about any aspect of the installation process, consult a professional electrician to avoid any potential risks or mistakes.
Mounting The Track
Mounting the track is an essential part of the installation process for a track light. Properly mounting the track ensures that the light fixtures are secure and positioned correctly. In this section, we will guide you through the steps to determine the placement of the track, mark the locations for mounting brackets, and attach the brackets securely to the ceiling or wall.
Determining the placement of the track
Before installing the track, it is crucial to determine the best placement for it in the room. Consider factors such as the room’s layout, the desired lighting effect, and any potential obstacles that may obstruct the track’s installation. To determine the placement:
- Measure the length of the track and ensure it fits the intended area without any obstructions.
- Consider the position of existing electrical wiring to connect the track light properly.
- Visualize the positioning of the track and ensure it aligns with your lighting goals, whether it’s highlighting a specific area or providing overall illumination.
- Take into account any potential shadows that may be cast by nearby objects or walls.
By taking these factors into consideration, you can determine the optimal placement for your track light, ensuring it complements your room’s aesthetics and serves its intended purpose.
Marking the locations for mounting brackets
Once you have determined the placement of the track, it’s time to mark the locations for the mounting brackets. Follow these steps:
- Using a pencil, mark the spots on the ceiling or wall where the brackets will be attached.
- Ensure that the marks are aligned with the track’s determined placement.
- Measure the distance between each marking to ensure even spacing between the brackets.
- Double-check the markings to ensure they are accurate and at the desired height.
By marking the locations for mounting brackets accurately and evenly, you will ensure a secure and balanced installation of the track light.
Attaching the brackets securely to the ceiling or wall
With the marked locations in place, it’s time to attach the brackets securely to the ceiling or wall. Follow these steps:
- Pre-drill holes at the marked locations for the mounting brackets.
- Use the appropriate screws or anchors, depending on the type of surface you are mounting the track to.
- Align the brackets with the pre-drilled holes and attach them using a screwdriver or drill.
- Ensure that each bracket is securely attached, and the track does not wobble or move when pressure is applied.
By securely attaching the brackets to the ceiling or wall, you guarantee the stability and safety of your track light installation.
Following these steps to mount the track will ensure a successful installation of your track light. With the track securely in place, you can move on to the next steps in the process, such as connecting the electrical wiring and attaching the light fixtures.

Wiring The Track
When installing a track light, one of the most crucial steps is wiring the track. A properly wired track ensures the efficient and safe operation of the light. In this section, we will guide you through the process step by step, focusing on turning off the circuit breaker, removing the cover plate from the electrical box, and connecting the track’s live, neutral, and ground wires to the electrical box.
Turning off the circuit breaker
The first and most important step is ensuring your safety by turning off the circuit breaker that supplies power to the electrical box. This will prevent any electrical accidents or shocks while working on the wiring. Locate the circuit breaker panel in your house or building and use a circuit tester to identify the correct breaker. Flip the breaker to the off position.
Removing the cover plate from the electrical box
With the circuit breaker turned off, it’s time to remove the cover plate from the electrical box. This will expose the wiring connections and allow you to connect the track. Use a screwdriver to remove the screws holding the cover plate in place. Carefully set aside the cover plate and any screws, ensuring you don’t misplace them.
Connecting the track’s live, neutral, and ground wires
Now that the electrical box is exposed, it’s time to connect the track’s live, neutral, and ground wires. Each wire serves a specific purpose in the electrical system and must be properly connected for the track light to function correctly.
| Wire Color | Purpose |
|---|---|
| Brown or Black | Live wire – carries current from the power source |
| White or Gray | Neutral wire – completes the electrical circuit |
| Green, Bare Copper, or Green with Yellow Stripe | Ground wire – protects against electrical faults |
To connect the wires, start by stripping the insulation off the end of each wire, revealing the copper conductor. Twist together the live wire from the track with the live wire from the electrical box, securing them with a wire nut. Repeat this process for the neutral and ground wires, ensuring a secure and reliable connection.
Once the wires are properly connected, carefully tuck them into the electrical box, taking care not to damage them or cause any strain on the connections. Finally, replace the cover plate onto the electrical box and secure it with the screws that were removed earlier.
With the track wires properly connected, you’re one step closer to having your track light up and running. In the next section, we will cover the final steps of installing a track light, including positioning and securing the track, attaching the light fixtures, and testing the system for functionality.
Installing The Track Heads
Attaching the track heads to the track is a crucial step in the installation process of a track light. This is where you bring the light fixture to life, illuminating your space with directional lighting. Follow the steps below to ensure a secure and functional installation.
Attaching the track heads to the track
To attach the track heads to the track, start by identifying the track head connectors. These connectors are typically located at the bottom of the track head and consist of a small screw or pin. Insert the connector into the groove on the track and slide it along until you reach the desired position. Once in place, tighten the connector to secure the track head. Repeat this process for each track head you wish to install, spacing them evenly along the track.
Adjusting the position and direction of the track heads
Once the track heads are securely attached to the track, you can adjust their position and direction to achieve the desired lighting effect. Most track heads offer a 360-degree rotation and a tilt mechanism, allowing for complete control over the light’s direction. Play around with different angles and orientations to find the perfect lighting arrangement for your space. Just remember to ensure the track heads are not pointing directly at any reflective surfaces to prevent glare.

Testing the track heads to ensure proper functionality
After installing and adjusting the track heads, it’s essential to test them to ensure they are functioning properly. Switch on the power supply and observe if the track heads illuminate as expected. Check if the light is evenly distributed and whether any adjustments need to be made to achieve the desired brightness and beam angle. Additionally, make sure the track heads are securely fastened and do not wobble or move when touched. Testing the track heads will give you peace of mind knowing that your installation was successful and that the lights will provide the lighting you need.
Finalizing The Installation
Once you have successfully mounted and wired your track light system, it’s time to finalize the installation. This step involves restoring power to the circuit, checking for any wiring or connection issues, and adjusting the track heads for optimal lighting angles.
Restoring power to the track light circuit
To restore power to the track light circuit, follow these steps:
- Locate the circuit breaker or fuse box in your home.
- Identify the circuit that controls the track light.
- Flip the circuit breaker switch to the “ON” position or replace the fuse if necessary.
Once you have restored power to the circuit, you should see the track light system come to life. If not, proceed to the next step.
Checking for any wiring or connection issues
To ensure proper functioning of your track light system, it’s important to check for any wiring or connection issues. Follow these steps:
- Inspect each connection point along the track, making sure all wires are securely connected.
- Check for any loose or exposed wires that may pose a safety hazard.
- If you notice any issues, turn off the power to the circuit and address the problem before proceeding further.
By conducting a thorough inspection of the wiring and connections, you can prevent any potential electrical problems and ensure the longevity of your track light system.
Adjusting the track heads for optimal lighting angles
The final step in the installation process is to adjust the track heads for optimal lighting angles. Here’s how:
- Turn on the track light system and observe the direction of the light beams.
- Use a ladder or step stool to reach the track heads.
- Rotate each track head to the desired angle, ensuring it focuses the light where you need it most.
- Experiment with different angles until you achieve the desired lighting effect.
By adjusting the track heads, you can customize the lighting in your space according to your preferences and needs.
With these final steps, you have successfully installed and finalized your track light system. Enjoy the enhanced lighting and ambiance it brings to your home or office.
Maintenance And Troubleshooting Tips
In order to keep your track light functioning optimally, regular maintenance is essential. This includes cleaning and maintaining the track and track heads. Additionally, troubleshooting common track light issues can help address any problems that may arise. Here are some tips on how you can maintain and troubleshoot your track light:
Cleaning and maintaining the track and track heads
To ensure the longevity of your track light, it’s important to regularly clean and maintain the track and track heads. Dust, dirt, and debris can accumulate over time, affecting the performance and appearance of your lights. Follow these steps to clean your track light:
- Turn off the power to the track light and let it cool down before cleaning.
- Gently remove the track heads by unscrewing them from the track.
- Use a soft, lint-free cloth to wipe down the track and the track heads. Avoid using abrasive cleaners or scrub brushes as they can damage the finish.
- Inspect the track for any loose connections or damaged wires. Tighten any loose connections and replace any damaged wires if necessary.
- Reattach the track heads securely onto the track.
- Turn the power back on and test the track light to ensure it is working properly.
By regularly cleaning and maintaining your track light, you can keep it looking stylish and functioning efficiently.

Troubleshooting common track light issues
Despite proper maintenance, track light issues can still occur. Here are some common problems and troubleshooting tips:
| Issue | Troubleshooting Tip |
|---|---|
| Track light not turning on | Check if the power is properly connected and the switch is in the “on” position. Replace any blown fuses or tripped circuit breakers. |
| Dim or flickering lights | Ensure that the bulbs are securely screwed into the track heads. Replace any faulty bulbs. Check for loose connections or damaged wiring. |
| Uneven lighting | Adjust the position of the track heads to ensure they are evenly spaced. Rotate them to direct the light where needed. |
| Excessive heat from the track heads | Ensure that the track heads are not obstructed by any objects or materials. If the issue persists, consult a professional. |
By troubleshooting these common track light issues, you can often solve the problem and avoid the need for professional assistance.
Seeking professional assistance when needed
While cleaning and troubleshooting can resolve many track light issues, there may be situations where professional help is necessary. If you encounter any of the following problems, it’s advisable to seek professional assistance:
- Frequent electrical surges or circuit overloading
- Significant damage to the track or track heads
- Persistent issues even after troubleshooting
Professional electricians have the expertise to handle complex electrical problems safely and effectively. Contact a reputable professional if you are unsure or uncomfortable with performing the necessary repairs yourself.
In conclusion, by regularly cleaning, maintaining, and troubleshooting your track light, you can ensure its longevity and optimal performance. Remember to seek professional assistance when needed and enjoy the benefits of a well-maintained track light system.
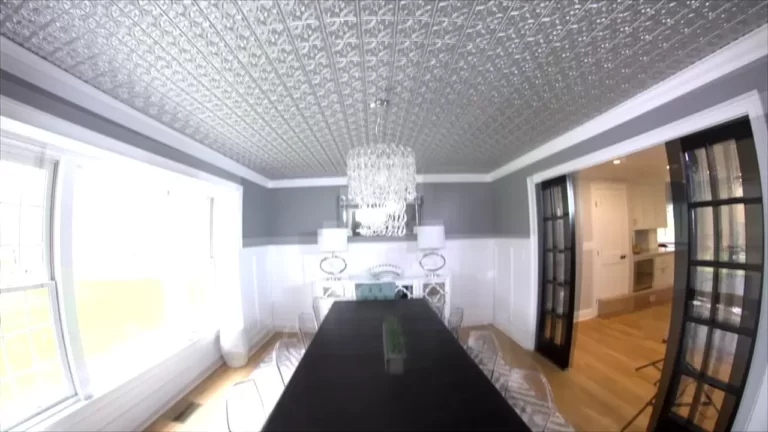
Enhancing Your Space With Track Lighting
Track lighting is a versatile and stylish solution for adding illumination to any room in your home. With its sleek design and adjustable heads, it allows you to create the perfect lighting effects to enhance your space. Whether you want to highlight artwork or architectural features, create different lighting moods, or incorporate it into various rooms and design styles, track lighting is a fantastic choice. In this article, we will explore the possibilities of track lighting and provide you with step-by-step instructions on how to install it in your own home.
Using track lighting to highlight artwork or architectural features
One of the primary advantages of track lighting is its ability to serve as a spotlight for your most cherished artwork or architectural features. By positioning adjustable track heads strategically, you can draw attention to specific pieces or areas of interest in your room. Whether it’s a beautiful painting, a decorative sculpture, or a unique architectural element, track lighting allows you to highlight them effectively. To achieve the best results, follow these simple steps:
- Start by determining the focal point you want to highlight. It could be a piece of artwork on a wall, a bookshelf, or even a fireplace mantel.
- Position the track lights at the appropriate distance from the focal point. Experiment with different angles to find the most flattering lighting effect.
- Adjust the track heads to direct the light towards the focal point. Depending on the size and shape of the subject, you may need to position multiple track heads for optimal illumination.
- Make sure to use proper bulbs that enhance the colors and details of the artwork or architectural feature.
Creating different lighting effects with adjustable track heads
Track lighting offers incredible flexibility in creating various lighting effects. With adjustable track heads, you can easily change the direction and intensity of the light to suit your preference. Here are some ideas to experiment with:
| Lighting Effect | Adjustment Tips |
|---|---|
| Spotlight | Position the track head directly towards the subject for a focused and dramatic effect. |
| Wall Wash | Angle the track head towards the wall to create a soft and subtle illumination that enhances the overall ambiance. |
| Task Lighting | Adjust the track head to direct the light onto a specific area, such as a kitchen counter or workspace, for optimal visibility. |
| Accent Lighting | Experiment with different angles and distances to accentuate specific objects or architectural details. |
Incorporating track lighting in various rooms and design styles
Track lighting can be seamlessly integrated into any room and design style, adding both functionality and aesthetics. Whether you have a modern, minimalist space, a cozy traditional room, or an eclectic mix of styles, track lighting can enhance its unique character. Here are some ideas to get you inspired:
- In the living room, use track lighting to create a warm and inviting atmosphere.
- In the kitchen, install track lights above the countertops and kitchen island for efficient task lighting.
- In the bedroom, utilize track lighting to highlight artwork or as a reading light solution.
- In the dining area, position the track heads to illuminate the table and create an intimate dining experience.
- In the hallway, install track lighting along the walls to add an interesting visual element and improve safety.
Remember to consider your existing decor and design elements when selecting the style and finish of your track lighting. Choosing fixtures that complement the overall aesthetic will ensure a cohesive and visually pleasing result.
By following these guidelines and getting creative with track lighting, you can transform your space into a beautifully illuminated haven. Try out different setups, experiment with angles and intensities, and enjoy the transformative power of track lighting!
Frequently Asked Questions For How To Install A Track Light
Do You Need An Electrician To Install Track Lighting?
Yes, it is recommended to hire an electrician to install track lighting. A professional electrician has the expertise to safely handle electrical connections and ensure proper installation for optimal functionality.
How Hard Is It To Install Track Lighting?
Installing track lighting is a relatively simple task. It involves mounting the track, connecting the wires, and attaching the light fixtures. With basic electrical knowledge and some tools, you can accomplish this DIY project without much difficulty.
How Does Track Lighting Attach To Ceiling?
Track lighting attaches to the ceiling by mounting a track directly onto the surface. The track is secured using screws or other appropriate hardware. Once the track is securely attached, the lighting fixtures can be easily snapped or clipped into place along the track.
How Do You Install A Track Light Rail?
To install a track light rail, follow these steps:
1. Choose the location and mark where you want to install the rail.
2. Connect the rail sections together using the provided connectors.
3. Secure the rail to the ceiling using screws or brackets.
4. Attach the track heads to the rail by sliding them onto the track and securing them in place.
5. Connect the wires from the track heads to the power source and turn on the lights.
Conclusion
To sum up, installing a track light can be a simple and rewarding project to enhance your space’s illumination. By following the step-by-step instructions provided in this blog post, you can confidently tackle this task. Remember to gather the necessary tools, plan your layout, and take safety precautions throughout the process.
With proper installation, you’ll enjoy the flexibility and stylish appeal that track lights bring to your home or office.