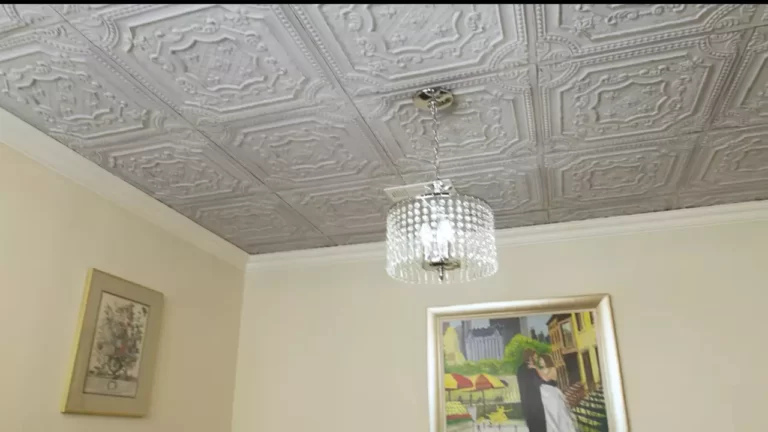
How to Install a Suspended Ceiling on Concrete?
To install a suspended ceiling on concrete, begin by installing a furring strip system along the perimeter of the room, using concrete anchors. Then, attach the suspension wires to the furring strips, making sure they are level.
Once the suspension wires are in place, install the main runners and cross tees, followed by the ceiling panels.
Choosing The Right Materials And Tools
When it comes to installing a suspended ceiling on concrete, choosing the right materials and tools is crucial to ensure a successful and hassle-free installation process. In this section, we will take a closer look at understanding the different types of suspended ceiling systems, selecting the appropriate ceiling tiles, and gathering the necessary tools for the installation process.
Understanding the Different Types of Suspended Ceiling Systems
Before diving into the installation process, it’s important to understand the different types of suspended ceiling systems available. By doing so, you can select the system that best suits your needs and requirements. Here are a few common types of suspended ceiling systems:
| Type | Description |
|---|---|
| Exposed Grid System | This system features a visible grid of metal or plastic components that support the ceiling tiles. |
| Concealed Grid System | In this system, the grid components are hidden behind the ceiling tiles, offering a seamless and clean appearance. |
| Suspension System | This system uses wires or rods to suspend the ceiling tiles from the concrete ceiling, providing a floating effect. |

Selecting the Appropriate Ceiling Tiles
Once you have chosen the type of suspended ceiling system that best fits your requirements, it’s time to select the appropriate ceiling tiles. Consider the following factors when choosing your ceiling tiles:
- Material: Ceiling tiles are available in a variety of materials such as mineral fiber, metal, plaster, and wood. Each material has its own unique characteristics and aesthetic appeal, so choose one that aligns with your preferences.
- Size and Shape: Determine the size and shape of the ceiling tiles based on the dimensions of your space. Most common ceiling tile sizes are 2×2 feet and 2×4 feet.
- Acoustic Properties: If sound insulation is important to you, opt for ceiling tiles with enhanced acoustic properties to create a quieter environment.
- Fire Resistance: Ensure that the ceiling tiles you choose have proper fire resistance ratings to meet safety regulations.
Gathering the Necessary Tools for the Installation Process
Before you begin the installation process, it’s essential to gather all the necessary tools. Here’s a list of tools you’ll typically need:
- Tape Measure: To accurately measure the dimensions of the room and ceiling tiles.
- Level: To ensure the suspended ceiling is installed evenly and horizontally.
- Electric Drill: For making holes in the concrete ceiling to attach the suspension system.
- Screwdriver: To tighten screws and secure components in the suspended ceiling system.
- Wire Cutters: For cutting and shaping wires or rods in the suspension system.
- Safety Equipment: Always prioritize safety by wearing gloves, goggles, and a dust mask during the installation process.
Having the right materials and tools at your disposal is critical when installing a suspended ceiling on concrete. Understanding the different types of suspended ceiling systems, selecting appropriate ceiling tiles, and gathering the necessary tools will help you achieve a professional-looking and durable ceiling installation.
Cleaning And Inspecting The Concrete Surface
Removing Any Existing Ceiling or Debris
Before installing a suspended ceiling on concrete, it is important to start with a clean slate. This means removing any existing ceiling or debris that may be present on the concrete surface. Removing the existing ceiling can be done by carefully prying off panels or tiles. It is essential to handle this process delicately to avoid damaging the concrete surface. Once the ceiling has been removed, inspect the area for any loose nails or screws that may have been left behind, as these can create obstacles during installation. Use a vacuum or broom to thoroughly clean up any debris, ensuring that the concrete surface is clean and free from any obstructions.
Inspecting for Any Cracks or Damage
The next step in preparing the concrete surface for a suspended ceiling installation is to inspect it for any cracks or damage. Cracks or damaged areas can compromise the stability and longevity of the suspended ceiling. Carefully examine the entire surface, paying close attention to corners, edges, and any joints where cracks are more likely to occur. If any cracks or damage are found, they should be repaired before moving forward with the installation. Fill in cracks using an appropriate concrete filler or patching compound, following the manufacturer’s instructions. Allow the repaired areas to dry and cure completely before proceeding further.
Cleaning the Surface Thoroughly
To ensure a solid bond between the concrete surface and the suspended ceiling, it is crucial to clean the surface thoroughly. Remove any dust, dirt, or grease that may have accumulated over time. Start by using a broom or brush to sweep away loose debris. For more stubborn dirt or stains, use a mild detergent mixed with water and a scrub brush to gently clean the surface. Avoid using harsh chemicals or abrasive cleaners that could damage the concrete. After cleaning, rinse the surface with clean water and allow it to dry completely before moving on to the next steps of the installation process.
To summarize, the cleaning and inspecting of the concrete surface is an important step in installing a suspended ceiling. By removing any existing ceiling or debris, inspecting for cracks or damage, and thoroughly cleaning the surface, you can ensure a smooth and successful installation. Taking the time to properly prepare the concrete surface will help achieve a durable and visually appealing suspended ceiling.

Applying A Moisture Barrier
When installing a suspended ceiling on a concrete surface, applying a moisture barrier is a crucial step to prevent any moisture-related issues. A moisture barrier acts as a protective layer between the concrete and the suspended ceiling, effectively sealing out any moisture that may seep through. In this section, we will discuss the importance of a moisture barrier, guide you in choosing the right type of moisture barrier, and provide step-by-step instructions on how to prepare the surface and apply the moisture barrier.
Understanding the Importance of a Moisture Barrier
Before delving into the details of applying a moisture barrier, it is important to understand why it is essential. Concrete surfaces have a tendency to absorb moisture, which can lead to a range of problems such as mold and mildew growth, deterioration of the ceiling materials, and even structural damage. By installing a moisture barrier, you create a barrier that prevents moisture from penetrating the ceiling, ensuring a longer lifespan for your suspended ceiling and maintaining a healthy indoor environment.
Choosing the Right Type of Moisture Barrier
When it comes to choosing the right moisture barrier for your suspended ceiling installation, there are a few factors to consider. The type of moisture barrier you choose will depend on the severity of moisture in the concrete, the location of the installation, and your budget. Here are some commonly used moisture barrier options:
| Type of Moisture Barrier | Advantages | Disadvantages |
|---|---|---|
| Sheet plastic (polyethylene) | Cost-effective, easy-to-install | Not suitable for high-moisture areas |
| Rubberized asphalt | Excellent moisture protection | Can be more expensive, and requires professional installation |
| Epoxy coating | Durable and resistant to moisture | Can be costly, requires specialized equipment |
Preparing the Surface and Applying the Moisture Barrier
Before applying the moisture barrier, it is crucial to properly prepare the concrete surface. Here is a step-by-step guide:
- Thoroughly clean the concrete surface using a broom or vacuum to remove any dust, debris, or loose particles.
- Inspect the concrete for any cracks or holes. Fill them with a suitable concrete patching compound and allow it to dry completely.
- Next, apply a concrete sealer to the surface. This will help reduce the moisture absorption of the concrete and improve the adhesion of the moisture barrier.
- Once the sealer has dried, it’s time to apply the moisture barrier. Follow the manufacturer’s instructions and use a roller or brush to evenly coat the surface with the moisture barrier material.
- Allow the moisture barrier to dry thoroughly before proceeding with the installation of the suspended ceiling.
By following these steps and using the right moisture barrier, you can ensure a successful installation of a suspended ceiling on a concrete surface. Remember, a moisture barrier is a crucial component in preventing moisture-related issues and prolonging the life of your suspended ceiling.
Determining The Layout Of The Grid System
Measuring and Marking the Ceiling for Grid Placement
When installing a suspended ceiling on concrete, one of the first steps is to determine the layout of the grid system. This will ensure that your ceiling tiles are properly aligned and that your installation looks professional. To begin, you’ll need to measure and mark the ceiling for grid placement.
The first thing you should do is measure the dimensions of your room. Use a tape measure to determine the length and width of the area where you will be installing the ceiling. Write down these measurements as they will come in handy later.
Once you have the dimensions, it’s time to mark the ceiling for grid placement. To do this, you’ll need a chalk line and a pencil. Start by finding the center point of the room. Measure the width of the room and divide it in half to find the center. Mark this point on the ceiling with a pencil.
Next, you’ll want to determine the size of your ceiling tiles. Most tiles are 2 feet by 2 feet, but you should check the specifications for the specific tiles you’ll be using. Use a tape measure to measure the size of the tiles and mark their dimensions on the ceiling.
After marking the dimensions of the tiles, you can begin creating a grid system. Start by using your tape measure to mark a line halfway between the center point and one of the walls. Repeat this process on the other side of the center point. These lines will serve as the boundaries for your grid.
Continue measuring and marking lines at 2-foot intervals until you reach the wall. This will give you a series of parallel lines that will serve as the main grid for your ceiling installation. It’s important to maintain consistent spacing between the lines to ensure a uniform look.

Planning for Lighting Fixtures and Other Obstacles
Before finalizing the layout of your grid system, it’s essential to consider any lighting fixtures or other obstacles that may affect the placement of the ceiling tiles. These can include recessed lights, vents, speakers, or any other feature that extends below the surface of the ceiling.
To plan for these obstacles, measure their dimensions and mark their locations on the ceiling. Once you have this information, you can adjust the placement of your grid to accommodate these features. For example, if you have a recessed light that extends 8 inches below the ceiling, you’ll want to make sure that your grid lines are at least 8 inches away from the light’s location.
Another consideration when planning for obstacles is the access panels. Access panels provide an entry point to the space above the suspended ceiling for maintenance or repairs. Make sure to incorporate access panels into your grid layout, marking their locations and ensuring that they are easily accessible.
By taking the time to plan for lighting fixtures and other obstacles, you can ensure a smooth installation process and avoid any issues down the line. With the proper measurements and markings, you’ll be able to create a grid system that seamlessly integrates all the necessary features of your suspended ceiling.
In conclusion, determining the layout of the grid system is a crucial step in installing a suspended ceiling on concrete. By accurately measuring and marking the ceiling for grid placement and considering any obstacles such as lighting fixtures, you’ll be well on your way to a successful installation.
Attaching The Main Tees To The Concrete Surface
Attaching the main tees to the concrete surface is a crucial step in installing a suspended ceiling. The main tees are the primary support system that holds the ceiling tiles in place. Properly securing the main tees ensures a sturdy and durable ceiling that will last for years to come. In this section, we will discuss the importance of selecting the correct anchoring method and provide a step-by-step guide on attaching the main tees according to the layout.
Selecting the Correct Anchoring Method
When it comes to anchoring the main tees to a concrete surface, it is essential to select the right method for optimal stability. There are two commonly used anchoring methods: concrete screws and adhesive anchors. The choice between the two depends on various factors including the weight of the ceiling, the condition of the concrete, and personal preference. Here’s a breakdown of each method:
| Concrete Screws | Adhesive Anchors |
|---|---|
|
|
Attaching the Main Tees According to the Layout
Once you have selected the correct anchoring method, it’s time to attach the main tees to the concrete surface according to the layout of your suspended ceiling. The layout determines the spacing and placement of the main tees, which should be aligned with the ceiling tiles. Here’s a step-by-step guide to help you:
- Start by marking the location of the main tees on the concrete surface. Use a tape measure and a chalk line to ensure accurate alignment.
- Using the appropriate anchoring method, secure the main tees to the concrete at the marked locations. Make sure the tees are level and securely attached.
- Continue attaching the main tees in a straight line, following the layout plan. Use a level to ensure they are installed correctly and maintain a uniform appearance.
- If there are any intersections or corners, cut the main tees accordingly to fit the layout. Use a hacksaw or tin snips for precision cuts.
- Once all the main tees are attached, proceed to install the cross tees and ceiling tiles, following the manufacturer’s instructions.
By carefully selecting the correct anchoring method and properly attaching the main tees according to the layout, you can ensure a smooth and successful installation of a suspended ceiling on concrete. Take your time, pay attention to details, and enjoy the benefits of a beautiful and functional ceiling in your space.

Installing Cross Tees And Wall Angles
One crucial step in installing a suspended ceiling on concrete is placing cross tees at regular intervals. These cross tees play a vital role in supporting the ceiling tiles, ensuring a stable and professional-looking finish. Additionally, attaching wall angles for support and stability is equally important. These wall angles serve as the main framework for your suspended ceiling, anchoring it securely to the surrounding walls.
Placing Cross Tees at Regular Intervals
In order to install a suspended ceiling that is visually appealing, it is important to place cross tees at regular intervals. These cross tees form a grid-like pattern that will hold the ceiling tiles in place. To accomplish this, follow these steps:
- Measure the length and width of the room to determine the exact spacing needed for your cross tees.
- Starting at one corner of the room, mark the desired interval on the wall using a pencil or marker.
- Repeat this process on the adjacent wall, ensuring that the marks align with those on the first wall.
- Use a chalk line or a straight edge to create a perfectly straight line between the marks on each wall.
- Using a level, extend the line across the remaining walls to create the grid pattern.
- Place the cross tees on the grid, aligning them with the marked lines.
- Ensure that each cross tee is securely seated in the main runners.
By following these steps, you will achieve a professional-looking suspended ceiling with evenly spaced cross tees that will support your ceiling tiles effectively.
Attaching Wall Angles for Support and Stability
In order to ensure optimal support and stability for your suspended ceiling, attaching wall angles is vital. Wall angles act as the skeleton of the suspended ceiling, providing a secure anchor to the surrounding walls. To properly attach wall angles, follow these steps:
- Measure and cut the wall angles to match the length of each wall.
- Align the top edge of the wall angle with the previously marked line on the wall.
- Secure the wall angle to the wall using appropriate fasteners, such as concrete screws.
- Ensure that the wall angle is straight and level using a spirit level.
- Repeat this process for each wall, ensuring that the wall angles are securely attached and align with one another.
By attaching wall angles in this manner, you will create a sturdy framework that will support the weight of the suspended ceiling and ensure its stability over time.
Cutting And Fitting The Ceiling Tiles
When installing a suspended ceiling on concrete, cutting and fitting the ceiling tiles is a crucial step to achieve a professional and polished look. This process requires precision and attention to detail, ensuring that each tile fits perfectly in its designated space. In this section, we will discuss two important aspects of cutting and fitting the ceiling tiles: measuring and cutting tiles for a perfect fit, and ensuring proper alignment and placement.
Measuring and Cutting Tiles for a Perfect Fit
Before cutting the ceiling tiles, it is essential to accurately measure the dimensions of the space where they will be installed. This will ensure that the tiles fit snugly and seamlessly into the grid system. Begin by carefully measuring the length and width of the empty ceiling space using a tape measure. Write down these measurements for reference.
Next, take one of the ceiling tiles and place it on a stable surface, such as a workbench or sawhorse. Align one edge of the tile with the base of the sawhorse to prevent any movement while cutting. Using the measurements you previously recorded, mark the appropriate cuts on the tile.
Pro Tip: Remember to account for any openings in the ceiling, such as light fixtures or vents, by measuring and marking the necessary cutouts on the tiles.
Once the measurements and markings are in place, use a sharp utility knife or a set of tin snips to carefully cut the ceiling tiles along the marked lines. Apply even pressure and make smooth, steady cuts, ensuring that the edges remain clean and straight. Repeat this process for each tile, double-checking the measurements to avoid any discrepancies.
Ensuring Proper Alignment and Placement
Once the tiles are cut to size, the next step is to ensure their proper alignment and placement in the suspended ceiling system. Begin by inserting the first tile into the grid system, gently sliding it into the designated space. Give it a slight push to ensure it fits securely and sits flush with the surrounding tiles.
Pro Tip: If necessary, use a utility knife to make small adjustments to the size of the tiles, ensuring a perfect fit within the grid system.
Continue this process, inserting each tile one by one into its designated slot in the grid system. Pay close attention to the alignment of the tiles, ensuring that they are evenly spaced and level with one another. This will create a seamless and cohesive appearance for your suspended ceiling.
Pro Tip: Use a level to check for straightness and make any necessary adjustments before moving on to the next tile.
To maintain a consistent and visually appealing ceiling, ensure that the tiles are aligned both horizontally and vertically. Take the time to step back and assess the overall look of the installed tiles, make any adjustments, if required, to achieve a symmetrical and balanced appearance.
By following these steps, you will be able to easily cut and fit the ceiling tiles, creating a suspended ceiling on concrete that is both functional and visually appealing.
Securing The Tiles To The Grid System
Once you have successfully installed the grid system for your suspended ceiling on concrete, the next step is to securely fasten the tiles. This ensures not only a visually appealing ceiling but also stability and durability. In this section, we will discuss two important aspects of securing the tiles to the grid system: using appropriate clips or suspension wires and ensuring the tiles are firmly secured to maintain stability.
Using Appropriate Clips or Suspension Wires
When it comes to securing the ceiling tiles, it is crucial to use the right clips or suspension wires. These accessories play a significant role in keeping the tiles in place and preventing any sagging or displacement over time. Here are a few key points to consider:
- Choose clips or suspension wires that are specifically designed for suspended ceilings. These products are made to withstand the weight of the tiles and ensure a secure attachment to the grid system.
- Ensure that the clips or suspension wires are compatible with the grid system you have installed. Different manufacturers may have varying specifications, so it’s essential to use components that are designed to work together.
- Follow the manufacturer’s instructions for properly attaching the clips or suspension wires to the grid system. This will ensure a secure and stable connection that can withstand the test of time.
Securing the Tiles Firmly, Ensuring Stability
Once you have the appropriate clips or suspension wires in place, it’s time to secure the tiles firmly to the grid system. This step is crucial as it ensures stability, prevents any movement, and maintains the overall integrity of the suspended ceiling. Here are some tips to achieve a solid attachment:
- Place each tile onto the grid system carefully. Ensure that it aligns properly and sits flush with the adjacent tiles.
- Attach the tiles to the grid system using the clips or suspension wires. Make sure to secure each corner and edge to avoid any loose or wobbly tiles.
- If your ceiling design requires cutting tiles to fit around obstacles, use appropriate tools such as a utility knife or a tile cutter to achieve clean and precise cuts. This will help in maintaining a professional finish and a snug fit.
- Regularly inspect the installed ceiling to identify any loose or sagging tiles. If you notice any, promptly address them by reattaching or replacing the clips or suspension wires as necessary.
By following these steps, you can ensure that your suspended ceiling on concrete is not only aesthetically pleasing but also stable and secure. The proper use of clips or suspension wires and the firm attachment of tiles will provide long-lasting support for your ceiling, keeping it in place for years to come.

Addressing Any Gaps And Finishing Touches
After installing a suspended ceiling on concrete, it’s important to address any gaps and add the finishing touches to ensure a polished and seamless look. This not only enhances the overall appearance but also helps prevent any potential issues such as moisture or pest infiltration. In this section, we will explore two key elements for achieving a professional finish: filling in gaps between tiles and wall edges, and installing trim or molding.
Filling in Gaps between Tiles and Wall Edges
One of the main areas where gaps occur in a suspended ceiling installation is between tiles and wall edges. These gaps can be unsightly and can compromise the effectiveness of the ceiling by allowing sound leakage or dust accumulation. To address this issue:
- Inspect and measure the gaps: Begin by thoroughly inspecting the area and measuring the size of the gaps. This will help determine the appropriate method for filling them in.
- Use caulk or sealant: For smaller gaps, a high-quality caulk or sealant specifically designed for use with suspended ceilings can be used. Apply a thin, even layer along the gap, ensuring complete coverage.
- Utilize expanding foam: For larger gaps, expanding foam can be an effective solution. Apply the foam into the gap, allowing it to expand and fill the space. Once dry, trim off any excess foam using a utility knife.
Installing Trim or Molding for a Polished Look
Trim or molding is an essential element in suspended ceiling installations as it adds a refined and sophisticated touch. It not only covers any imperfections or gaps but also creates a smooth transition between the ceiling and walls. Here’s how to install trim or molding:
- Choose the right trim: Select trim or molding that complements the style and design of your suspended ceiling. There are various options available, such as PVC or metal trims.
- Measure and cut the trim: Measure the length required for each section of trim and cut it accordingly. Use a miter saw or a miter box with a hand saw for precise cuts.
- Attach the trim: Secure the trim in place using construction adhesive or small nails. Ensure it is aligned properly and level with the ceiling and wall.
- Fill nail holes and gaps: After installing the trim, fill any nail holes or gaps with a suitable filler. Smooth it out using a putty knife and allow it to dry completely before sanding down any excess.
- Paint or stain: If desired, paint or stain the trim to match the color scheme of the room. Be sure to use a suitable paint or stain for the material of the trim.
By addressing any gaps and incorporating trim or molding, you can achieve a visually appealing and professional finish for your suspended ceiling installation on concrete. These finishing touches not only enhance the aesthetics but also contribute to the functionality and longevity of the ceiling.
Maintaining And Repairing The Suspended Ceiling
Frequent maintenance and timely repairs are crucial to ensure the longevity and functionality of a suspended ceiling. Whether you have a suspended ceiling in your home or office, it is important to understand how to keep it clean and address any damage that may occur. In this section, we will discuss two key aspects of maintaining and repairing a suspended ceiling: cleaning the ceiling tiles regularly and repairing damaged tiles or grid system components.
Cleaning the Ceiling Tiles Regularly
Regularly cleaning your suspended ceiling tiles is important for maintaining their appearance and preventing the buildup of dust, dirt, and grime.
Here are some tips for effectively cleaning your ceiling tiles:
- Start by turning off the lights and laying down drop cloths or protective coverings to catch any falling debris.
- Using a vacuum cleaner with a soft brush attachment or a duster, gently remove any loose dust and dirt from the surface of the tiles.
- If there are stains or spots on the tiles, create a solution of mild soap and warm water, and use a soft sponge or cloth to gently scrub the affected areas.
- Rinse the tiles with clean water and pat them dry with a soft cloth.
- For stubborn stains or grease, you can use a specialized ceiling tile cleaner or consult the manufacturer’s instructions for recommended cleaning methods.
Regularly cleaning your ceiling tiles not only improves their appearance but also helps to maintain a healthier indoor environment by reducing the accumulation of allergens and pollutants.
Repairing Damaged Tiles or Grid System Components
Damaged ceiling tiles or grid system components can detract from the overall appearance and functionality of your suspended ceiling. It is important to address any issues promptly to prevent further damage and ensure the safety of the ceiling.
If you notice any damaged tiles or components, follow these steps to repair them:
- Remove the damaged ceiling tile carefully to avoid causing further damage to the surrounding tiles or grid system.
- Inspect the grid system for any loose or broken components. Tighten or replace any damaged grid system components as necessary.
- Measure the dimensions of the damaged ceiling tile and purchase a replacement tile that matches the style and size of the existing tiles.
- Install the replacement tile by sliding it into the grid system and adjusting it to fit snugly in place.
- If the damaged tile was stained or discolored, you may need to consider replacing a larger section of tiles to maintain a uniform appearance.
By addressing any damaged tiles or grid system components promptly, you can maintain the structural integrity and aesthetic appeal of your suspended ceiling.
Frequently Asked Questions Of How To Install A Suspended Ceiling On Concrete
How To Install A Drop Ceiling In A Garage?
To install a drop ceiling in a garage, follow these steps:
1. Measure and mark the desired height for the suspended ceiling.
2. Install the perimeter track along the walls, ensuring it is level.
3. Attach main beams to the track, spaced according to the chosen tile size.
4. Insert cross tees into the main beams at regular intervals.
5. Place ceiling tiles into the grid formed by the main beams and cross tees.
What Is The Difference Between A Drop Ceiling And A Suspended Ceiling?
A drop ceiling and a suspended ceiling are the same things. They are secondary ceilings that are installed beneath the main ceiling. They create a gap that can hide wires, pipes, and other utilities.
What Is The Space Between the Suspended Ceiling And Slab On Top?
The space between a suspended ceiling and the slab on top is known as the plenum. It is used for various purposes such as hiding electrical and HVAC components, providing access for maintenance, and reducing noise. The plenum helps create a visually appealing appearance while also serving practical functions.
Is A Drop Ceiling Easy To Install?
Yes, drop ceilings are easy to install. They require basic tools and can be done by a DIYer. In just a few steps, you can have a new ceiling that hides unsightly wires and pipes.
Conclusion
Installing a suspended ceiling on concrete is a challenging task, but with the right knowledge and tools, it can be accomplished smoothly. By following the step-by-step guide provided in this blog post, you can ensure a successful installation that not only enhances the aesthetics of your space but also improves its acoustics and insulation.
Remember to measure accurately, choose the appropriate materials, and seek professional help if needed. With patience and dedication, you can achieve a beautiful and functional suspended ceiling that adds value to your home or office.