How to Install a Suspended Ceiling?
To install a suspended ceiling, begin by measuring the space and purchasing the necessary materials such as a grid system, ceiling tiles, and suspension wires. Assemble the grid system according to manufacturer instructions, ensuring it is level and secure.
Attach the suspension wires to the ceiling joists and connect them to the grid system. Lastly, insert the ceiling tiles into the grid system and make any necessary adjustments to ensure a proper fit.
Understanding The Basics Of Suspended Ceilings
If you are considering a renovation or construction project, one important aspect to consider is the installation of a suspended ceiling. Suspended ceilings, also known as drop ceilings, offer a range of benefits and are widely used in various types of buildings. In this article, we will delve into the basics of suspended ceilings, including their benefits, uses, and components, to provide you with a comprehensive understanding of this versatile ceiling option. So, let’s get started!

Benefits and Uses of Suspended Ceilings
Suspended ceilings provide numerous advantages that make them a popular choice in both residential and commercial settings. Some of the key benefits include:
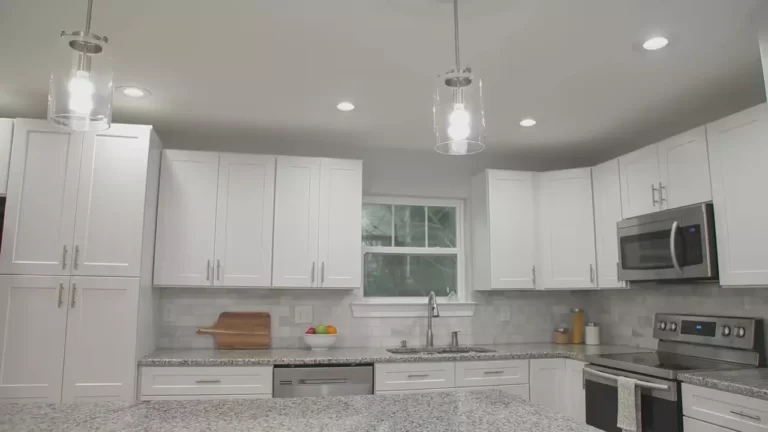
- Enhanced Aesthetics: Suspended ceilings can instantly transform a room by concealing unsightly wires, plumbing, and ductwork. With a variety of design options available, they allow you to create a clean and professional look.
- Noise Reduction: These ceilings are excellent at reducing noise levels, making them particularly suitable for environments that require sound control, such as offices, conference rooms, and educational facilities.
- Easy Access to Services: One of the primary advantages of suspended ceilings is their ability to provide easy access to plumbing, electrical, and HVAC systems. This quick access makes maintenance and repairs hassle-free.
- Thermal Insulation: Suspended ceilings can improve energy efficiency by providing an additional layer of insulation. This helps to maintain desired room temperatures and reduce heating or cooling costs.
Considering these benefits, it’s no wonder that suspended ceilings are widely used in various settings, including:
- Offices and commercial buildings
- Retail stores and shopping malls
- Hospitals and healthcare facilities
- Schools and educational institutions
- Restaurants and hospitality spaces
Components of Suspended Ceiling Systems
A suspended ceiling system comprises several essential components that work together to create a sturdy and visually appealing ceiling. The key components of a suspended ceiling system include:
- Suspended Grid: This is the framework that holds the ceiling tiles in place. It consists of main runners, cross tees, and wall angles, forming a grid pattern.
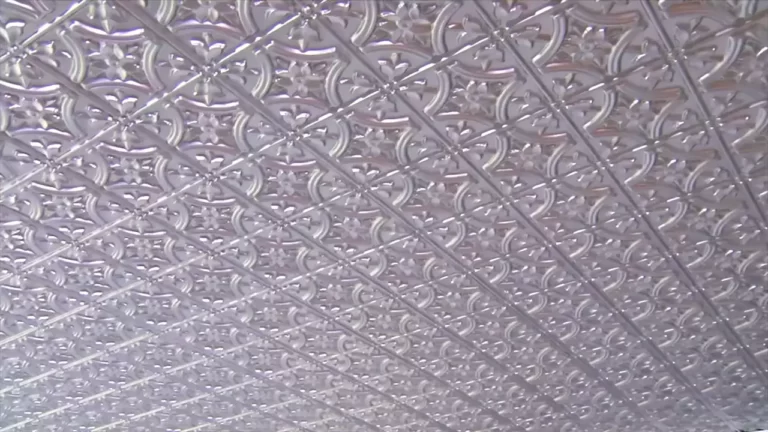
- Ceiling Tiles: These are the decorative panels that fit into the suspended grid. Ceiling tiles come in various materials, sizes, and designs, catering to different aesthetic preferences and functional requirements.
- Support Wires: These thin wires are used to hang the suspended grid from the existing ceiling or structure above. Support wires provide stability and ensure the proper installation of the suspended ceiling system.
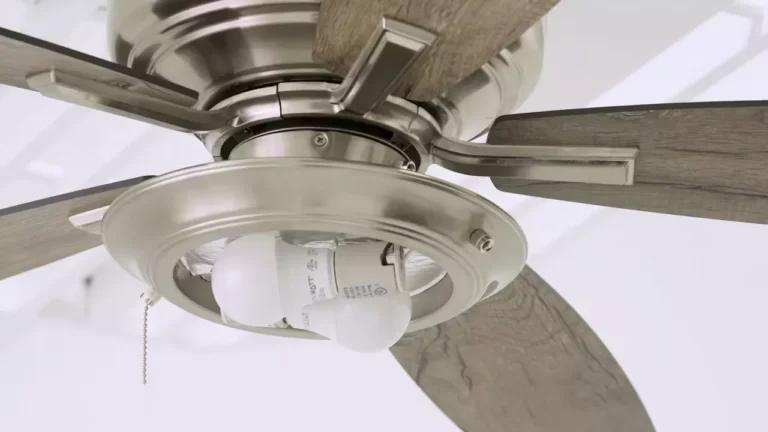
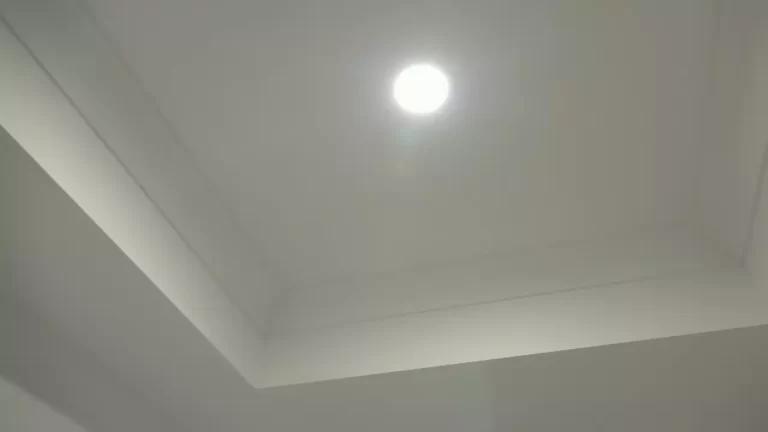
- Lighting Fixtures and Air Vents: These components are integrated into the suspended ceiling system to accommodate lighting fixtures, such as recessed lights or fluorescent tubes, and air vents for proper ventilation.
When all these components are installed correctly, they form a cohesive suspended ceiling system that not only adds visual appeal but also improves the overall functionality of the space.
Assessing The Space And Gathering Materials
Before you begin installing a suspended ceiling, it’s crucial to assess the space and gather all the necessary materials. This will ensure a smoother and more efficient installation process, saving you time and effort in the long run.
Measuring the Ceiling Area
Start by accurately measuring the ceiling area where you plan to install the suspended ceiling. This will help you determine the amount of materials needed and ensure a precise fit. To measure the area, follow these steps:
- Begin at one corner of the room and measure the length of one wall.
- Move along the wall, measuring each section and recording the measurements.
- Repeat this process for all the walls, taking into account any openings such as doors or windows.
- Add together the measurements to calculate the total length and width of the ceiling area.
By carefully measuring the ceiling area, you can avoid any discrepancies and avoid wasting materials.
Determining the Required Materials
Once you have the measurements, it’s time to determine the materials you’ll need for the installation. Here’s a list of the essential materials required:
| Materials | Quantity |
|---|---|
| Suspended ceiling grid | Based on the total length and width of the ceiling area |
| Ceiling tiles | Based on the total area of the ceiling (length x width) |
| Wire hangers | As needed |
| Screws and anchors | As needed |
| Insulation, if required | Based on the insulation needs |
Make sure to calculate the quantities accurately and account for any extra materials you may need as a contingency. This will prevent any delays or interruptions during the installation process.

Tools Needed for Installation
In addition to the materials, you’ll also need certain tools to install a suspended ceiling. Here are the essential tools you’ll require:
- Measuring tape
- Pencil
- Circular saw or tin snips
- Drill or screwdriver
- Wire cutters
- Level
- Safety goggles and gloves
These tools will help you accurately and safely install the suspended ceiling, so ensure you have them on hand before you begin.
By carefully assessing the space and gathering all the necessary materials and tools, you’ll be well-prepared to install your suspended ceiling. This preparation phase sets the foundation for a successful and seamless installation process.
Preparing The Ceiling For Installation
Before you begin installing a suspended ceiling, it’s essential to properly prepare the ceiling. This involves clearing the room and covering furniture, locating and marking ceiling joists, and inspecting and addressing any existing issues. By following these steps, you’ll ensure a smooth and successful installation process.
Clearing the Room and Covering Furniture
The first step in preparing the ceiling for installation is clearing the room of any furniture or belongings that may obstruct your work area. This will create ample space and prevent any damage to your items. It’s a good idea to cover any furniture that cannot be moved with protective sheets or plastic to shield it from dust and debris generated during the installation process.
Locating and Marking Ceiling Joists
In order to securely attach the suspended ceiling framework, it’s crucial to locate and mark the positions of the ceiling joists. These joists provide the necessary support for the suspended ceiling system. To locate the joists accurately, you can use a stud finder or tap the ceiling with your knuckles and listen for a solid sound, indicating the presence of a joist. Once you’ve identified the joist locations, use a pencil or chalk to mark them clearly for reference during the installation.
Inspecting and Addressing Any Existing Issues
Before proceeding with the installation, it’s essential to inspect the ceiling for any existing issues that may affect the installation process or compromise the integrity of the suspended ceiling. Look for any water stains, cracks, or signs of structural damage. If you notice any issues, address them as necessary. For instance, if there are water stains, investigate and fix the underlying cause of the leak before proceeding. Similarly, if there are cracks, fill and repair them to ensure a smooth and even surface for the suspended ceiling installation.
By properly preparing the ceiling before installation, you’ll set a solid foundation for your suspended ceiling project. Clearing the room, marking the ceiling joists accurately, and addressing any existing issues will contribute to a seamless and successful installation process.
Installing The Main Tees And Cross Tees
When it comes to installing a suspended ceiling, one of the key steps is installing the main tees and cross tees. These components form the framework on which the ceiling panels will be placed. Attaching the main tees to joists, cutting and installing the cross tees, and ensuring proper spacing and alignment are essential to achieving a professional-looking result. Let’s dive into each of these steps in detail.
Attaching the Main Tees to Joists
The main tees are the primary support for the entire suspended ceiling system. They are typically installed perpendicular to the ceiling joists. To attach the main tees to the joists, follow these steps:
- Measure and mark the desired location of the main tees on the ceiling joists.
- Secure the main tee hanger wires to the joists using screws or nails. Make sure the hanger wires are straight and level.
- Snap the main tees into the hanger wires, ensuring they are securely locked in place.
Repeat these steps for the remaining main tees, ensuring they are spaced according to the manufacturer’s recommendations.

Cutting and Installing the Cross Tees
Once the main tees are in place, it’s time to install the cross tees. These tees run parallel to the main tees and provide support for the ceiling panels. Follow these steps for cutting and installing the cross tees:
- Measure the distance between two main tees and mark it on the cross tees.
- Use a utility knife or tin snips to cut the cross tees to the desired length.
- Slide the cut cross tees into the slots on the main tees, making sure they fit snugly.
- Repeat these steps for all the cross tees, maintaining the proper spacing as recommended by the manufacturer.
Note: In some cases, you may need to notch the cross tees to fit around obstacles such as ductwork or lighting fixtures. Use a coping saw or tin snips to make these necessary cuts.
Ensuring Proper Spacing and Alignment
Proper spacing and alignment of the main tees and cross tees are crucial for the structural integrity and aesthetics of the suspended ceiling. To ensure you achieve the desired result, follow these guidelines:
- Use a level to check that the main tees are straight and level.
- Measure the distance between the main tees and cross tees to ensure they are evenly spaced.
- Make any necessary adjustments to maintain proper alignment.
By carefully following these steps and guidelines, you can confidently install the main tees and cross tees of a suspended ceiling. This framework will provide the foundation for a beautiful and functional ceiling in any space.
Adding The Suspension Wire And Anchors
Adding the suspension wire and anchors is a crucial step in installing a suspended ceiling. These components provide the necessary support for the ceiling tiles and ensure a sturdy and secure installation. In this section, we will discuss the steps involved in measuring and cutting the suspension wire, installing anchors, connecting the wire, and adjusting the height of the suspension wire.
Measuring and Cutting the Suspension Wire
Before you start adding the suspension wire, it’s important to measure the length needed for each section. Start by determining the desired height for your ceiling and add a few inches for flexibility. Use a measuring tape to measure the distance from the main ceiling structure to the desired height, and then add a few more inches for connecting the wire to the anchors.
Once you have the measurements, cut the suspension wire to the desired length using wire cutters. Make sure to have enough wire for each section and keep in mind that the wire will be attached to the anchors at both ends.
Installing Anchors and Connecting the Wire
After cutting the suspension wire, it’s time to install the anchors. Start by locating the main ceiling structure and mark the spots where the anchors will be placed. The spacing between anchors will depend on the weight of the ceiling tiles and the manufacturer’s recommendations. It’s typically recommended to have at least one anchor every four feet for a secure installation.
Use a drill to create pilot holes for the anchors and then screw them into place. Make sure the anchors are securely fastened to the ceiling structure.
Next, connect one end of the suspension wire to an anchor by threading it through the hole or loop provided on the anchor. Use pliers to twist the wire tightly around itself to ensure a secure connection.
Repeat the process for each anchor, making sure the suspension wire is level and taut. Take your time to ensure all the wires are properly connected and aligned.
Adjusting the Height of the Suspension Wire
Once all the suspension wires are connected to the anchors, you may need to adjust the height of the wire to achieve a level ceiling. This step is important to ensure that the ceiling tiles will fit properly and look aesthetically pleasing.
To adjust the height, simply twist the wire in a clockwise direction, which will raise the level of the suspension wire. Alternatively, twisting the wire counterclockwise will lower the height. Make small adjustments and check the level frequently to achieve the desired height for your suspended ceiling.
Remember to repeat this process for each suspension wire, ensuring that all the wires are adjusted to the same height.
By following these steps, you can successfully add the suspension wire and anchors when installing a suspended ceiling. This crucial step will provide the necessary support for your ceiling tiles and ensure a sturdy and secure installation.

Placing And Securing The Ceiling Panels
Installing a suspended ceiling can be a great way to update the look of any room, while also adding functionality and convenience. Once you’ve gathered all the necessary materials and have prepared the room, it’s time to start placing and securing the ceiling panels. This is a crucial step that requires precision and attention to detail. In this section, we will discuss how to cut the panels to fit, how to install the first panel, and how to secure subsequent panels for a flawless finish.
Cutting Panels to Fit
Before placing the ceiling panels, it’s important to measure and cut them to fit the dimensions of your room. This ensures a seamless appearance and reduces the risk of having uneven edges. Here’s a step-by-step guide to cutting panels to fit:
- Start by measuring the length and width of the room. Be sure to account for any obstacles, such as lights or vents.
- Using these measurements, mark the corresponding dimensions on the back of the ceiling panel.
- Use a straight edge or a T-square to create a straight line along the marked dimensions.
- Carefully cut along the marked line using a sharp utility knife or a panel saw.
- Once the panel is cut, check the fit by placing it into position. Make any necessary adjustments until it fits snugly.
Installing the First Panel
Now that your ceiling panels are cut to size, it’s time to install the first panel. This sets the foundation for the rest of the ceiling installation process. Follow these steps to install the first panel:
- Identify the corner where you want to start the installation, considering the direction of the room and any lighting fixtures.
- Apply construction adhesive to the back of the first panel, following the manufacturer’s instructions.
- Position the panel in the corner, ensuring it is flush against the wall and aligned with any adjacent panels that may be required for a seamless transition.
- Secure the panel to the ceiling framework using screws or nails.
- Double-check that the panel is level and securely attached before moving on to the next step.
Securing Subsequent Panels
Once the first panel is in place, the process of securing subsequent panels becomes more streamlined. Here’s how to continue the installation:
- Apply construction adhesive to the back of the second panel, following the manufacturer’s instructions.
- Position the panel next to the installed panel, ensuring a snug fit and alignment.
- Secure the second panel to the ceiling framework using screws or nails, making sure to maintain a consistent spacing between panels.
Repeat these steps for the remaining panels, cutting and fitting as necessary to accommodate any obstacles or irregularities in the room. Remember to periodically check the levelness and stability of the panels as you proceed. Once all panels are securely in place, you can then proceed to add the finishing touches to complete your suspended ceiling installation.
Installing a suspended ceiling requires precision and careful execution, but the end result is well worth the effort. By following these steps, you can confidently complete the process of placing and securing the ceiling panels, achieving a professional-looking suspended ceiling that enhances the aesthetics and functionality of your space.
Installing Lights And Vents
When it comes to installing a suspended ceiling, one crucial step is to ensure proper lighting and ventilation. By cutting holes for lighting fixtures and installing light fixtures or vents, you can create a well-lit and comfortable space.

Cutting Holes for Lighting Fixtures
To begin, you’ll need to determine the desired locations for your lighting fixtures. Once you have identified the spots, use a measuring tape to mark the center of each hole. Using a compass or a suitable template, trace the outline of the fixture on the ceiling tiles.
| Tools: | Measuring tape, compass or template, utility knife |
|---|---|
| Steps: |
|
Remember to wear appropriate safety gear, such as goggles and gloves, while handling sharp tools.
Installing Light Fixtures or Vents
Once you have cut the necessary holes, it’s time to install the light fixtures or vents. Ensure the wiring for the lights is properly installed by a licensed electrician before proceeding.
| Tools: | Screws, screwdriver, wire cutter/stripper, electrical tape |
|---|---|
| Steps: |
|
It’s important to consult the manufacturer’s instructions for specific installation requirements and to follow all local building codes.
With lights and vents properly installed, your suspended ceiling will not only look fantastic but also provide excellent illumination and ventilation for your space.
Concealing Edges And Gaps
Installing a suspended ceiling is a great way to enhance the look of a room while also providing practical advantages such as improved acoustics and easy access to the area above the ceiling for maintenance purposes. However, achieving a seamless and polished finish can be a challenge when it comes to concealing edges and gaps. In this section, we will discuss two effective methods to ensure your suspended ceiling looks professional and flawless: using trim pieces to hide edges and filling and patching gaps.
Using Trim Pieces to Hide Edges
One of the simplest and most visually appealing ways to conceal the edges of a suspended ceiling is by using trim pieces. These special metal or plastic strips are designed to fit neatly along the perimeter of the ceiling, providing a clean and finished appearance.
When installing trim pieces, follow these steps for a seamless finish:
- Measure the length of each side of the room and cut the trim pieces accordingly.
- Attach the trim pieces to the wall or ceiling using nails or adhesive, ensuring they are aligned with the edges of the suspended ceiling tiles.
- Secure the trim pieces firmly in place, making sure there are no gaps or uneven edges.
Using trim pieces not only hides the rough edges of the suspended ceiling tiles but also adds a decorative touch to the overall design. It creates a smooth transition between the ceiling and the walls, contributing to a polished and sophisticated look.
Filling and Patching Gaps
Despite careful installation, gaps may still occur between the suspended ceiling tiles. These gaps can be unsightly and compromise the desired visual effect. Luckily, there are effective methods to fill and patch these gaps, ensuring a cohesive and seamless appearance.
To fill and patch gaps in a suspended ceiling, follow these steps:
- Determine the size and depth of the gaps.
- Choose an appropriate filler material, such as joint compound or acrylic caulk.
- Prepare the filler material according to the manufacturer’s instructions.
- Apply the filler into the gaps, using a putty knife or a caulking gun for precise application.
- Smooth out the filler material to create an even surface.
- Allow the filler to dry completely before sanding or painting.
Filling and patching gaps not only improves the appearance of the suspended ceiling but also ensures that the tiles are securely in place, minimizing potential damage or movement.

Maintaining And Repairing Suspended Ceilings
Maintaining and repairing your suspended ceiling is essential to ensure its longevity and aesthetic appeal. Regular cleaning and dusting of the ceiling surface help maintain its pristine appearance, while addressing any damaged panels or components promptly ensures structural integrity. In this section, we will discuss two crucial aspects of maintaining and repairing suspended ceilings: cleaning and dusting the ceiling and repairing damaged panels or components.
Cleaning and Dusting the Ceiling
Regularly cleaning and dusting your suspended ceiling not only keeps it looking fresh but also helps in preventing the accumulation of dirt and debris. Here are some key steps to follow for effective cleaning:
- Start by shutting off the electricity to the room or area where the suspended ceiling is installed.
- Use a soft-bristle brush or a dust mop to gently remove any loose dust or debris from the ceiling surface.
- For thorough cleaning, mix a mild detergent or ceiling-specific cleaner with warm water.
- Dampen a microfiber cloth or mop in the cleaning solution and wring it out to remove excess moisture.
- Gently wipe the ceiling tiles or panels, working in small sections to ensure complete coverage.
- Pay special attention to any stains or stubborn dirt spots, using a soft sponge or scrub brush to gently scrub away the grime.
- Once you have cleaned the entire ceiling, rinse the cloth or mop in clean water and wring it out before giving the ceiling a final wipe down to remove any residue from the cleaning solution.
- Allow the ceiling to air dry completely before turning the electricity back on and reassembling any light fixtures or other suspended elements.
Regular dusting and cleaning are especially important in areas prone to high humidity or where the ceiling is exposed to dirt, grease, or other contaminants. By following these simple steps, you can keep your suspended ceiling looking its best for years to come.
Repairing Damaged Panels or Components
Over time, suspended ceilings may experience damage due to various factors such as accidental impacts, water leaks, or wear and tear. It is crucial to address any issues promptly to prevent further damage and maintain the structural stability of the ceiling. Here’s how you can repair damaged panels or components:
- Start by assessing the extent of the damage to determine the appropriate course of action.
- If a ceiling tile or panel is cracked or broken, carefully remove it by sliding it out of the grid system.
- Replace the damaged tile or panel with a new one of the same size and design, matching it to the surrounding tiles to ensure a seamless appearance.
- If any suspension wires or brackets are damaged, replace them with new ones to maintain the stability of the ceiling.
- In case of water damage, identify and fix the source of the water leak to prevent future issues.
- Ensure that all repairs are done accurately and securely to maintain the integrity of the suspended ceiling system.
Regularly inspecting your suspended ceiling for potential damage and addressing it promptly can significantly extend its lifespan and save you from costly repairs down the line. By following these repair guidelines, you can ensure your suspended ceiling remains functional and visually appealing for years to come.
Frequently Asked Questions For How To Install A Suspended Ceiling
Is It Hard To Install A Suspended Ceiling?
Installing a suspended ceiling is not difficult. The process involves attaching a metal grid to the ceiling and then inserting ceiling tiles or panels into the grid. With careful planning and some basic DIY skills, you can successfully install a suspended ceiling in your space.
How Do You Install Drop Ceiling?
To install a drop ceiling, follow these steps:
1. First, measure and mark the ceiling grid on the walls.
2. Install the wall angle brackets.
3. Attach and level the suspension wires.
4. Add main tees and cross tees to create the grid.
5. Finally, insert and secure the drop ceiling panels into the grid. Remember to consult the manufacturer’s instructions for specific details.
What Is The Minimum Gap For A Suspended Ceiling?
The minimum gap for a suspended ceiling is typically around 3 to 4 inches. It is important to have this gap to allow for ventilation, accommodate any unevenness in the ceiling surface, and provide space for the installation of lighting, sprinkler systems, and other fixtures.
How Do You Install A Suspended Drywall Ceiling?
To install a suspended drywall ceiling, follow these steps:
1. Start by measuring and marking the location of the ceiling joists.
2. Install the metal tracks onto the walls, following the marked lines.
3. Attach the hangers to the ceiling joists, ensuring proper spacing.
4. Hang and secure the main suspension wires to the hangers.
5. Finally, insert and secure the drywall panels onto the metal grid.
Conclusion
To sum up, installing a suspended ceiling can be a cost-effective and visually appealing way to enhance any space. By following the step-by-step process outlined in this guide, you can achieve professional results even if you have little to no experience in construction.
Remember to choose the right materials, accurately measure and mark the grid, and install the tiles with care. With the right tools and a little patience, you can transform your ceiling into a beautiful and functional feature that will elevate the overall aesthetics of your room.