How to Install a Slate Roof?
To install a slate roof, start by preparing the roof deck and laying a waterproof underlayment. Then, install the starter course of slates, ensuring they overlap correctly.
Gradually work up the roof, aligning and securing the slates with copper nails.
Choosing The Right Slate Roof: Factors To Consider
When it comes to installing a slate roof, one of the most important decisions you’ll make is choosing the right type of slate roofing material. There are a variety of factors to consider when making this decision, including the durability and lifespan of slate roofs, as well as cost considerations. In this article, we’ll explore these factors in more detail to help you make an informed choice.
Types of slate roofing materials
There are several types of slate roofing materials available, each with its own unique characteristics and appearance. Some common types include:
| Type of Slate | Appearance | Advantages | Disadvantages |
|---|---|---|---|
| Traditional Slate | Smooth, natural look | High durability, long lifespan | Higher cost |
| Textured Slate | Rough texture, rustic appearance | Less expensive, easy to maintain | Less durable than traditional slate |
| Variegated Slate | Mixed colors and patterns | Unique and eye-catching | Requires regular maintenance |
Durability and lifespan of slate roofs
One of the key advantages of slate roofs is their durability and long lifespan. Unlike other roofing materials, such as asphalt shingles, slate can withstand harsh weather conditions and is resistant to fire, rot, and insects. With proper installation and maintenance, a slate roof can last for over a century, making it a worthwhile investment.

Cost considerations for slate roofs
While the durability and longevity of slate roofs make them an attractive option, it’s important to consider the cost implications. Slate roofing materials tend to be more expensive compared to other options, such as asphalt shingles or metal roofs. Additionally, the installation of a slate roof requires specialized skills and expertise, which can further increase the overall cost. However, the long-term savings in terms of durability and lifespan often outweigh the initial investment.
In conclusion, when choosing the right slate roof, it’s essential to consider the type of slate roofing materials, their durability and lifespan, and the cost implications. By weighing these factors, you can make an informed decision that suits your budget and meets your aesthetic preferences. Remember to consult with a professional roofing contractor to ensure proper installation and get the most out of your slate roof for years to come.
Preparing The Roof For Installation
Before installing a slate roof, it is crucial to ensure that the roof is properly prepared. This involves assessing the roof’s structural integrity, repairing any existing damage, and installing proper underlayment. Taking these necessary steps will not only guarantee a smooth installation process but also enhance the durability and longevity of the slate roof. In this article, we will walk you through each of these essential tasks to help you prepare the roof effectively.
Assessing the roof’s structural integrity
The first step in preparing the roof for slate installation is to assess its structural integrity. It is vital to ensure that the roof’s framework is sturdy and can support the weight of the slate tiles. This assessment should be carried out by a professional roofing contractor or a structural engineer to confirm the roof’s suitability for slate roofing. Here are a few key factors to consider:
- Check for any signs of sagging or structural deformities, as they may indicate weaknesses that need to be addressed.
- Examine the underlying decking for rot, decay, or water damage. Any damaged sections should be replaced to provide a solid and even foundation for the slate tiles.
- Ensure that the roof’s framing, such as trusses or rafters, is properly aligned and secure. Any deficiencies in the framing should be addressed before proceeding with the installation.
Repairing any existing damage
Before installing a slate roof, it is essential to repair any existing damage to prevent further problems in the future. Here are some common areas to check for damage:
- Inspect the roof surface for cracked or broken tiles. These damaged tiles should be replaced to ensure a uniform and watertight slate roof.
- Check the flashing and roof penetrations, such as chimneys and vents, for any signs of wear or deterioration. These areas should be repaired or replaced as necessary to maintain a watertight seal.
- Examine the gutters and downspouts for debris or blockages. Clear any obstructions to ensure proper water drainage from the roof during rainy seasons.
Installing proper underlayment
The underlayment is a critical component of a slate roof system, as it provides an additional layer of protection against water infiltration. Here are the essential steps to follow when installing underlayment:
- Start by cleaning the roof surface thoroughly, ensuring it is free from dirt, dust, and debris.
- Roll out a high-quality underlayment material, such as a synthetic fiber mat or a self-adhering waterproof membrane, across the entire roof surface. Be sure to overlap the underlayment sheets correctly to prevent water from seeping through the seams.
- Secure the underlayment to the roof decking using roofing nails or staples, as recommended by the manufacturer. Ensure proper fastening to avoid any loose areas that could compromise the integrity of the slate roof system.
By properly assessing the roof’s structural integrity, repairing existing damage, and installing appropriate underlayment, you are now ready to move on to the next step of installing a slate roof. These preparatory measures will ensure that your slate roof performs optimally for years to come, protecting your home and adding a touch of timeless elegance.
Installing The Slate Roof
Installing a slate roof can be a challenging yet rewarding project. A properly installed slate roof not only enhances your home’s aesthetics but also provides excellent durability and longevity. In this section, we will guide you through the step-by-step process of installing a slate roof, ensuring a precise and secure installation.
Gathering the Necessary Tools and Materials
Before you start the installation process, it is essential to gather all the necessary tools and materials. Here’s a list of items you will need:
- Slate tiles
- Roofing nails or hooks
- Hammer
- Roofing nails or hooks
- Chalk line
- Slate cutters or a slate ripper
- Roofing underlayment
- Flashing materials
- Ridge tiles
- Ladder or scaffolding
- Safety equipment (gloves, safety glasses, etc.)
Measuring and Marking the Roof for Installation
Accurate measurements and markings are crucial to ensure a precise installation. Begin by measuring the area where the slate tiles will be installed. Use a chalk line to mark the starting point and guidelines for the rows of tiles, ensuring a straight and symmetrical appearance.
Cutting and Shaping the Slate Tiles
Once you have marked the roof, it’s time to cut and shape the slate tiles to fit the desired layout. Use slate cutters or a slate ripper to cut the tiles, ensuring clean and accurate cuts. Take care to maintain the desired dimensions and shapes while cutting.
Setting the First Row of Slate Tiles
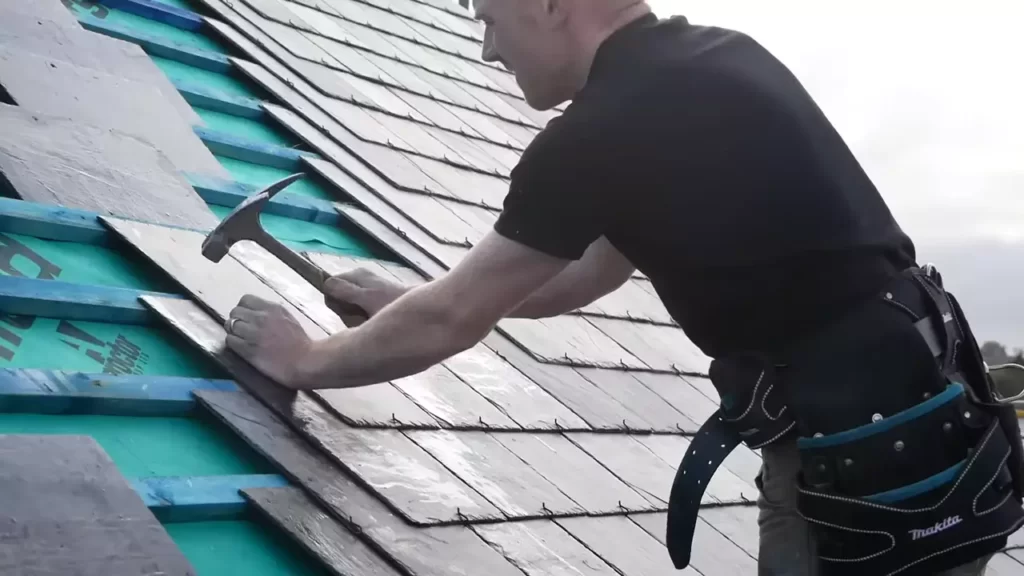
Start the installation process by setting the first row of slate tiles. Place the tiles along the chalk line, ensuring a proper alignment. Use roofing nails or hooks to secure the tiles in place, making sure they are firmly attached to the roof.
Nail or Hook Fixing Methods for Slate Roofs
When it comes to fixing the slate tiles, you have two common options: nail or hook fixing methods. The nail fixing method involves using roofing nails to secure the tiles to the roof. Alternatively, you can opt for the hook fixing method, where slate hooks are used to hold the tiles in place. Choose the method that suits your preferences and the specific requirements of your project.
Installing Flashings and Ridge Tiles
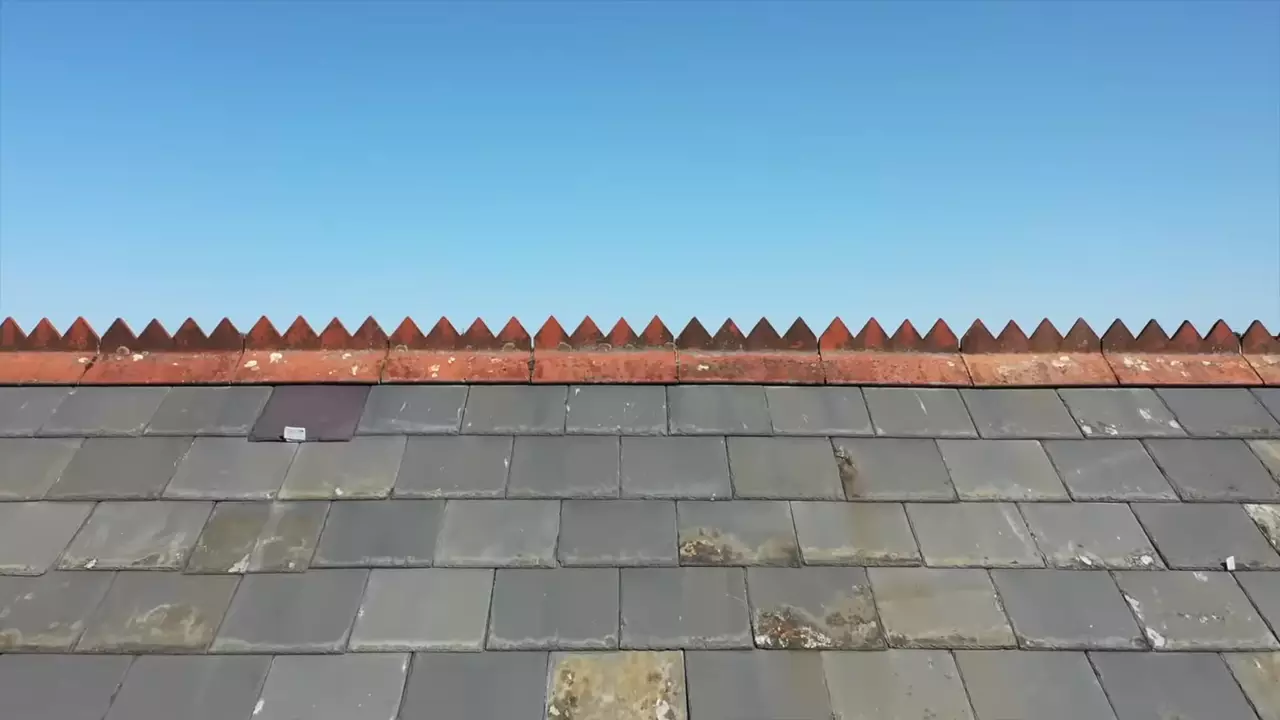
Installing flashings and ridge tiles is a crucial step in ensuring the weatherproofing and stability of your slate roof. Flashings provide a watertight seal around roof penetrations, such as chimneys and vent pipes, while ridge tiles add an attractive finish to the roof’s ridge. Take care to properly install and secure these elements, ensuring a tight fit and proper alignment.
By following these step-by-step instructions, you can successfully install a slate roof that not only adds charm to your home but also offers exceptional durability and protection against the elements.
Maintaining And Repairing A Slate Roof
A slate roof is not only durable and long-lasting, but it also adds a touch of elegance to any home. However, like any other roofing material, slate roofs require regular maintenance and occasional repairs to keep them in optimal condition. In this section, we will discuss the essential steps you need to take to maintain and repair a slate roof.
Regular Inspections
Regular inspections are crucial for maintaining the longevity and functionality of your slate roof. By conducting routine inspections, you can identify any signs of damage or deterioration early on and take appropriate action. We recommend inspecting your slate roof at least once or twice a year, ideally during spring and fall.
During the inspection, pay close attention to the following:
- Cracked or broken slate tiles
- Loose or missing nails
- Worn-out or damaged flashings
- Excessive debris or moss buildup
Additionally, be on the lookout for any signs of water leaks, such as stained ceilings or walls. Promptly addressing these issues will prevent further damage and costly repairs down the line.

Cleaning and Removing Debris
To ensure the integrity of your slate roof, it is essential to keep it clean and free from debris. This includes removing leaves, twigs, moss, and other organic matter that may accumulate on the surface.
Here’s a simple step-by-step guide to cleaning your slate roof:
- Start by gently sweeping away loose debris with a soft-bristle broom or a leaf blower. Avoid using a pressure washer, as the force of the water can damage the slate tiles.
- If you notice any moss or algae growth, mix a solution of water and mild detergent and spray it on the affected areas. Allow the solution to sit for a few minutes, then use a soft brush to scrub away the growth.
- Rinse the roof thoroughly with water, ensuring all residues are removed.
- Inspect the gutters and downspouts for any blockages and remove any accumulated debris.
Regular cleaning not only enhances the aesthetic appeal of your slate roof but also prevents moisture buildup and potential damage to the tiles.
Repairing Cracked or Broken Slate Tiles
Over time, slate tiles may develop cracks or break due to various factors such as extreme weather conditions or accidental damage. It is crucial to address these issues promptly to prevent water infiltration and further deterioration of the roof.
If you notice cracked or broken slate tiles, follow these steps to repair them:
- Carefully remove the damaged tile using a slate ripper or a hammer and chisel.
- Replace the tile with a new one of the same size and thickness, ensuring a proper fit.
- Secure the new tile in place by nailing it with copper or stainless-steel nails.
- Apply roofing cement to seal any gaps or joints between the tiles.
Regularly inspecting your slate roof and promptly repairing any damaged tiles will help maintain its structural integrity and prevent costly repairs in the future.
Replacing Damaged Flashings
Flashings are the metal strips or sheets installed around roof features such as chimneys, skylights, and vent pipes. They provide a watertight seal and prevent water from penetrating the roof. Over time, flashings can become worn-out, corroded, or damaged, compromising the integrity of the slate roof.
If you notice damaged flashings, follow these steps to replace them:
- Remove the damaged flashing by carefully prying it away from the roof surface using a pry bar or a flat-head screwdriver.
- Measure and cut a new piece of flashing to the required length.
- Install the new flashing, ensuring a snug fit and proper alignment with the roof feature.
- Secure the flashing in place using roofing nails or screws.
- Seal any gaps or joints with roofing cement to prevent water infiltration.
Regularly inspecting and replacing damaged flashings will help maintain the waterproofing integrity of your slate roof, ensuring its long-lasting performance.
Frequently Asked Questions Of How To Install A Slate Roof
How Much Does It Cost To Install A Slate Roof?
The cost of installing a slate roof can vary depending on factors such as the size of the roof, the type and quality of slate used, and the complexity of the installation. On average, you can expect to pay between $15 and $30 per square foot for materials and labor.
However, it’s best to get quotes from reputable contractors to get an accurate estimate for your specific project.
How Long Does A Slate Roof Last?
One of the major benefits of a slate roof is its exceptional durability. With proper installation and maintenance, a slate roof can last anywhere from 75 to over 100 years. This longevity is due to the natural characteristics of slate, which make it resistant to fire, moisture, and temperature fluctuations.
Is A Slate Roof Suitable For All Types Of Buildings?
Slate roofs are a great choice for a wide range of buildings, including residential homes, commercial buildings, and historical structures. However, it’s important to consider the weight of slate as it is heavier compared to other roofing materials. Before installing a slate roof, it’s recommended to have a professional contractor assess the structural integrity of the building to ensure it can support the weight of the slate tiles.
Conclusion
To sum up, installing a slate roof requires careful planning, preparation, and execution. By following the steps outlined in this guide, you can successfully install a slate roof that is not only durable and long-lasting but also aesthetically pleasing. Remember to use the appropriate tools, materials, and techniques to ensure a proper installation.
With proper maintenance, your slate roof will continue to protect your home for many years to come.

