How to Install a Sharkbite Slip Coupling?
To install a Sharkbite slip coupling, start by cutting the damaged section of the pipe. Then, simply push the slip coupling onto each end of the cut pipe and tighten the compression nuts.
Enjoy a quick and easy installation with a secure and watertight connection. When it comes to plumbing repairs, having the right tools and knowledge can save you time, money, and frustration. One such tool that simplifies the process is the Sharkbite slip coupling.
If you have a damaged pipe and need a reliable solution, installing a slip coupling can be a straightforward and effective way to fix the problem. This innovative device eliminates the need for soldering or specialized skills, providing a secure and watertight connection with minimal effort. We will guide you through the simple steps required to install a Sharkbite slip coupling, ensuring that your plumbing repairs are done efficiently and effectively. So, let’s dive in and learn how to install a Sharkbite slip coupling.
What Is A Sharkbite Slip Coupling?
Brief explanation of Sharkbite slip coupling and its benefits
A Sharkbite slip coupling is a popular plumbing tool that offers a quick and convenient solution for repairing or replacing pipes without the need for soldering or glue. It is a versatile and efficient fitting that can easily connect two pipes together, even if they have different diameters or materials.
One of the standout benefits of a Sharkbite slip coupling is its ease of installation. Unlike traditional pipe fittings, you don’t need to be a plumbing expert or have any specialized tools. With its push-to-connect technology, you can simply slide the coupling onto the pipe ends and apply pressure to create a secure and watertight seal. This eliminates the hassles of cutting, soldering, and drying time, saving you valuable time and effort.
Another advantage of using a Sharkbite slip coupling is its versatility. Whether you’re dealing with copper, PEX, CPVC, or even PVC pipes, this fitting can handle it all. This means that you don’t have to worry about compatibility issues or searching for specific fittings for each type of pipe. The slip coupling can adapt and connect different pipe materials, making it a convenient option for any plumbing project.
Importance of using a slip coupling for plumbing repairs
When it comes to plumbing repairs, using a slip coupling can make a world of difference. It ensures a strong and reliable connection between two pipes, allowing the efficient flow of water or other substances. Whether you’re fixing a small leak or replacing a damaged section of pipe, the slip coupling provides a quick and effective solution.
One of the main reasons why slip couplings are important for plumbing repairs is their ability to save you time and money. Instead of cutting lengthy sections of pipe and installing new fittings, you can simply cut out the damaged area and use a slip coupling to join the two ends back together. This minimizes the amount of pipe you need to replace and reduces the overall cost of the repair.
Moreover, slip couplings also help to prevent leaks and water damage. By creating a secure and watertight connection, they ensure that there are no weak points where water can escape. This helps to maintain the integrity of your plumbing system and prevents further damage or mold growth. Using a slip coupling can give you peace of mind knowing that your repairs are long-lasting and reliable.
In summary, a Sharkbite slip coupling offers an efficient and convenient solution for joining pipes of different materials or diameters. It eliminates the need for soldering or glue, saving time and effort. Using a slip coupling for plumbing repairs results in a strong and reliable connection, saving you money and preventing water damage.
Tools And Materials Needed
Before you begin installing a Sharkbite slip coupling, it is important to gather all the necessary tools and materials. Having these items on hand will ensure a smoother installation process and minimize any potential delays. Below is a comprehensive list of the tools and materials you will need:
List of tools required for the installation process
Here is a list of the essential tools that you will need to install a Sharkbite slip coupling:
- Sharkbite depth gauge
- Pipe cutter
- Deburring tool
- Adjustable wrench or pliers
- Marker or pencil
- Tape measure
- Clean cloth or rag
Necessary materials and supplies to have on hand
In addition to the tools mentioned above, you will also need specific materials and supplies to successfully install a Sharkbite slip coupling. These materials include:
- Sharkbite slip coupling
- PVC or copper pipes – make sure they are the correct size
- Teflon tape or pipe dope for sealing connections
- Plumber’s putty for sealing leaks
- Pipe inserts – necessary for PEX tubing installations
- Copper crimp rings – required for connecting PEX tubing to fittings
- Pipe straps or hangers for securing the pipes in place
- Pipe insulation (optional) – helps prevent condensation and heat loss
Having all the necessary tools and materials ready before you start the installation process will save you time and frustration. Make sure you have all the items listed above, as they are crucial for a successful installation of a Sharkbite slip coupling.
Step 1: Prepare The Pipe
Before installing a Sharkbite slip coupling, it’s essential to properly prepare the pipe. This step ensures a tight and secure connection, preventing any potential leaks or issues in the future. Let’s dive into the first step of the installation process, which involves cleaning and deburring the pipe ends.
Cleaning and Deburring the Pipe Ends
To start, you’ll need to clean the pipe ends thoroughly. Use a clean cloth or rag to wipe away any dirt, dust, or debris. It’s crucial to have a clean surface to ensure a reliable seal and avoid any complications during installation.
Next, inspect the pipe ends for any burrs or sharp edges. Burrs can interfere with the installation and compromise the joint’s integrity. To remove any existing burrs, you can use a deburring tool specifically designed for this purpose. Run the deburring tool around the exterior edge of the pipe, applying gentle pressure to smooth out any rough spots.
Make sure to **double-check** all pipe ends, as even a small burr can cause significant issues. A properly deburred pipe ensures a secure connection, minimizing the risk of leaks or leaks in the future.
Once you have finished cleaning and deburring the pipe ends, it’s time to move on to the next step of the installation process. Now you are ready to install a Sharkbite slip coupling.

Step 2: Mark The Cut
In order to install a Sharkbite slip coupling, you need to mark the location on the pipe where you will make the cut. This step is crucial as it ensures a clean and precise cut, which is essential for a successful installation. In this section, we will discuss how to determine the length of the pipe to be cut and how to accurately mark the pipe for a clean and precise cut.
Determining the length of the pipe to be cut
Before you can mark the pipe for cutting, you need to determine the length of the pipe that needs to be removed. To do this, follow these steps:
- Start by measuring the distance between the two ends of the pipe where the Sharkbite slip coupling will be installed.
- Use a measuring tape or a ruler to get an accurate measurement of this distance.
- Make sure to take into consideration any additional pipe length that needs to be added for an overlap with the Sharkbite fittings.
- Add the required overlap length to the initial measurement to get the total length of the pipe that needs to be cut.
By following these steps, you will be able to determine the exact length of the pipe that needs to be cut for the installation of the slip coupling.
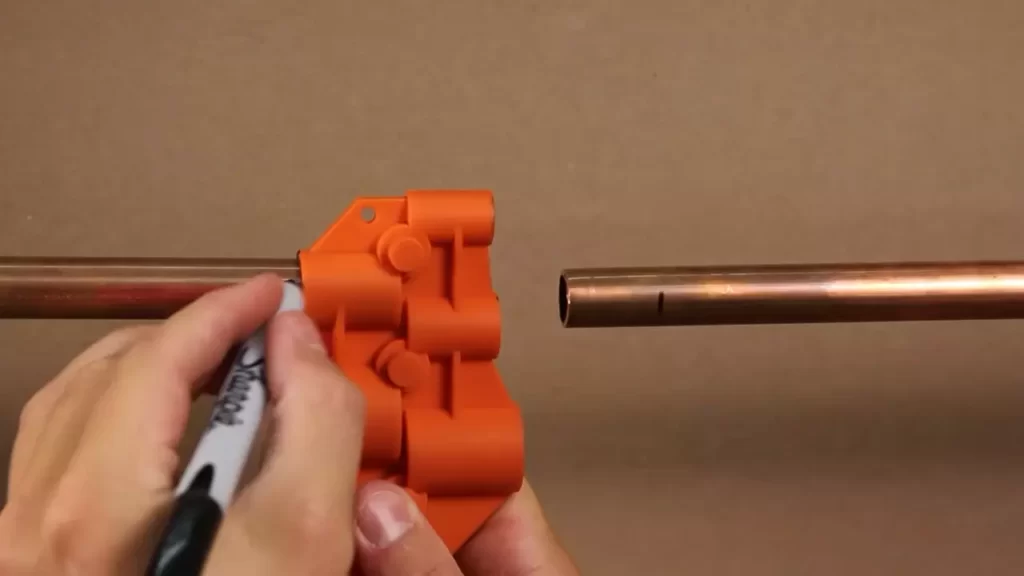
Marking the pipe accurately for a clean and precise cut
Once you have determined the length of the pipe that needs to be cut, it’s time to mark the pipe for a clean and precise cut. Follow these steps:
- Use a marker or a pencil to make a clear and visible mark on the pipe at the determined length.
- Make sure to double-check the mark to ensure its accuracy. You can use a level or a straight edge to ensure the mark is perfectly straight.
- If the pipe has a slippery surface or if you are having trouble making a mark, you can use a piece of masking tape to mark the location for cutting.
By accurately marking the pipe, you ensure that the cut will be made at the correct location, resulting in a clean and precise cut. This is important as it allows for a tight and secure fit of the Sharkbite slip coupling.
Step 3: Cut The Pipe
Now that you have marked the section of the pipe where the slip coupling will be installed, it’s time to cut the pipe to ensure a proper fit. This step is crucial for a successful installation, as a straight and even cut will ensure a secure connection with the slip coupling.
Using a pipe cutter to cut the marked section of the pipe
To cut the pipe, you will need a pipe cutter. This handy tool will allow you to make clean and precise cuts, ensuring a professional-looking installation. Here’s how to use a pipe cutter:
- Position the pipe cutter around the marked section of the pipe, ensuring that the cutting wheel is aligned with the mark.
- Tighten the pipe cutter by turning the handle in a clockwise motion. Apply moderate pressure to the cutter, making sure to keep it aligned with the mark to ensure a straight cut.
- Rotate the pipe cutter around the pipe, continuously tightening the handle as you go. The cutting wheel will gradually score the pipe’s surface until it cuts through completely.
- Once you have made a full rotation with the pipe cutter, release the pressure on the handle and remove the cutter from the pipe.
By following these steps, you will be able to cut the marked section of the pipe cleanly and accurately, preparing it for the slip coupling installation.
Ensuring a straight and even cut for a proper fit with the slip coupling
It’s essential to ensure a straight and even cut when preparing the pipe for the slip coupling. A straight cut will provide a solid foundation for the slip coupling connection and reduce the risk of leaks or instability in the piping system.
Here are a few tips to ensure a proper fit:
- Check the cut pipe end for any burrs or rough edges. Remove these using a deburring tool or a knife to create a flat surface for the slip coupling to be attached.
- Measure the length of the cut pipe section to ensure it matches the length needed for the slip coupling. Double-checking your measurements will help prevent any fitting issues during the installation process.
- If necessary, use a file or sandpaper to smoothen the edges of the cut pipe for a flush fit with the slip coupling.
By taking these extra measures and ensuring a straight and even cut, you can guarantee a secure and leak-free connection when installing the slip coupling.

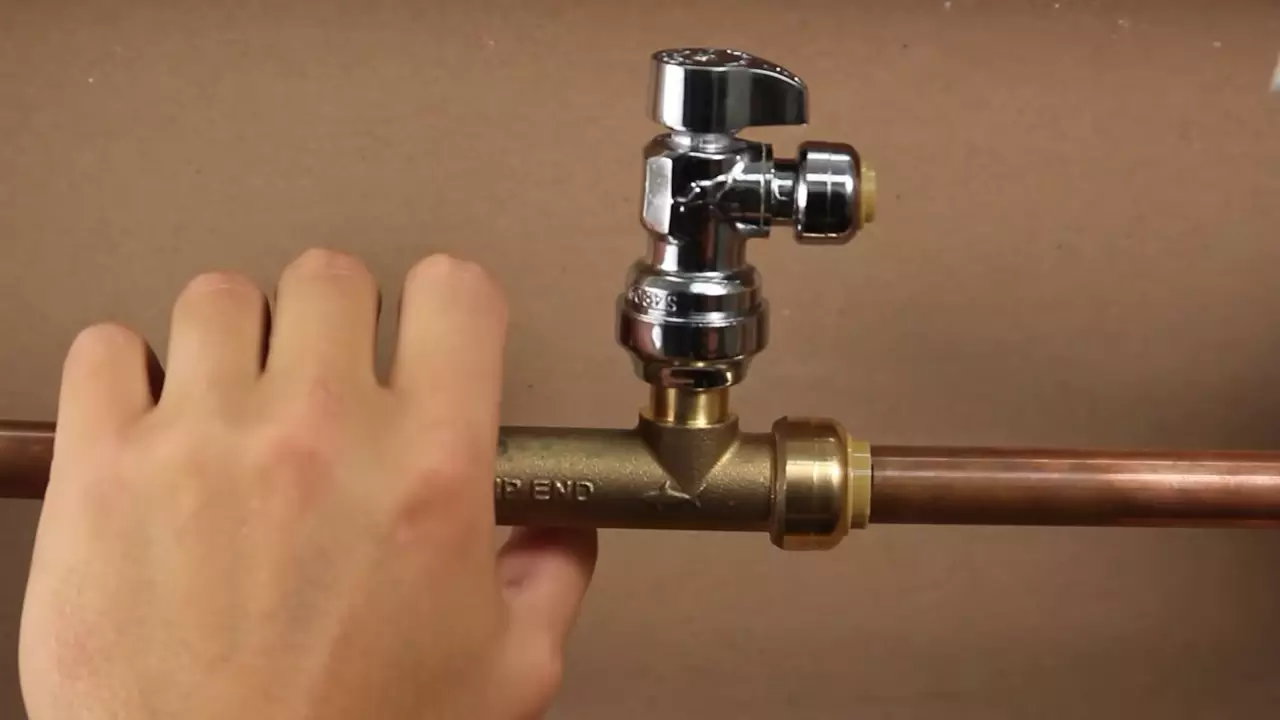
Step 4: Install The Slip Coupling
Now that you have prepared the pipes and applied the Sharkbite deburring tool, it’s time to install the slip coupling. This step is crucial in creating a strong and secure connection between the pipes. Follow these simple instructions to ensure a successful installation:
Sliding the slip coupling onto one pipe end
The first step is to slide the slip coupling onto one end of the pipe. It’s important to note that the Sharkbite slip coupling is designed to be easily installed without the need for any special tools or soldering. This makes the installation process quick and hassle-free.
To slide the slip coupling onto the pipe end, simply hold the slip coupling with one hand and line it up with the pipe. Then, gently push the slip coupling onto the pipe until it slides all the way to the desired position. You’ll feel a slight resistance as the coupling grips onto the pipe, ensuring a secure fit.
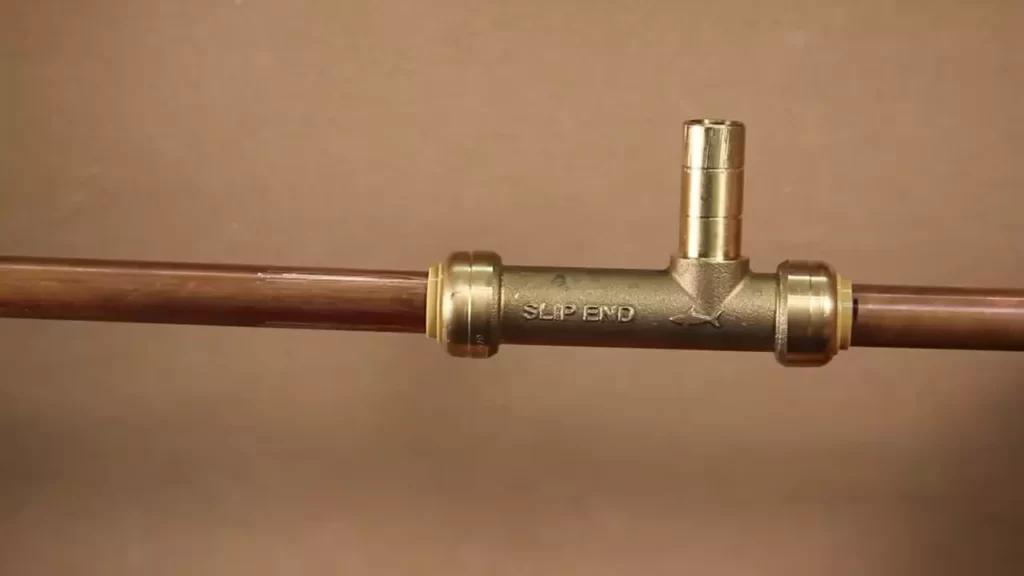
Pushing the coupling over the other pipe end to create a secure connection
Once you have successfully slid the slip coupling onto one pipe end, it’s time to push the coupling over the other pipe end. This will create a secure connection between the two pipes, ensuring that water flows freely through the plumbing system.
To push the coupling over the other pipe end, again hold the slip coupling with one hand and line it up with the second pipe. Apply steady pressure and push the slip coupling onto the pipe until it reaches the desired position. This will create a tight seal and prevent any leaks or water damage.
It’s important to ensure that both ends of the slip coupling are securely attached to the pipes. This will guarantee a reliable and long-lasting connection. Take a moment to double-check that the coupling is fully engaged and in the correct position.
Now that you have completed the installation of the slip coupling, you can proceed to the next steps to complete your plumbing project. With the Sharkbite slip coupling, you can trust that your pipes are securely connected and that your plumbing system will function smoothly for years to come.
Step 5: Verify The Connection
After successfully aligning and fitting the Sharkbite slip coupling in the previous steps, it’s crucial to verify the connection to ensure it is secure and leak-free. This step is essential for the long-term functionality and durability of your plumbing system. In this section, we will discuss two crucial aspects that you need to check to ensure a proper connection.
Checking for Proper Alignment and Fit of the Slip Coupling
The first aspect to verify is the alignment and fit of the slip coupling. It’s important to ensure that the slip coupling is aligned correctly with the pipes that you are connecting. If the alignment is off, it can lead to leaks and potential damage to the plumbing system.
To check the alignment, visually inspect the slip coupling and the pipes. Make sure the coupling’s ends are properly inserted into each pipe, and there is no significant deviation from a straight line. You can use a level or a straight edge to assist you in confirming the alignment.
In addition to alignment, it’s crucial to ensure that the slip coupling fits snugly onto the pipes. Gently tug on the slip coupling to check if it is securely attached. If it slides off easily, it may not be properly fitted, and you may need to remove it and start the installation process again.
Ensuring a Tight and Leak-Free Connection Between the Pipes
The second aspect to verify is the tightness and leak-free nature of the connection between the pipes. A tight connection is essential to prevent water leakage, which can damage the surrounding areas and compromise the integrity of your plumbing system.
To ensure a tight connection, you can use a torque wrench to tighten the slip coupling’s compression nuts. Follow the manufacturer’s recommended torque specifications to achieve the right tightness. Over-tightening can lead to damage, while under-tightening can result in leaks.
The final step is to carefully inspect the connection for any signs of leakage. Look for dripping water or dampness around the connection area. If you notice any leaks, try tightening the compression nuts further. If the leaks persist, you may need to remove the slip coupling and inspect the pipes for possible damage or debris.
By diligently checking for proper alignment and fit as well as ensuring a tight and leak-free connection, you can be confident in the integrity of your Sharkbite slip coupling installation. This will provide you with peace of mind and a reliable plumbing system for years to come.
Tip 1: Pay Attention To Pipe Sizing
Selecting the Correct Size Slip Coupling for Your Pipes
When it comes to installing a Sharkbite slip coupling, it’s crucial to pay attention to pipe sizing. Choosing the right size slip coupling ensures a proper fit, preventing leaks and ensuring a reliable connection. Understanding the importance of matching pipe sizes is essential for a successful installation.
Here’s a step-by-step guide on how to select the correct size slip coupling for your pipes:
- Measure the Diameter: Start by measuring the diameter of the pipes you need to connect. Ensure accurate measurements by using a pipe measuring tool or a tape measure.
- Check the Pipe Materials: Different materials, such as copper, CPVC, or PEX, have different standard sizes. Be aware of the material of your pipes and make sure to select a slip coupling that is compatible with it.
- Refer to the Sharkbite Size Chart: Sharkbite provides a valuable size chart that helps you determine the correct slip coupling size based on the pipe diameter and material. This chart is easy to use and can be accessed on the Sharkbite website or included in the packaging of the slip coupling.
- Consider Pipe Expansion: If you’re working with PEX pipes, keep in mind that they have a certain degree of expansion and contraction. It’s important to select a slip coupling that can accommodate this movement to prevent damage or leaks.
By following these steps, you can ensure that you select the correct size slip coupling for your pipes. Remember, an accurate fit leads to a secure and long-lasting connection, so it’s crucial not to overlook pipe sizing.
In addition to selecting the correct size slip coupling, it’s also crucial to understand the importance of properly preparing the pipes and using the right tools for installation. Check out our next tip for more information on this topic!
Tip 2: Apply The Right Amount Of Pressure
When it comes to installing a Sharkbite slip coupling, applying the right amount of pressure is crucial to ensure a secure and leak-free connection. The slip coupling is designed to provide a quick and simple solution for repairing or extending pipe systems, but it’s important to use the right technique to prevent damage and ensure a reliable installation.
Applying consistent and even pressure while installing the slip coupling
One of the key aspects of installing a Sharkbite slip coupling is to apply consistent and even pressure throughout the process. This will help ensure that the pipe and coupling fit together tightly and create a reliable connection. To achieve this, start by inserting one end of the slip coupling onto the pipe and then gradually push it in. As you push the coupling, apply steady pressure with your hands, making sure not to use excessive force that could damage the components.
Avoiding excessive force that can damage the pipe or coupling
While it’s important to apply enough pressure to create a secure connection, it’s equally crucial to avoid using excessive force that can cause damage to the pipe or slip coupling. Excessive force can lead to cracked pipes or deformed couplings, compromising the effectiveness of the installation. Remember that Sharkbite slip couplings are designed to provide a snug fit without the need for complicated tools or excessive force. If you encounter significant resistance or difficulty during installation, it’s always best to double-check the alignment of the pipe and coupling and make any necessary adjustments before applying more pressure.
In conclusion, applying the right amount of pressure is a critical step in successfully installing a Sharkbite slip coupling. By applying consistent and even pressure, you can ensure a tight and reliable connection while avoiding excessive force that may cause damage. Following these guidelines will help you achieve a leak-free installation and enjoy the benefits of a properly functioning pipe system.
Precaution: Check For Leaks
Performing a thorough inspection to identify any leaks after installation
Once you have successfully installed a Sharkbite Slip Coupling, it is crucial to perform a thorough inspection to ensure there are no leaks. This step is essential to guarantee the reliability and effectiveness of your plumbing system. By checking for leaks, you can spot any potential issues and address them promptly, preventing any further complications.
Inspecting for leaks after installation requires a systematic approach. Start by running water through the pipes and visually inspecting each connection point. Check for any signs of water seepage or dripping. Additionally, pay close attention to any visible cracks or damage in the plumbing components. Water stains or moisture around the connections can also indicate a leak. Take a step back and examine the overall area to ensure there are no hidden leaks.

Taking necessary steps to fix leaks and ensure a reliable connection
If you do identify any leaks during your inspection, it is crucial to take immediate action to fix them. Ignoring leaks can lead to water damage, low water pressure, and even mold growth. It is essential to ensure a reliable connection to avoid future plumbing problems.
Fixing leaks:
- Identify the source: Carefully inspect the connection points to determine where the leak is coming from. It could be a loose coupling, a damaged pipe, or an improperly sealed joint.
- Tighten connections: If the leak is originating from a loose coupling or joint, use a wrench to tighten it. This will help create a secure and watertight connection. Take care not to overtighten, as it can damage the components.
- Replace damaged components: If you notice any cracks or damages, it may be necessary to replace the affected components. Disconnect the coupling and use a new one to ensure a proper seal.
- Apply sealant: For stubborn leaks, you can apply a sealing compound or thread tape to the connection points. This additional layer of protection can help create a reliable seal.
- Reinspect: After addressing the leaks, it is important to reinspect the affected area to verify that the repairs have been successful. Check for any new or recurring leaks to ensure the plumbing is now in optimal condition.
By following these steps, you can fix any leaks and ensure a reliable connection. Regularly inspecting your plumbing system for leaks is essential for maintaining its integrity and preventing future issues.
Frequently Asked Questions Of How To Install A Sharkbite Slip Coupling
How Do You Install A Sharkbite Slip Coupling Correctly?
To install a Sharkbite slip coupling, make sure to clean the pipes, mark the insertion depth, and cut the pipe cleanly. Then, simply push the Sharkbite slip coupling onto the pipe until it reaches the insertion depth mark. No soldering or special tools are needed for this installation.
Are Sharkbite Slip Couplings Reliable For Long-Term Use?
Yes, Sharkbite slip couplings are highly reliable for long-term use. They are made from durable materials that ensure leak-free connections. The slip coupling design allows for flexibility and easy installation without compromising performance. With proper installation and maintenance, these couplings can provide a reliable solution for plumbing needs.
Do I Need Any Special Tools To Install A Sharkbite Slip Coupling?
No, you do not need any special tools to install a Sharkbite slip coupling. The slip coupling is designed for easy installation and does not require soldering or any complex tools. Simply push the coupling onto the pipe and ensure it reaches the insertion depth mark.
It’s a simple and hassle-free installation process.
Conclusion
Installing a Sharkbite slip coupling is a simple and efficient way to repair or extend your plumbing system. With its innovative design and easy-to-use features, this coupling provides a reliable and leak-free connection in just a few steps. Whether you’re a DIY enthusiast or a professional plumber, the Sharkbite slip coupling offers convenience and durability that will enhance your plumbing projects.
So, say goodbye to complex and time-consuming pipe repairs and embrace the simplicity of the Sharkbite slip coupling for all your plumbing needs.