How to Install a Roof Fan?
To install a roof fan, start by choosing the right location and ensuring proper electrical connections. Then, securely mount the fan and connect the wiring to complete the installation.
Adding a roof fan can improve air circulation and ventilation in your space while also providing aesthetic appeal. By following these steps, you can successfully install a roof fan and reap its benefits.
Factors To Consider When Selecting A Roof Fan
Before you rush to install a roof fan, it’s important to carefully consider a few key factors. Choosing the right roof fan is crucial to ensure optimal performance and satisfaction. Here are some important factors to consider when selecting a roof fan:
Size and Capacity
The size and capacity of a roof fan play a significant role in its effectiveness. Generally, roof fans come in various sizes, and it’s essential to choose the right one that matches the size of your roof and the space you want to ventilate. Installing an undersized fan might not provide sufficient ventilation, while an oversized one could be unnecessary and cost you more. So, carefully measure the dimensions of your roof and consider the square footage of the area you want to cool before making a selection.

Noise Level
No one likes to be disturbed by a loud buzzing noise from their roof fan, especially when trying to relax or have a conversation. That’s why it’s crucial to consider the noise level of a roof fan before making a purchase. Look for roof fans specifically designed to operate quietly, ensuring peaceful and undisturbed living spaces. Many reputable brands now offer models with advanced noise reduction technology and whisper-quiet operation, providing comfort without compromising on performance.
Energy Efficiency
In today’s environmentally-conscious world, energy efficiency is a vital consideration. Not only does an energy-efficient roof fan help reduce your carbon footprint, but it also saves you money on energy bills. Look for fans with high Energy Star ratings, as they are designed to consume less electricity while delivering optimal ventilation. Additionally, opting for a roof fan with features like adjustable speed settings and automated controls allows you to customize energy usage based on your needs, further enhancing efficiency.
Design and Aesthetics
A roof fan not only serves a functional purpose but can also be a stylish addition to your living space. Consider the design and aesthetics of the roof fan, ensuring it complements your home’s overall interior and exterior decor. Whether you prefer a sleek modern design or a more traditional look, selecting a fan that aligns with your aesthetic preferences will enhance not only the functionality but also the visual appeal of your space.
Brand Reputation
When it comes to investing in a roof fan, opting for a reputable brand is a wise decision. Established brands have a proven track record of delivering quality products with advanced features and excellent customer support. Research customer reviews and testimonials to gauge the reputation and satisfaction of previous buyers. Choosing a reliable brand ensures peace of mind, knowing that you’re investing in a roof fan that will perform optimally and last for years to come.
How To Measure Your Roof For Proper Fan Fit
When it comes to installing a roof fan, one of the essential steps is ensuring the proper fit for your roof. This involves measuring your roof accurately and determining the optimal size for the fan. In this section, we will discuss how to measure your roof for proper fan fit, including understanding roof pitch, measuring the roof opening, and determining the optimal fan size for your needs.
Understanding Roof Pitch
Before measuring your roof for a fan, it is essential to understand roof pitch. Roof pitch refers to how steep or flat your roof is. Determining the pitch is crucial for selecting the appropriate fan and ensuring proper installation.
Measuring Roof Opening
Once you understand the roof pitch, the next step is to measure the roof opening. This is the area where the fan will be installed. To measure the roof opening accurately, follow these steps:
- Start by gathering the necessary materials, including a tape measure and a ladder.
- Securely place the ladder against the side of your house and climb up to the roof.
- Locate the area where you want to install the fan.
- Measure the length and width of the roof opening. Make sure to measure both dimensions accurately.
- Record the measurements, noting them down for future reference.
Determining Optimal Fan Size
After measuring the roof opening, the next step is to determine the optimal fan size for your needs. To do this, consider factors such as the size of the room, the level of ventilation required, and the fan’s CFM (Cubic Feet per Minute) rating.
To calculate the required CFM rating, use the following formula:
| Room Area (square feet) | CFM Rating |
|---|---|
| Up to 100 | 1 CFM per square foot |
| 100-400 | 2 CFM per square foot |
| 400-700 | 3 CFM per square foot |
| Above 700 | 4 CFM per square foot |
Once you have determined the required CFM rating, select a fan size that meets or exceeds this rating. It is always better to choose a slightly larger fan to ensure optimal ventilation.
By understanding the roof pitch, measuring the roof opening accurately, and selecting the correct fan size, you can ensure a proper fit for your roof fan installation. This will result in efficient ventilation and a more comfortable living environment.

Gathering The Necessary Tools And Materials
Before you start installing a roof fan, it’s essential to gather all the necessary tools and materials. Having everything at hand will save you time and ensure a smooth installation process. Here are the tools and materials you’ll need for the job:
Screwdrivers
A screwdriver is an indispensable tool for any home improvement project, including installing a roof fan. Make sure you have a set of both flathead and Phillips head screwdrivers. These versatile tools will come in handy when you need to remove or tighten screws during the installation process.
Wrenches
Wrenches are critical for securing nuts and bolts. You’ll need both adjustable and socket wrenches to ensure a secure and stable installation. The adjustable wrench will allow you to tighten or loosen different sizes of nuts, while the socket wrench will ensure a precise fit on specific bolts.
Sealant
Sealant plays a crucial role in preventing water leaks and ensuring the longevity of your roof fan installation. Choose a high-quality sealant suitable for use on roofs. Apply it around the base of the fan and any necessary joints to create a watertight seal and protect your home from potential water damage.
Roofing Cement
Roofing cement is another essential material for installing a roof fan. It helps to secure the fan’s base to the roof, providing extra stability and protection against wind and weather elements. Apply a generous amount of roofing cement around the base of the fan to create a strong bond between the fan and the roof.
Safety Harness
Your safety should always be a top priority when working on the roof. A safety harness is a must-have tool to ensure you stay secure and protected while installing a roof fan. Make sure the safety harness is in good condition and properly fitted. Use it in conjunction with a sturdy anchor point to prevent falls and ensure a safe working environment.
Ladder
A ladder is essential for accessing the roof and carrying out the installation process. Ensure the ladder is stable and securely positioned. Consider using a ladder with anti-slip features for added safety. Always follow proper ladder safety guidelines to minimize the risk of accidents.
Checking Your Attic For Proper Ventilation
Proper attic ventilation is essential for maintaining a comfortable and energy-efficient home. Without adequate ventilation, excess heat and moisture can accumulate in your attic, leading to a range of problems such as increased energy bills, condensation buildup, and damage to your roof shingles.
Assessing Current Ventilation System
Before installing a roof fan, it’s crucial to assess your attic’s current ventilation system. This will help you determine whether there are any existing vents and if they are providing sufficient airflow. Start by inspecting the soffit vents, gable vents, and ridge vents in your attic.
If you notice any signs of blockage or damage, such as debris or bird nests, it’s important to address these issues before proceeding with the installation. Blocked vents can significantly restrict airflow, rendering a roof fan less effective in regulating the attic temperature.

Calculating Proper Ventilation Requirements
Proper attic ventilation is not a one-size-fits-all solution. The amount of ventilation needed depends on factors such as the size of your attic, the type of roof, and the climate in your region. To calculate the proper ventilation requirements for your attic, you can follow a simple formula:
- Measure the square footage of your attic floor area.
- Multiply the square footage by 0.7 to get the minimum amount of net free ventilation area required.
- Divide this number by the net free area of the vent you plan to install to determine the number of vents needed.
- For optimal airflow, distribute the vents evenly between the intake and exhaust areas of your attic.
Remember, this calculation provides a basic guideline. It’s always best to consult with a roofing professional to ensure accurate and adequate ventilation for your specific attic.
Installing Additional Vents, if Needed
Based on your ventilation calculation, it may be necessary to install additional vents in your attic. This is particularly important if the assessment of your current ventilation system reveals inadequate airflow. Installing vents at strategic locations can help promote proper air circulation and prevent heat and moisture buildup.
The two common types of vents are soffit vents and roof vents. Soffit vents are installed in the underside of the roof overhang, while roof vents are installed on the uppermost part of the roof. Both vents work together to create a natural flow of air, with the soffit vents drawing in fresh air and the roof vents expelling hot air.
When installing additional vents, ensure they are positioned to provide balanced airflow throughout the attic. Consider using a table or diagram to plan the placement of vents, taking into account the size, number, and location of both intake and exhaust vents.
By assessing your current ventilation system, calculating proper ventilation requirements, and installing additional vents if needed, you can ensure your roof fan operates at its maximum potential, keeping your attic well-ventilated and your home comfortable.
Safely Accessing The Roof
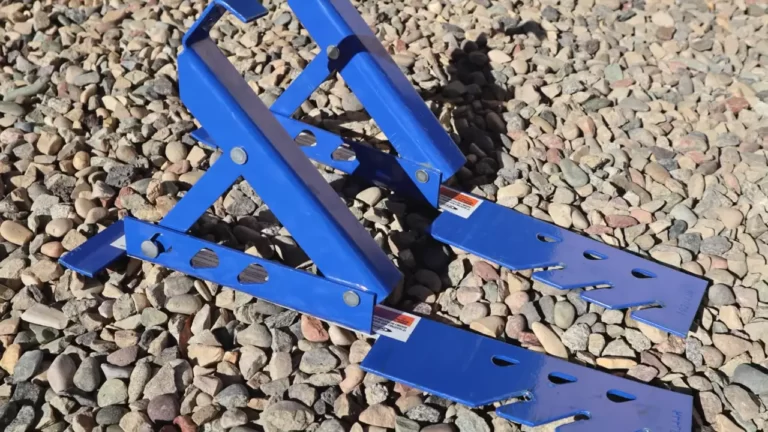
Using Ladders Properly
One of the key steps to safely accessing the roof when installing a roof fan is using ladders properly. When choosing a ladder, make sure it is long enough to reach the roof without having to stand on the top rungs. Additionally, ensure that the ladder is in good condition and sturdy enough to support your weight. Before climbing the ladder, check for any loose or damaged rungs, and always set the ladder on a stable and level surface.
When positioning the ladder against the roof, make sure it extends at least three feet beyond the roof’s edge. This provides stability and prevents the ladder from slipping. When climbing, maintain three points of contact at all times, either two feet and one hand or two hands and one foot. This ensures stability and balance while ascending or descending the ladder. As you climb, avoid leaning to the side or overstretching, as this may cause the ladder to become unstable.
Wearing Safety Gear
Another essential aspect of safely accessing the roof is wearing the appropriate safety gear. Before starting the installation process, make sure to adorn yourself with the necessary protective equipment. This includes a hard hat to protect your head from falling debris, safety glasses to shield your eyes, and sturdy work gloves to safeguard your hands from sharp edges or hot surfaces.
Additionally, wearing slip-resistant footwear provides grip and stability while walking on the roof. Opt for shoes or boots with rubber soles that offer excellent traction, especially in wet or slippery conditions. Remember, the right safety gear significantly reduces the risk of accidents and injuries while working at heights.
Employing a Spotter
Employing a spotter during the roof fan installation process is crucial for maintaining safety. A spotter can provide an extra set of eyes to watch for potential hazards and offer assistance if needed. Before climbing the ladder, discuss a communication plan with your spotter to ensure clear and concise instructions.
When working on the roof, the spotter should keep a safe distance and immediately notify you of any imminent dangers, such as loose tiles, unstable surfaces, or overhead obstructions. Their presence not only enhances safety but also provides reassurance and peace of mind while accessing the roof.

Credit: homeguide.com
Removing Existing Roof Vent
Detaching Old Vent from the Roof
When it’s time to install a new roof fan, one of the first steps is to remove the existing roof vent. This is an important task that requires careful attention to detail. To get started, follow these steps:
- Ensure your safety by using appropriate protective gear such as gloves and goggles.
- Position a ladder securely on the roof to reach the vent.
- Inspect the vent to determine the method of attachment. Most roof vents are secured with nails or screws.
- Using a screwdriver or a pry bar, carefully remove the nails or screws that are holding the vent in place.
- Once the fasteners are removed, gently detach the old vent from the roof. Be cautious not to damage the surrounding roofing material.
- Set the old vent aside, as it may be useful for reference or as a template for installing the new vent.
Clearing Debris and Obstructions
Before installing the new roof fan, it’s essential to clear any debris and obstructions that may have accumulated around the area. Follow these steps to ensure a clean and smooth installation:
- Inspect the opening left behind after removing the old vent. Check for any loose nails, screws, or other debris that may impede the installation of the new vent.
- Using a broom or a brush, sweep away any loose dirt, leaves, or other debris from the surrounding roof area.
- If there are any obstructions, such as branches or twigs, carefully remove them to create a clear path for the new vent.
- Inspect the condition of the surrounding roofing material. Look for any signs of damage or deterioration that may require repairs before proceeding with the installation.
By properly detaching the old vent and clearing any debris or obstructions, you’ll be well-prepared to install the new roof fan. Taking these steps will help ensure a smooth and efficient installation process, resulting in a properly functioning roof fan that enhances ventilation and comfort in your home.
Preparing The Roof Opening
When installing a roof fan, it is crucial to properly prepare the roof opening before proceeding further. This ensures a secure and hassle-free installation process.
Marking the Center of the Opening
The first step in preparing the roof opening is accurately marking the center point. To do this, follow these simple steps:
- Measure the width and length of the fan unit.
- Divide both measurements by 2 to find the center point.
- Using a tape measure, locate the center point on the roof.
- Mark the center point using a pencil or marker.
Cutting the Opening to Size
Once the center point is marked, it’s time to cut the roof opening to the correct size. Follow the steps below to ensure a precise cut:
- Measure the dimensions of the fan unit carefully, taking into consideration any manufacturer specifications for clearance.
- Use a reliable measuring tape to transfer these dimensions onto the roof surface, ensuring the center point is aligned correctly.
- Double-check the measurements to ensure accuracy before proceeding.
- Using a circular saw or reciprocating saw, carefully cut along the marked lines to create the opening.
Ensuring Proper Clearance and Alignment
To guarantee the fan unit fits securely and functions optimally, it is important to ensure proper clearance and alignment during installation. Follow these steps:
- Measure the dimensions of the fan unit and note any recommended clearance specified by the manufacturer.
- Check the clearance on all sides of the opening, ensuring sufficient space for the fan unit to fit properly.
- Reposition the fan unit if necessary, making sure it aligns perfectly with the cut opening.
- Secure the fan unit in place and ensure it is level.
By carefully following these steps, you can effectively prepare the roof opening for installation of a roof fan. This will not only help ensure a secure fit but also contribute to the efficiency and longevity of the fan’s operation.

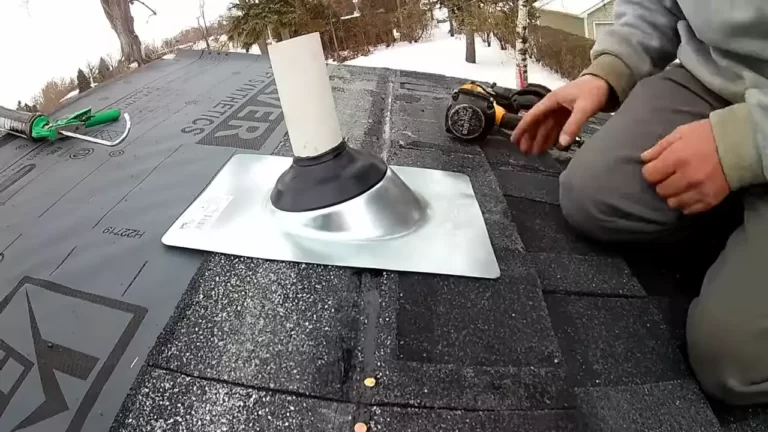
Installing The Roof Fan
Installing a roof fan is a great way to improve ventilation in your home and ensure a comfortable living environment. Whether you want to cool down a stuffy attic or provide fresh air circulation in your living space, a roof fan can be a practical and energy-efficient solution. In this guide, we will walk you through the step-by-step process of installing a roof fan, ensuring a successful and weatherproof installation.
Placing the Fan in the Opening
Before you can secure the roof fan in place, you need to position it correctly in the opening. Begin by measuring the opening and confirming that it matches the dimensions of the fan. It’s crucial to ensure a proper fit to prevent any potential leaks or gaps.
Once you have verified the sizing, carefully place the fan in the opening, ensuring that it sits securely and evenly. It’s recommended to have someone assist you during this step to ensure the fan is positioned correctly and doesn’t slide or fall.
Securing the Fan with Fasteners
After placing the roof fan in the opening, it’s time to secure it using fasteners. Start by aligning the mounting brackets of the fan with the designated holes on the roof. This will ensure that the fan sits level and prevents any potential wobbling or instability.
Once the brackets are aligned, insert the provided screws or bolts through the holes and tighten them securely with a screwdriver or wrench. Make sure to follow the manufacturer’s instructions regarding the recommended torque or force applied to the fasteners to avoid over-tightening or damaging the fan.
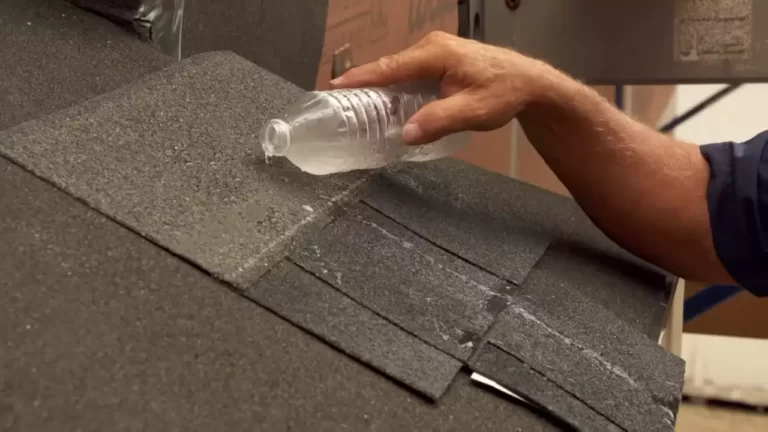
Sealing the Edges for Weatherproofing
To ensure the roof fan is weatherproof and protected against any moisture or water infiltration, it’s essential to seal the edges properly. Start by applying a generous amount of weatherproofing sealant along the perimeter of the fan, making sure to cover any gaps or seams.
Using a caulk gun, carefully and evenly spread the sealant, ensuring that it forms a watertight seal between the fan and the roof. Pay special attention to the corners and edges, as these areas are prone to potential leaks. Allow the sealant to dry completely before moving onto any further steps.
By following these steps, you can successfully install a roof fan in your home. Remember to always prioritize safety and follow the manufacturer’s instructions throughout the installation process. With a properly installed roof fan, you can enjoy improved ventilation and a more comfortable living space.
Wiring And Electrical Connections
When it comes to installing a roof fan, ensuring proper wiring and electrical connections is crucial for the fan to function safely and efficiently. In this section, we will discuss the necessary steps to run electrical wiring to the fan, connect the wires properly, and test the fan’s electrical functions.
Running Electrical Wiring to the Fan
To begin with, you’ll need to identify a power source for your roof fan. This can be an existing electrical outlet or junction box nearby. Once you have located a suitable power source, follow these steps to run electrical wiring to the fan:
- Determine the shortest and most direct path from the power source to the fan location.
- Measure the required length of electrical wiring, ensuring to add a few extra feet for any unforeseen adjustments.
- Securely attach the electrical wiring to the roof rafters or joists, using cable staples or clips to maintain a neat and organized installation.
- If necessary, drill holes through the roof to pass the wiring through, ensuring that the holes are appropriately sealed afterwards to prevent any water leaks.
- Continue running the wiring to the designated location where the fan will be installed, keeping it well away from any sharp objects or potential hazards.
Connecting the Wires Properly
Once the electrical wiring is in place, it’s time to connect the wires properly. Follow these steps to ensure a secure and efficient electrical connection:
- Identify the power wires, typically black or red, and neutral wires, usually white.
- Strip the plastic coating from the ends of the power and neutral wires, exposing about 3/4 inch of bare wire.
- Connect the power wire of the fan to the power wire from the power source, using wire nuts or connectors. Ensure that they are firmly twisted together and the connection is secure.
- Similarly, connect the neutral wire of the fan to the neutral wire from the power source using wire nuts or connectors.
- If your fan has an additional wire for grounding, typically green or bare copper, connect it to the grounding wire from the power source or the fan’s grounding screw.
- Once all the connections are made, carefully tuck the wires into the electrical box and secure the box cover.
Testing the Fan’s Electrical Functions
After completing the wiring and electrical connections, it’s essential to test the fan’s electrical functions before finishing the installation. Follow these steps to ensure the fan is working correctly:
- Switch on the electrical power source and ensure that there is a steady supply of electricity.
- Turn on your fan’s power switch, usually located on the fan itself or a separate wall control panel.
- Observe the fan blades and listen for any unusual noises or vibrations. If everything appears to be functioning smoothly, proceed to the next step.
- Test the fan’s various speed settings, if applicable, to ensure they are all working properly.
- If your fan has a light fixture, make sure to turn it on and off to confirm its functionality.
- If any issues or abnormalities are detected during the testing phase, double-check the wiring connections, consult the fan’s installation manual, or seek assistance from a qualified electrician to resolve the problem.
By following these steps to properly wire and connect your roof fan, you can ensure a safe and efficient installation. Remember to always prioritize your safety and consult a professional if you are unsure about any aspect of the process.
Completing The Installation
Now that we have covered the necessary steps for preparing the installation area and mounting the roof fan securely, it’s time to complete the installation process. This final stage involves inspecting for proper fit and alignment, applying roofing cement for extra sealant, and cleaning up the work area to ensure a tidy and professional finish.

Inspecting for Proper Fit and Alignment
Before you can consider the installation complete, it’s crucial to inspect the roof fan for proper fit and alignment. This step ensures that the fan is securely in place and functions optimally. Here’s what you need to do:
- Check that the fan is centered and aligned correctly with the mounting hole.
- Ensure that the fan is level and flush with the roof surface.
- Tighten any loose screws or bolts to ensure a secure fit.
- Verify that the fan blades rotate smoothly without any obstructions.
By conducting a thorough inspection, you can identify any potential issues and address them before considering the installation complete. This attention to detail will ensure optimal performance and longevity of your roof fan.
Applying Roofing Cement for Extra Sealant
In addition to the provided sealing components, applying roofing cement can provide an extra layer of sealant to enhance the waterproofing capabilities of your roof fan installation. Here’s how to do it:
- Remove the existing sealing components, such as rubber gaskets or foam strips, from the fan base.
- Apply a generous amount of roofing cement to the base of the fan.
- Spread the cement evenly to create a watertight seal.
- Reinstall or replace the sealing components on top of the roofing cement.
Roofing cement provides an added layer of protection against leaks and ensures a watertight seal around the fan base. This step is especially important if you live in an area prone to heavy rain or strong winds.
Cleaning Up the Work Area
Once the roof fan installation is complete, it’s important to clean up the work area to leave a professional and tidy finish. Here are some key steps to follow:
- Remove any debris, tools, or leftover materials from the installation area.
- Sweep or vacuum any loose dirt or dust from the roof surface.
- Dispose of any waste materials, such as packaging or scraps, responsibly.
- Inspect the surrounding area for any potential hazards or loose objects that could pose a safety risk.
By cleaning up the work area, you not only ensure a visually appealing result but also minimize any potential risks or accidents caused by leftover materials. A clean and organized work area reflects your attention to detail and professionalism.
Regular Maintenance Tips For Optimal Performance
Cleaning the Fan Blades
One of the most important regular maintenance tasks for optimal performance of your roof fan is to clean the fan blades. Over time, dust, dirt, and debris can accumulate on the blades, which can reduce the efficiency of the fan and even lead to motor burnout. To clean the fan blades:
- Turn off the power to the fan to prevent any accidents.
- Use a ladder or step stool to reach the fan.
- Use a soft cloth or sponge dampened with a mild detergent solution to gently wipe the blades, removing any dust or grime.
- Rinse the cloth or sponge and wipe the blades again to remove any residue.
- Allow the blades to dry completely before turning the fan back on.
Note: Avoid using abrasive materials, as they can scratch the surface of the blades. Regularly cleaning the fan blades will not only help maintain optimal performance but also prevent any debris from being circulated throughout your home.
Checking for Loose or Worn Parts
Another important aspect of maintaining your roof fan’s performance is to regularly check for any loose or worn parts. Over time, the vibrations and movements of the fan can cause screws, bolts, and other components to become loose. This can lead to increased noise, wobbling, and even structural damage if left unattended. To check for loose or worn parts:
- Turn off the power to the fan.
- Inspect the fan housing, motor, and other components for any visible signs of damage or wear.
- Tighten any loose screws or bolts using a screwdriver or wrench.
- If you notice any worn or damaged parts, consider replacing them to ensure optimal performance.
Note: Regularly checking for loose or worn parts not only helps maintain the fan’s performance but also ensures the safety of your home and prevents any potential accidents.
Lubricating Moving Components
Proper lubrication of the moving components is crucial for the smooth operation and longevity of your roof fan. Over time, the bearings and other moving parts can wear out due to friction, leading to increased noise and reduced performance. To lubricate the moving components:
- Turn off the power to the fan and make sure it has come to a complete stop.
- Locate the oil holes or ports on the fan motor or bearings.
- Using a suitable lubricant recommended by the manufacturer, apply a few drops of oil to the oil holes or ports.
- Rotate the blades manually to distribute the oil evenly.
- Wipe off any excess oil.
Note: Be mindful not to over-lubricate, as it can attract more dust and debris, leading to clogging. By regularly lubricating the moving components, you can ensure smooth and quiet operation, prolonging the lifespan of your roof fan.
Common Issues And Troubleshooting Guide
Installing a roof fan is a great way to improve air circulation and ventilation in your home or office space. However, like any electrical appliance, roof fans can encounter common issues that may require troubleshooting. In this guide, we will discuss some of the most common issues that roof fan owners may face and provide a step-by-step troubleshooting guide to help resolve these problems.
Fan Motor Failures
One of the most frustrating issues that can occur with a roof fan is a motor failure. When the fan motor stops functioning properly, it can prevent the fan from spinning, resulting in poor airflow. Here are a few troubleshooting steps to identify and resolve fan motor failures:
- Check the power supply: Ensure that the fan is properly connected to the power supply and that the circuit breaker or fuse is not tripped. If there is a power outage or surge, it can lead to motor failure.
- Inspect the wiring: Examine the wiring connections to ensure they are secure and not damaged. Loose or damaged wires can prevent the motor from receiving power.
- Test the capacitor: The capacitor is a crucial component that helps start and run the motor. Use a multimeter to check if the capacitor is functioning correctly. If it’s faulty, replacing it might resolve the motor failure.
- Consider the age of the fan: If the motor failure occurs in an older fan, it may be time to replace the entire unit. Older motors can wear out over time and become less efficient.

Power Supply Problems
An inadequate power supply can cause several issues with the operation of a roof fan. If the fan is not receiving enough power, it may not function properly or at all. Here are some troubleshooting steps to address power supply problems:
- Check the voltage: Ensure that the power outlet the fan is connected to provides the correct voltage. Use a voltage tester to confirm the voltage.
- Use a dedicated circuit: If the fan is sharing the circuit with other large appliances, the power supply may be insufficient. Connect the fan to a dedicated circuit to ensure it receives enough power.
- Consider an electrical upgrade: If your home or office frequently experiences power fluctuations or inadequate power supply, consider consulting an electrician to upgrade the electrical system.
Strange Noises or Vibrations
If you notice strange noises or vibrations coming from your roof fan, it may indicate an underlying issue that needs attention. Here are some troubleshooting steps to resolve these problems:
- Tighten loose components: Check that all the screws, bolts, and brackets holding the fan in place are tight. Loose components can cause rattling noises and vibrations.
- Inspect fan blades: Examine the fan blades for any signs of damage or misalignment. Bent or unbalanced blades can create unusual noises and vibrations.
- Check for debris: Clear any debris, such as dust or leaves, that may have accumulated on the fan blades or motor. Debris can disrupt the smooth operation of the fan and cause unusual noises.
- Lubricate moving parts: Apply lubricant to the fan motor and other moving parts to reduce friction and eliminate any squeaking or grinding noises.
By following these troubleshooting steps, you can address common issues that may arise with your roof fan and ensure it operates efficiently. If the problem persists or you are uncertain about performing any troubleshooting steps, it’s recommended to consult a professional electrician or the manufacturer’s customer support for further assistance.
Understanding Warranty And Repair Options
When it comes to installing a roof fan, it’s important to not only consider the installation process but also think about the warranty and repair options for your fan. Understanding these options will not only give you peace of mind but also ensure that you make the most out of your investment. In this section, we will explore three key areas: contacting the manufacturer, hiring professional repair services, and exploring DIY repair options.
Contacting the Manufacturer
If you encounter any issues or have questions about your roof fan, it is always a good idea to reach out to the manufacturer directly. They are the experts when it comes to their product, and they will be able to provide you with the most accurate and reliable information. Whether you have concerns about the warranty coverage, need clarification on repair procedures, or simply have general inquiries, contacting the manufacturer should be your first step.
When contacting the manufacturer, make sure to gather all relevant information about your roof fan, such as the model number, serial number, and any purchase or warranty documentation. This will help expedite the process and enable the manufacturer to assist you more efficiently. Most manufacturers provide contact information on their website, including phone numbers, email addresses, and even live chat support, making it easy for you to get in touch with them.
Hiring Professional Repair Services
In some cases, the issues with your roof fan might be beyond your expertise or capabilities. In such situations, it is recommended to hire professional repair services. These are trained and experienced technicians who specialize in roof fan repairs and are equipped with the necessary tools and knowledge to diagnose and fix any issues.
When hiring professional repair services, consider doing some research to find reputable companies or individuals in your area. Look for reviews and testimonials from past customers to ensure the quality of their work. Additionally, ask for quotes or estimates from different providers to compare prices and services.
Keep in mind that hiring professional repair services might come with a cost, but it can save you time, effort, and frustration. Plus, you can have peace of mind knowing that your roof fan is being taken care of by professionals who understand the intricacies of the system.
Exploring DIY Repair Options
If you are comfortable with DIY projects and have some knowledge of electrical systems, you may consider exploring DIY repair options for your roof fan. However, it’s important to note that attempting repairs without proper knowledge or experience can potentially cause more harm than good.
Before attempting any DIY repairs, thoroughly read the manufacturer’s instructions and consult any available documentation or online resources. This will give you a better understanding of the repair process and help you assess whether it is something you can handle on your own. Remember to always prioritize safety, wear protective gear, and follow proper electrical procedures.
Some common DIY repair options for roof fans include replacing faulty wiring, fixing loose connections, or replacing damaged components such as motors or blades. However, if the issue seems more complex or requires specialized knowledge, it’s best to consult a professional repair service to avoid further damage or potential safety hazards.
In conclusion, understanding the warranty and repair options for your roof fan is crucial for ensuring its longevity and efficient performance. Whether you reach out to the manufacturer directly, hire professional repair services, or explore DIY options, always prioritize safety and seek expert help when needed. By taking proactive steps, you can enjoy the benefits of your roof fan for years to come.
Frequently Asked Questions For How To Install A Roof Fan
How Much Does It Cost To Install A Roof Fan?
The cost of installing a roof fan can vary depending on factors such as the type of fan, the complexity of the installation, and the location. On average, you can expect to pay between $300 and $800 for professional installation.
Can I Install A Roof Fan Myself?
While it is possible to install a roof fan yourself, it is not recommended unless you have experience with roofing and electrical work. Roof fan installation involves navigating the roof, cutting a hole, wiring the fan, and sealing the area properly.
It is best to hire a professional for this task.
How Long Does It Take To Install A Roof Fan?
The duration of roof fan installation depends on various factors such as the complexity of the installation, the type of roof, and the accessibility of the area. On average, it can take around 4 to 8 hours for a professional to complete the installation process.
Conclusion
Installing a roof fan can significantly improve ventilation and air circulation in your home. By following these simple steps, you can easily install a roof fan and start enjoying its benefits. Remember to choose the right fan for your space, gather the necessary tools, and ensure a secure installation.
Regular maintenance and cleaning will help keep your roof fan in optimal condition. With proper installation and care, your roof fan will enhance your comfort and energy efficiency. So, go ahead and get started on installing a roof fan today!