How to Install a Roman Shade Inside Mount
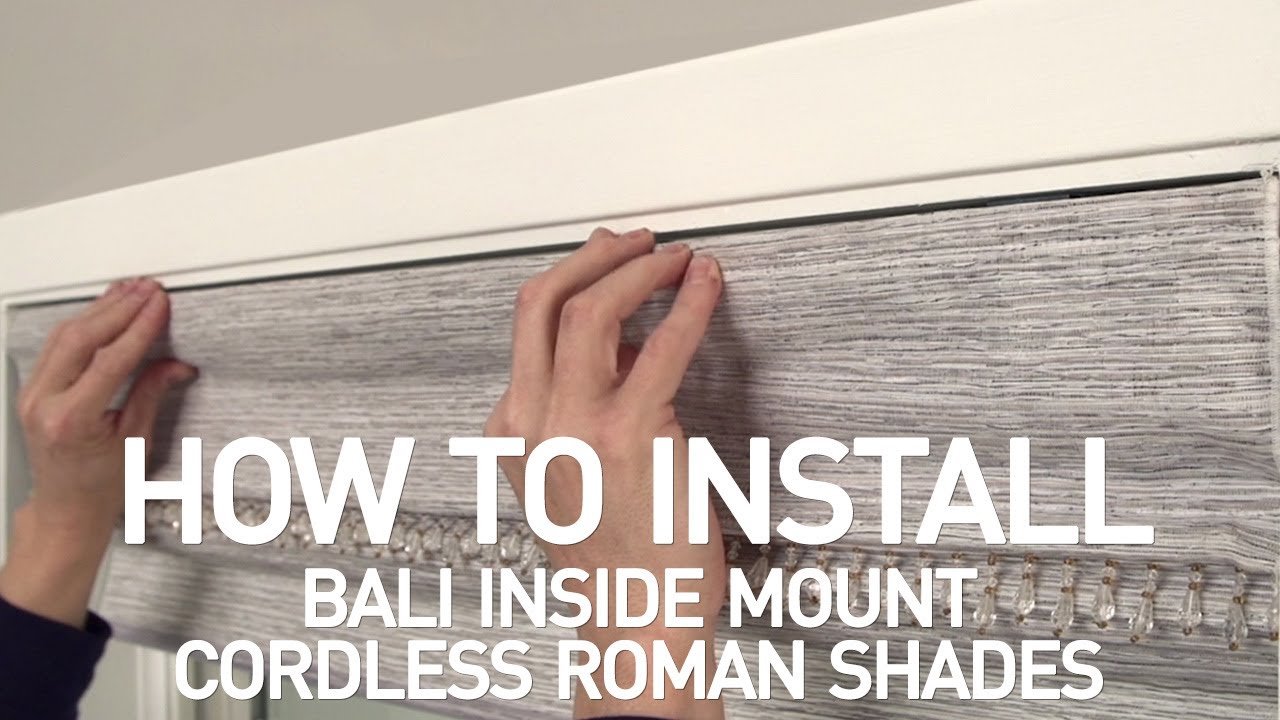
To install a Roman shade inside mount, measure the window frame, choose the appropriate size shade, and attach it using brackets or clips provided. This simple process allows for a seamless and customized window treatment that enhances the aesthetics of any space.
Introducing a Roman shade inside mount is an ideal way to add a touch of elegance and sophistication to your windows. These stylish and versatile window coverings not only provide privacy and light control but also complement the interior decor.
Installing a Roman shade inside mount is a hassle-free task that requires measuring the window frame accurately, selecting the right size shade, and attaching it using the provided brackets or clips. Whether you prefer a sleek and minimalistic design or a bold and vibrant pattern, Roman shades deliver a timeless charm to your living space while preserving your desired level of privacy and control over natural light. In this guide, we will provide you with simple, step-by-step instructions on how to install a Roman shade inside mount.
Choosing The Right Roman Shade For Inside Mount
When it comes to installing roman shades, one important decision you’ll need to make is whether to go with an inside mount or an outside mount. While both options have their advantages, an inside mount offers a sleek and streamlined look, particularly for windows with limited depth. In this post, we will focus on the inside mount option, and help you choose the right roman shade for your needs. Follow these steps to ensure a successful installation process.
Understanding the different types of Roman shades
Before you start measuring your window, it’s important to have a clear understanding of the different types of roman shades available. Roman shades come in various styles, including flat roman shades, hobbled roman shades, and top-down/bottom-up shades. Each style offers its own unique features and benefits.
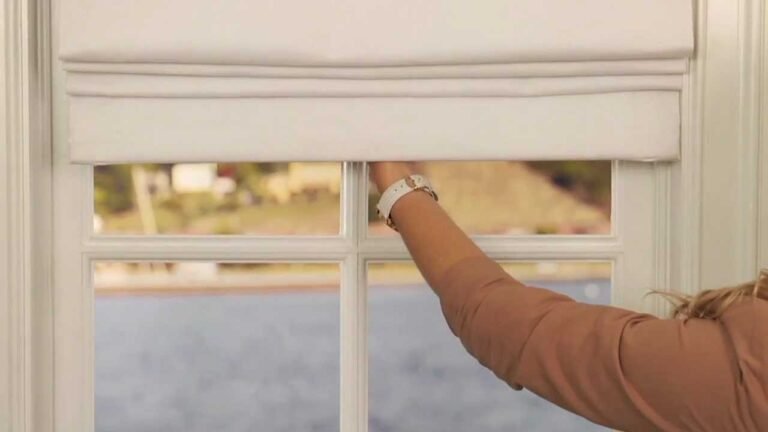
Flat roman shades, as the name suggests, have a flat, clean look when fully lowered. They are a popular choice for a modern and minimalist aesthetic. On the other hand, hobbled roman shades have soft folds that cascade down when lowered, creating an elegant and luxurious ambiance in any room. Lastly, top-down/bottom-up shades allow you to lower the shade from the top for privacy while still letting in natural light from the bottom.
Measuring the window for inside mount
Accurate measurements are crucial to ensure the proper fit of your roman shades. To measure your window for inside mount, follow these simple steps:
- Using a metal tape measure, measure the width at the top, middle, and bottom of the window.
- Take the narrowest measurement of the three for the width.
- For the height, measure from the top inside edge of the window frame to the windowsill or desired endpoint.
- Again, take the smallest measurement to ensure a proper fit.
Remember to measure each window individually, as windows in the same room may have slight variations. It’s also a good idea to double-check your measurements before proceeding to the next step.
Selecting the appropriate fabric and style
When it comes to selecting the fabric and style for your roman shades, consider both your aesthetic preferences and practical needs. The fabric choice will impact the amount of light that enters the room, as well as the overall look and feel. Popular fabric options for roman shades include linen, cotton, and polyester blends.
In addition to fabric, consider the style of your roman shades. Do you prefer a solid color or a pattern? Are you looking for a shade that provides complete privacy or one that filters light while still offering privacy?
Once you have considered these factors, you can browse through various options and select the one that best suits your style and functional needs.
Installing roman shades can add style and functionality to any room. By understanding the different types of roman shades, measuring your window accurately, and selecting the appropriate fabric and style, you can be sure to choose the right roman shade for inside mount and enjoy the benefits it brings to your home.
Preparing The Window For Installation
Before you begin installing a Roman shade inside mount, it is crucial to properly prepare the window to ensure a secure and flawless installation process. This will help you achieve the perfect final result and prevent any potential issues that may arise later on. To prepare your window for installation, there are three essential steps you must follow:
Clearing the window area of any obstacles
It is important to clear the window area of any objects or obstacles that might hinder the installation process. Remove curtains, blinds, or any other window treatments that are currently in place. Make sure the window frame is clean and free of any decorative items or hardware that could get in the way. By creating clear and unobstructed access to the window, you’ll have an easier time during the installation process.
Cleaning the window thoroughly
Before installing the Roman shade, take some time to thoroughly clean the window. Remove any dirt, dust, or grime that has accumulated on the glass surface. This will help ensure a smooth and seamless installation. Use a glass cleaner and a lint-free cloth to clean both the interior and exterior of the window, paying attention to any areas that may have been neglected. A clean window will provide a better surface for mounting the shade and will enhance the overall appearance of your window treatment.
Checking for any damages or repairs needed
Prior to installation, it is crucial to inspect the window for any damages or repairs that may be required. Examine the frame for any cracks, dents, or loose components that could affect the stability of the installation. Addressing any necessary repairs before proceeding will prevent further damage and ensure a secure mount. Additionally, check the surrounding wall area for any signs of structural damage or moisture that could compromise the installation process. By taking the time to perform these checks, you’ll have peace of mind knowing that your Roman shade will be mounted properly and securely.
By following these three important steps to prepare your window for installation, you’ll set the stage for a successful and hassle-free Roman shade installation. Clearing the window area, cleaning the glass, and checking for any damages will help you achieve a beautiful and functional window treatment that adds style and elegance to your living space.
Gathering The Tools And Materials Needed
Before you begin the installation process for your Roman shade, it’s important to gather all the necessary tools and materials. Having everything on hand will make the process smoother and more efficient. In this section, we’ll outline the list of tools required for installation, the materials needed for mounting the Roman shade, as well as optional accessories that can enhance its functionality.List of tools required for installation
To ensure a successful installation, you will need the following tools:- Drill: A power drill will be required to make holes for mounting brackets. Make sure you have the appropriate drill bits as well.
- Screwdriver: A screwdriver, both flathead and Phillips, will be necessary to secure the mounting brackets and other hardware.
- Measuring tape: Accurate measurements are crucial for a properly fitting Roman shade. Use a measuring tape to measure the window height and width accurately.
- Pencil: Marking the positions for the brackets and other hardware can be easily done with a pencil.
- Level: A level tool will help ensure that the shade is installed straight and aligned correctly.
- Stepladder: Depending on the height of your window, a stepladder may be necessary to reach the installation area safely.
Materials needed for mounting the Roman shade
In addition to the tools mentioned above, you will also need the following materials:- Mounting brackets: These brackets will hold the Roman shade in place. Depending on the manufacturer’s instructions, you may need either inside mount brackets or outside mount brackets.
- Screws: These will be used to secure the mounting brackets and other hardware. Be sure to use the appropriate screws for the type of wall or window frame you have.
- Anchors (if necessary): If you are installing the shade on drywall or any other type of material that may not provide sufficient support, anchors may be needed to ensure a secure installation.
Optional accessories for enhancing functionality
While not essential for installation, these optional accessories can enhance the functionality and convenience of your Roman shade:- Cord cleats: If your shade has cords, cord cleats can be used to secure the cords and keep them out of reach of children or pets.
- Hold-down brackets: These brackets can be used to prevent the Roman shade from swinging or moving when it’s drawn down.
- Valance: A valance can be added to the top of the shade to enhance its appearance and provide a finished look.
Step 1: Mounting The Brackets
Mounting the brackets is the crucial first step to install a Roman shade accurately and securely. By properly positioning and installing the brackets, you’ll ensure the smooth operation and longevity of your Roman shade. Let’s go through the step-by-step process of mounting the brackets to achieve a flawless installation.
Determining the Positioning of Brackets
Before you start mounting the brackets, it is essential to determine the correct placement of the brackets on your window frame or wall. The positioning of the brackets will depend on the specific instructions provided by the manufacturer for your Roman shade.
Typically, you’ll need to measure and mark the brackets’ location based on the width and mounting requirements of your Roman shade. For an inside mount installation, the brackets are usually placed at the top corners of the window frame and evenly spaced apart along the width of the shade.
Marking the Screw Hole Locations
Once you have determined the positioning of the brackets, it’s time to mark the screw hole locations accurately. This step ensures that the brackets will be securely attached to the window frame or wall.
Using a pencil or a marker, mark the exact spot where the screw holes of the brackets will go. Make sure to double-check your measurements and alignment before proceeding to the next step. Precision in marking the screw hole locations will prevent any misalignment issues when installing the brackets.
Installing the Brackets Securely
Now that you have determined the positioning and marked the screw hole locations, it’s time to install the brackets securely. Place each bracket on its respective mark and align it properly according to the instructions provided by the manufacturer.
Using a drill or a screwdriver, attach the brackets firmly to the window frame or wall by driving screws through the pre-drilled holes in the brackets. Ensure that the screws are tightened adequately but not overly tightened, as this could damage the brackets or the window frame.
Repeat the process for each bracket, making sure they are all securely installed and aligned.
By accurately determining the positioning, marking the screw hole locations, and installing the brackets securely, you have successfully completed the first step of installing a Roman shade inside mount. Now, your Roman shade is ready for the next steps, bringing both functionality and style to your window!
Step 2: Attaching The Headrail To The Brackets
Once you have successfully measured and marked the positions for the brackets in Step 1, it’s time to move on to attaching the headrail to the brackets. This step is crucial in ensuring that your Roman shade is securely held in place and functions properly.
Aligning the headrail with the brackets
Start by aligning the headrail with the brackets. Place the headrail on top of the brackets, ensuring that it is centered and level. To achieve a neat and professional look, make sure the headrail is flush against the wall or window frame. This will ensure that the Roman shade hangs straight and operates smoothly.
Inserting the headrail into the brackets
After aligning the headrail, insert it into the brackets. Carefully push the headrail into the brackets on both sides simultaneously. It’s essential to exert equal pressure on both sides to prevent any misalignment. Be cautious not to force the headrail into the brackets; it should slide in smoothly.
If you encounter any difficulties while inserting the headrail, ensure that the brackets are properly installed and securely fixed. Double-check the measurements and make any necessary adjustments.
Ensuring a secure fit
Once you have inserted the headrail into the brackets, it’s time to secure it in place. This ensures that your Roman shade stays in position and doesn’t accidentally fall down.
Check that the headrail is firmly seated within the brackets. Gently tug on the headrail to ensure it is properly attached and doesn’t come loose. If needed, make further adjustments to achieve a secure fit.
If you’re satisfied with the placement and fit, move on to Step 3 to complete the installation process. Your Roman shade is now ready to be operated and enjoyed!

Credit: www.amazon.com
Step 3: Adjusting The Cord Tension
Properly adjusting the cord tension of your Roman shade is crucial for smooth operation and achieving the desired look. In this step, we will guide you through the process of evaluating and adjusting the cord tension to ensure your shade works flawlessly. Let’s get started!
Evaluating the Cord Tension
Before you start adjusting the tension, it’s important to evaluate how the cord moves and feels. Follow these steps:
- Stand in front of your shade and gently pull down on the cord to raise the shade.
- Observe the resistance in the cord. It should be firm but still allow you to lower and raise the shade comfortably.
- Check for any excess sagging or too much tension in the cord. The height of the shade should be even and consistent when fully raised.
If you notice any issues during this evaluation, it’s likely that you need to adjust the tension for optimal performance.
Adjusting the Tension for Proper Operation
To adjust the cord tension, follow these steps:
- Locate the cord tension device, typically a small plastic or metal piece near the top of the shade. It may be hidden inside the headrail.
- Using a flathead screwdriver, turn the tension device clockwise to increase tension or counterclockwise to decrease tension.
- Make small adjustments at a time and test the cord movement after each adjustment.
- Repeat this process until you achieve the desired tension for smooth operation.
Testing the Cord for Smooth Movement
Once you’ve adjusted the tension, it’s important to test the cord for smooth movement. Here’s how:
- Slowly raise and lower the shade using the cord to ensure it moves without any hitches or difficulty.
- Check that the shade stops at the desired height and stays securely in position without sagging or rising unexpectedly.
- If you notice any issues, repeat the tension adjustment process until the cord operates smoothly.
By properly adjusting the cord tension, you can ensure your Roman shade functions optimally and enhances the overall aesthetic of your space.
Step 4: Testing The Roman Shade
After successfully installing your Roman shade inside mount, it’s important to thoroughly test it to ensure everything is working properly. By testing the shade, you can identify any issues or adjustments that need to be made before enjoying the full functionality and appearance of your newly installed shade.Operating the shade to ensure smooth movement
One of the first things you’ll want to do when testing your Roman shade is to check for smooth and effortless movement. With the shade fully lowered, gently pull on the lift cord or chain to raise it. Pay close attention to how the shade moves along the track or brackets. It should glide up and down without any resistance or sticking points. If you notice any difficulties in operation, it may be necessary to adjust the tension or alignment of the shade.Assessing the overall appearance and functionality
Another important aspect of testing your Roman shade is assessing its overall appearance and functionality. Look for any wrinkles or unevenness in the fabric when the shade is both fully raised and fully lowered. Additionally, check for any sagging or misalignment along the bottom or sides of the shade. Ensure that the shade operates smoothly at every stage, allowing you to stop it at any desired height without it slipping. Moreover, inspect the cords or chains for any fraying or signs of wear and tear. This thorough assessment will help you identify any areas that require adjustments for optimal functionality and a neat appearance.Making any necessary adjustments
If you encounter any issues during the testing process, such as difficult movement, wrinkling, misalignment, or fraying cords, it’s crucial to make the necessary adjustments. Use the manufacturer’s instructions as a guide to troubleshoot problems and fix them accordingly. This may involve adjusting the tension of the lift cord or chain, repositioning the brackets, or even replacing worn-out parts. Remember to follow safety precautions and guidelines throughout the adjustment process to prevent any accidents and ensure a satisfactory result. Testing your Roman shade not only ensures smooth operation but also allows you to assess its overall appearance and functionality. By making any necessary adjustments, you can achieve a perfect fit and flawless performance, enhancing both the aesthetics and functionality of your window treatment. Take the time to test your Roman shade thoroughly and make any needed improvements, guaranteeing long-lasting satisfaction with your installation process.Troubleshooting Common Installation Issues
Installing a Roman shade inside mount can be a great way to add a touch of elegance and style to your windows. However, like any DIY project, it can sometimes come with its fair share of challenges. In this section, we will address some common issues that homeowners may encounter during the installation process and provide practical solutions so that you can enjoy your Roman shades to their fullest potential.
Shade not raising or lowering properly
If you find that your Roman shade is not operating smoothly or refuses to raise or lower, don’t fret. This issue can typically be resolved with a few simple adjustments. First and foremost, check if the lift cords are properly threaded through the cord lock mechanism. Misaligned or tangled cords can impede the smooth operation of your shade. Ensure that all the cords are untangled and threaded correctly.
If you have confirmed that the lift cords are correctly installed, the next step is to examine the cord lock mechanism itself. Dust and debris can accumulate over time and cause the lock to jam. Use a clean, dry cloth to gently wipe away any dirt or debris from the mechanism. If the issue persists, you may need to lubricate the lock with a silicone-based spray. Apply the spray sparingly and operate the shade a few times to distribute the lubricant evenly.
Uneven or lopsided appearance
An uneven or lopsided appearance of your Roman shade can be frustrating, especially when you’ve painstakingly measured and installed it. Fortunately, there are a few common causes for this issue and simple remedies to restore a balanced and appealing look to your shade.
The first thing to check is whether the shade is level. Use a spirit level to determine if it’s straight horizontally and vertically. If it’s not, adjust the brackets accordingly to ensure that the shade hangs perfectly level. Occasionally, the mounting surface itself may be uneven, requiring shimming to achieve a level installation.
In some cases, the uneven appearance may be due to an uneven distribution of weight on the shade. This can happen if the cords are not evenly tensioned. Double-check that the cords are threaded evenly through the rings and tied off securely. Adjust the tension by carefully pulling on each cord until the shade hangs evenly.
Loose or wobbly brackets
Loose or wobbly brackets not only detract from the overall aesthetic, but they can also compromise the functionality and longevity of your Roman shade. Follow these steps to ensure that your brackets are secure and stable.
- Start by checking the screws that secure the brackets to the mounting surface. If they are loose, tighten them using a screwdriver.
- If the brackets continue to wobble, consider using anchor screws for added stability. Anchor screws provide extra support by securing the brackets directly into the wall or window frame.
- Another option is to use additional brackets for larger or heavier shades. By properly spacing the brackets and distributing the weight evenly, you can prevent wobbling and ensure a secure installation.
By addressing these common installation issues, you can overcome any challenges that may arise during the installation of your Roman shades. Remember to follow the manufacturer’s instructions and take your time to ensure a proper and secure installation. Soon enough, you’ll be enjoying the beauty and functionality of your Roman shades with confidence.
Maintenance Tips For Long-Lasting Performance
Roman shades are a popular and versatile window treatment that can add both style and functionality to any room. To ensure that your Roman shades continue to look and perform their best, it’s important to perform regular maintenance. By taking a few simple steps, you can extend the lifespan of your shades and keep them looking like new for years to come.
Regular cleaning and dusting
One of the most important aspects of maintaining your Roman shades is regular cleaning and dusting. Over time, dust and debris can accumulate on the fabric or material, affecting both the appearance and performance of your shades. To prevent this, it’s recommended to dust your shade regularly using a soft cloth or vacuum attachment.
Bold important sentence: Regular cleaning and dusting is essential to keep your Roman shades looking fresh and free from dirt and grime.
If your shades are made of fabric, you can also lightly vacuum them using a brush attachment. This will help remove any loose dirt or pet hair that may have accumulated. In addition to dusting, you can also spot clean any stains or spills using a mild detergent and a clean cloth. However, be sure to test the cleaning solution on a small, inconspicuous area of the shade first to ensure it doesn’t cause any damage or discoloration.
To maintain the appearance and functionality of your Roman shades, it’s important to avoid using harsh cleaning agents or abrasive materials, as these can damage the fabric or material.
Inspecting for any damages or wear
Regularly inspecting your Roman shades for any signs of damage or wear is another key factor in maintaining their performance. Look for any frayed cords, broken slats, or loose stitching. If you notice any of these issues, it’s important to address them promptly to prevent further damage.
Bold important sentence: Regular inspections can help catch small problems early, preventing them from becoming larger issues that may require costly repairs.
In addition to the shade itself, it’s also important to check the hardware, such as the brackets or pulley system, for any signs of damage or wear. Ensure that the shade is securely attached to the window frame to prevent it from falling or becoming loose. If you’re unsure about how to inspect your Roman shades or identify any potential issues, consider consulting a professional.
Repairing or replacing components as needed
If during your inspection you find any damaged or worn components, it’s essential to repair or replace them as needed. This may involve restringing the cords, replacing broken slats, or sewing any torn fabric. By addressing these issues promptly, you can help prevent further damage and ensure that your shades continue to function properly.
Bold important sentence: Taking care of necessary repairs can help prolong the lifespan of your Roman shades, saving you time and money in the long run.
In some cases, it may be more cost-effective or practical to replace the entire shade instead of repairing individual components. This is especially true if the shade is very old or extensively damaged. When choosing a replacement shade, be sure to select one that matches your existing decor and is of high quality to ensure long-lasting performance.
In conclusion, regular maintenance is crucial to maintaining the performance and appearance of your Roman shades. By incorporating these simple tips into your routine, you can enjoy the benefits of beautiful and functional window treatments for years to come.
Frequently Asked Questions Of How To Install A Roman Shade Inside Mount
How Do You Hang Roman Shades Inside A Mount?
To hang roman shades inside a mount, follow these steps: 1. Measure the width and length of the window frame accurately. 2. Purchase shades that fit within these measurements. 3. Attach the brackets that came with the shades to the window frame.
4. Slide the headrail of the shades into the brackets until secure. 5. Test the shades by pulling the cord or using the control mechanism to ensure smooth operation.
Can A Roman Shade Be Installed As An Inside Or Outside Mount Treatment?
Yes, a roman shade can be installed as both an inside mount and an outside mount treatment.
How Do You Fit Roman Blinds Inside Recess?
To fit Roman blinds inside a recess, measure the width of the recess and deduct 1cm to ensure a proper fit. Install brackets at the top of the window frame and attach the blinds. Adjust the blinds with the control cord for desired coverage.
How Much Depth Is Needed For Inside Mount Roman Shades?
Inside mount roman shades typically require a depth of at least 2 inches to accommodate the brackets and allow for proper installation.
Conclusion
Installing a Roman shade inside mount can be a simple and rewarding project. By following the step-by-step instructions outlined in this blog post, you can effortlessly enhance the look of your windows and add privacy to your space. Remember to choose the right tools and take accurate measurements for a perfect fit.
With a little bit of patience and attention to detail, you’ll have your Roman shade installed in no time. Happy decorating!

