How to Install a Return Air Vent?
To install a return air vent, locate a suitable spot on the wall or ceiling, mark the dimensions, cut an opening, attach the vent cover, and secure it in place with screws. Installing a return air vent is a straightforward process that helps improve airflow in your home.
A return air vent allows air to flow back to the heating or cooling system for effective circulation. By installing a return air vent, you can enhance the overall efficiency of your HVAC system. This guide will provide you with step-by-step instructions on how to install a return air vent, ensuring proper air distribution and optimal functioning of your heating and cooling system.
Importance Of Return Air Vents
The role of return air vents in HVAC systems is vital, as they serve the purpose of allowing air to flow back to the heating and cooling system for conditioning. Return air vents help maintain a balanced airflow by ensuring that an equal amount of air is supplied and returned, promoting efficient operation of the HVAC system.
Role of Return Air Vents in HVAC Systems
In an HVAC system, return air vents play a crucial role in maintaining proper air circulation. These vents are responsible for drawing indoor air, including dust, pollutants, and allergens, back into the system where it can be filtered, conditioned, and redistributed throughout the space. By capturing the return air, the system can maintain a healthy balance of fresh air and efficiently regulate the indoor temperature.

Why Proper Installation is Necessary for Optimal System Performance
Proper installation of return air vents is essential to ensure the optimal performance of the HVAC system. Incorrect or inadequate installation can lead to several issues, such as reduced airflow, increased energy consumption, uneven temperature distribution, and diminished air quality.
Here are some key reasons why proper installation is necessary:
- Preventing air leakage: A well-installed return air vent prevents air from leaking through gaps or cracks in the system. This ensures that the air being drawn back into the system is from the designated return air pathway, promoting efficient airflow.
- Maximizing system efficiency: Proper installation ensures that the system operates at its highest efficiency level, allowing it to heat or cool the indoor space effectively. This leads to energy savings and lower utility bills over time.
- Improving indoor air quality: When return air vents are correctly installed, they effectively capture and filter out contaminants present in the indoor air. This helps maintain a healthier indoor environment by reducing allergens and pollutants, promoting better respiratory health for occupants.
- Achieving balanced airflow: Correct placement and sizing of return air vents contribute to balanced airflow throughout the space. This prevents hot or cold spots and ensures a more comfortable indoor environment.
To achieve the benefits mentioned above, it is advisable to hire a professional HVAC technician for the proper installation of return air vents. They have the knowledge and expertise to assess the specific requirements of your HVAC system and ensure that the return air vents are seamlessly integrated to maximize system performance.
Factors To Consider Before Installation
Installing a return air vent is an essential step in improving the efficiency and effectiveness of your HVAC system. However, before you begin the installation process, there are several factors that you need to consider. By assessing the existing HVAC system, determining the appropriate location for the return air vent, and calculating the required size of the vent, you can ensure a successful installation. Let’s explore these factors in more detail:
Assessing the existing HVAC system
Before installing a return air vent, it’s important to assess your existing HVAC system. This involves inspecting the layout and design of the system, as well as evaluating the airflow and distribution throughout your home. Take note of any existing vents, returns, or dampers, and consider their placement and functionality. This assessment will help you understand how the new return air vent will integrate with your current system and ensure optimal performance.
Determining the appropriate location for the return air vent
Choosing the right location for your return air vent is crucial for its effectiveness. Ideally, the vent should be installed in a central area of your home, such as a hallway or living room, where it can easily pull air from various rooms. Avoid placing the vent near potential sources of contamination, such as kitchens or bathrooms, to maintain the quality of the air being circulated. Additionally, consider any structural elements, such as walls or furniture, that may obstruct the airflow and select a location that allows for unrestricted air movement.
Calculating the required size of the vent
To ensure proper air circulation, it’s important to calculate the appropriate size of the return air vent. This calculation is based on the square footage of your home and the recommended air exchange rate for your HVAC system. A simple formula for determining the size of the vent is to multiply the square footage by a predetermined factor, typically 0.08. For example, if your home is 1,000 square feet, the return air vent size should be approximately 80 square inches. Proper sizing will ensure that the vent can effectively return the necessary amount of air to your HVAC system.
By considering these factors before installing a return air vent, you can enhance the overall performance and efficiency of your HVAC system. Assess the existing HVAC system, determine the appropriate location, and calculate the required size to optimize air circulation throughout your home. Taking these steps will not only improve the comfort of your living space but also help reduce energy consumption and lower your utility bills.
Measuring The Airflow
Measuring the airflow is an essential step in installing a return air vent. This allows you to ensure proper ventilation and maintain a comfortable environment. There are a few key factors to consider when measuring the airflow, including using an anemometer and determining the adequate airflow for the space. Let’s delve into each of these factors in detail.
Using an Anemometer to Measure Airflow
One of the most effective tools for measuring airflow is an anemometer. This device measures the speed of airflow by utilizing its rotating blades. Here’s how you can use an anemometer to measure airflow:
- Place the anemometer in the airflow path: Position the anemometer in the area where you want to measure the airflow. Make sure it is securely set in a stable position, without any obstructions blocking the airflow.
- Switch on the anemometer: Turn on the anemometer and allow it to stabilize. This ensures accurate measurements.
- Hold the anemometer properly: Hold the anemometer with a firm grip during the measurement process. This helps prevent any shaking or movement that could affect the readings.
- Measure the airflow speed: Point the anemometer’s sensor in the direction of the airflow and take the reading. The anemometer will display the airflow speed in feet per minute (FPM) or meters per second (m/s), depending on the unit of measurement selected.
Determining the Adequate Airflow for the Space
Once you have measured the airflow, it’s crucial to determine the adequate airflow for the space. This ensures that the ventilation system effectively circulates air and maintains optimal air quality. Here are a few steps you can follow:
- Consider the room size: Take into account the dimensions of the room, including the length, width, and height. These measurements will help you determine the volume of air needed to ensure adequate ventilation.
- Calculate the air changes per hour (ACH): The ACH represents the number of times the air in a room is replaced within one hour. A standard guideline is to aim for 4-6 ACH for residential spaces, while commercial spaces may require higher ACH rates depending on the specific requirements.
- Use the formula: Divide the desired ACH by 60 to determine the number of air changes per minute (ACM). Then, multiply the ACM by the room volume to find the required airflow rate in cubic feet per minute (CFM).
- Select an appropriate vent size: Based on the calculated CFM, choose a return air vent size that can handle the required airflow. Ensure the vent’s design allows for unrestricted airflow to maximize ventilation efficiency.
By accurately measuring the airflow and determining the appropriate airflow for the space, you can ensure effective ventilation and maintain a comfortable atmosphere in your living or working environment.
Choosing The Right Vent Size
When installing a return air vent, one of the most important factors to consider is the vent size. Choosing the right vent size ensures proper airflow and circulation within your HVAC system, optimizing its performance and efficiency.
Factors to consider when selecting the vent size
Before selecting a vent size, it’s crucial to take into account several factors that can influence the airflow and overall effectiveness of your HVAC system:
- Room size: The size of the room where the vent will be installed is a primary consideration. Larger rooms may require a larger vent size to ensure adequate air intake and circulation.
- Ceiling height: The height of the ceiling can impact the ventilation needs of the room. Higher ceilings may require a larger vent size to compensate for the increased volume of air.
- Number of occupants: If the room is frequently occupied by multiple individuals, the vent size should be chosen accordingly to accommodate the additional air exchange required.
- HVAC system capacity: The capacity of your HVAC system is crucial in determining the appropriate vent size. A vent that is too small for the system’s capacity can lead to restricted airflow and decreased efficiency.
Matching the vent size with the HVAC system capacity
To ensure optimal airflow and performance, the vent size should be matched with the capacity of your HVAC system. An undersized vent can strain the system, leading to reduced efficiency, while an oversized vent can cause air to pass through too quickly, resulting in inadequate air filtration.
Consulting the manufacturer’s specifications or seeking professional advice can help you determine the appropriate vent size for your HVAC system. Additionally, it’s worth considering the use of return air grilles with adjustable louvers, as they allow for fine-tuning of the airflow to better match the system’s capacity.
Remember, choosing the right vent size is crucial for the overall performance and efficiency of your HVAC system. By taking into account factors such as room size, ceiling height, number of occupants, and HVAC system capacity, you can ensure proper airflow and circulation, ultimately enhancing the comfort and air quality in your living space.
Tools And Materials Needed For Installation
Installing a return air vent is a crucial step in ensuring proper air circulation and HVAC efficiency. Before you begin, it’s important to have the necessary tools and materials at hand to make the installation process as seamless as possible. In this blog post, we will outline the key tools you’ll need for the installation and the required materials for securing and sealing the vent.
List of necessary tools for the installation process
Below is a comprehensive list of tools you should gather before starting the installation process:
| Tools |
|---|
| Power drill |
| Screwdriver (both flathead and Phillips) |
| Measuring tape |
| Hacksaw or tin snips |
| Pencil or marker |
| Level |
| Stud finder |
| Masking tape |
| Utility knife |
Required materials for securing and sealing the vent
Securing and sealing the vent properly is essential to ensure its effectiveness. Here are the materials you’ll need:
For securing the vent:
- Vent cover or grille
- Screws
- Mounting brackets or clips
For sealing the vent:
- Duct tape
- Weatherstripping
- Silicone caulk
- Sealant or adhesive suitable for your wall or ceiling material
By gathering these tools and materials beforehand, you’ll be well-prepared to install the return air vent with ease. Remember to follow proper safety precautions, such as wearing protective eyewear and gloves, throughout the installation process. With everything in place, you’ll soon enjoy improved air circulation and a more comfortable living environment.
Keep in mind that proper installation is key, but maintenance is also essential for the longevity of your return air vent. Regularly cleaning and inspecting the vent will ensure it functions optimally, allowing you to enjoy the benefits of efficient heating and cooling. Now that you have everything you need, it’s time to get started on the installation process!

Step-By-Step Installation Process
Preparing the installation area
- Identify the location where you want to install the return air vent. It should be on an interior wall near the floor, preferably in a central location.
- Clean the area to remove any dust or debris. This will ensure a clean and smooth installation.
Cutting an appropriate hole for the vent
- Measure the dimensions of the vent. Use a tape measure to determine the width and height of the vent.
- Mark the dimensions on the wall using a pencil. Make sure the marks are level and centered.
- Use a drywall saw or a reciprocating saw to cut out the marked area. Start from one corner and carefully follow the lines. Be cautious and wear protective goggles to avoid any accidents.
- Once the hole is cut, remove any excess drywall or debris from the area. This will ensure a clean and precise fit for the vent.
Mounting the vent securely on the wall
- Check if the vent has mounting brackets or screws. If it does, position them on the back of the vent accordingly.
- Hold the vent against the wall and align it with the hole. Ensure that it fits snugly and is level.
- If the vent has mounting brackets, use a screwdriver to secure them onto the surface of the wall. Make sure the vent is firmly attached and does not wobble.
- Check the vent to ensure it is securely mounted and properly aligned. Give it a gentle tug to confirm its stability.
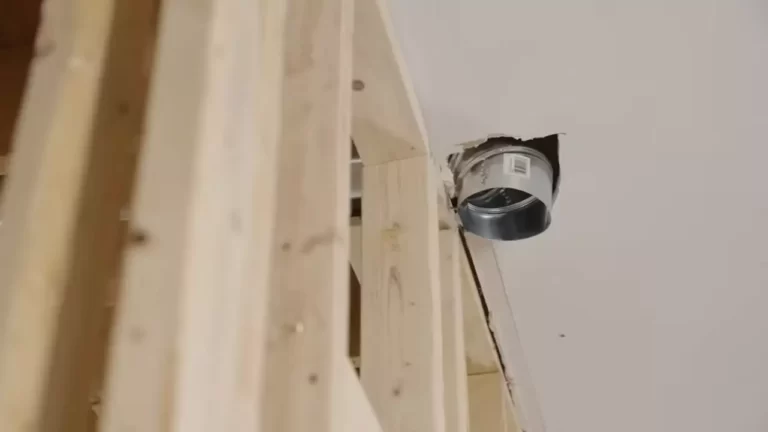
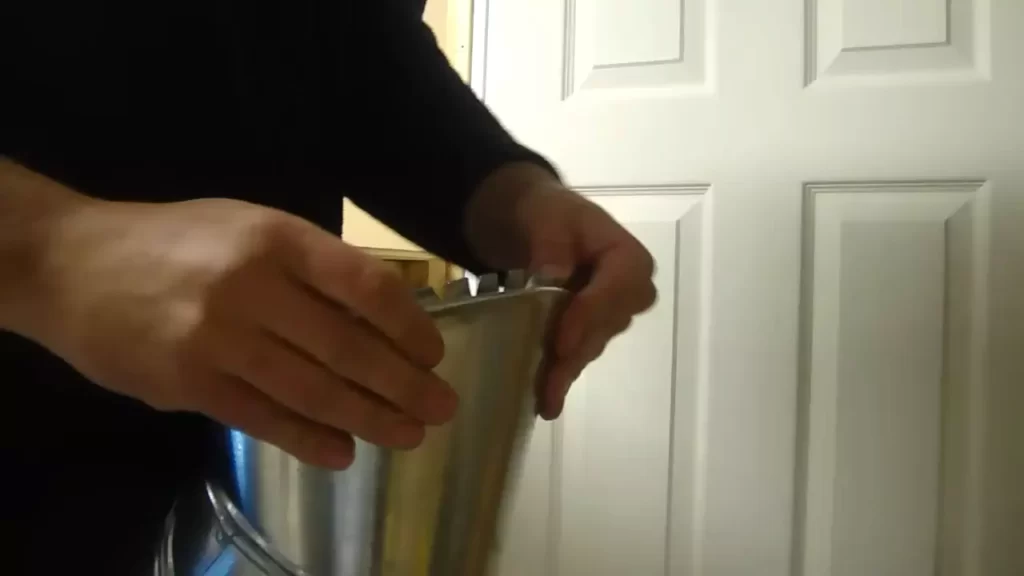
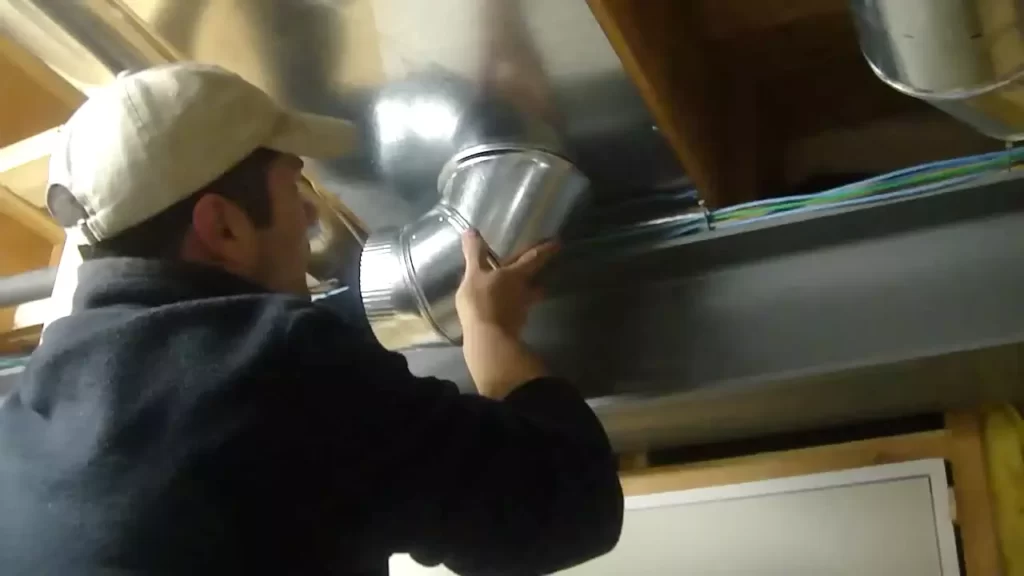
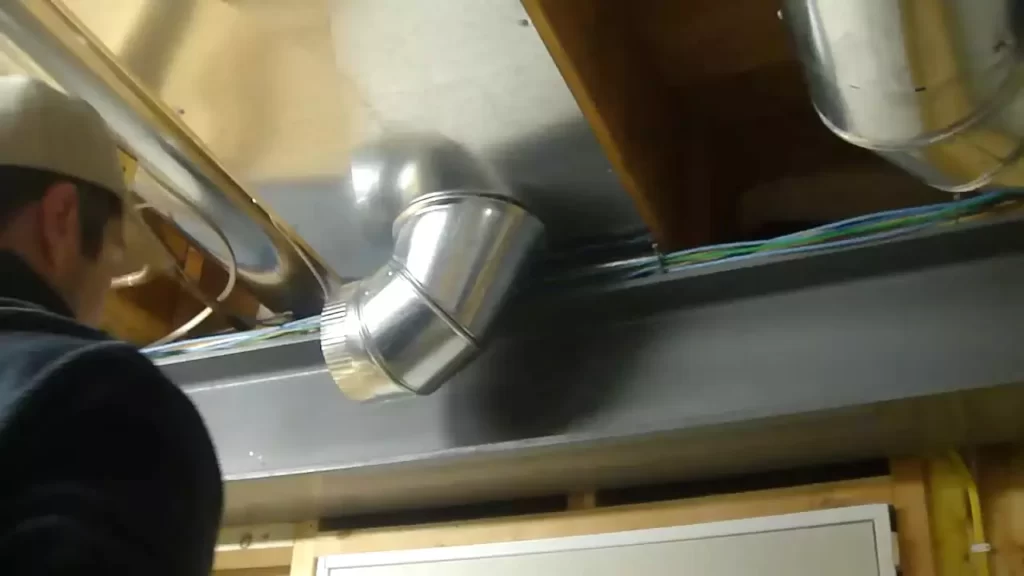
Connecting the vent to the ductwork
- Locate the ductwork behind the wall where the vent is mounted. You may need to cut a small access hole to reach it.
- Connect the vent opening to the ductwork using appropriate duct connectors or screws.
- Ensure a tight and secure connection between the vent and the ductwork to prevent any air leaks.
- Once connected, seal any gaps or joints with duct tape or mastic sealant to further enhance the airtightness.
Attaching The Grille Or Cover
Now that you have properly installed your return air vent, it’s time to add the finishing touches by attaching the grille or cover. The grille or cover not only enhances the aesthetic appeal of your vent but also serves as a protective barrier, preventing any debris or objects from entering the ductwork.
Types of grilles and covers available
When it comes to selecting a grille or cover for your return air vent, there are several options to choose from. The choice mainly depends on your personal preference and the overall style of your space. Here are some popular types:
| Type | Description |
|---|---|
| Standard Grilles | These grilles are the most common choice and come in various designs to suit different interior styles. They are durable, budget-friendly, and provide adequate airflow. |
| Decorative Grilles | If you’re looking to add a touch of elegance or uniqueness to your space, decorative grilles are the way to go. They come in ornate designs and finishes that can complement your decor. |
| Custom Grilles | For those seeking a truly personalized touch, custom grilles are an excellent option. You can choose the material, color, pattern, and size to perfectly match your style and preferences. |
| Magnetic Covers | If you prefer a more temporary solution, magnetic covers are a great choice. They easily attach to the vent through magnets and can be easily removed for cleaning or maintenance. |
Securing the grille or cover onto the vent
Once you have selected the grille or cover that suits your needs, it’s time to secure it onto the vent. Follow these steps to ensure a proper installation:
- Position the grille or cover over the opening of the return air vent, ensuring it aligns correctly.
- Using screws or clips provided with the grille or cover, attach it to the vent. Make sure to tighten the screws properly to prevent any movement or rattling.
- Double-check for any gaps or unevenness between the grille or cover and the vent. This will ensure that no airflow is restricted.
- If necessary, make any adjustments or tighten the screws further to create a secure fit.
By securely attaching the grille or cover, you can ensure optimal performance of your return air vent while maintaining a visually appealing look in your space. Take some time to choose a grille or cover that not only meets your functional needs but also adds an aesthetic touch to your room.
Sealing The Installation
Techniques for properly sealing the vent to prevent air leakage
Sealing the installation of a return air vent is crucial to maintain proper airflow and prevent air leakage. Without proper sealing, conditioned air from your HVAC system can escape, resulting in energy waste and reduced comfort levels in your home. To ensure a tight fit and prevent air leaks, there are several techniques you can employ. Here are a few effective methods:
1. Using tape: Tape is a simple yet effective solution for sealing the installation of a return air vent. Begin by placing a strip of HVAC tape along the edges of the vent to create an airtight seal. Make sure to press the tape firmly to ensure it adheres properly. Avoid using regular duct tape, as it may not provide the necessary durability or sealing properties that HVAC tape does.
2. Seals: Seals, such as foam gaskets or rubber seals, can be placed around the edges of the vent to create an airtight barrier. These seals help to fill any gaps or uneven surfaces between the vent and the surrounding walls or ceiling. To install the seal, simply apply it along the edges of the vent, pressing firmly to ensure a tight fit. Seals come in various sizes and materials, so be sure to choose one that is suitable for your specific vent installation.
3. Foam insulation: Foam insulation is an excellent option for sealing the installation of a return air vent. It provides both insulation and airtight sealing properties. Begin by measuring the size of the vent opening and cut the foam insulation to fit. Place the foam insulation around the edges of the vent, ensuring a snug fit. The foam will expand slightly, helping to fill any gaps or cracks around the vent.
Properly sealing the installation of your return air vent is essential to maximize the efficiency of your HVAC system and maintain a comfortable indoor environment. Whether you choose to utilize tape, seals, or foam insulation, ensure that you achieve a tight fit to prevent any air leakage. Taking the time to seal your vent properly will result in improved energy efficiency and lower utility costs. So, don’t overlook this crucial step in the installation process.
Testing And Adjusting The Vent
Once you have successfully installed your return air vent, it is crucial to test and adjust it to ensure optimum airflow and desired air balance. This step ensures that your HVAC system is working efficiently and effectively. In this section, we will guide you through the process of testing your vent and adjusting the damper if necessary to achieve the desired air balance.
Running the HVAC system to check for proper airflow
After installing the return air vent, it is essential to test the airflow to ensure it is working as intended. Here’s how you can do it:
1. Start by turning on your HVAC system and setting it to the desired temperature. Allow it to run for a few minutes so that the air can circulate throughout the room.
2. Stand in front of the return air vent and feel the airflow. Is it strong enough? Is it evenly distributed? Pay attention to any unusual noises or restrictions in airflow.
3. Walk around the room and check for any areas where the airflow feels weak or stagnant. Make a note of these areas as they may require some adjustments.
4. If you notice any issues with the airflow, it is time to move on to the next step – adjusting the damper.
Adjusting the damper if necessary for desired air balance
The damper plays a crucial role in controlling the airflow through the return air vent. If you find that the airflow is imbalanced or not reaching certain areas of the room adequately, adjusting the damper might solve the problem. Here’s how you can do it:
1. Locate the damper on your return air vent. It is typically a sliding or rotating mechanism that controls the airflow. Refer to the manufacturer’s instructions if you are unsure about its exact location.
2. Slowly adjust the damper to increase or decrease the airflow. Start by making small adjustments and then retest the airflow to see if there is any improvement. Repeat this process until you achieve the desired air balance.
3. Keep in mind that adjusting the damper too much can lead to unwanted noise or strain on the HVAC system. Therefore, it is essential to find the right balance that provides adequate airflow without causing any unnecessary stress.
4. Once you have adjusted the damper and achieved the desired air balance, take the time to retest the airflow throughout the room. Ensure that the airflow is consistent and evenly distributed without any weak spots.
Remember, proper testing and adjusting of your return air vent are crucial for the overall efficiency and effectiveness of your HVAC system. By following these steps, you can ensure that your system is working optimally, providing you with reliable and comfortable air circulation throughout your space.
Maintenance And Care Tips
Proper maintenance and care of your return air vent is essential to ensure optimal performance and indoor air quality in your home. By regularly cleaning, checking and replacing filters, as well as inspecting for damage or blockages, you can prevent issues and maintain a healthy environment. Here are some important tips to help you maintain and care for your return air vent.
Cleaning the vent and grille regularly
Cleaning the vent and grille regularly is crucial to prevent the accumulation of dust, dirt, and debris, which can hinder airflow and reduce the efficiency of your HVAC system. To effectively clean the vent and grille, follow these steps:
- Turn off your HVAC system to ensure safety.
- Using a vacuum cleaner with a brush attachment, gently remove any visible dust or dirt from the vent and grille.
- Alternatively, you can use a soft brush or microfiber cloth to wipe away dust and debris.
- For stubborn dirt or grime, mix a solution of mild soap and water and gently scrub the vent and grille with a soft brush or cloth.
- Rinse with clean water and ensure the vent and grille are completely dry before turning on your HVAC system.
Checking and replacing filters as needed
The air filter in your return air vent plays a crucial role in trapping dust, allergens, and other particles, preventing them from circulating in your home. Regularly checking and replacing filters is essential to maintain good indoor air quality and promote efficient airflow. Follow these steps to check and replace filters:
- Turn off your HVAC system for safety.
- Locate the air filter in your return air vent. It is often found near the furnace or air handler.
- Inspect the filter for dust and debris buildup. If it appears dirty or clogged, it’s time to replace it.
- Refer to the manufacturer’s instructions or the filter’s packaging to select and purchase the correct replacement.
- Remove the old filter and carefully insert the new one, making sure it is properly aligned.
- Secure the filter in place and ensure there are no gaps or loose edges.
- Finally, turn on your HVAC system and enjoy clean, filtered air.
Inspecting for any damage or blockages
Regular inspection of your return air vent is vital to identify any damage or blockages that can compromise its performance. Follow these steps to inspect your vent:
- Visually inspect the vent and grille for any signs of damage, such as cracks or bent fins.
- Remove any objects, obstructions, or debris that may be blocking the vent.
- Check the surrounding area for signs of moisture or water damage, as this can indicate a potential issue.
- Ensure that there are no furniture or other objects obstructing the airflow to the vent.
- If you notice any significant damage or blockages, it is recommended to consult with a professional HVAC technician for further assessment and repairs.
By following these maintenance and care tips, you can ensure that your return air vent operates efficiently, improves indoor air quality, and helps maintain a comfortable living environment in your home. Remember, a well-maintained return air vent contributes to the overall performance and longevity of your HVAC system.
Tips For Diy Installation Success
Installing a return air vent can be a rewarding and cost-effective project for any homeowner. However, to ensure success and safety, there are a few important tips to keep in mind. Following safety precautions during the installation process is crucial, and seeking professional help if unsure about any step is always a wise decision. By adhering to these guidelines, you can confidently tackle this DIY project and reap the benefits of improved air circulation and energy efficiency in your home.
Following safety precautions during the installation process
When it comes to installing a return air vent, safety should be your top priority. Here are some important safety precautions you should follow:
- Ensure that the power supply to the area where you will be working is turned off.
- Wear appropriate safety gear, such as gloves and safety glasses, to protect your hands and eyes from any potential hazards.
- If you will be working in tight or confined spaces, make sure to take breaks to avoid feeling dizzy or lightheaded.
- Use a sturdy ladder or scaffolding when working at heights to prevent falls or injuries.
Seeking professional help if unsure about any step
While installing a return air vent can be a relatively straightforward process, it’s important to recognize your limitations. If you are unsure about any step, seeking professional help is highly recommended. HVAC professionals have the knowledge and expertise to ensure a safe and proper installation. They can also provide valuable advice on the best location for the vent and any additional considerations specific to your home’s HVAC system. Investing in professional help can save you time, money, and potential headaches in the long run.
Common Mistakes To Avoid
When installing a return air vent, it’s important to ensure that everything is done correctly to avoid any issues down the line. Here are some common mistakes to avoid during the installation process:
Not considering the airflow requirements
One of the biggest mistakes people make when installing a return air vent is not considering the airflow requirements. Each HVAC system has specific requirements for the amount of air that needs to be circulated throughout the space. Failing to account for this can result in poor air quality, uneven temperature distribution, and increased energy consumption.
To avoid this mistake, make sure to carefully read the manufacturer’s instructions and consult with an HVAC professional if needed. They will be able to determine the appropriate size and location for the return air vent based on your specific system and space requirements.
Improperly sealing the vent and causing air leaks
Another common mistake is improperly sealing the vent, which can lead to air leaks. Air leaks occur when there are gaps or cracks around the vent, allowing air to escape or enter the system where it shouldn’t. This not only affects the efficiency of your HVAC system but can also result in drafts, inconsistent temperatures, and higher utility bills.
To properly seal the vent, use caulk or weatherstripping to fill any gaps or cracks around the edges. This will help create a tight seal and prevent air from escaping or entering the system. Additionally, double-check the installation to ensure that the vent is securely attached and that there are no loose or damaged parts.
| Mistake | Impact | Solution |
|---|---|---|
| Not considering airflow requirements | Poor air quality, uneven temperature distribution, increased energy consumption | Read manufacturer’s instructions, consult HVAC professional |
| Improperly sealing the vent | Air leaks, drafts, inconsistent temperatures, higher utility bills | Use caulk or weatherstripping to seal gaps, ensure secure attachment |
By avoiding these common mistakes and taking the necessary precautions, you can ensure a successful return air vent installation that optimizes your HVAC system’s performance and improves the overall comfort of your space.
Importance Of Professional Inspection
When it comes to installing a return air vent, seeking professional inspection is of utmost importance. A return air vent is an essential component of a heating, ventilation, and air conditioning (HVAC) system. It allows air to circulate from the occupied spaces back to the system for conditioning and purification.
Consequences of Improper Installation
Improper installation of a return air vent can lead to various consequences, both in terms of comfort and efficiency. Here are some potential issues that may arise:
- Insufficient airflow: A poorly installed return vent may obstruct the airflow, causing reduced efficiency and compromising the overall performance of the HVAC system. This can lead to uneven temperature distribution and discomfort in different areas of your home or office.
- Increased energy consumption: An improper installation can result in air leaks, which force the HVAC system to work harder to maintain the desired temperature. This leads to higher energy consumption and increased utility bills.
- Poor indoor air quality: When a return air vent is not installed correctly, it can allow pollutants and contaminants to bypass the filtration system. This affects the indoor air quality, leading to potential health issues, especially for individuals with respiratory conditions.
- Noise and vibration: A return vent that is not secured properly can create noise and vibration as the HVAC system operates. This not only causes annoyance but also indicates a potential inefficiency or mechanical problem with the system.
Benefits of Regular Professional HVAC Inspections
Regular professional inspections of your HVAC system have numerous advantages, some of which are:
- Enhanced system performance: Professional technicians have the expertise to identify and rectify any issues with the return air vent and other components of the HVAC system. This ensures optimal performance and efficiency, leading to improved comfort and energy savings.
- Extended equipment lifespan: By regularly inspecting and maintaining your HVAC system, professionals can detect problems early on, preventing further damage to the equipment. This extends the lifespan of the system and saves you from costly repairs or premature replacement.
- Improved indoor air quality: Professional inspections include thorough cleaning and maintenance of the return air vent and filters. This helps in removing dust, allergens, and other pollutants from the air, promoting a healthier indoor environment.
- Cost savings: A well-functioning HVAC system with a properly installed return air vent operates more efficiently, resulting in lower energy consumption and reduced utility bills. Additionally, early detection of potential issues through professional inspections can prevent major repairs or system breakdowns, saving you money in the long run.
By opting for professional inspection of your HVAC system, including the installation of a return air vent, you can ensure a properly functioning and efficient system that provides optimal comfort and indoor air quality.
Frequently Asked Questions Of How To Install A Return Air Vent
How Do I Choose The Right Size Return Air Vent?
To choose the right size return air vent, measure the opening where you’ll be installing it. Ideally, the vent should match the size of the opening to ensure optimum airflow in your HVAC system. If you’re unsure, consult a professional to help you determine the appropriate size for your specific needs.
What Tools Do I Need To Install A Return Air Vent?
To install a return air vent, you’ll need a few basic tools including a screwdriver, measuring tape, pencil, and a jigsaw or reciprocating saw. Additionally, depending on your specific installation requirements, you may also need a drill, screws, and a caulk gun for sealing purposes.
How Do I Locate The Best Position For A Return Air Vent?
To determine the best position for a return air vent, consider the layout of your space and the natural airflow. Ideally, the vent should be placed in a central area, such as a hallway or near the ceiling, to allow for efficient air circulation throughout the room.
Avoid placing it behind furniture or in areas with restricted airflow.
Can I Install A Return Air Vent Myself Or Do I Need Professional Help?
While installing a return air vent yourself is possible, it’s recommended to seek professional help, especially if you have little to no experience with HVAC systems. A professional can ensure the vent is properly sized, located, and installed, maximizing its efficiency and preventing any potential damage to your HVAC setup.
Conclusion
Installing a return air vent is a crucial step in maintaining healthy air quality in your home. By following the steps outlined in this guide, you can ensure efficient air circulation and improved HVAC system performance. From locating the right spot to measuring and cutting the vent, this blog post has provided you with a detailed walkthrough.
With the right tools and a little bit of patience, you can successfully install a return air vent and enjoy a comfortable living environment. So, what are you waiting for? Get started on improving your indoor air quality today!