How to Install a Range Hood Vent Through Ceiling?
To install a range hood vent through the ceiling, measure and mark the desired vent location, cut a hole in the ceiling, attach the vent pipe to the hood, and secure the vent pipe in the hole with screws or clamps. Then, connect the vent pipe to an exterior wall or roof vent using ducting materials.
Understanding The Importance Of Proper Ventilation
Proper ventilation is crucial in any kitchen to maintain a healthy and comfortable environment. When it comes to installing a range hood vent through the ceiling, understanding the importance of proper ventilation is paramount. In this section, we will explore the significance of ventilation in the kitchen, the benefits of having a range hood vent, and the impact poor ventilation can have on indoor air quality.
Importance of ventilation in the kitchen
Ventilation plays a vital role in the kitchen, as it helps to remove smoke, odors, and airborne pollutants that are generated during cooking. By expelling these contaminants, ventilation helps to maintain a cleaner and fresher indoor environment, significantly reducing the risk of respiratory problems and improving overall air quality. Without proper ventilation, these pollutants would linger, causing discomfort and potentially posing health risks to the occupants of the home.

Benefits of a range hood vent
A range hood vent is a kitchen appliance designed to extract and exhaust pollutants out of the kitchen. Installing a range hood vent provides numerous benefits:
- Effective smoke removal: Cooking can often produce smoke, especially when using high heat or grilling. A range hood vent efficiently captures and removes smoke, preventing it from spreading throughout the kitchen and the rest of the house.
- Odor elimination: Certain foods, like fish and spices, can leave lingering odors in the kitchen. A range hood vent helps to eliminate these odors, keeping your kitchen smelling fresh and inviting.
- Improved indoor air quality: By removing pollutants such as carbon monoxide and volatile organic compounds (VOCs), a range hood vent significantly improves indoor air quality. This is particularly important for homes with individuals who suffer from allergies or respiratory conditions.
- Reduced moisture accumulation: Cooking produces steam and moisture, which can lead to the growth of mold and mildew in the kitchen. A range hood vent helps to control humidity levels by expelling excess moisture, preventing potential mold-related issues.
The impact of poor ventilation on indoor air quality
Poor ventilation can have a detrimental effect on indoor air quality, leading to a range of health problems and discomfort. Without proper ventilation, smoke, cooking fumes, and other pollutants accumulate in the kitchen, causing respiratory issues, eye irritation, and unpleasant odors. Additionally, excess moisture due to inadequate ventilation contributes to the growth of mold and mildew, which can trigger allergies and respiratory conditions. Therefore, investing in a range hood vent and ensuring proper ventilation in the kitchen is crucial for maintaining a healthy and comfortable living environment.
Preparing For The Installation
Assessing the Kitchen Layout and Ceiling Structure
Before you begin the installation process, it is crucial to assess the kitchen layout and ceiling structure to ensure a smooth installation of your range hood vent. Proper assessment will help you determine the feasibility and potential challenges along the way.
First, consider the overall layout of your kitchen. Look for available space where the range hood vent can be installed. It’s important to take into account the proximity of other appliances and cabinets to ensure proper ventilation and functionality.
Next, carefully inspect the ceiling structure. Check if there are any obstacles such as electrical wiring, plumbing, or HVAC ductwork that may hinder the installation process. Identifying these before starting will help you plan accordingly and avoid any potential mishaps during the installation.
Choosing the Right Location for the Range Hood Vent
Once you have assessed the kitchen layout and ceiling structure, it’s time to choose the ideal location for your range hood vent. The right location will ensure efficient and effective ventilation while complementing the overall design aesthetics of your kitchen.
Consider the proximity of the range hood vent to the cooking area. Ideally, it should be placed directly above the stove or cooktop to capture and eliminate the cooking fumes and odors effectively. Placing it too far away will result in reduced ventilation efficiency.
Furthermore, take into account the ceiling height. A recommended distance between the range hood vent and the cooking surface is around 24 to 30 inches. This will prevent any headroom issues and ensure proper ventilation.
Measuring and Marking the Ceiling for Installation
Now that you have chosen the location for your range hood vent, it’s time to measure and mark the ceiling for installation. This step is crucial to ensure proper alignment and prevent any mistakes during the installation process.
Start by measuring the dimensions of your range hood vent. This will help you determine the exact placement on the ceiling. Use a measuring tape to carefully measure and mark the area where the vent will be installed.
Consider using a pencil or a washable marker to make the markings on the ceiling. This will allow you to easily erase or adjust the markings if needed. Double-check the measurements to avoid any errors and ensure accuracy.
Once you have marked the ceiling, it’s time to prepare for the actual installation process. Gather all the necessary tools and materials, and ensure you have a clear understanding of the instructions provided by the manufacturer.

Gathering The Necessary Tools And Materials
Before you begin installing a range hood vent through the ceiling, it’s important to gather all the necessary tools and materials. This will ensure a smoother and more efficient installation process. Here is a list of tools you will need:
List of tools needed for the installation process
- Power drill
- Measuring tape
- Pencil
- Saw
- Screwdriver
- Level
- Stud finder
- Drywall saw
- Wire cutters
- Adjustable wrench
- Painters tape
- Safety goggles
- Dust mask
These tools will help you throughout the installation process, ensuring accuracy and safety. Make sure you have all of them handy before getting started.
Types of range hood vents and their requirements
There are different types of range hood vents available in the market, and each type has its own specific installation requirements. Here are some common types:
| Type | Installation Requirements |
|---|---|
| Wall-mounted | Requires an exterior wall for venting. The vent can be installed directly through the wall. |
| Under-cabinet | These vents are installed below the kitchen cabinets. They require ductwork to vent the air outside. |
| Island | Island vents are installed over a kitchen island. They require ductwork to vent the air outside through the ceiling. |
Understanding the type of range hood vent you have will help you determine the specific requirements for installation.
Finding the right size and style for your kitchen
When choosing a range hood vent, it’s important to find the right size and style that complements your kitchen. Consider the following factors:
- Size: Measure the width and depth of your stovetop to determine the appropriate size for your range hood vent. It should ideally cover the entire cooking area.
- Style: Choose a style that matches the overall aesthetic of your kitchen. Whether you prefer a sleek and modern design or a more traditional look, there are various options available to suit your taste.
Once you have determined the size and style, you can proceed with the installation process, confident that you have chosen the right range hood vent for your kitchen.
Installing The Range Hood Vent
If you’re renovating your kitchen or simply upgrading your range hood, installing a range hood vent through the ceiling can be a practical and stylish choice. This method allows for better ventilation and eliminates the need for a wall-mounted vent. In this guide, we’ll walk you through the steps to properly install a range hood vent through the ceiling.
Removing the existing range hood (if applicable)
Before you can begin installing the range hood vent, you’ll need to remove the existing range hood (if there is one). Here’s how:
- Start by turning off the power to the range hood at the circuit breaker.
- Detach the range hood from the wall or cabinet it’s mounted on. This is typically done by removing screws or bolts.
- Disconnect any electrical connections and remove the range hood from the area.
Cutting a hole in the ceiling for the vent
Once the existing range hood is removed, the next step is to cut a hole in the ceiling for the vent. Follow these steps:
- Identify the ideal location for the range hood vent. This is usually determined by the location of the stove or cooktop.
- Measure and mark the exact spot on the ceiling where the vent will be installed.
- Using a stud finder, locate any joists or obstructions in the area and ensure your installation won’t be affected by them.
- Use a reciprocating saw or a jigsaw to carefully cut a hole in the ceiling according to the marked spot.

Attaching the vent pipe to the range hood and ceiling
Now that the hole in the ceiling is ready, it’s time to attach the vent pipe to both the range hood and the ceiling. Follow these steps:
| Steps to Attach Vent Pipe | Required Tools |
| 1. Position the range hood near the hole in the ceiling. | Screwdriver, pipe clamps |
| 2. Connect the vent pipe to the range hood using pipe clamps, ensuring a secure fit. | |
| 3. Insert the vent pipe into the hole in the ceiling. | |
| 4. Secure the vent pipe to the ceiling using pipe clamps. | |
| 5. Use foil tape to seal any gaps or joints in the vent pipe to prevent air leakage. | Foil tape |
By following these steps, you can successfully install a range hood vent through the ceiling. Remember to always prioritize safety and consult professional assistance if needed. Good luck with your installation!
Connecting The Range Hood To The Ventilation System
Once you have successfully installed the range hood vent through the ceiling, the next step is to connect it to the ventilation system. This crucial step ensures that the range hood effectively removes smoke, odors, and grease from your kitchen, keeping the air clean and fresh.
Understanding the ventilation system in your home
Before connecting the range hood to the ventilation system, it’s important to have a basic understanding of how the system works in your home. Most houses have either a ducted or ductless ventilation system. Ducted systems require a vent pipe that channels the air outside, while ductless systems use filters to purify the air before releasing it back into the kitchen.
Selecting the appropriate venting method for your range hood
Choosing the right venting method is crucial to ensure optimal performance of your range hood. The most common options include venting through the wall or through the roof. Additionally, you’ll need to determine the size of the vent pipe based on the range hood specifications and the distance between the hood and the exterior wall or roof. This will help ensure proper airflow and minimize any potential obstruction.
Connecting the vent pipe to the ductwork or exterior wall
Now that you have selected the appropriate venting method, it’s time to connect the vent pipe to either the ductwork or the exterior wall. Here are the steps to follow:
- Measure and cut the vent pipe to the desired length, ensuring it reaches the exterior wall or roof where it will be connected.
- Attach one end of the vent pipe to the exhaust port of the range hood. Make sure to secure it tightly with the provided clamps or connectors.
- If connecting to the ductwork, insert the other end of the vent pipe into the appropriate opening in the ductwork. Again, secure it tightly to prevent any air leaks.
- If venting through an exterior wall, create a hole of the appropriate size and position it to align with the end of the vent pipe. Secure the vent pipe to the wall using brackets or screws to keep it in place.
- Apply silicone or weatherproof sealant around the joint where the vent pipe meets the ductwork or exterior wall. This will help prevent any air leakage.
Once the vent pipe is securely connected, turn on the range hood and check for any air leaks or unusual noises. Adjust the connections if necessary. It’s also a good idea to regularly clean and maintain the venting system to ensure its efficiency and longevity.
By following these steps, you can successfully connect your range hood to the ventilation system in your home, allowing it to effectively remove smoke, odors, and grease from your kitchen. This not only improves air quality but also keeps your kitchen clean and fresh while cooking.
Securing And Testing The Range Hood Vent
Once you have successfully cut the hole for the range hood vent through the ceiling and connected the vent pipe, the next step is to secure the vent and test its functionality. These crucial steps ensure that the range hood works efficiently and effectively, extracting smoke, steam, and odors from your kitchen.
Ensuring a proper seal around the vent pipe
Before securing the range hood vent, it is essential to ensure a proper seal around the vent pipe. A secure seal prevents any air leakage and maintains the flow of air through the hood.
You can achieve a tight seal by using metal foil tape or duct sealant. Apply the tape or sealant around the joint where the vent pipe meets the range hood and the ceiling. Make sure to cover any gaps or openings to eliminate any potential air leaks.
To further ensure a proper seal, you can also use a silicone caulking gun to seal the joint between the range hood and the ceiling. Apply a bead of silicone caulk around the joint to create an airtight seal.

Securing the range hood to the ceiling
After ensuring a proper seal, it’s time to secure the range hood to the ceiling. This step ensures that the vent stays in place and doesn’t sag or become loose over time.
- First, locate the mounting brackets or screw holes on the range hood. These are usually situated at the top and back of the hood.
- Position the range hood under the vent opening in the ceiling and align the mounting brackets or holes with the corresponding holes in the ceiling.
- Insert screws or bolts through the holes and tighten them securely with a screwdriver or a drill. Ensure that the range hood is firmly attached to the ceiling.
It is important to follow the manufacturer’s instructions for securing the range hood, as different models may have specific mounting requirements. Refer to the installation manual or guide provided with your range hood for detailed instructions.
Testing the functionality of the range hood vent
Now that the range hood is securely in place, it’s time to test its functionality. Testing ensures that the vent effectively removes smoke, steam, and odors from your kitchen, keeping the air fresh and clean.
- Turn on the range hood fan and check if it operates smoothly without any unusual noises.
- Place your hand near the vent opening to feel the airflow. It should be strong and steady, indicating that the vent is pulling air efficiently.
- Light a candle or use a smoke tester near the cooking area to see if the range hood effectively captures the smoke and exhausts it through the vent.
If you notice any issues during the testing phase, such as weak airflow or ineffective smoke capture, double-check the installation and ensure the vent pipe is properly connected. It is also recommended to clean or replace any filters inside the range hood that may be obstructing the airflow.
By ensuring a proper seal, securely mounting the range hood, and testing its functionality, you can have peace of mind knowing that your range hood vent is operating efficiently, providing a clean and healthy cooking environment in your kitchen.
Finishing Touches And Maintenance
Once you have successfully installed your range hood vent through the ceiling, it’s time to focus on the finishing touches and ongoing maintenance to ensure its optimal performance. This includes concealing the vent pipe for a seamless appearance, adding a decorative cover to the range hood vent, and regular maintenance and cleaning.
Concealing the vent pipe for a seamless appearance
To achieve a clean and seamless look, it’s important to conceal the vent pipe after installation. This not only enhances the aesthetic appeal of your kitchen but also prevents any potential damage or obstruction. Here are a few ways to achieve this:
- Use a drywall cover: Install a drywall cover to hide the vent pipe. This cover can be painted to match the color of your ceiling, blending it seamlessly into the surroundings.
- Install a decorative box: Another option is to construct a decorative box around the vent pipe. This can be made from wood or other suitable materials and can be customized to match your kitchen’s design theme.
- Utilize a ceiling panel: If you prefer a more integrated look, consider installing a ceiling panel that incorporates the vent pipe into its design. This can create a cohesive and stylish appearance.
Adding a decorative cover to the range hood vent
To enhance the visual appeal of your range hood vent, consider adding a decorative cover. This not only adds a touch of elegance to your kitchen but also helps to keep the vent clean and free from debris. Here are a few options to consider:
- Stainless steel cover: A stainless steel cover not only looks sleek and modern but is also easy to clean and maintain. It complements various kitchen styles and adds a professional touch.
- Custom-designed cover: If you want a unique and personalized touch, consider having a custom-designed cover made. This can incorporate intricate patterns or designs that match your kitchen’s decor.
- Glass cover: A glass cover can create a stylish and contemporary look. It allows for a clear view of the vent and adds a sense of openness to your kitchen.
Regular maintenance and cleaning for optimal performance
To ensure your range hood vent functions efficiently and keeps your kitchen air clean, regular maintenance and cleaning are essential. Here are a few maintenance tips to keep in mind:
- Clean the filters: Depending on the type of range hood vent you have, the filters may need to be cleaned or replaced regularly. Follow the manufacturer’s instructions for proper maintenance.
- Check for blockages: Regularly inspect the vent pipe and exterior vent for any blockages. Remove any debris or obstructions that may hinder the vent’s performance.
- Wipe down the exterior: Keep the exterior of the range hood vent clean by wiping it down with a damp cloth and mild detergent. This helps to remove grease and dirt buildup.
- Inspect the fan: Periodically check the fan for any damage or signs of wear. Clean the blades and ensure they are functioning properly.
By following these finishing touches and maintenance tips, you can ensure that your range hood vent not only looks great but also operates at its best, keeping your kitchen fresh and smoke-free.

Troubleshooting Common Installation Issues
When it comes to installing a range hood vent through the ceiling, it’s not uncommon to encounter a few hiccups along the way. Fortunately, many common installation issues can be easily troubleshooted, allowing you to ensure a smooth and efficient vent system. In this section, we will address some of the most frequent problems that arise during the installation process and provide you with practical solutions to overcome them.
Dealing with a mismatched vent pipe and range hood
If you find yourself facing a situation where the vent pipe and range hood do not align properly, don’t panic. This is a common problem that can be easily solved. Follow these steps to troubleshoot the issue:
- Measure the diameter of your range hood’s exhaust port and the vent pipe. Ensure that they are compatible and the sizes match. If the sizes do not match, you may need to purchase a new vent pipe or modify the existing one accordingly.
- Inspect the connections between the range hood and the vent pipe. Make sure they are securely attached and sealed tightly to prevent any air leaks.
- If the vent pipe is too short or too long, you may need to adjust its length. Use appropriate connectors or extenders to achieve the desired length.
Addressing leaks or condensation in the vent system
Leakage or condensation within the vent system can cause damage and reduce the effectiveness of your range hood. Follow these steps to troubleshoot leaks or condensation issues:
- Inspect all connections in the vent system, including the joints and seams. Ensure that they are properly sealed with aluminum tape or high-temperature silicone to prevent any air leakage.
- Check for any gaps or cracks in the vent pipe. If you find any, use appropriate sealants to seal them off.
- Consider adding insulation around the vent pipe to reduce condensation. Insulation can help prevent moisture buildup and minimize the possibility of leaks.
Troubleshooting electrical connections and controls
Proper electrical connections and controls are crucial for the safe and efficient operation of your range hood. If you encounter any issues with the electrical components, follow these steps to troubleshoot the problem:
- Check the power supply and ensure that it is connected correctly. Verify that there is an adequate power supply for the range hood to function properly.
- Inspect the wiring connections between the range hood and the electrical source. Make sure the connections are secure and tight.
- If your range hood has controls such as switches or buttons, check them for any signs of damage or malfunction. Replace any faulty controls to ensure proper operation.
- If the problem persists, it is advisable to seek assistance from a professional electrician to diagnose and fix any electrical issues.
Addressing these common installation issues will help you to successfully install and troubleshoot your range hood vent through the ceiling. By following these troubleshooting steps, you can ensure that your vent system is properly aligned, sealed, and connected, allowing you to enjoy a well-functioning range hood that effectively removes cooking odors and keeps your kitchen fresh and clean.
Frequently Asked Questions For How To Install A Range Hood Vent Through Ceiling
How Much Does It Cost To Install A Range Hood Vent Through The Roof?
The cost of installing a range hood vent through the roof varies, but it typically ranges from $300 to $600. Factors such as the type of hood, roof material, and labor fees can influence the final cost. Consider consulting with a professional for an accurate estimate.
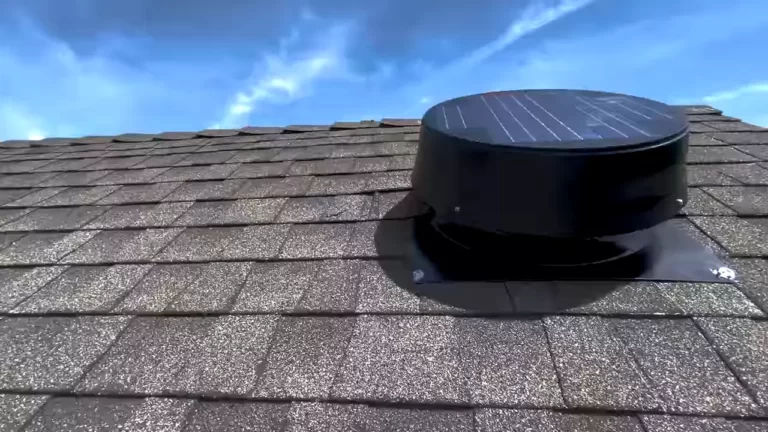
How Do You Vent A Stove Hood Through The Roof?
To vent a stove hood through the roof, follow these steps:
1. Install a roof vent and ductwork above the stove.
2. Connect the ductwork to the hood using compatible fittings.
3. Securely attach the vent to the roof, ensuring it is watertight.
4. Check for any leaks or gaps in the ductwork and fix them promptly.
5. Test the ventilation system to ensure proper function.
Can Range Hood Be Flush With Ceiling?
Yes, a range hood can be flush with the ceiling.
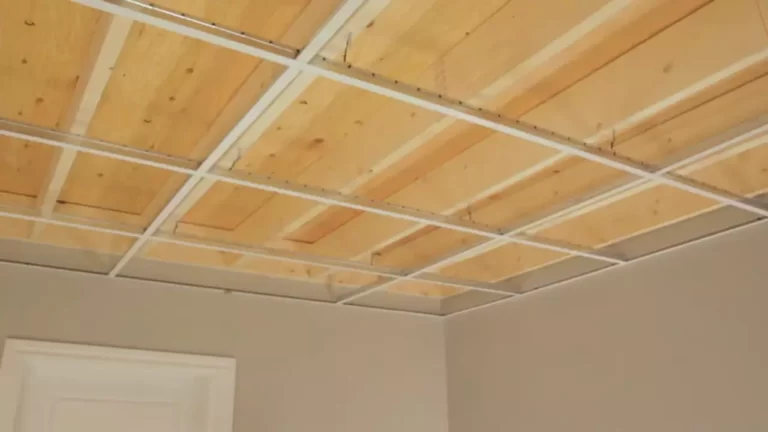
Is It OK to Vent Your Range Hood Into The Attic?
No, it is not OK to vent your range hood into the attic. Venting into the attic can lead to moisture build-up, mold growth, and damage to your home’s structure. It is essential to properly vent the range hood to the outside to ensure proper ventilation and maintain a healthy living environment.
Conclusion
Installing a range hood vent through the ceiling might seem like a daunting task, but with the right instructions and tools, you can do it successfully. By following the step-by-step guide provided in this blog post, you can ensure proper ventilation in your kitchen, which is essential for maintaining a clean and healthy environment.
So, don’t hesitate to take on this project and enjoy the benefits of a well-ventilated kitchen.