How to Install a Faux Beam?
To install a faux beam, measure and mark the desired position, attach the mounting brackets, and slide the beam onto the brackets. Then, secure the beam with screws, and finish by filling any visible gaps or seams with caulk and paint as desired.
Installing a faux beam can add a touch of elegance and character to any space. Whether you want to enhance the aesthetic appeal of your home or create a rustic ambiance, faux beams can be a cost-effective and easy-to-install option.
By following a few simple steps, you can quickly transform your ceiling into an eye-catching focal point. We will guide you through the process of installing a faux beam to help you achieve the desired look effortlessly.
Benefits Of Installing Faux Beams
Adds Elegance and Character to Any Space
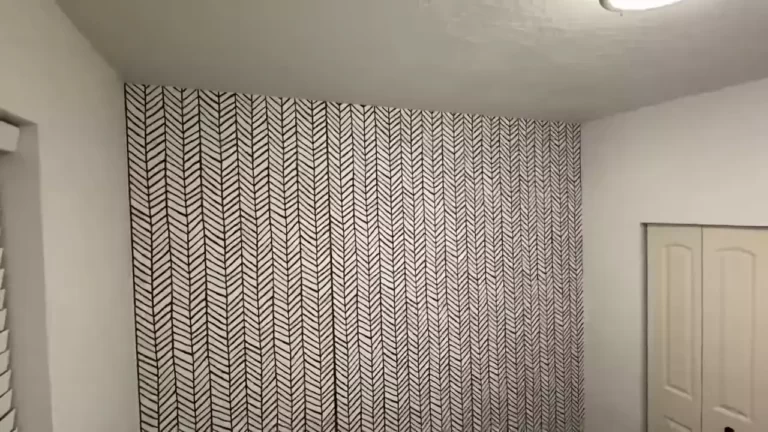
One of the key benefits of installing faux beams in your home is that they add an instant touch of elegance and character to any space. Whether you’re looking to enhance the charm of your living room, bedroom, or kitchen, faux beams can effortlessly transform the overall aesthetic and ambiance of the room.
These beams are meticulously designed to replicate the appearance of real wood, providing a rich and authentic feel. With their beautiful grains and realistic textures, faux beams not only enhance the visual appeal but also create a warm and inviting atmosphere.
Lightweight and Easy to Install
Another advantage of faux beams is their lightweight nature, which makes the installation process a breeze. Unlike real wood beams, which can be heavy and require additional structural support, faux beams are designed to be light and easy to handle.
This lightweight feature not only simplifies the installation process but also eliminates the need for complex and time-consuming construction work. With basic tools and a few simple steps, you can achieve professional-looking results without any hassle.
Cost-Effective Alternative to Real Wood Beams
When it comes to cost, faux beams provide a highly attractive alternative to real wood beams. Real wood beams can be expensive due to the cost of sourcing, cutting, and treating the wood, as well as the labor required for installation.
In contrast, faux beams offer a cost-effective solution without compromising on the aesthetic appeal. These beams are typically made from high-quality polyurethane or high-density polyurethane foam, which not only provides durability but also replicates the look and feel of genuine wood at a fraction of the cost.
Additionally, the low maintenance requirements of faux beams make them an excellent long-term investment. Unlike real wood beams, faux beams do not warp, crack, or require periodic staining or sealing. This means that you save both time and money on maintenance in the long run.
Overall, installing faux beams in your home offers a host of benefits. From adding elegance and character to any space, to their lightweight nature and cost-effectiveness, faux beams are a versatile and practical choice for homeowners looking to enhance the beauty of their living spaces.
Choosing The Right Faux Beam For Your Space
Installing a faux beam can instantly transform the look and feel of your space, adding a touch of rustic charm or architectural elegance. However, with so many options available, it’s important to choose the right faux beam that suits your space perfectly. Consider the following factors when selecting your faux beam:
Consider the size and dimensions
Before making a purchase, carefully measure the area where you plan to install the faux beam. Consider the ceiling height, width, and overall dimensions of the room. This will help you choose a faux beam that fits proportionally and seamlessly into your space. Opting for a beam that is too large or too small can disrupt the aesthetic balance, so it’s crucial to get the size right.
Select the material that best matches your decor
The material of your faux beam can greatly impact the overall look and feel of your space. Choose a material that complements your existing decor, whether it’s wood, polyurethane, or another synthetic material. If you have a traditional or rustic interior, a wooden faux beam can add warmth and authenticity. For a modern or contemporary setting, sleek polyurethane beams can provide a clean and minimalist look. Carefully consider the color, texture, and grain of the material to ensure it aligns with your desired aesthetic.
Evaluate the weight and installation requirements
When selecting a faux beam, it’s essential to evaluate both its weight and the installation requirements. Some beams may be significantly heavier than others, which could impact the structural integrity of your space. Ensure that your ceiling can support the weight of the beam you choose. Additionally, consider the installation process. Some beams are easier to install with simple brackets or adhesive, while others may require professional assistance. Assess your DIY skills and available resources before settling on a faux beam that matches your installation capabilities.
By carefully considering the size, material, weight, and installation requirements of your faux beam, you can choose the perfect addition to your space. Remember to measure accurately, select the right material for your decor, and consider any installation limitations. With these considerations in mind, you’ll be well on your way to enhancing the aesthetic appeal of your room with a stunning faux beam.

Preparing Your Space For Installation
Before you begin installing a faux beam in your space, it’s important to make sure your space is properly prepared. This involves taking some essential steps to ensure the measured beam placement, assessing the ceiling structure, and determining the appropriate height and distance between beams for aesthetic appeal. Let’s dive into each of these steps:
Measuring and marking the beam placement
The first step in preparing your space for faux beam installation is measuring and marking the beam placement. This includes measuring the length of the beam and determining the desired location on the ceiling where you want to install it. To do this, follow these simple steps:
- Measure the length of the beam: Use a measuring tape to determine the length of the beam you’ll be installing. Make sure to measure it accurately, as this will determine the overall size of your faux beam installation.
- Determine the desired beam placement: Once you’ve measured the beam length, decide where you want to install it on the ceiling. Mark this spot using a pencil or painter’s tape, ensuring the placement is visually appealing and complements the overall design of your space.
Assessing the ceiling structure and ensuring it can support the weight
Assessing the ceiling structure is a crucial step before installing a faux beam, as it ensures that the ceiling can support the weight of the beam. Here’s what you need to consider:
- Check the type of ceiling: Determine the type of ceiling you have, whether it’s drywall, wood, or another material. This will determine the installation method and any additional support needed.
- Locate ceiling joists: Use a stud finder to locate the ceiling joists. These are the structural supports that will bear the weight of the faux beam. Mark the location of each joist using a pencil or painter’s tape.
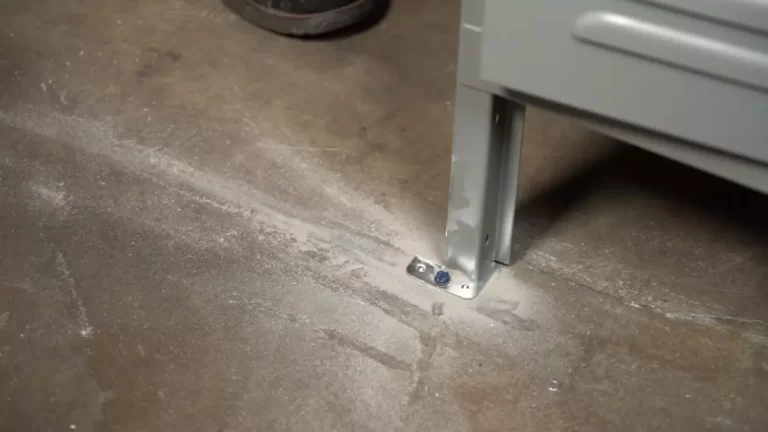
- Ensure solid attachment points: Assess the condition of the ceiling and make sure there are solid attachment points for the faux beam. These can be existing beams, strong ceiling joists, or additional support brackets if needed.
Determining the appropriate height and distance between beams for aesthetic appeal
When installing faux beams, it’s important to consider the aesthetic appeal by determining the appropriate height and distance between beams. Here’s how you can achieve a visually pleasing result:
- Consider the height of the ceiling: Take into account the height of your ceiling when determining the height of the faux beam. This will ensure a proportional and balanced design.
- Balance the distance between beams: If you are installing multiple beams, consider the distance between each beam. A general rule of thumb is to keep the spacing between beams around 4 to 5 feet, but this can vary depending on your specific preferences and the overall design of your space.
- Align beams with other architectural features: If you have existing architectural features, such as windows or door frames, align the beams with these elements for a cohesive and harmonious look.
By following these steps and taking the time to properly prepare your space for faux beam installation, you’ll ensure a seamless and visually appealing result that enhances the overall design of your space.

Gathering The Necessary Tools And Materials
Before installing a faux beam in your home, it’s important to gather all the necessary tools and materials. These items will ensure a smooth installation process and a secure finished product. Here’s a breakdown of what you’ll need:
Faux Beams
The first item on your list is, of course, the faux beams themselves. These beams are designed to mimic the look of real wood while being lightweight and easy to work with. They come in various styles, sizes, and colors, so choose the one that suits your home’s aesthetic best.
Adhesive and Screws
Next, you’ll need adhesive and screws to secure the faux beams in place. The adhesive will provide additional support and ensure that the beams stay firmly attached to the ceiling or wall. Make sure to choose an adhesive that is compatible with your specific faux beams and the surface you’re working with. Additionally, screws will be necessary for added stability and peace of mind.
Level, Tape Measure, and Pencil
To ensure that your faux beams are installed straight and level, you’ll need a level, tape measure, and pencil. The level will help you make sure that the beams are aligned correctly, while the tape measure and pencil will be used to mark the appropriate spots for installation. Taking accurate measurements and marking positions will be crucial in achieving a professional-looking end result.
Ladder or Scaffolding
If you have high ceilings or are planning to install faux beams in hard-to-reach areas, having a ladder or scaffolding is essential. This will allow you to safely access these areas and work comfortably. Make sure to choose a ladder or scaffolding that provides the necessary height and stability for the job.
With these tools and materials at your disposal, you’ll be well-prepared to tackle the installation of your faux beams. In the next section, we’ll go over the step-by-step process of installing faux beams, so stay tuned!
Installing The Faux Beam
When it comes to adding character and visual appeal to your space, installing a faux beam can make a dramatic difference. Not only does it provide a rustic and charming touch, but it also adds depth and dimension to any room. If you’re ready to give your space a makeover, follow these steps on how to install a faux beam with ease.
Cleaning and Prepping the Ceiling Surface
Before you begin, it’s important to ensure that the ceiling surface is clean and free from any dust or debris. This will create a smooth and sturdy base for the faux beam to adhere to. Start by wiping down the surface with a damp cloth to remove any dirt or grime. If there’s any existing paint or finish, you may need to sand it down lightly to create a more textured surface for better adhesion.
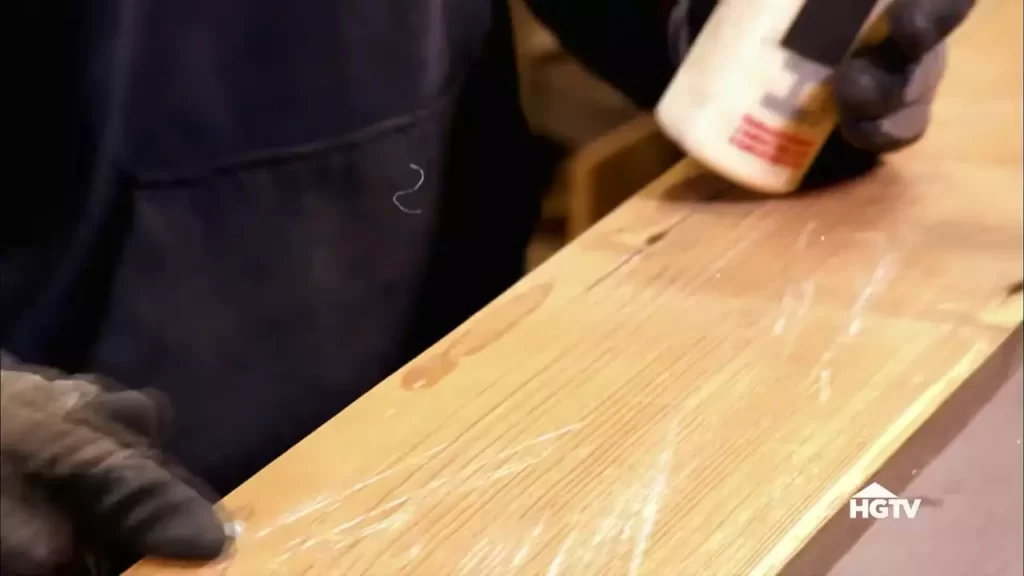
Applying Adhesive to the Back of the Beam
Once the ceiling surface is prepped, it’s time to apply adhesive to the back of the faux beam. Choose a strong adhesive that is suitable for bonding wood to the ceiling surface. Apply the adhesive generously along the length of the beam, making sure to cover the entire back surface. Using a notched trowel can help spread the adhesive evenly.
Aligning and Securing the Beam to the Marked Measurements
Now that the adhesive is applied, carefully align the faux beam to the marked measurements on the ceiling. Slowly and steadily press the beam against the ceiling surface, making sure it is centered and level. Take your time to make any necessary adjustments before the adhesive dries and sets. Use a level to ensure the beam is straight and parallel to the walls.
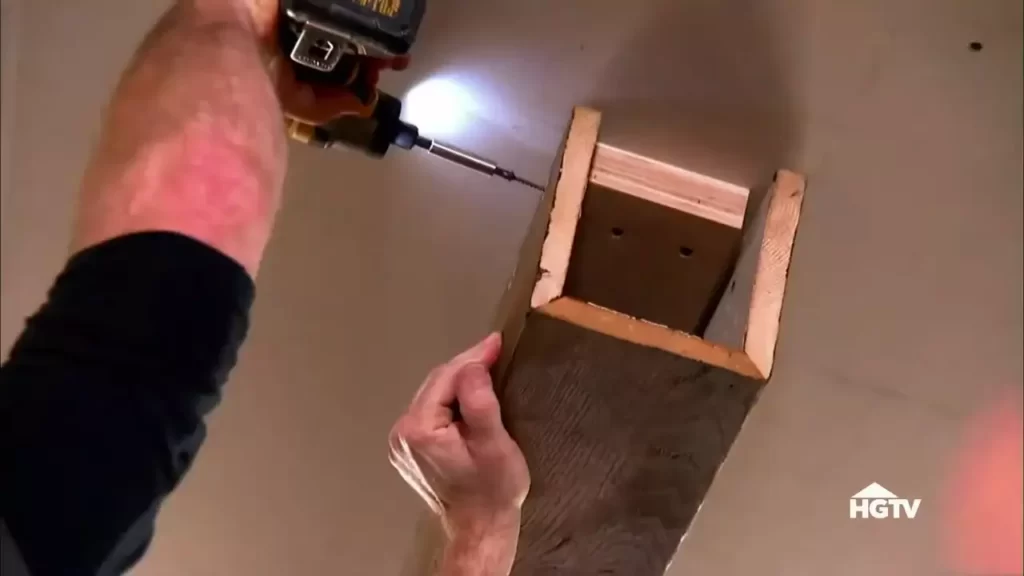
Reinforcing with Screws for Added Stability
To ensure the faux beam is securely in place and doesn’t sag over time, reinforcing it with screws is a wise step. Mark the locations where the screws will be inserted, typically at regular intervals along the beam. Pre-drill the holes to prevent splitting, then carefully insert the screws into the beam and into the ceiling surface. Be sure to tighten them just enough to hold the beam firmly in place without over-tightening and damaging the beam.
By following these steps, you can successfully install a faux beam and transform the look and feel of your space. Remember to take your time, measure accurately, and double-check your work to ensure a professional and sturdy installation.
Enhancing The Look Of The Faux Beam
Filling any gaps or seams with caulk or wood filler
Once you have installed your faux beam, it’s time to enhance its look by filling any gaps or seams. This step ensures a seamless and polished appearance. To do this, you can use caulk or wood filler that matches the color of your beam. Apply the caulk or wood filler generously along any areas where there are visible gaps or seams. Use a putty knife to smooth it out and create a flush surface. Allow it to dry completely before moving on to the next step.
Sanding the beam for a smooth finish
After filling the gaps, sanding the faux beam will give it a smooth and refined finish. Start by using a sanding block or sandpaper with a medium grit. Gently sand the beam, focusing on areas where the caulk or wood filler was applied. This will help create a seamless transition between the filled gaps and the rest of the beam. Gradually switch to finer grit sandpaper for a smoother finish. Remember to dust off any debris or particles before proceeding to the next step of finishing.
Painting or staining the beam to match your desired aesthetic
Now that you have filled the gaps and sanded the beam, it’s time to add the final touch by painting or staining it. This step allows you to customize the beam’s appearance to match your desired aesthetic. Choose a paint color or stain that complements your existing decor or personal style. Before applying any paint or stain, ensure that the beam is clean and free of dust. Apply the chosen paint or stain evenly, using a brush or roller, following the manufacturer’s instructions. You may need to apply multiple coats for the best results. Allow the paint or stain to dry completely between coats.
In conclusion, enhancing the look of your faux beam involves filling any gaps or seams with caulk or wood filler, sanding the beam for a smooth finish, and painting or staining it to match your desired aesthetic. Following these steps will help transform your faux beam into a stunning focal point that adds character and charm to your space.
Maintenance And Care For Faux Beams
Once you have successfully installed your faux beams, it is essential to properly maintain and care for them to ensure they retain their beauty and functionality for years to come. Regular dusting, periodic inspections, and timely repairs or replacements are key to keeping your faux beams in top condition.
Regular dusting to remove dirt and debris
One of the most important steps in maintaining your faux beams is regular dusting to remove accumulated dirt and debris. Dust can accumulate on the surface of the beams over time, making them appear dull and less appealing. To keep your beams looking their best, use a soft microfiber cloth or a feather duster to remove dust from the surface gently. Avoid using any harsh chemicals or abrasive materials that could potentially damage the faux beam’s finish.

Periodic inspection for any signs of damage or wear
It is crucial to perform periodic inspections to check for any signs of damage or wear on your faux beams. Inspecting the beams regularly allows you to detect early signs of deterioration or issues that may require immediate attention. Look for cracks, chips, or discoloration on the beams’ surface, as these can be indicators of underlying damage. Additionally, inspect the attachment points, ensuring that the beams are securely fastened to the ceiling or wall.
Repairing or replacing damaged beams as needed
If during your inspection, you discover any damaged or worn-out faux beams, it is essential to take prompt action. Depending on the extent of the damage, you can either repair the beams or consider replacing them altogether. For minor cracks or chips, you can use a wood filler or color-matched caulk to fill in the damaged areas. Smooth out the surface and blend in the repaired section with the surrounding beam. However, if the damage is severe or beyond repair, it is advisable to replace the beam to maintain the aesthetic appeal and structural integrity of your faux beam installation.
Remember, the maintenance and care you provide for your faux beams significantly contribute to their longevity and overall appearance. By incorporating regular dusting, periodic inspections, and timely repairs or replacements, you can ensure that your faux beams continue to enhance the beauty of your space for years to come.
Frequently Asked Questions For How To Install A Faux Beam
How Do You Install A Faux Beam?
Installing a faux beam is a simple process that involves measuring, cutting, and securing the beam to the ceiling. First, measure and mark the desired location for the beam. Then, cut the beam to the appropriate length and attach it to the ceiling using construction adhesive and screws.
Finally, finish the beam with paint or stain to match your decor.
What Are Faux Beams Made Of?
Faux beams are typically made of high-density polyurethane or high-density foam. These materials are lightweight, durable, and easy to work with. They give the appearance of real wood beams without the weight or cost associated with traditional wood beams. Faux beams are also resistant to rot, warping, and insect damage.
Can You Install Faux Beams On Any Ceiling?
Yes, faux beams can be installed on any type of ceiling, including drywall, plaster, or wood. However, it is important to ensure that the ceiling can support the weight of the beam. If you have a suspended or dropped ceiling, additional support may be needed.
Always consult the manufacturer’s instructions or a professional installer for guidance on your specific ceiling type.
Conclusion
Installing a faux beam can transform the look of any space, adding character and sophistication. By following the step-by-step instructions provided in this guide, you can easily achieve professional-looking results. Remember to measure accurately, choose the right materials, and take your time during the installation process.
With a little patience and attention to detail, you’ll have a stunning faux beam that will surely impress your guests. So, why wait? Get started on your faux beam installation project today and enjoy the beauty it brings to your home.