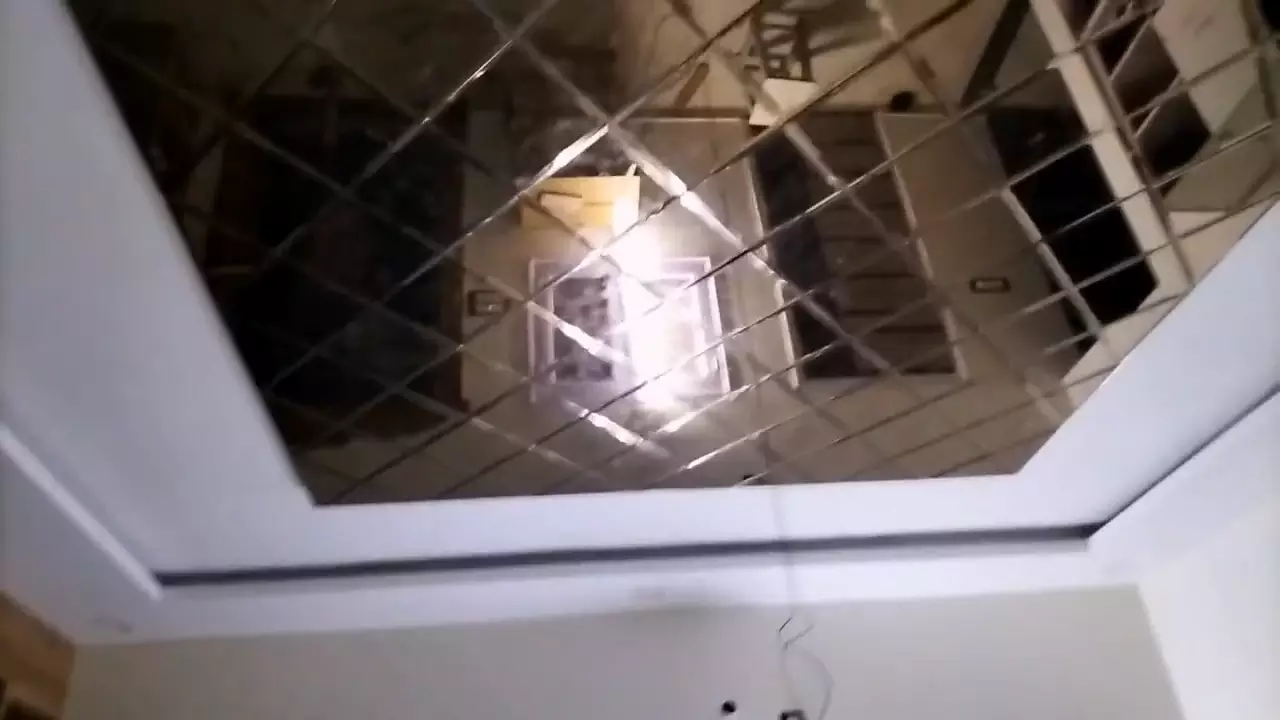
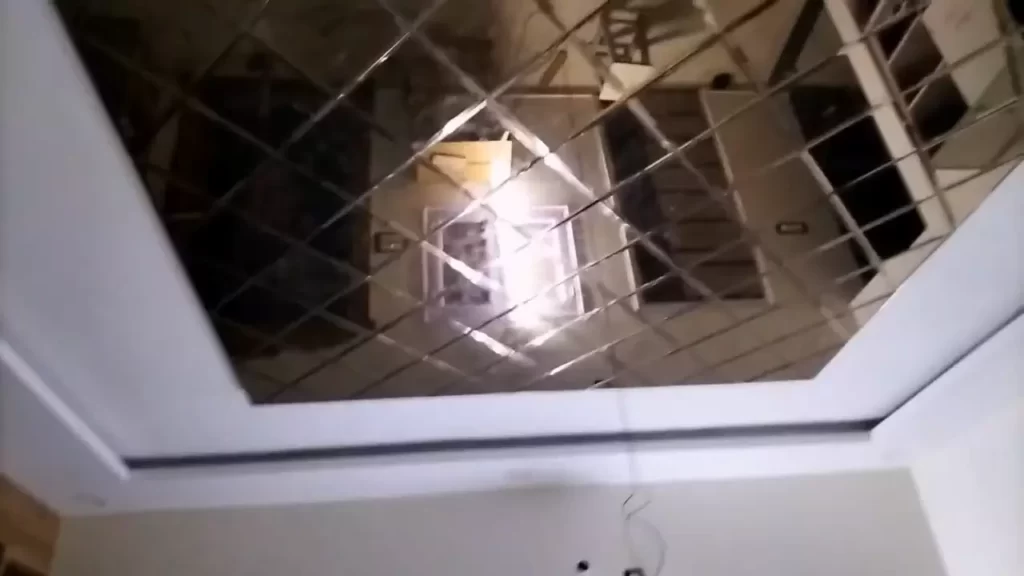
How to Install a Ceiling Mirror?
To install a ceiling mirror, measure the area, clean the ceiling, apply adhesive, and carefully place the mirror. A ceiling mirror can add a touch of elegance and style to any room.
It can create the illusion of a bigger space and reflect light, making the room appear brighter. Installing a ceiling mirror may seem like a daunting task, but with the right tools and techniques, it can be a straightforward process.
We will guide you through the steps to install a ceiling mirror in a quick and efficient manner. Whether you’re a DIY enthusiast or a professional, our tips and instructions will help you achieve a flawless installation. So, let’s get started!
Planning And Preparation
Before installing a ceiling mirror in your home, proper planning and preparation are essential. This will ensure a successful installation and help you avoid any potential issues down the line. In this section, we will discuss the key steps involved in the planning and preparation phase, including determining the right location, assessing the structural integrity of the ceiling, and measuring and marking the dimensions of the mirror. Let’s dive into each step in detail.
Determining the right location for the ceiling mirror
Deciding on the perfect location for your ceiling mirror is crucial, as it can greatly impact the overall aesthetics and functionality of the space. Consider a few factors when determining the ideal spot:
- The purpose of the mirror: Are you installing it in a bedroom, a gym, or a dance studio? Knowing the purpose will help you choose the right location.
- Natural lighting: Take into account the natural light sources in the room to maximize its reflective properties.
- Room size and layout: Consider the dimensions and layout of the room to find a location that provides an optimal view and complements the existing decor.
By carefully considering these factors, you can choose a location that not only enhances the visual appeal but also serves its intended purpose effectively.
Assessing the structural integrity of the ceiling
Ensuring the structural integrity of your ceiling is vital to support the weight of the mirror and prevent any accidents. Here’s how you can assess your ceiling:
- Identify the type of ceiling: Is it drywall, plaster, or another material? Understanding the composition will help you determine the appropriate installation method.
- Inspect the ceiling for any signs of damage: Look for cracks, sagging, or water stains. If you notice any structural issues, it’s important to address them before proceeding with the installation to guarantee the mirror’s stability and safety.
- Consider professional assistance: If you’re unsure about the structural integrity or lack the necessary expertise, it’s advisable to consult a professional contractor or engineer who can provide guidance and ensure the installation is done correctly.
By carefully assessing the structural integrity, you can prevent any potential risks and ensure a secure installation for your ceiling mirror.
Measuring and marking the dimensions for the mirror
Precise measurements are key to achieving a seamless and visually pleasing installation of your ceiling mirror. Follow these steps to measure and mark the dimensions:
- Gather the necessary tools: A measuring tape, pencil, and straightedge will be essential for this step.
- Measure the length and width of the mirror: Ensure you account for any decorative border or frame.
- Mark the measurement on the ceiling: Use a pencil and straightedge to create accurate markings where the mirror will be positioned.
- Double-check the measurements: Verify the dimensions to avoid any mistakes or inaccuracies before proceeding with the installation.
By carefully measuring and marking the dimensions, you will achieve a precise fit and ensure that the mirror seamlessly integrates into its intended space.
Planning and preparation play a vital role in the successful installation of a ceiling mirror. By determining the right location, assessing the structural integrity of the ceiling, and measuring and marking the dimensions accurately, you are setting yourself up for a visually stunning and safe addition to your home. Continue reading our guide to learn more about the installation process.
Gathering The Necessary Tools And Materials
Before you embark on installing a ceiling mirror, it is important to gather all the necessary tools and materials to ensure a smooth and successful installation process. By having everything at hand, you can avoid unnecessary delays and interruptions. Here are the key tools and materials you will need:
Safety goggles and gloves
First and foremost, prioritize your safety by wearing protective gear. Safety goggles and gloves are essential to protect your eyes and hands from any potential injuries during the installation.
Stud finder
A stud finder is an indispensable tool for finding the studs or beams behind your ceiling. Locating the studs is crucial as they provide the necessary support for mounting the mirror securely. This will prevent any accidents or damage caused by a mirror that is not properly attached.
Measuring tape
Accurate measurements are essential when it comes to installing a ceiling mirror. A measuring tape will help you determine the exact dimensions and positioning of the mirror. This will ensure the mirror is centered and aligned correctly, enhancing its aesthetic appeal.
Level
For a professional and polished look, using a level is crucial. It will help you ensure that the mirror is perfectly horizontal or level. This is important to avoid any distortions or discomfort when looking into the mirror.
Screwdriver or drill
Depending on your mirror’s mounting method, you will either need a screwdriver or a drill. A screwdriver is necessary if you plan to attach the mirror using screws, while a drill will be required if you need to create holes for mounting brackets.
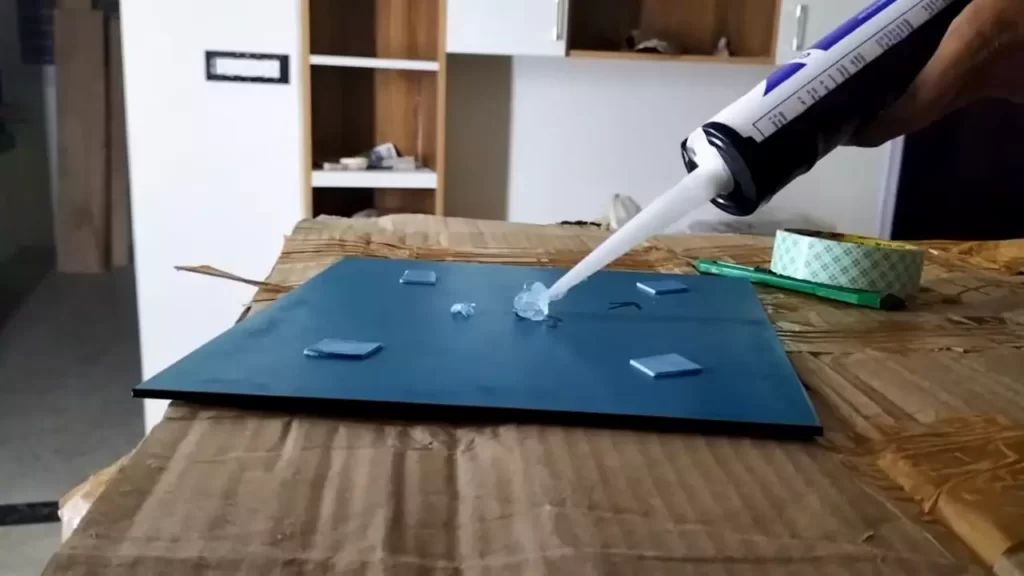
Mirror adhesive or mounting brackets
The method you choose for mounting your ceiling mirror will determine whether you need mirror adhesive or mounting brackets. Mirror adhesive is a strong and reliable option that allows you to secure the mirror directly to the ceiling. On the other hand, if you prefer a more versatile and adjustable option, mounting brackets may be the better choice.
Mirror clips or j-channels
Mirror clips or j-channels provide additional support and stability for your ceiling mirror. These accessories help distribute the weight evenly, preventing the mirror from sagging or falling. Depending on the size and weight of your mirror, you may need to use both or either one of these options.
Screws or nails
Lastly, you will need screws or nails to secure the mirror brackets or clips to the ceiling. Ensure that you choose the appropriate size and type of screws or nails that can handle the weight of your mirror and provide sufficient anchoring.
Now that you have gathered all the necessary tools and materials, you are ready to dive into the installation process. Keep in mind that following safety precautions and taking accurate measurements will greatly contribute to a successful outcome.
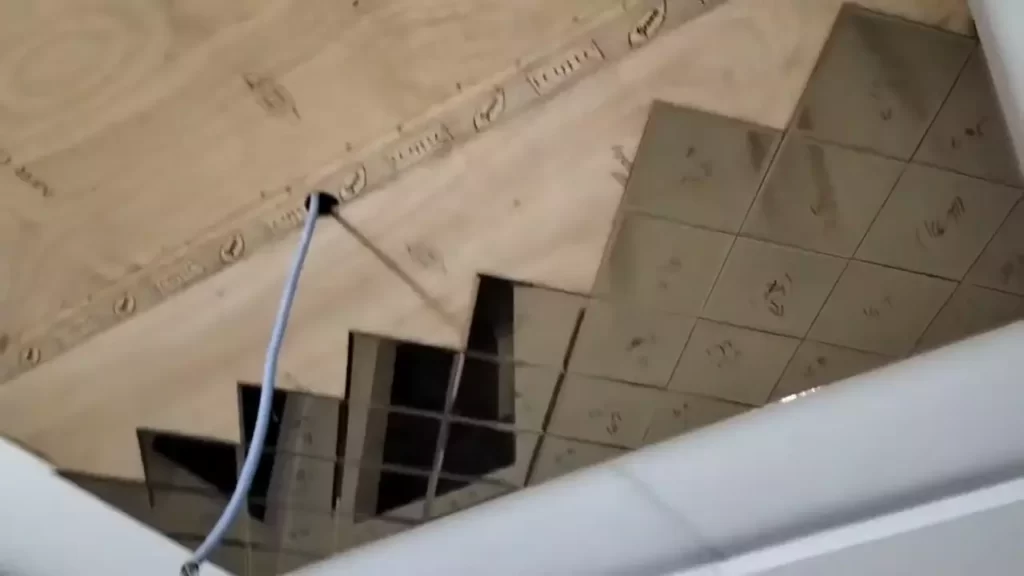
Installing The Ceiling Mirror
When it comes to adding a touch of elegance and visual appeal to your space, installing a ceiling mirror can be a great choice. Not only does it create the illusion of a larger room, but it also reflects light and adds a unique aesthetic. While the task may seem daunting, with the right tools and knowledge, you can easily install a ceiling mirror yourself. In this guide, we’ll take you through each step of the installation process, from finding the ceiling joists or studs to securing the mirror in place.
Finding the ceiling joists or studs
The first step in installing a ceiling mirror is to locate the ceiling joists or studs. These are essential for ensuring the mirror is securely attached to the ceiling. To find the joists or studs, you can use a stud finder tool or, if you don’t have one, try tapping the ceiling with your knuckles. You’ll notice a solid sound when you tap on the joist or stud.
Marking the locations of the joists or studs
Once you’ve identified the positioning of the joists or studs, it’s important to mark their locations. This will serve as a guide when attaching the mirror clips or j-channels to the ceiling. Using a pencil or chalk, make small marks on the ceiling where the joists or studs are located.
Attaching the mirror clips or j-channels to the ceiling
With the locations of the joists or studs marked, it’s time to attach the mirror clips or j-channels to the ceiling. These will provide the necessary support for the mirror. Secure the clips or j-channels by drilling pilot holes into the ceiling at the marked locations and then screw them into place. Make sure they are level and evenly spaced.
Applying the mirror adhesive or using mounting brackets
Before lifting and positioning the mirror onto the ceiling, you’ll need to prepare it for installation. Depending on the type of mirror you have, you can apply mirror adhesive to the back or use mounting brackets. Be sure to follow the manufacturer’s instructions carefully to ensure proper attachment.
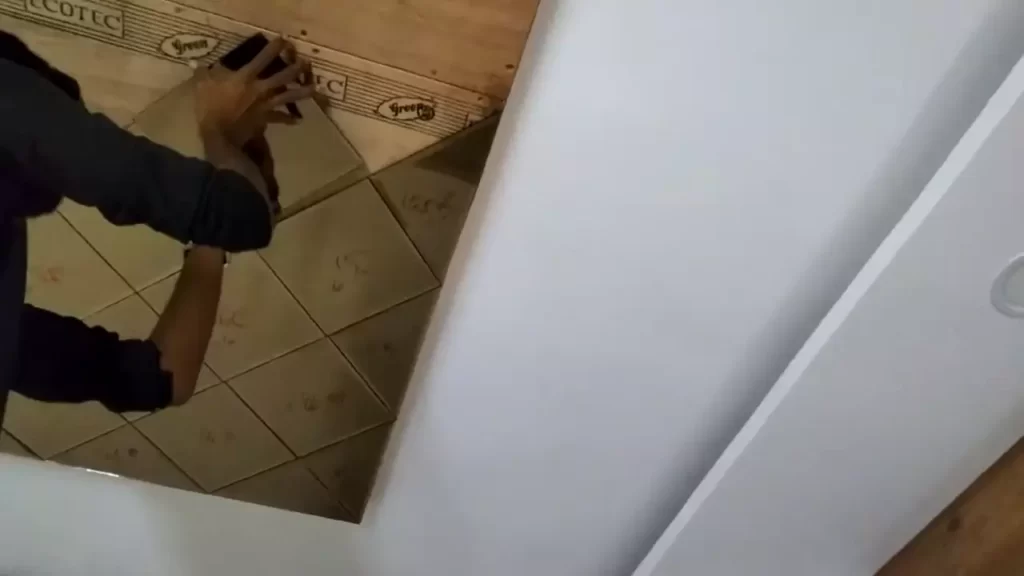
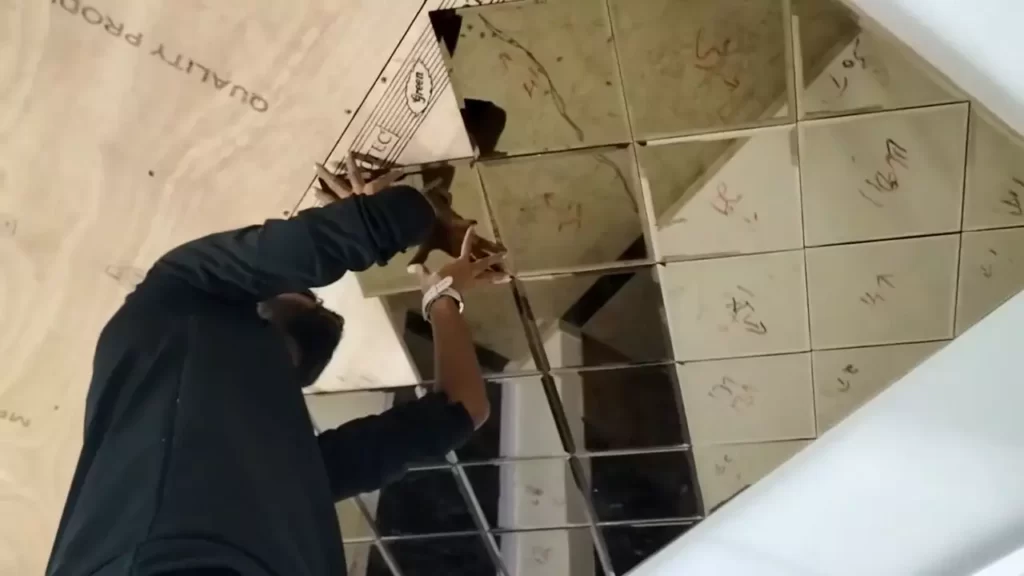
Lifting and positioning the mirror onto the ceiling
Now comes the exciting part—lifting and positioning the mirror onto the ceiling. Enlist the help of a friend or family member to assist you in carefully lifting the mirror and aligning it with the mirror clips or j-channels. Take your time to ensure it is centered and level.
Securing the mirror in place with screws or nails
Once the mirror is positioned correctly, you’ll need to secure it in place. Depending on the type of mirror clips or j-channels you used, you can attach the mirror to them using screws or nails. Be sure to use the appropriate size and length to ensure a secure hold.
Checking for level and adjusting if necessary
After securing the mirror, it’s important to check for levelness. Use a level tool to ensure the mirror is straight and adjust if necessary. Make small adjustments by loosening or tightening the screws or nails until the mirror is perfectly level.
With these steps completed, your ceiling mirror is now securely installed and ready to enhance your space with its unique allure. Take a step back and admire your handiwork, knowing that you completed the installation process with expertise and precision.
Finishing Touches
Removing any adhesive residue or excess mounting brackets
Before you can put the finishing touches on your ceiling mirror installation, it’s important to take care of any remaining adhesive residue or excess mounting brackets. You want to ensure that the surface of your mirror is clean and flawless, so the following steps will guide you through the process:
- Start by gently removing any leftover adhesive. Use a plastic scraper or putty knife to scrape off the residue, being careful not to scratch the mirror surface. Remember to work slowly and apply light pressure to avoid any damage.
- If there are any stubborn adhesive spots, you can try using a mild adhesive remover. Apply a small amount to a clean cloth and gently rub the residue until it dissolves. Then, wipe away the remnants with a damp cloth and dry the surface thoroughly.
- Next, check if there are any excess mounting brackets that were not completely covered by the mirror. Use a screwdriver or wrench to carefully remove them, ensuring not to damage the ceiling or mirror in the process.
- Once all the adhesive residue and excess brackets have been removed, take a moment to inspect the area and ensure that it is smooth and ready for the next step. Any imperfections should be addressed before proceeding.
Cleaning the mirror surface
After removing all remnants of adhesive and excess mounting brackets, it’s time to give your ceiling mirror a thorough cleaning. This step is important to get rid of any smudges, fingerprints, or other blemishes that might have accumulated during the installation process. Follow these steps for a sparkling mirror:
- Start by dusting off the surface of the mirror with a soft, lint-free cloth or a microfiber duster. This will help remove any loose dirt or debris.
- Next, prepare a solution of mild dish soap and warm water. Dip a clean cloth into the solution and wring out any excess liquid. Gently wipe the mirror surface, starting from the top and working your way down.
- For any stubborn smudges or marks, you can use a glass cleaner specifically formulated for mirrors. Spray the cleaner onto a clean cloth and lightly buff the affected area.
- Finally, take a dry cloth or paper towel and wipe the mirror surface to remove any remaining moisture. Ensure that the mirror is completely dry to prevent streaks or water spots.
Adding decorative trims or frames, if desired
The last step of finishing touches involves adding decorative trims or frames to your ceiling mirror. This step is optional but can greatly enhance the visual appeal of your mirror. Follow these guidelines to achieve a polished look:
- If you have decided to add trims or frames, carefully measure the dimensions of your mirror to ensure a proper fit.
- Select trims or frames that complement the style and decor of your space. You can choose from various materials, such as wood, metal, or even decorative molding.
- Follow the manufacturer’s instructions to attach the trims or frames securely to the mirror edges. Use appropriate adhesive or mounting hardware for the chosen materials.
- Take a step back and appreciate the transformation. The addition of trims or frames can provide an elegant and polished finish to your ceiling mirror installation.
Safety Considerations And Tips
Ensuring proper weight support for the mirror
One of the most important considerations when installing a ceiling mirror is ensuring proper weight support. Mirrors can be heavy, especially if they are large or have a thick frame. Before installing the mirror, it is essential to assess the weight and ensure that the ceiling can support it adequately.
Here are a few steps you can take:
- Identify a sturdy point on the ceiling where the mirror will be installed.
- Check the ceiling material and its load-bearing capacity. If you are unsure, consult a professional.
- Choose the appropriate mounting hardware or consult with the mirror manufacturer for their recommended installation methods.
- Install any required support brackets or hooks securely to distribute the weight of the mirror evenly.
- Double-check the weight capacity of the chosen adhesive or mounting hardware to ensure it can bear the mirror’s weight.
Following manufacturer’s instructions for adhesive use
When it comes to attaching the mirror to the ceiling, it is crucial to follow the manufacturer’s instructions for adhesive use. Manufacturers design their products with specific guidelines to ensure proper installation and safety.
Here’s how you can ensure a proper adhesive application:
- Review the manufacturer’s instructions thoroughly before starting the installation process.
- Ensure that the surface of the ceiling is clean, dry, and free from any dust or debris that could affect the adhesive’s performance.
- Apply the adhesive according to the manufacturer’s specifications, giving special attention to the recommended quantity and method of application.
- Allow the adhesive to cure for the recommended time before attaching the mirror.
- Double-check the adhesive’s drying time and follow any additional recommendations for maintenance or future adjustments.
Using caution when working on ladders or elevated surfaces
When installing a ceiling mirror, it is essential to use caution when working on ladders or elevated surfaces. Safety should always be a priority to prevent accidents and injuries.
Here are some tips to stay safe:
- Use a sturdy and stable ladder that is appropriate for the height needed. Ensure it is on an even surface.
- Ensure the ladder is tall enough to reach the ceiling comfortably without overstretching.
- Never stand on the top step or exceed the weight capacity of the ladder. It is better to use a heavier-duty ladder if needed.
- Have someone assist you when necessary, especially if the mirror is large or heavy.
- Keep your balance and avoid sudden movements or jerks that could destabilize the ladder or elevated surface.
Taking measures to prevent the mirror from falling or breaking
Lastly, preventive measures should be taken to ensure the mirror does not fall or break once it is installed. Proper precautions can help mitigate any potential risks.
Consider these preventive measures:
- Use an adhesive or mounting system specifically designed for ceiling mirrors to provide optimum strength and stability.
- Secure any loose or protruding parts of the mirror, such as frames or edges, to minimize the risk of accidents.
- Regularly inspect the mirror and its attachments for any signs of damage or wear. Replace any compromised components promptly.
- Avoid placing heavy objects or applying excessive pressure on the mirror, as it can weaken the adhesive or cause stress cracks.
- Consider using additional safety measures, such as safety cables or clear brackets, for added security.
By following these safety considerations and taking the necessary precautions, you can install a ceiling mirror with confidence, knowing that it is securely mounted and poses minimal risk. Remember that if you are unsure about any aspect of the installation, it is always best to consult a professional to ensure a safe and successful installation.
Maintenance And Care
Proper maintenance and care of your ceiling mirror are essential to ensure its longevity and optimal performance. By following a few simple steps, you can keep your mirror looking pristine and free from any damage or loosening. In this section, we will discuss the importance of regularly cleaning and dusting the mirror, inspecting for signs of damage or loosening, and how to repair or replace any broken parts.
Regularly cleaning and dusting the mirror
Regular cleaning and dusting of your ceiling mirror will help to maintain its clarity and shine. Dust and dirt can easily accumulate on the mirror’s surface over time, diminishing its reflective quality. To clean your mirror, follow these steps:
- Start by dusting the mirror with a soft, microfiber cloth. Gently wipe the surface, making sure to remove any loose dust particles.
- Next, prepare a mixture of warm water and a mild, non-abrasive glass cleaner. Dip a clean cloth into the mixture and wring out any excess liquid.
- Gently wipe the mirror’s surface in circular motions, paying attention to any smudges or stains. Avoid excessive pressure or using rough materials that may scratch the mirror.
- Once you have cleaned the entire surface, use a dry cloth to remove any remaining moisture or streaks.
It is recommended to clean your ceiling mirror at least once a month or as needed, depending on the environment in which it is installed. This regular cleaning routine will help to prevent the build-up of dirt and maintain the mirror’s optimal reflective quality.
Inspecting for any signs of damage or loosening
Regular inspections of your ceiling mirror are vital to detect any signs of damage or loosening. Over time, the mirror may be subjected to various factors that could impact its stability and safety. To inspect your mirror, follow these steps:
- Stand directly underneath the mirror and visually examine the edges and corners for any cracks, chips, or other signs of damage.
- Check for any loosening of the mirror from the ceiling. Look for gaps or movement between the mirror and its mounting brackets.
- If you notice any issues, it is important to address them promptly to prevent further damage or potential accidents. Consult with a professional if necessary.
Regular inspections will help you identify any potential problems early on and take the necessary steps to rectify them.
Repairing or replacing any damaged or broken parts
If you discover any damaged or broken parts during your inspection, it is crucial to repair or replace them promptly. Neglecting to address these issues can compromise the stability and safety of the mirror. Follow these steps to repair or replace damaged parts:
- Identify the specific parts that need repair or replacement. This could include brackets, screws, or other hardware.
- Refer to the manufacturer’s guidelines or consult with a professional for guidance on the appropriate replacement parts.
- If possible, remove the damaged parts and replace them with the new ones. Ensure the new parts are securely fastened.
- If the repair is beyond your capabilities, it is advisable to seek professional assistance to ensure proper installation and safety.
By promptly addressing any damaged or broken parts, you can extend the lifespan of your ceiling mirror and maintain its functionality.
By following these maintenance and care guidelines, you can keep your ceiling mirror in optimal condition for years to come. Remember to regularly clean and dust the mirror, inspect for any signs of damage or loosening, and repair or replace any damaged or broken parts. With proper maintenance, your ceiling mirror will continue to enhance the aesthetic appeal of your space while providing a unique decorative element.
Frequently Asked Questions For How To Install A Ceiling Mirror
How Do You Secure A Mirror On The Ceiling?
To secure a mirror on the ceiling, follow these steps:
1. Measure the size and weight of the mirror to choose the appropriate mounting hardware.
2. Locate the ceiling studs using a stud finder.
3. Use screws or heavy-duty anchors to attach a sturdy hanging wire or mounting brackets to the studs.
4. Hang the mirror using the wire or brackets, making sure it is level.
5. Double-check the stability and tighten any screws if necessary.
Is It Possible To Hang A Mirror From A Ceiling?
Yes, it is possible to hang a mirror from a ceiling. Use appropriate hardware like brackets and screws designed for ceiling installation. Ensure the weight of the mirror is supported by the ceiling structure. Hire a professional if unsure about installation safety.
Is Mirror Ceiling A Good Idea?
Yes, a mirror ceiling can be a good idea. It adds a sense of space and depth to a room, making it appear larger and brighter. It also creates a unique and stylish design feature. However, it’s important to consider the overall aesthetic and purpose of the room before deciding if a mirror ceiling is suitable.
Why Do People Put Mirrors On Ceiling?
People put mirrors on the ceiling to enhance the visual appeal of a room, create an illusion of more space, and add a touch of luxury. It can also be used for entertainment and intimacy purposes.
Conclusion
To sum up, installing a ceiling mirror is a simple and effective way to add a touch of glamour and sophistication to any space. By following the step-by-step instructions outlined in this guide, you can easily transform your room and create a visually stunning focal point.
Remember to consider safety precautions, gather the necessary tools, and take your time during the installation process. With some patience and effort, you’ll be able to enjoy the reflective beauty of a ceiling mirror in no time. Get ready to elevate your interior design game!