How to Install a Ceiling Medallion?
Install a ceiling medallion by following these steps: Measure and mark the center of the ceiling, apply adhesive to the back of the medallion, position it on the ceiling, and secure it with screws. Installing a ceiling medallion is a great way to add a touch of elegance and style to any room.
Whether you want to enhance the visual appeal of a chandelier or simply create a focal point in the ceiling, a ceiling medallion can do wonders. In this guide, we will walk you through the process of installing a ceiling medallion in a few easy steps.
With just a few tools and some basic DIY skills, you can transform any room into a visually stunning space. So, let’s dive in and discover how to install a ceiling medallion effortlessly.
Factors To Consider
When it comes to installing a ceiling medallion, there are several factors to consider that can greatly impact the end result. These factors include the size and proportions, style and design, and material and durability of the medallion. By carefully evaluating these elements, you can ensure that the medallion you choose not only enhances the overall aesthetic of your space but also serves its functional purpose effectively.

Size and Proportions
Choosing the right size and proportions of a ceiling medallion is crucial for achieving a balanced and visually pleasing look. The medallion should complement the size of the room and the height of the ceiling. If the medallion is too small, it may be overshadowed by other elements in the space, whereas a medallion that is too large can overwhelm the room. To determine the appropriate size, consider the dimensions of the ceiling, the size of the light fixture, and the overall style of the room.
Style and Design
The style and design of the ceiling medallion should harmonize with the existing décor and architectural elements of the room. Whether you prefer a traditional, ornate medallion or a modern, minimalist design, it’s essential to choose a style that complements the overall aesthetic of the space. Pay attention to details such as patterns, shapes, and textures to ensure that the medallion seamlessly integrates into the room’s design scheme.
Material and Durability
When selecting a ceiling medallion, consider the material and durability of the product. Medallions are available in a variety of materials, including wood, polyurethane, and plaster. Each material offers different advantages in terms of aesthetics, durability, and maintenance. For example, while wood medallions may provide a classic and authentic look, they require regular upkeep to maintain their condition. On the other hand, polyurethane and plaster medallions are known for their durability and ease of maintenance. Consider your specific needs and preferences when evaluating the material options.
In conclusion, choosing the right ceiling medallion involves careful consideration of the size and proportions, style and design, and material and durability. By taking these factors into account, you can ensure that the medallion not only enhances the visual appeal of your space but also stands the test of time.
Tools And Materials Needed
Before you dive into the process of installing a ceiling medallion, it’s essential to gather all the necessary tools and materials. This ensures that you have everything at your disposal and saves you time and effort. In this section, we will discuss the tools and materials you will need to get the job done.
Measuring Tape
The measuring tape plays a crucial role in determining the exact size and position of the ceiling medallion. Measure the center of the ceiling to ensure the medallion is properly aligned with the light fixture or ceiling fan.
Pencil
A pencil allows you to mark the measurements accurately on the ceiling. These marks will be your guidelines for placing the medallion in the right position.
Level
A level helps you achieve a straight and properly aligned installation. It ensures that the medallion is not slanted or crooked when attached to the ceiling.
Adhesive
An adhesive is used to secure the ceiling medallion to the ceiling. Choose a strong adhesive that is suitable for your ceiling material.
Screwdriver
A screwdriver is needed to remove any existing screws or hardware from the ceiling before installing the medallion. It may also be required to tighten or adjust screws on the medallion depending on the installation method.
Drill
In some cases, a drill is necessary to create pilot holes for screws or to install anchors if your ceiling requires extra support for the medallion.

Safety Precautions
When installing a ceiling medallion, it is crucial to prioritize safety. Taking the necessary precautions can help prevent accidents and ensure a smooth installation process. Here are some key safety measures to keep in mind:
Turning off electricity
Before you begin installing a ceiling medallion, it is essential to turn off the electricity to the room. This step will help eliminate the risk of electric shock and protect you from any potential electrical hazards. To turn off the electricity, follow these simple steps:
- Locate the circuit breaker or fuse box in your home.
- Identify the circuit that supplies power to the room where you’ll be working.
- Switch off the corresponding circuit breaker or remove the fuse.
- Double-check that the power is indeed off by testing the light switch or using a voltage tester.
By following these steps, you can ensure a safe working environment throughout the installation process.
Using proper safety gear
Equipping yourself with the right safety gear is crucial when installing a ceiling medallion. The following items are essential to protect yourself during the installation:
- Gloves: Wear sturdy work gloves to safeguard your hands from cuts, scrapes, or other injuries.
- Safety goggles: Protect your eyes from dust, debris, and potential falling objects by wearing safety goggles.
- Dust mask: If you are working in a dusty or poorly ventilated area, wearing a dust mask can prevent you from inhaling harmful particles.
- Protective clothing: Consider wearing long sleeves and pants to shield your skin from any accidental contact with sharp tools or materials.
By wearing the appropriate safety gear, you can minimize the risk of injuries and ensure a safer installation process.
Removing the Light Fixture Cover
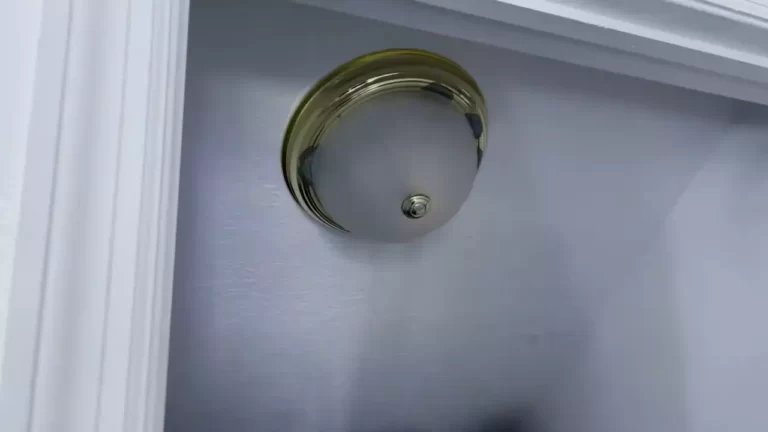
Before you can install a ceiling medallion, you must first remove the light fixture cover. This is an essential step to access the electrical wiring and ensure a safe and successful installation. Follow these simple steps to remove the light fixture cover:
1. Turning off the power
Start by turning off the power to the light fixture at the circuit breaker. This is an important safety precaution to prevent any electrical accidents during the removal process. Locate the circuit breaker that controls the power supply to the light fixture and flip the switch to the off position. Verify that the power is completely off by testing the light switch.
2. Unscrewing the cover
Once the power is turned off, you can begin unscrewing the cover of the light fixture. Most light fixtures have a cover that is held in place by screws. You may need a screwdriver or a hex key, depending on the type of screws used. Carefully remove the screws while holding the cover to prevent it from falling.
If you encounter any difficulties in loosening the screws, you can use a penetrating oil to help loosen them. Apply a few drops of the oil to the screw and wait a few minutes before attempting to unscrew it again. This will help loosen any rust or debris that may be preventing the screw from turning.
Once all the screws are removed, gently lower the cover and set it aside. Be mindful of any electrical wires that may be attached to the cover. Avoid tugging or pulling on the wires, as this can damage the electrical connections.
With the light fixture cover removed, you can proceed with the installation of the ceiling medallion. Refer to the manufacturer’s instructions for specific guidance on how to attach the medallion to your ceiling.

Marking The Center Point
Before you begin installing a ceiling medallion, it’s crucial to mark the center point on your ceiling. This step ensures that the medallion is perfectly aligned and balanced in the room.
Measuring the ceiling
The first step in marking the center point is measuring the dimensions of your ceiling. With a measuring tape, determine the length and width of the ceiling space where you plan to install the medallion. Write down these measurements for reference.
Note: If your ceiling is irregularly shaped or has unique features, it’s best to measure multiple points to ensure accuracy.
Marking the center
Once you have measured the ceiling, it’s time to mark the center point. Here are the steps to follow:
- Take the length measurement you recorded earlier and divide it by two. This will give you the midpoint of the length.
- Take the width measurement and divide it by two. This will give you the midpoint of the width.
- Note: If your ceiling is rectangular, the center will be where these two lines intersect. If your ceiling is circular or irregularly shaped, you may need to use additional measurements or tools to identify the exact center.
- Using a pencil or chalk, make a small dot at the center point you have identified. This will serve as your reference mark.
By marking the center point accurately, you can ensure that your ceiling medallion installation is symmetrical and visually appealing.
Applying The Adhesive
Once you have chosen the perfect ceiling medallion for your space, the next step is to apply the adhesive. This crucial step will ensure that the medallion stays securely in place for years to come. In this section, we will cover the process of choosing an appropriate adhesive and the steps to apply it to the back of the medallion.
Choosing an appropriate adhesive
When it comes to selecting the right adhesive for your ceiling medallion installation, it’s important to choose a product that is specifically designed for this purpose. While there are various adhesives available in the market, not all of them are suitable for this task.
One popular choice for ceiling medallion installation is a polyurethane adhesive. This type of adhesive provides excellent bonding strength and is resistant to moisture, making it perfect for areas such as the ceiling. Additionally, it is easy to work with and dries clear, ensuring a seamless installation.
Another option is a construction adhesive that is specifically designed for bonding decorative elements like ceiling medallions. These adhesives often come in tube form, which makes application more convenient.
Applying adhesive to the back of the medallion
Before applying the adhesive, ensure that the back of the medallion is clean and free from any dust or debris. This can be done by gently wiping the surface with a dry cloth.
Next, apply a generous amount of adhesive to the back of the medallion using a caulking gun or a putty knife. Spread the adhesive evenly across the surface, ensuring that every area is covered. Avoid applying too much adhesive, as it may squeeze out once the medallion is pressed against the ceiling.
Table: Steps for Applying Adhesive
| Step | Description |
|---|---|
| 1 | Clean the back of the medallion |
| 2 | Apply adhesive using a caulking gun or putty knife |
| 3 | Spread adhesive evenly |
| 4 | Avoid applying excessive adhesive |
Once the adhesive is applied, carefully position the medallion on the ceiling, aligning it with the desired location. Press firmly but gently, ensuring that the medallion adheres to the surface.
Allow the adhesive to dry completely before proceeding with any additional installation steps, such as securing the medallion with screws or nails.
By choosing the right adhesive and following the correct application process, you can ensure a successful and long-lasting installation of your ceiling medallion. Now that you know how to apply the adhesive, you’re one step closer to enhancing the elegance of your space with a beautiful ceiling medallion.

Installing The Medallion
Installing a ceiling medallion can add a touch of elegance and sophistication to any room. Not only does it serve as a decorative element, but it can also help to enhance the lighting fixtures in your space. In this section, we will guide you through the step-by-step process of installing a ceiling medallion, ensuring a seamless and professional finish.
Aligning the medallion with the center mark
Before you begin installing the medallion, it is important to ensure that it is aligned with the center of the room. To do this, follow these steps:
- Start by locating the center of the ceiling using a measuring tape or a laser level. Mark this spot with a pencil.
- Place the medallion on a flat surface and measure its diameter.
- Divide the diameter of the medallion by two to determine its radius.
- Measure the distance from the center mark on the ceiling to the nearest wall or feature.
- Subtract the radius of the medallion from the distance measured in the previous step.
- From the center mark on the ceiling, measure this new distance and mark it with a pencil.
By aligning the medallion with the center mark, you will ensure that it is perfectly positioned in the room and provides a balanced look.
Pressing the medallion onto the ceiling
Once you have aligned the medallion with the center mark, it is time to secure it to the ceiling. Follow these steps to ensure a secure and long-lasting installation:
- Apply a generous amount of construction adhesive or adhesive caulk to the back of the medallion, ensuring that it is evenly distributed.
- Hold the medallion firmly and press it onto the ceiling, starting from the center and working your way outwards.
- Apply even pressure to the medallion, making sure it adheres to the ceiling properly.
- Use a level or a measuring tape to check if the medallion is aligned horizontally and vertically.
- If necessary, make any adjustments by gently rotating or repositioning the medallion before the adhesive sets.
- Allow the adhesive to dry completely as per the manufacturer’s instructions.
Once the adhesive has dried, the medallion will be securely attached to the ceiling, ready to enhance the aesthetic appeal of your space.
Installing a ceiling medallion may seem like a daunting task, but by following these simple steps, you can achieve professional results. Remember to take your time, ensuring that the medallion is aligned properly and securely fastened. With a little bit of effort, you can enjoy the beauty and elegance that a ceiling medallion brings to your home.
Securing The Medallion
Once you have chosen the perfect ceiling medallion for your space and painted or finished it to your liking, it’s time to install it securely. Securing the medallion is an important step to ensure it stays in place and provides an eye-catching focal point in your room. In this section, we will explore two popular methods: using screws or an additional adhesives.
Using Screws or Additional Adhesive
When it comes to securing your ceiling medallion, you have the option of using screws or additional adhesive for added stability. Both methods have their advantages, so it ultimately depends on your personal preference and the characteristics of your ceiling.
Using Screws
Using screws is a popular choice as it provides a secure and long-lasting installation. Before you begin, make sure you have the necessary tools: a drill, screws (preferably ones that match the finish of your medallion), and a ladder or step stool for accessibility.
- Carefully position the medallion on the ceiling, ensuring it is centered and aligned with the light fixture or chandelier.
- With a pencil, mark the locations where the screws will go. These marks should correspond to the pre-drilled holes in the medallion.
- Using a drill bit slightly smaller than the screws, create pilot holes at the marked locations.
- Align the pre-drilled holes in the medallion with the pilot holes and attach the medallion to the ceiling by inserting the screws and tightening them with a screwdriver or drill.
- Make sure the medallion is securely attached and flush against the ceiling, with no gaps or wobbling.

Using Additional Adhesive
If you prefer not to use screws or if your ceiling material does not allow for screw attachments, you can opt for additional adhesive to secure the medallion. It’s important to choose a strong adhesive specifically designed for ceiling medallion installations.
Here’s how to install a ceiling medallion using additional adhesive:
- Apply the adhesive to the back of the medallion, following the manufacturer’s instructions.
- Position the medallion on the ceiling, aligning it with the light fixture or chandelier.
- Press the medallion firmly against the ceiling, applying even pressure to ensure proper adhesion.
- Hold the medallion in place for the recommended amount of time specified by the adhesive manufacturer to allow it to dry and set properly.
- Check the stability of the medallion to ensure it is securely attached.
Using screws or additional adhesive are both effective methods to secure a ceiling medallion. Choose the option that best suits your needs and provides the stability and aesthetic you desire. With proper installation, your ceiling medallion will add a touch of elegance and style to any room in your home.
Finishing Touches
When it comes to installing a ceiling medallion, paying attention to the finishing touches is essential to achieving a polished and professional look. These final steps will help ensure that your ceiling medallion installation is seamless and flawless. In this section, we will discuss two important aspects of the finishing touches: checking for any gaps or unevenness and cleaning up any excess adhesive.
Checking for any gaps or unevenness
After installing the ceiling medallion, it’s crucial to inspect it for any gaps or unevenness. These imperfections can detract from the overall aesthetic appeal of the room. Here’s how you can check for and address these issues:
- Step 1: Examine the edges of the medallion to ensure that they are flush against the ceiling surface. Use your hand to feel for any gaps or discrepancies.
- Step 2: If you discover any gaps or unevenness, apply a small amount of adhesive to the affected areas.
- Step 3: Gently press the medallion against the ceiling, exerting pressure to create a tight seal. This will help eliminate any gaps and ensure a seamless integration with the ceiling.
Cleaning up any excess adhesive
During the installation process, it’s not uncommon for some adhesive to squeeze out from beneath the medallion. To achieve a neat and professional finish, follow these steps to clean up any excess adhesive:
- Step 1: Allow the adhesive to dry partially. Typically, this takes about 15 to 20 minutes, but refer to the adhesive manufacturer’s recommendations for specific drying times.
- Step 2: Use a damp cloth or sponge to carefully wipe away the excess adhesive. Be cautious not to apply too much pressure, as this could damage the medallion or the ceiling paint.
- Step 3: Continue to clean the surface until all excess adhesive is removed, leaving a clean and seamless appearance.
By carefully checking for any gaps or unevenness and cleaning up any excess adhesive, you can ensure that your ceiling medallion installation looks flawless and professional. These finishing touches will add the final touch of elegance to your space and leave you with a stunning focal point that enhances the overall aesthetic appeal of the room.
Tips For A Smooth Installation
If you are looking to add a touch of elegance to your room, installing a ceiling medallion is a great option. Not only does it enhance the beauty of your chandelier or ceiling fan, but it also adds a classic touch to your overall decor. While installing a ceiling medallion may seem like a daunting task, with the right tips and tricks, you can easily achieve a smooth installation. In this article, we will provide you with some helpful advice to make your ceiling medallion installation a breeze.
Checking for any wiring obstacles
Before you start installing your ceiling medallion, it is important to check for any wiring obstacles that may be present. The last thing you want is to accidentally damage a wire or cause a short circuit. To avoid any mishaps, follow these steps:
- Turn off the power: Prior to starting any electrical work, always turn off the power to the designated area. This will ensure your safety while checking for wiring obstacles.
- Inspect the ceiling: Carefully examine your ceiling to locate any electrical wires or fixtures that may interfere with your installation process.
- Make adjustments if necessary: If you find any wiring obstacles, you may need to make adjustments to your installation plan. This may involve repositioning your medallion or seeking professional help to reroute any electrical wires.

Ensuring a level installation
One of the key factors to a successful ceiling medallion installation is ensuring a level placement. A crooked or uneven medallion can spoil the overall appearance and detract from its intended purpose. To achieve a level installation, follow these steps:
- Gather your tools: Before you begin, make sure you have a level, tape measure, pencil, and a sturdy ladder.
- Measure and mark: Use a tape measure to find the center point of your ceiling where you want to place the medallion. Make a small mark with a pencil.
- Attach the medallion: Apply an adhesive or screw the medallion onto the ceiling, ensuring it is centered on the marked spot.
- Check for level: Use a level to ensure that the medallion is perfectly horizontal or vertical, depending on your design preference. Make any necessary adjustments to achieve a level installation.
- Secure it in place: Once you are satisfied with the positioning, securely fasten the medallion to the ceiling.
By following these simple but essential tips, you can ensure a smooth and hassle-free installation of your ceiling medallion. Take your time to check for any potential wiring obstacles and make sure to achieve a level placement for that perfect finishing touch to your room’s decor. Now you can sit back, relax, and enjoy the added charm and elegance that your ceiling medallion brings.
Troubleshooting Common Issues
Installing a ceiling medallion can add a touch of elegance and charm to any room. However, like any home improvement project, it can come with its fair share of challenges. In this section, we’ll address some common issues that may arise during the installation process and provide solutions to help you troubleshoot them.
Medallion not sticking to the ceiling
If you find that your ceiling medallion is having trouble adhering properly to the ceiling, there are a few possible reasons for this. One common issue is the presence of dust or debris on the ceiling’s surface, which can prevent the adhesive from forming a strong bond. To address this problem:
- Clean the ceiling surface thoroughly, using a damp cloth or sponge to remove any dirt or dust particles.
- Ensure that the surface is completely dry before attempting to apply the adhesive.
- Apply a high-quality adhesive specifically designed for ceiling medallions, following the manufacturer’s instructions.
If, after following these steps, you are still experiencing difficulty with your medallion sticking to the ceiling, it may be worth considering using a different type of adhesive. Some adhesives work better on certain surfaces than others, so experimenting with different options may yield better results.
Gaps between the medallion and ceiling
If you notice unsightly gaps between the medallion and the ceiling, it can detract from the overall aesthetic appeal of the installation. These gaps can occur due to inconsistencies in the ceiling’s surface or improper installation techniques. Here are a few steps you can take to address this issue:
- Inspect the medallion and ceiling to identify any high or low points that may be causing the gaps.
- Use a filler or caulk to fill in the gaps, ensuring a smooth and seamless transition between the medallion and the ceiling.
- Allow the filler or caulk to dry completely before proceeding with any further steps.
In some cases, the gaps may be too large or difficult to fill with a filler or caulk. If this is the case, you may need to consider removing the medallion and making adjustments to the installation process. Taking the time to properly align and secure the medallion during the initial installation can prevent gaps from forming.
By troubleshooting these common issues during the installation process, you’ll be able to achieve a flawless and stunning look for your ceiling medallion. Remember to take the necessary time and care to ensure a proper and secure installation, as this will greatly enhance the overall beauty and longevity of your medallion.
Frequently Asked Questions On How To Install A Ceiling Medallion
What Kind Of Adhesive For Ceiling Medallion?
For ceiling medallions, it is recommended to use a strong adhesive like construction adhesive or a polyurethane-based adhesive. Both provide excellent bonding and can securely attach the medallion to the ceiling.
How Do You Cut A Hole In A Ceiling Medallion?
To cut a hole in a ceiling medallion, mark the desired location. Use a jigsaw or a hole saw to carefully cut along the marked outline. Make sure to secure the medallion while cutting and always wear protective gear.
How Do You Install A Two-Piece Ceiling Medallion?
To install a two-piece ceiling medallion, first, turn off the power to the light fixture. Then, remove the existing fixture and attach the small medallion to the ceiling using adhesive. After that, connect the electrical wires from the fixture to the ceiling wires and attach the large medallion on top.
Finally, secure the fixture and turn on the power.
How Big Of A Ceiling Medallion Do I Need?
Choose a ceiling medallion that matches the size of your room. Measure the width of the chandelier or light fixture. The diameter of the medallion should be at least one-third to one-half of the fixture’s width.
Conclusion
To sum it up, installing a ceiling medallion can be a simple and rewarding DIY project that can instantly enhance the look of any room. By following the step-by-step instructions and gathering the necessary tools, you can easily create a beautiful focal point that adds elegance and charm to your ceilings.
Remember to take accurate measurements, properly secure the medallion, and consider decorating options to personalize the design. So why wait? Start transforming your space today with a stunning ceiling medallion installation!


