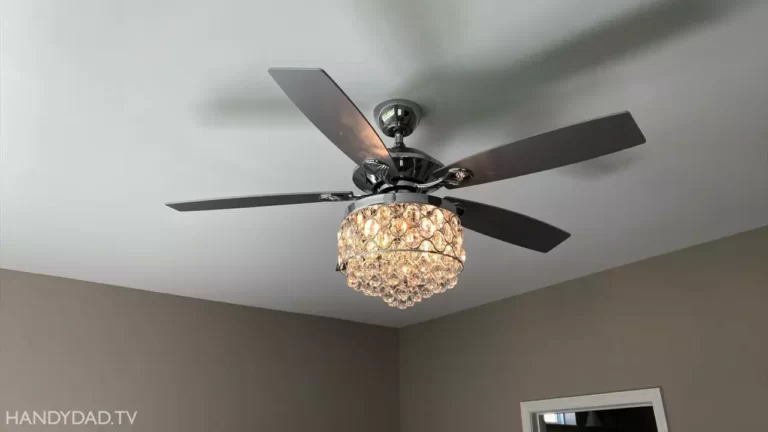
How to Install a Ceiling Fan With Light Kit?
To install a ceiling fan with a light kit, follow the manufacturer’s instructions. First, ensure electrical power is turned off, then mount the fan to the ceiling and wire it according to the instructions, attaching the light kit last.
Ceiling fans with light kits are popular additions to homes as they provide both illumination and air circulation. If you’re looking to enhance the functionality and aesthetic appeal of your living space, installing a ceiling fan with a light kit can be a great option.
Whether you’re replacing an existing ceiling fixture or starting from scratch, this guide will walk you through the step-by-step process of installing a ceiling fan with a light kit. By adhering to the manufacturer’s instructions and taking necessary safety precautions, you’ll soon be enjoying the benefits of a well-lit and properly ventilated room. Read on to learn how to install a ceiling fan with a light kit efficiently and effectively.

Factors To Consider When Selecting A Ceiling Fan With Light Kit
When it comes to installing a ceiling fan with a light kit, there are several factors that you should consider. These factors will help ensure that you make the right choice for your space, maximizing both style and functionality. Let’s explore the key factors that you should keep in mind when selecting a ceiling fan with a light kit.
Room size and ceiling height
The first factor to consider is the size of the room and the height of the ceiling. The size of the room will determine the blade span of the ceiling fan, while the ceiling height will determine the ideal mounting option.
A larger room will require a ceiling fan with a wider blade span to effectively circulate air. On the other hand, a smaller room can accommodate a ceiling fan with a narrower blade span. Additionally, the height of the ceiling will determine whether you need a flush mount or downrod mount ceiling fan.
Blade span and number of blades
The blade span of a ceiling fan refers to the diameter of the circle created by the rotating blades. This factor is closely related to the room size, as mentioned earlier. The blade span typically ranges from 36 inches to 72 inches.
Additionally, the number of blades on the ceiling fan can impact its performance and style. While the number of blades doesn’t affect the airflow significantly, it can contribute to the aesthetics. Ceiling fans with fewer blades often give a sleek and modern look, while those with more blades offer a traditional or rustic appearance.
Motor power and airflow
The motor power and airflow of a ceiling fan determine its performance in terms of air circulation. A powerful motor will provide better airflow and cooling effect. Look for ceiling fans with high CFM (Cubic Feet per Minute) ratings, as they indicate a greater volume of air movement.
Moreover, considering the energy efficiency of the motor is important to ensure that the ceiling fan doesn’t consume excessive energy. Look for ceiling fans with Energy Star certification, which indicates that the fan meets strict energy efficiency standards.
Lighting options and wattage
Another crucial factor to consider is the lighting options and wattage of the ceiling fan with a light kit. You may opt for a ceiling fan with integrated lights or one that allows you to add your preferred light bulbs or LED modules.
Ensure that the light kit provides adequate illumination for the room, and consider the wattage of the light bulbs to ensure energy efficiency. LED lights are a popular choice as they are long-lasting and consume less energy compared to traditional incandescent bulbs.
Energy efficiency and certifications
Lastly, it’s essential to consider the energy efficiency and certifications of the ceiling fan with a light kit. Look for ceiling fans that are ENERGY STAR certified, as they meet strict energy efficiency standards set by the U.S. Environmental Protection Agency.
Investing in an energy-efficient ceiling fan not only helps reduce your energy consumption but also saves you money on utility bills. Moreover, it contributes to a greener and more sustainable environment.

Popular Ceiling Fan With Light Kit Styles And Designs
When it comes to enhancing the comfort and style of your living spaces, installing a ceiling fan with a light kit is a great option. Ceiling fans not only provide a refreshing breeze during hot summer days, but they also serve as a functional and aesthetically pleasing addition to any room. With a plethora of styles and designs available, it’s easy to find a ceiling fan with a light kit that complements your decor and personal taste. Let’s explore some of the popular styles and designs that you can consider for your home.
Traditional and Classic Styles
If you’re inclined towards timeless elegance and a more traditional ambiance, a ceiling fan with a light kit in a classic style is your perfect match. These fans typically feature ornate details, such as intricate carvings, polished finishes, and decorative glass shades, reminiscent of the bygone eras. Traditional and classic ceiling fans add a touch of sophistication and refinement to your space, giving it a warm and inviting appeal.
Modern and Contemporary Designs
For those who prefer a sleek and minimalist look, modern and contemporary ceiling fans with light kits offer a perfect blend of functionality and aesthetics. These fans often showcase clean lines, smooth finishes, and innovative designs, making them an ideal choice for contemporary and urban spaces. With their understated elegance and futuristic features, modern ceiling fans effortlessly enhance the modern decor of your home.
Rustic and Farmhouse Aesthetics
If you’re a fan of the cozy and rustic farmhouse style, consider installing a ceiling fan with a light kit that reflects this charming aesthetic. Rustic and farmhouse-inspired fans often incorporate natural materials like wood, distressed finishes, and vintage-inspired elements, creating a warm and inviting atmosphere. These fans beautifully complement country-inspired decor, bringing a touch of rustic elegance to your space.
Industrial and Urban-Inspired Looks
For those who appreciate a more edgy and contemporary vibe, ceiling fans with an industrial or urban-inspired design are an excellent choice. These fans often feature metal finishes, exposed hardware, and a rugged aesthetic, giving your space an industrial loft feel. Whether you’re aiming for an urban chic look or want to add a touch of warehouse-inspired charm, an industrial or urban-inspired ceiling fan with a light kit can elevate your space to new heights.
Checking Electrical Wiring And Safety
When installing a ceiling fan with a light kit, it is crucial to check the electrical wiring and ensure safety precautions are in place. This step is essential to prevent any electrical hazards and ensure smooth operation of your new ceiling fan. In this section, we will discuss how to assess existing wiring and circuit capacity, ensuring proper grounding and safety precautions, and when to consult a licensed electrician if necessary.
Assessing Existing Wiring and Circuit Capacity
Before beginning the installation process, it is important to assess the existing wiring and circuit capacity in your home. This step ensures that your electrical system can handle the additional load from the ceiling fan and light kit. To assess the wiring and circuit capacity, follow these steps:
- Turn off the power: Start by turning off the power to the area where you plan to install the ceiling fan. This can be done by switching off the circuit breaker or removing the fuse associated with that circuit.
- Inspect the wiring: Carefully examine the wiring in the electrical box where the ceiling fan will be installed. Ensure that it is in good condition, without any frayed or damaged wires.
- Determine the circuit capacity: Check the circuit capacity by referring to the amperage rating on the circuit breaker or fuse. This will help you determine if the circuit has enough capacity to handle the ceiling fan and light kit.
Ensuring Proper Grounding and Safety Precautions
Proper grounding is essential for the safe operation of any electrical appliance, including a ceiling fan with a light kit. To ensure proper grounding and safety, consider the following:
- Check for grounding wire: Verify if there is a grounding wire present in the electrical box. This wire is typically green or copper in color.
- Connect the grounding wire: If a grounding wire is present, connect it to the grounding screw on the ceiling fan mounting bracket. This will establish a secure electrical ground.
- Test the grounding: Before turning on the power, it is crucial to test the grounding using a circuit tester. This ensures that the ceiling fan is properly grounded and eliminates the risk of electrical shocks.

Consulting a Licensed Electrician if Necessary
If you are unsure about any aspect of the electrical wiring or safety precautions, it is always recommended to consult a licensed electrician. They have the expertise to ensure that the installation is done correctly and that all safety measures are in place. It is better to be safe than sorry, so if you have any doubts, don’t hesitate to seek professional assistance.
By thoroughly checking the electrical wiring and following safety precautions, you can confidently proceed with the installation of your ceiling fan with a light kit. Taking the time to assess the existing wiring, ensure proper grounding, and consult a professional if needed will help ensure a safe and successful installation.
Gathering Tools And Materials
Installing a ceiling fan with a light kit is not as complicated as it may seem. With the right tools and materials, you can easily complete this project. Before getting started, make sure you gather all the necessary tools and materials to ensure a smooth installation process.
Screwdrivers, Pliers, and Wire Strippers
Three essential tools you’ll need for installing a ceiling fan with a light kit are screwdrivers, pliers, and wire strippers. Screwdrivers will come in handy for removing the existing light fixture or any wiring covers. Pliers will be required for bending, twisting, or cutting wires as needed. Wire strippers are essential for safely removing the insulation from wires to prepare them for connection.
Ladder or Step Stool
To reach the ceiling where the ceiling fan will be installed, you will need a ladder or step stool. Make sure the ladder or step stool is stable and secure before climbing on it to ensure your safety during the installation process.
Ceiling Fan Kit with Light Fixture
Of course, you’ll need a ceiling fan kit with a light fixture. Before purchasing one, make sure to consider the size of the room and the fan’s design to match your decor. Additionally, ensure the ceiling fan kit includes all the necessary components such as blades, mounting bracket, motor, and light fixture.
Wire Connectors and Electrical Tape
Wire connectors and electrical tape are essential for connecting and insulating wires to ensure safety. Wire connectors are used to join wires securely, while electrical tape is used to insulate the connections and prevent any accidental contact. These items are crucial for a reliable and long-lasting installation.
Mounting Hardware and Screws
When it comes to mounting the ceiling fan, you’ll need the appropriate hardware and screws. The specific mounting hardware required may vary depending on the type of ceiling in your home. Ensure the screws and mounting hardware provided with your ceiling fan kit are suitable for your ceiling type and size. Double-check that you have all the necessary hardware for a secure installation.
Now that you know the essential tools and materials required to install a ceiling fan with a light kit, it’s time to get started on the installation process. Remember to follow the manufacturer’s instructions and take all necessary safety precautions along the way. Soon enough, you’ll be enjoying the comfort and functionality of your new ceiling fan with a light kit.
Removing The Old Ceiling Fan Or Light Fixture
Switching off the power to the existing fixture
Before you begin removing the old ceiling fan or light fixture, it is crucial to ensure your safety by switching off the power. Locate the circuit breaker panel in your home and find the corresponding switch for the room where the ceiling fan is installed. Flip the switch to the “off” position to cut off the power supply to the fixture.
Detaching the fan blades and removing the canopy
Once you have confirmed that the power is off, you are now ready to remove the fan blades and canopy of the old ceiling fan. Start by unscrewing the screws holding the fan blades in place. Depending on the model, you may need a screwdriver or an Allen wrench to do this. Take caution not to damage the blades in the process. Once the blades are detached, locate the canopy cover and remove it by unscrewing the screws or twisting it counterclockwise. This will give you access to the mounting bracket and wiring.
Disconnecting wires and removing the mounting bracket
Now that you’ve taken off the canopy cover, it’s time to disconnect the wires and remove the mounting bracket. Begin by carefully separating the wire connectors holding the fan wires and the house wires together. Once the wires are disconnected, you can unscrew the mounting bracket from the electrical box using a screwdriver. Make sure to hold onto the bracket as you remove the screws to prevent it from falling.
In some cases, the mounting bracket may be attached to a metal strap or a crossbar. If so, you may need to loosen additional screws or bolts to free the bracket. Once the mounting bracket is removed, inspect the electrical box to ensure it is in good condition and can support the new ceiling fan. If there are any signs of damage, consult a professional electrician before proceeding to install the new fixture.
With the old ceiling fan or light fixture successfully removed, you are one step closer to installing your new ceiling fan with a light kit. By following these steps, you can confidently remove the old fixture and prepare your ceiling for the installation of the updated ceiling fan. Safety should always be a top priority, so remember to switch off the power and take caution when handling electrical components.

Installing The Ceiling Fan With Light Kit
Installing a ceiling fan with a light kit can provide both comfort and style to any room. Not only does it circulate the air and cool the room during warm months, but it also adds a beautiful aesthetic touch to the space. If you’re ready to enhance the functionality and ambiance of your room, follow these step-by-step instructions to successfully install your ceiling fan with a light kit.
Assembling and Preparing the Fan Components
The first step is to gather all the necessary tools and components to assemble the fan. This typically includes the fan motor, fan blades, blade irons, mounting bracket, canopy, downrod, and light kit. Before you begin, ensure that you have read the manufacturer’s instructions and safety precautions.
Now, let’s assemble the fan:
- Start by attaching the blade irons to the fan blades using the provided screws. Make sure they are securely tightened to prevent any wobbling.
- Next, attach the fan motor to the mounting bracket using the screws provided. Again, ensure they are tightened properly.
- Once the motor is securely attached, connect the downrod to the motor housing. Tighten the screws to hold it in place.
- Lastly, attach the canopy to the mounting bracket, covering the motor housing and electrical wires. Use the provided screws to secure it.
Mounting the Fan Bracket to the Ceiling Joist or Beam
The next step is to mount the fan bracket to the ceiling joist or beam. It’s important to locate the proper placement for optimal airflow.
Follow these steps to mount the fan bracket:
- Locate the ceiling joist or beam using a stud finder.
- Hold the fan bracket against the ceiling and align it with the joist or beam.
- Mark the screw holes on the ceiling using a pencil.
- Drill pilot holes into the marked spots to make it easier to screw in the bracket.
- Screw the fan bracket into place using the provided screws.
Wiring the Fan and Light Fixtures Properly
Now that the fan bracket is securely mounted, it’s time to wire the fan and light fixtures.
Follow these steps to ensure proper wiring:
- Turn off the power to the room at the circuit breaker.
- Carefully remove the existing lighting fixture, exposing the electrical box and wires.
- Identify the electrical wires from the fan and light kit, as well as the corresponding wires from the ceiling.
- Connect the matching wires together using wire nuts. Typically, this includes connecting the black (hot) wires, white (neutral) wires, and green or copper (ground) wires.
- Securely tuck the connected wires into the electrical box.
- Attach the included canopy cover to conceal the electrical connections.
Attaching the Fan Blades and Light Kit Securely
With the wiring complete, it’s time to attach the fan blades and light kit to the ceiling fan.
Follow these steps to ensure a secure attachment:
- Attach each fan blade to the blade irons using the provided screws. Ensure they are tightened securely.
- Next, install the light kit to the fan by connecting the corresponding wires and tightening the screws.
- Double-check all the screws and connections to ensure everything is secure.
Once you’ve completed these steps, you’re ready to turn the power back on and enjoy the comfort and beauty of your newly installed ceiling fan with a light kit. It’s important to keep the manufacturer’s instructions handy for any future maintenance or troubleshooting.
Testing And Fine-Tuning The Ceiling Fan With Light Kit
Once you have successfully installed your brand new ceiling fan with a light kit, it’s time to ensure that everything is in proper working order. Testing and fine-tuning the fan and light kit is crucial to optimize its performance and avoid any potential issues down the line. In this section, we will walk you through the necessary steps to restore power, check for proper operation, balance and adjust the fan blades, verify the functionality of the light kit, and ensure smooth and quiet operation.
Restoring Power and Checking for Proper Operation
The first step in testing your ceiling fan with a light kit is to restore power to the room. Make sure that the circuit breaker or fuse box is switched on and the power is flowing. Retrieve the remote control or wall switch that operates the fan and light, and turn it on. Observe the fan blades for smooth movement and listen for any unusual noises. The fan blades should rotate evenly and quietly, without any wobbling or clicking sounds. If you notice any abnormalities, you may need to balance and adjust the fan blades.

Balancing and Adjusting the Fan Blades if Necessary
Unbalanced fan blades can cause excessive noise and vibration, affecting the overall performance of the ceiling fan. To balance the blades, start by turning off the fan and carefully inspect each blade for any visible signs of misalignment. If you notice any blade that appears to be higher or lower than the others, it may require adjustment. Use a blade balancing kit or attach adhesive weights to the blade to correct the imbalance. Once you have adjusted all the blades, turn on the fan and check if the vibration and noise have reduced. Repeat the process as needed until the fan operates smoothly and quietly.
Verifying the Functionality of the Light Kit
After ensuring that the fan is operating correctly, it’s time to test the functionality of the light kit. Turn on the light switch or use the remote control to activate the light. Make sure that the light bulb illuminates properly and emits the desired amount of light. Check for any flickering or dimming issues, which could indicate loose connections or faulty wiring. Additionally, test any additional light settings or features offered by your specific light kit, such as dimming capabilities or color temperature adjustments. In case of any discrepancies, consult the manufacturer’s instructions or seek professional assistance.
Ensuring Smooth and Quiet Operation
Lastly, it’s important to ensure that your ceiling fan with a light kit operates smoothly and quietly. Pay attention to any irregular noises, such as grinding, humming, or rattling sounds. These could be signs of loose components or improper installation. Tighten any loose screws or connections and make sure that the fan is securely mounted to the ceiling. Test the fan at different speeds to ensure that it performs consistently and without any disturbances. If you continue to experience excessive noise or other issues, consult the troubleshooting guide provided by the manufacturer or contact a professional electrician.
Common Ceiling Fan With Light Kit Installation Issues
Common Ceiling Fan With Light Kit Installation Issues
When you decide to install a ceiling fan with a light kit in your home, it’s essential to ensure a successful installation. However, various issues can arise during the installation process, which can hinder the fan’s functionality. It’s crucial to be aware of these common issues and know how to troubleshoot them effectively. In this section, we will explore three of the most common ceiling fan with light kit installation issues:
1. Slow or Wobbling Fan Operation
A ceiling fan that operates slowly or wobbles can be both annoying and inefficient. It’s important to address this issue promptly to ensure optimal performance. The following factors can contribute to slow or wobbling fan operation:
- Uneven blades: If the blades are not aligned correctly, they can cause the fan to wobble. Check each blade’s balance and make necessary adjustments to achieve a smooth operation.
- Improper installation: Ensure that the fan is securely mounted to the ceiling using the appropriate hardware. Loose screws or a weak mounting bracket can lead to wobbling.
- Uneven motor housing: Inspect the motor housing for any irregularities. If it is not aligned properly, it can affect the fan’s balance and cause wobbling.
- Incorrect blade pitch: The blade pitch determines the airflow generated by the fan. If the pitch is incorrect, it can result in reduced speed and wobbling. Refer to the manufacturer’s instructions to adjust the blade pitch if necessary.
2. Inadequate Lighting or Flickering Lights
When installing a ceiling fan with a light kit, proper lighting is essential to create a comfortable and well-lit space. If you experience inadequate lighting or flickering lights, consider the following troubleshooting steps:
- Bulb wattage: Ensure that the light bulbs being used are compatible with the light kit. Using bulbs with wattages exceeding the recommended limit can cause flickering or inadequate lighting.
- Loose connections: Check all the wiring connections inside the light kit to ensure they are secure. Loose connections can result in flickering lights or intermittent operation.
- Dimmer switch compatibility: If you are using a dimmer switch, ensure that it is compatible with both the fan and the light kit. Using an incompatible dimmer switch can cause flickering or inconsistent lighting.
- Faulty light kit: If the above steps do not resolve the issue, it is possible that the light kit itself is faulty. In such cases, contacting the manufacturer or seeking professional assistance may be necessary.
3. Noisy or Vibrating Fan Motor
A noisy or vibrating fan motor can be a major annoyance, disrupting the peaceful ambiance you desire. The following factors can contribute to a noisy or vibrating fan motor:
- Loose motor housing: Check the motor housing and ensure that it is tightly secured. Loose housing can cause excessive vibrations and noise.
- Blade alignment: Ensure that the blades are aligned correctly and not hitting any neighboring objects or surfaces. Misaligned blades can lead to vibrations and noise.
- Imbalanced fan blades: Use a balancing kit or trial and error to adjust the balance of each blade. Imbalanced blades can cause the fan motor to produce excessive noise and vibrations.
- Faulty motor: If the above steps do not resolve the issue, it is possible that the fan motor itself is faulty. In such cases, contacting the manufacturer or seeking professional assistance is recommended.
By addressing this common ceiling fan with light kit installation issues, you will ensure that your fan operates smoothly, provides adequate lighting, and enhances the comfort of your living space.

Helpful Tips For A Successful Ceiling Fan Installation
When it comes to installing a ceiling fan with a light kit, there are several helpful tips that can ensure a successful installation. From reading and following the manufacturer’s instructions to enlisting the help of a second person, these tips will make the installation process much smoother. In this article, we will discuss these tips in detail, providing you with the guidance you need to install your ceiling fan effortlessly.
Reading and Following the Manufacturer’s Instructions Carefully
One of the most crucial steps in installing a ceiling fan with a light kit is to carefully read and follow the manufacturer’s instructions. These instructions provide step-by-step guidance on how to assemble and install the fan properly. Make sure to familiarize yourself with the instructions before starting the installation process. This will help you understand the required tools, wiring connections, and any specific requirements for your ceiling fan model.
Using Wire Connectors for Secure and Reliable Connections
Proper wiring connections are essential for the safe and reliable operation of your ceiling fan. When connecting the wires, it is crucial to use wire connectors. These connectors ensure secure connections and prevent any loose or exposed wires that could potentially cause a safety hazard. Follow the instructions provided by the manufacturer to identify which wires to connect and use wire connectors accordingly. Take the time to make sure all connections are secure before moving on to the next step of the installation process.
Enlisting the Help of a Second Person for Safety and Ease
Installing a ceiling fan with a light kit can be a challenging task, especially when it comes to lifting and mounting the fan. To make the installation process easier and safer, it is recommended to enlist the help of a second person. Having an extra set of hands will not only ensure a safer installation but also make it easier to align the fan properly and secure it in place. Additionally, having someone assist you with the installation process can help save time and reduce the risk of any possible accidents.
With these helpful tips, you are now equipped for a successful ceiling fan installation. By following the manufacturer’s instructions carefully, using wire connectors for secure connections, and enlisting the help of a second person, you can enjoy a properly installed and functioning ceiling fan with a light kit. Remember to take measurements, align the fan correctly, and ensure all connections are secure before testing your newly installed ceiling fan. Now, let’s get started on your ceiling fan installation project!
Frequently Asked Questions Of How To Install A Ceiling Fan With Light Kit
How Do You Hook Up A Light Kit To A Ceiling Fan?
To connect a light kit to a ceiling fan: Turn off the power at the breaker. Remove the fan canopy. Connect the light kit wires to the fan wires. Securely fasten all connections with wire connectors. Install the light kit onto the fan.
Restore power. Test the light. Enjoy your new ceiling fan with light!
Are Ceiling Fan Light Kits Easy To Install?
Yes, ceiling fan light kits are easy to install. They can be installed without much difficulty.
Do Ceiling Fan Light Kits Fit All Fans?
Ceiling fan light kits may not fit all fans. It depends on the specific design and size of the fan as well as the compatibility of the light kit. Consider checking the manufacturer’s instructions or consulting a professional to ensure a proper fit.
Can You Wire A Ceiling Fan With Light To A Single Switch?
Yes, you can wire a ceiling fan with light to a single switch. Simply connect the fan and light wires to the corresponding switch wires using wire nuts and electrical tape. Make sure to turn off the power before attempting any electrical work and consult a licensed electrician if needed to ensure safety and compliance.
Conclusion
Installing a ceiling fan with a light kit may seem like a daunting task, but with the right steps and tools, it can be a straightforward process. By following the instructions in this blog post and taking your time, you can enjoy the benefits of a ceiling fan with a light in no time.
Remember to turn off the power, assemble the fan correctly, and follow the manufacturer’s instructions. Happy installing!