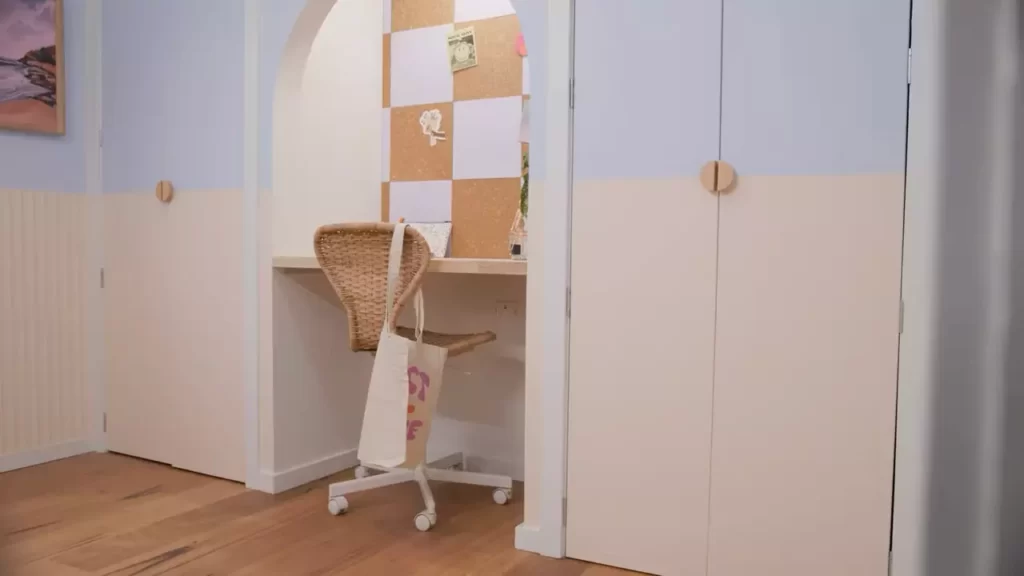
How to Install a Floating Desk?
To install a floating desk, start by locating studs in the wall and marking their positions. Then, use a level to ensure the mounting rail is straight.
Next, attach the mounting rail to the wall using screws and a drill. After that, attach the desk to the mounting rail using the provided hardware. Make sure to check the desk for stability and adjust as necessary. Finally, enjoy your new floating desk setup! A floating desk is a space-saving and stylish option for those looking to create a functional workspace in small or limited areas.
By attaching the desk to the wall, it appears as if it is floating, giving the illusion of more space in the room. If you’re interested in installing a floating desk, this guide will take you through the step-by-step process of how to get it done. From finding the studs in the wall to securing the desk, we’ll cover all the necessary steps to ensure a successful installation. Let’s get started!
Choosing The Right Location For Your Floating Desk
Choosing the right location for your floating desk is crucial to ensure both functionality and aesthetic appeal in your workspace. Consider the purpose and functionality of the desk, assess the available space in your room, and take note of natural lighting and the view to create an ideal setting. Let’s dive into these factors in more detail.
Consider the purpose and functionality of the desk
Before deciding on the location for your floating desk, ponder upon the purpose and functionality it needs to serve. Will this be your go-to workstation for daily work tasks? Or is it primarily meant for creative activities like drawing or crafting? By clearly defining the desk’s purpose, you can determine the best location that aligns with your needs and ensures maximum productivity.
Assess the available space in your room
To find the ideal location for your floating desk, you must assess the available space in your room. Measure the dimensions of the wall where you plan to install the desk, taking into account any obstructions like electrical outlets, windows, or doors. Having a clear understanding of the available space helps you determine the size and style of the floating desk that will fit perfectly without cluttering the room.
Take note of natural lighting and the view
Natural lighting and the view from your floating desk play a crucial role in creating a pleasant and inspiring working environment. Positioning your desk near a window allows ample natural light to flood the space, promoting a positive and energetic atmosphere. Moreover, having a pleasant view, such as a garden or a scenic landscape, can provide visual relief during breaks and enhance your overall well-being.
Considering these factors will help you choose the perfect location for your floating desk that offers both functionality and aesthetic appeal. Remember to contemplate the purpose and functionality of the desk, assess the available space in your room, and take note of natural lighting and the view. By finding the optimal location, you can create a workspace that fosters productivity and makes you look forward to tackling daily tasks with enthusiasm. So, let’s get started and find the best spot for your floating desk in your room!
Preparing The Workspace For Installation
Before you begin installing your floating desk, it’s essential to prepare the workspace properly. Taking the time to clear the area of any obstructions, remove existing furniture or fixtures, and clean the wall or surface where the desk will be mounted will ensure a smooth and successful installation. In this guide, we’ll go over each step in detail to help you get your workspace ready for your new floating desk.
Clear the area of any obstructions
To start, you’ll want to clear the area where you plan to install your floating desk of any obstructions. This includes removing any furniture, rugs, or other items that may be in the way. By clearing the space, you’ll have a clear and unobstructed area to work in and prevent any accidents or damage during the installation process. It’s also a good idea to measure the available space to ensure that your chosen floating desk will fit comfortably and leave enough room for movement.
Remove any existing furniture or fixtures
If you have any existing furniture or fixtures in the area where you plan to install your floating desk, it’s necessary to remove them. This includes chairs, shelves, cabinets, or any other items that may interfere with the installation process. Clearing the workspace of these items will give you more freedom to maneuver and make it easier to mount your floating desk securely.
Clean the wall or surface where the desk will be mounted
Before mounting your floating desk, it’s crucial to clean the wall or surface where it will be installed. This ensures proper adhesion and helps the desk stay securely in place. Start by removing any dirt, dust, or debris from the area using a damp cloth or mild cleaning solution. Once the surface is clean, allow it to dry completely before proceeding. Make sure to inspect the area for any cracks, holes, or imperfections that may need to be addressed before installation.
By following these steps to prepare your workspace for installation, you’ll set the foundation for a successful and hassle-free installation of your floating desk. Taking the time to clear the area of obstructions, remove existing furniture or fixtures, and clean the wall or surface will provide a stable and secure environment for your desk, ensuring it lasts for years to come.

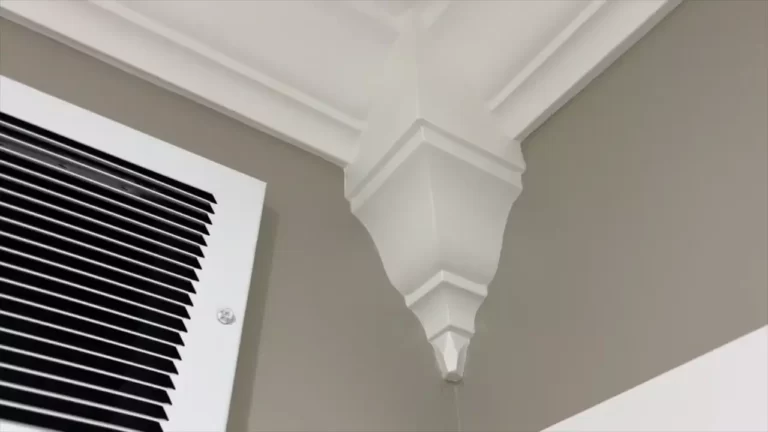
Installing The Mounting Bracket
Installing the mounting bracket is a crucial step in the process of setting up a floating desk. The bracket provides stability and support, ensuring that your desk stays securely attached to the wall or surface. In this section, we will walk you through the necessary steps to properly install the mounting bracket.
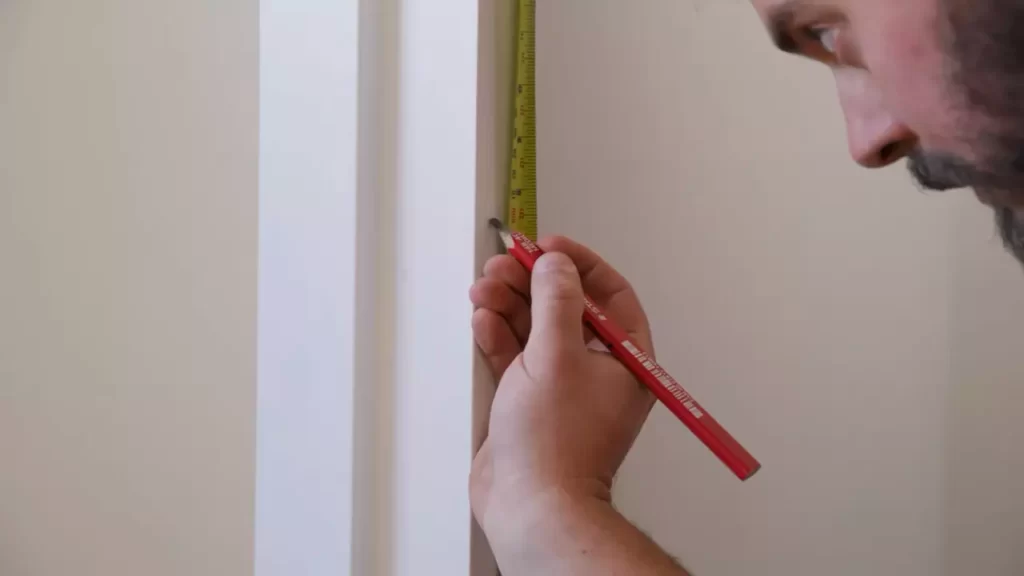
Measure and mark the desired height and position of the desk
Before installing the mounting bracket, take the time to determine the ideal height and position for your floating desk. Use a tape measure to measure and mark the desired height on the wall or surface where the desk will be mounted. For example, if you prefer a standing desk, measure accordingly to ensure a comfortable working height. These marks will serve as guidelines when installing the bracket.
Use a level to ensure the bracket is straight
Once you have marked the desired height, it’s important to make sure that the bracket is straight and level when installing it. This will ensure that your desk is stable and properly aligned. To achieve this, place a level on top of the bracket and adjust as needed until it is perfectly level. This may require slight adjustments to the height and position initially marked on the wall or surface.
Drill pilot holes for the mounting screws
Once the bracket is level, it’s time to prepare for the mounting screws. To ensure a secure attachment, you will need to drill pilot holes at the marked positions on the wall or surface. Pilot holes help prevent the wood or other material from splitting when driving in the screws. Choose a drill bit size that matches the diameter of the screws you will be using and drill the holes at the marked positions.
Attach the bracket securely to the wall or surface
With the pilot holes prepared, it’s time to attach the mounting bracket to the wall or surface. Position the bracket over the pilot holes and use the appropriate screws and a screwdriver or drill to attach it securely. Make sure to tighten the screws firmly but be cautious not to over-tighten, as this can damage the bracket or the wall material.
By following these steps to install the mounting bracket, you will be one step closer to having a sturdy and functional floating desk. Once the bracket is securely attached, you can move on to the next steps of setting up your workspace, such as attaching the desk surface and organizing the cables. Stay tuned for our upcoming sections that will guide you through the remaining installation process.
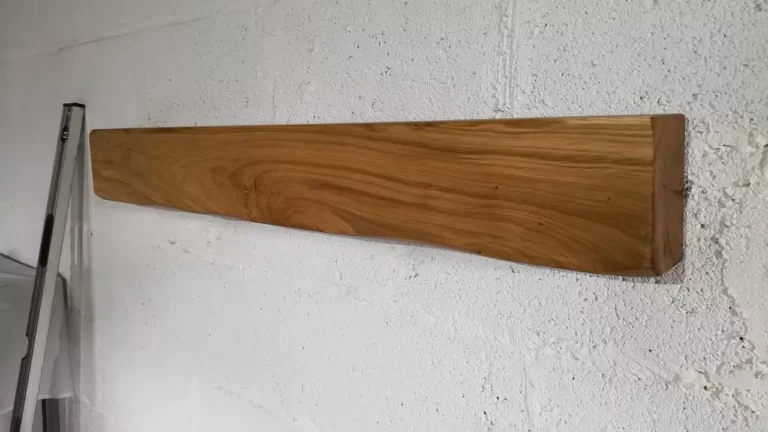
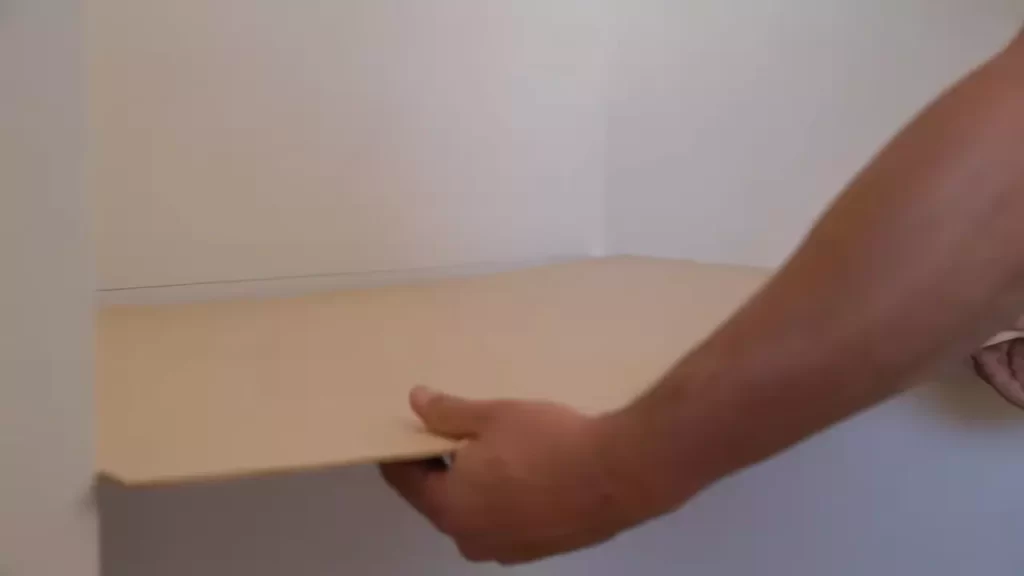
Mounting The Floating Desk
Once you have assembled your floating desk, it’s time to mount it securely to the wall. Properly aligning and securing the desk to the mounting bracket is crucial for stability and safety. Follow these simple steps to ensure a hassle-free installation:
Align the desk with the mounting bracket
Before attaching the desk to the bracket, make sure it is properly aligned. To do this, measure and mark the desired height on the wall using a tape measure and level. Position the mounting bracket accordingly, ensuring it is level and centered.
Securely attach the desk to the bracket
Once the bracket is properly aligned, it’s time to attach the desk. Using a drill and screws, secure the desk onto the bracket using the predrilled holes on the desk. Be sure to tighten the screws firmly, but avoid over-tightening, as it may damage the desk or affect its stability.
Double-check for stability and adjust if necessary
Once the desk is attached to the bracket, it’s important to check its stability. Gently push and pull the desk to ensure it is securely mounted. If you notice any wobbling or instability, try adjusting the screws or repositioning the bracket slightly. Making these adjustments will help ensure a sturdy and reliable floating desk.
By following these simple steps, you can successfully mount your floating desk. Remember to take your time and double-check for stability before finalizing the installation. Now you are ready to enjoy your stylish and functional workspace!
Additional Tips For A Successful Installation
When installing a floating desk, there are a few additional tips that can help ensure a successful installation. These tips are especially important if you have a larger desk or if you are mounting the desk on a drywall. By following these tips, you can enhance the stability and weight capacity of your floating desk.
Consider adding additional support brackets for larger desks
If you have a larger desk, it is recommended to consider adding additional support brackets. These brackets can help distribute the weight more evenly and provide extra stability. Without proper support, larger desks may have a greater risk of sagging or falling from the wall. By installing additional brackets, you can minimize these risks and create a more secure workspace.
Use anchors if mounting on a drywall
When mounting your floating desk on a drywall, it is crucial to use anchors for added stability. Drywalls may not be able to support the weight of the desk on their own, and using anchors helps distribute the weight and prevent any potential damage. Be sure to choose the right type of anchors suitable for the weight capacity of your desk. This way, you can ensure that your desk stays securely attached to the wall, providing a safe and reliable workspace.
Test the weight capacity of the desk before placing heavy items on it
Before placing heavy items such as monitors, computers, or books on your floating desk, it is essential to test its weight capacity. Most desks come with a weight limit specified by the manufacturer. To ensure the desk can handle the load, start by placing lighter items on it and gradually increase the weight. This way, you can determine if the desk is sturdy enough to support the desired items. Testing the weight capacity beforehand can save you from any potential accidents or damage to the desk.
Maintaining Your Floating Desk
Now that you have successfully installed your floating desk, it is important to ensure its longevity and functionality by properly maintaining it. By following a few simple steps, you can keep your desk looking clean, sturdy, and in optimal condition.
Clean and dust the desk regularly
To keep your floating desk looking its best, it is essential to clean and dust it regularly. Dust and debris can accumulate on the surface of the desk, affecting its appearance and potentially causing damage over time. Use a soft, lint-free cloth or a duster to gently wipe away any dust or dirt particles. Avoid using harsh cleaning agents or abrasive materials as they may scratch or damage the desk’s surface. Regular cleaning will not only maintain the desk’s visual appeal but also prevent the build-up of allergens and improve your overall workspace hygiene.
Avoid placing excessive weight on the desk
Although floating desks are designed to be sturdy and secure, it is important to avoid placing excessive weight on them. Excessive weight can strain the desk’s brackets or wall mounts, potentially compromising its stability and safety. Make sure to evenly distribute the weight of any items on the desk and avoid overloading it with heavy objects. Taking these precautions will help maintain the desk’s structural integrity and prevent any unforeseen accidents or damage.
Check for any signs of wear or damage and repair if needed
Regularly inspect your floating desk for any signs of wear or damage, as proactive maintenance can prevent minor issues from developing into major problems. Check for loose screws, cracks, or any instability in the desk’s construction. If you notice any issues, it is important to address them promptly to ensure the desk remains functional and secure. You may need to tighten screws or brackets, repair any damages, or even consider consulting a professional for assistance.
By following these simple maintenance guidelines, you can prolong the lifespan of your floating desk and ensure its continued functionality and aesthetic appeal. Maintaining a clean and dust-free surface, avoiding excessive weight, and promptly addressing any signs of wear or damage will help you make the most out of your floating desk for years to come.
Frequently Asked Questions For How To Install A Floating Desk
How Do I Install A Floating Desk?
To install a floating desk, start by finding a suitable wall space. Mark and drill holes for the mounting brackets, ensuring they are level. Attach the brackets and secure them with screws. Place the desk onto the brackets and make sure it is level.
Finally, secure the desk to the brackets with screws for stability.
What Tools Do I Need To Install A Floating Desk?
To install a floating desk, you will need a measuring tape, a level, a pencil, a power drill, drill bits suitable for your wall, screws, and wall anchors (if necessary). Additionally, having a helper to hold the desk during installation will make the process easier.
Can A Floating Desk Be Installed On Any Type Of Wall?
Floating desks can be installed on most types of walls, including drywall, plaster, and brick. However, it is important to ensure the wall is sturdy enough to support the weight of the desk and any items placed on it. If unsure, consult a professional or consider reinforcing the wall before installation.
Conclusion
In closing, installing a floating desk can be a simple and innovative way to create a functional workspace without taking up much space. By following the step-by-step guide outlined in this blog post, you can confidently install your floating desk and enjoy the benefits of a clutter-free and stylish work area.
Remember to choose the right wall, measure, and level accurately, and use the proper tools and materials for a successful installation. So, why wait? Get started on creating your dream workspace today!