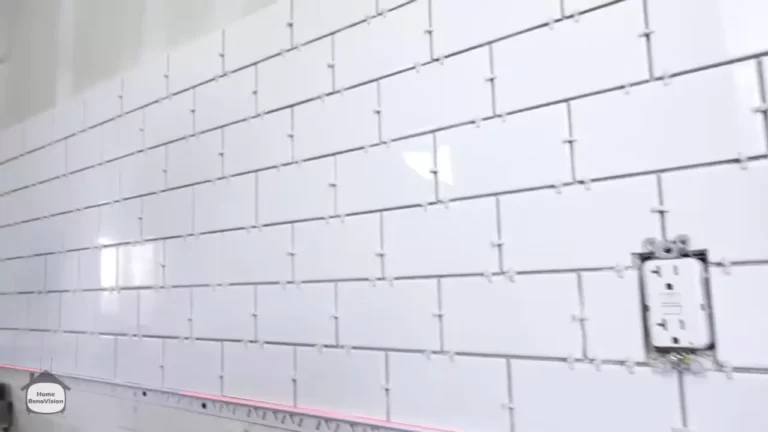
How to Install Hexagon Tile Floor?
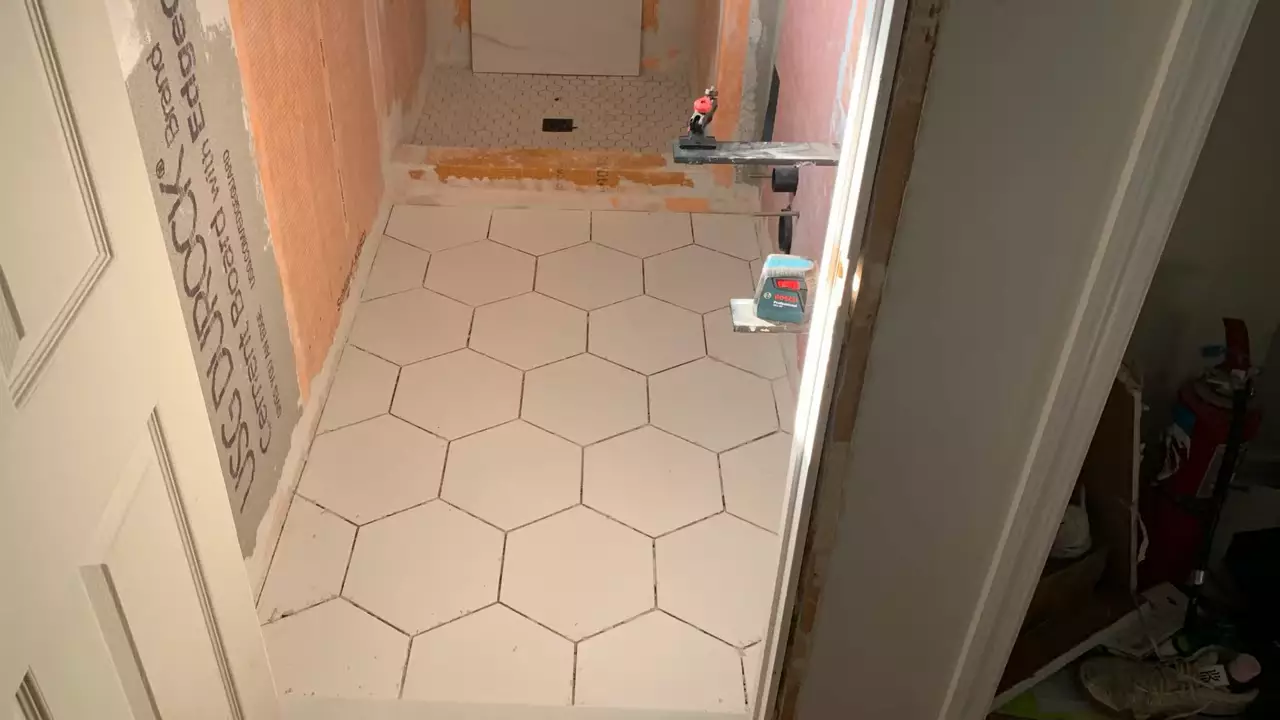
To install hexagon tile floor, start by preparing the surface and ensuring it is clean and smooth. Then, lay out the tiles in the desired pattern, using spacers to maintain an even gap between each tile.
Apply tile adhesive or thinset mortar to the floor, and press the tiles firmly into place. Once the adhesive has dried, remove the spacers and grout the gaps between the tiles. Finally, wipe away any excess grout and seal the tiles to protect them from stains and moisture.
Required Tools And Materials
Before you embark on the installation process of a stunning hexagon tile floor, it’s crucial to have the right tools and materials at your disposal. By gathering everything you need in advance, you’ll streamline the installation process and ensure a smooth and successful project. In this section, we’ll explore the list of tools needed for the installation process, the various types of hexagon tiles suitable for installation, and the necessary preparation materials for the floor surface.
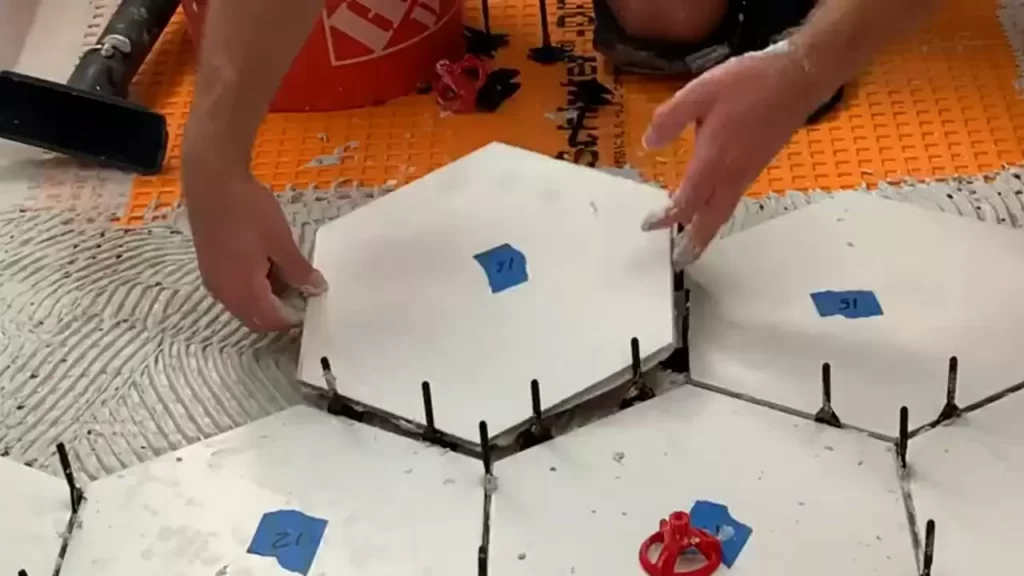
List of tools needed for the installation process
Installing a hexagon tile floor requires specific tools to achieve precise and professional results. Having the following tools handy will greatly assist you in the installation process:
| Trowel | A trowel is essential for spreading thinset adhesive evenly on the floor surface. |
| Tile spacers | Tile spacers are indispensable for maintaining consistent spacing between hexagon tiles during installation, ensuring a clean and uniform look. |
| Tile cutter | A tile cutter with a scoring wheel allows you to make accurate cuts on the hexagon tiles, ensuring a seamless fit around edges and corners. |
| Wet saw | A wet saw is a powerful tool that comes in handy for cutting intricate or larger pieces of hexagon tiles, enhancing precision in the installation process. |
| Notched trowel | A notched trowel is specifically designed to create ridges in the thinset adhesive, ensuring proper tile adhesion and minimizing the risk of tile slippage. |
| Grout float | Once the hexagon tiles are installed, a grout float enables you to apply grout smoothly and evenly into the joints, giving your floor a polished finish. |
| Mixing paddle | A mixing paddle attached to a power drill makes preparing the thinset adhesive or grout less labor-intensive, saving you time and effort in the process. |
Types of hexagon tiles suitable for installation
Hexagon tiles come in a range of materials, styles, and finishes, allowing you to select the perfect option to complement your space. Here are some popular hexagon tile choices suitable for installation:
- Porcelain hexagon tiles: Known for their incredible durability and low maintenance, porcelain hexagon tiles are ideal for high-traffic areas like kitchens and bathrooms.
- Ceramic hexagon tiles: These tiles offer a wide variety of colors and patterns, making them a versatile choice for any room.
- Natural stone hexagon tiles: With their unique textures and natural beauty, natural stone hexagon tiles add a touch of elegance to any space, though they require extra care and maintenance.
- Mosaic hexagon tiles: Featuring small hexagon-shaped pieces arranged on a mesh backing, mosaic hexagon tiles allow for intricate and visually striking designs.
Necessary preparation materials for the floor surface
Prior to installing hexagon tiles, it’s crucial to prepare the floor surface adequately. Here are the necessary preparation materials:
- Leveling compound: If the floor surface is uneven, leveling compound helps create a smooth and level base for the hexagon tiles.
- Crack isolation membrane: To prevent cracks in the subfloor from transferring to the tile, a crack isolation membrane provides an extra layer of protection.
- Thinset adhesive: Thinset adhesive is necessary for securing the hexagon tiles to the floor surface and ensuring long-lasting adhesion.
- Grout: Grout not only fills the joints between hexagon tiles but also enhances their visual appeal, so choose a color that complements your desired aesthetic.
- Sealer: Applying a sealer over the grout helps protect it from stains and discoloration, prolonging the lifespan of your hexagon tile floor.
By gathering all these tools and materials, you’ll be well-prepared to embark on the installation of your stunning hexagon tile floor. Let’s move on to the next section to learn how to properly prepare the subfloor for the installation process.
Preparing The Subfloor And Layout
In order to ensure a successful installation of a hexagon tile floor, it is crucial to properly prepare the subfloor and carefully plan the layout. This involves inspecting the subfloor for any damage or unevenness, fixing any issues that are identified, and determining the layout and pattern of the hexagon tiles.
Inspecting the subfloor for any damage or unevenness
Before starting the installation process, it is important to thoroughly inspect the subfloor for any damage or unevenness. This step is crucial as any existing issues can affect the stability and longevity of the tile floor. Here’s how to inspect the subfloor:
- Look for any cracks, holes, or chips in the subfloor surface.
- Check for any signs of water or moisture damage, such as discoloration, warping, or soft spots.
- Ensure that the subfloor is level and free from any bumps or dips.
If you notice any damage or unevenness during the inspection, it is essential to address these issues before proceeding with the tile installation.
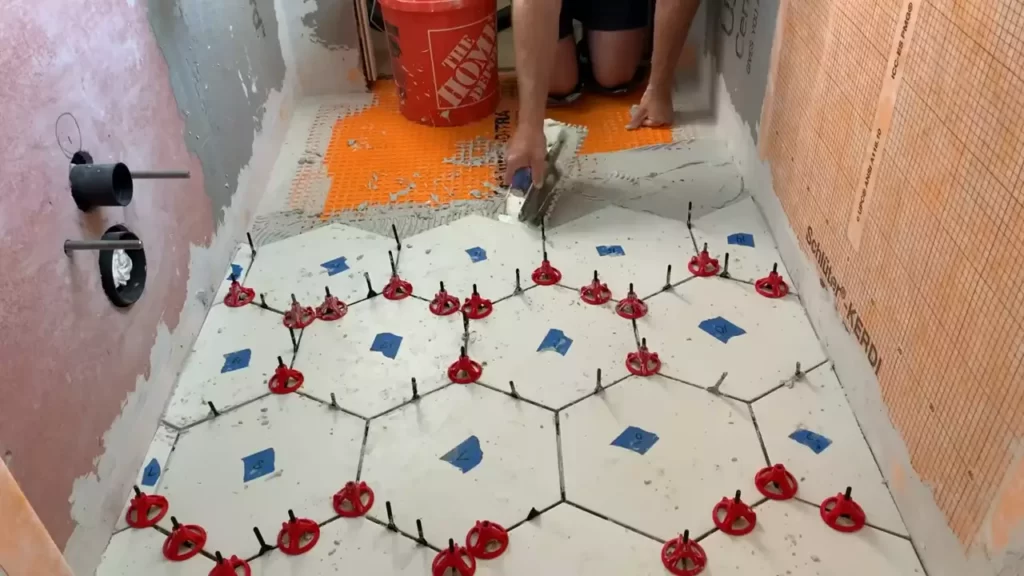
Fixing any subfloor issues before tile installation
If any damage or unevenness is found during the subfloor inspection, it is important to fix these issues before proceeding with the installation of the hexagon tiles. Here are some steps to fix common subfloor issues:
- Fill cracks or holes in the subfloor using a suitable patching compound or filler.
- Repair any water or moisture damage by drying out the affected area and replacing damaged subfloor sections.
- If the subfloor is uneven, level it using a self-leveling compound or by adding additional layers of plywood.
By addressing any subfloor issues beforehand, you can ensure a stable and durable foundation for your hexagon tile floor.
Determining the layout and pattern of the hexagon tiles
The next step in preparing the subfloor and layout is determining the layout and pattern of the hexagon tiles. This step is crucial to achieve an aesthetically pleasing and cohesive tile installation. Here are some tips for determining the layout:
- Consider the size of the room and the dimensions of the hexagon tiles. Aim for symmetry and balance in the layout.
- Mock up the layout using dry tiles or cardboard cutouts to visualize how the final installation will look.
- Plan the position of the focal point, such as the center of the room or a specific area where the tiles will stand out.
- Take into account the direction of natural light and the flow of the room to create a harmonious layout.
Once you have determined the layout and pattern, you can proceed with the actual installation of the hexagon tiles, confident that your subfloor is prepared and the layout will enhance the overall beauty of your space.
Mixing And Applying Mortar
Mixing and applying mortar is a crucial step in installing a hexagon tile floor. Understanding the process and following the manufacturer’s guidelines will ensure a strong bond between the tile and the subfloor. In this section, we will discuss the selection of the appropriate mortar, mixing it correctly, and applying it smoothly to create a uniform layer.
Selecting the Appropriate Mortar for Hexagon Tile Installation
Choosing the right type of mortar is essential to achieve a long-lasting and durable hexagon tile floor. There are several factors to consider when selecting the appropriate mortar:
- Type of tile: Different types of hexagon tiles may require specific types of mortar. Porcelain and ceramic tiles have different adhesive requirements than natural stone tiles. Check with the manufacturer or your tile supplier to ensure you’re using the right mortar for your specific tile type.
- Subfloor material: The material of your subfloor will also influence the type of mortar you need. Concrete, plywood, and cement boards may require different adhesives. Consult the manufacturer’s instructions to determine the best mortar for your subfloor material.
- Environmental conditions: Consider the humidity, temperature, and exposure to water in the area where the hexagon tile floor will be installed. Some mortars are specifically designed for high-moisture environments or exterior applications.
Mixing the Mortar According to the Manufacturer’s Guidelines
Properly mixing the mortar is crucial for achieving the right consistency and maximizing its adhesive strength. Here are the steps to follow:
- Gather the materials: Start by collecting the necessary tools and materials, including the mortar, a large bucket, a drill with a mixing attachment, and water.
- Measure the mortar: Carefully measure the required amount of mortar according to the manufacturer’s instructions. Use a scale or measuring cup to achieve accurate proportions.
- Prepare the mixing container: Use a large bucket or a mixing tray to hold the mortar. Make sure the container is clean and free of any debris.
- Add water: Gradually add water to the mortar while continuously mixing it. Use the drill with a mixing attachment to blend the mortar and water until you achieve a creamy consistency. Avoid adding too much water, as it can weaken the adhesive properties of the mortar.
- Let the mortar rest: Allow the mixed mortar to rest for a few minutes before using it. This resting period allows the chemicals in the mortar to activate and ensures optimal adhesion.
Applying the Mortar onto the Subfloor and Creating a Uniform Layer
Now that you have your prepared mortar, it’s time to apply it to the subfloor. Follow these steps to create a uniform layer:
- Start with a clean and level subfloor: Ensure that the subfloor is clean, free of any dust or debris, and completely level. This will provide a smooth and even surface for the mortar and tiles.
- Use a notched trowel: Take a notched trowel and scoop a generous amount of mortar onto it.
- Apply the mortar: Begin applying the mortar onto the subfloor by pressing the notched trowel at a 45-degree angle. Use a sweeping motion to spread the mortar evenly, creating ridges or grooves with consistent depth.
- Work in small sections: It’s best to work in small sections at a time, as the mortar should not dry out before placing the tiles. Adhere to the manufacturer’s guidelines regarding working time.
- Comb the mortar: After spreading the mortar, use the notched side of the trowel to comb the ridges in one direction. This will further enhance the bond with the tiles.
Following these steps will help you mix and apply mortar effectively for your hexagon tile floor installation. Remember to read and follow the manufacturer’s instructions for your specific mortar and tile type, as they may provide additional guidance or requirements.
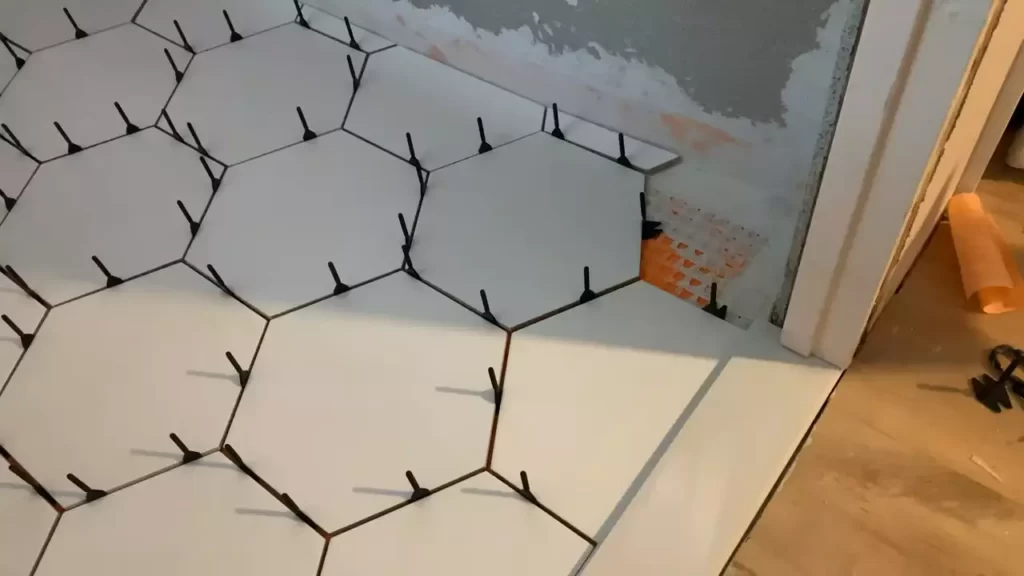
Installing The Hexagon Tiles
The installation process of hexagon tiles requires precision and a systematic approach. To ensure a smooth and seamless installation, it is important to follow the correct steps. In this section, we will guide you through the process of installing the hexagon tiles, starting with placing the first tile in the center of the floor.
Placing the first hexagon tile in the center of the floor
To create a visually appealing pattern, it is crucial to begin the installation with the first hexagon tile placed accurately in the center of the floor. Here’s how you can achieve this:
1. Clean the floor surface thoroughly to remove any dirt or debris that could interfere with the tile’s adhesion.
2. Identify the center point of the floor by measuring and marking the midpoint of each wall. This will serve as a guide for placing the first hexagon tile.
3. Apply a thin layer of tile adhesive or mortar to the floor, using a notched trowel to ensure an even distribution.
4. Gently press the first hexagon tile firmly into the adhesive, aligning it with the center point. Ensure that it is level and flush with the surrounding tiles.
Adding spacers to ensure uniform spacing between tiles
Achieving uniform spacing between the hexagon tiles is essential for a professional and visually appealing finish. By adding spacers, you can ensure that the gaps between the tiles are consistent. Here’s how you can do it:
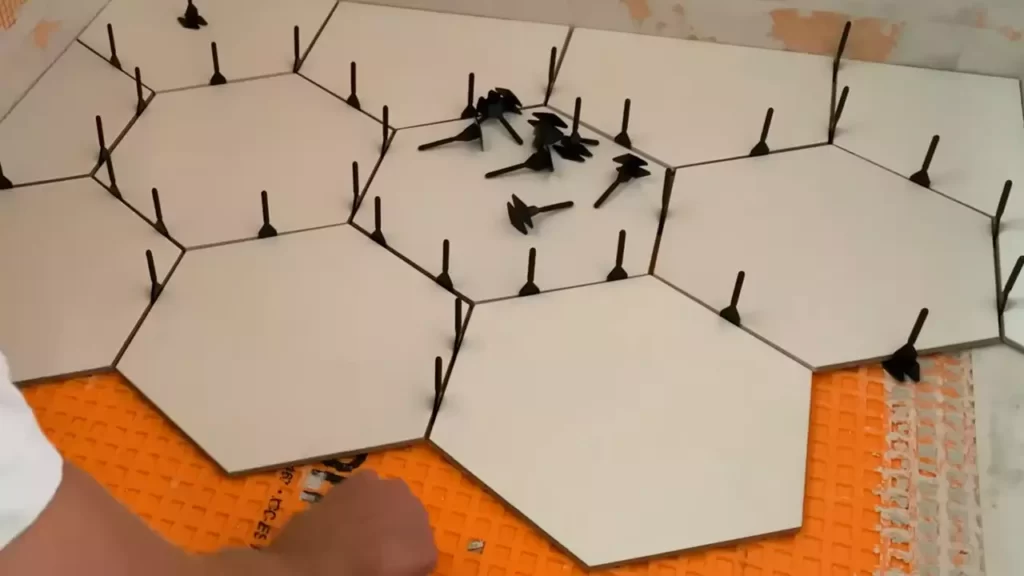
1. Insert tile spacers on all sides of the first hexagon tile, placing them snugly against the edges. These spacers will determine the width of the gaps between the tiles.
2. As you continue the installation process, be sure to insert spacers between each hexagon tile. This will help maintain a uniform spacing throughout the entire floor.
3. Remove any excess adhesive that may seep through the gaps with a damp cloth or sponge, taking care not to disturb the tiles.
Continuing the installation process row by row, working outward
After successfully placing the first hexagon tile and ensuring consistent spacing, it’s time to continue the installation process row by row, working outward. Follow these steps for a seamless installation:
1. Apply tile adhesive or mortar to a small section of the floor, using the notched trowel to create ridges for better adhesion.
2. Place the next hexagon tile in the desired position, ensuring it aligns with the previously installed tiles and the spacers.
3. Press the tile gently and firmly into the adhesive, using a slight twisting motion to ensure full contact.
4. Continue this process, row by row, working outward from the center, until the entire floor is covered with hexagon tiles.
5. periodically check the levelness of the tiles and adjust as needed to maintain a flat and even surface.
By following these steps, you can successfully install hexagon tiles and create a stunning and visually captivating hexagon tile floor. Remember to allow sufficient time for the adhesive to dry before walking on the newly installed tiles and enjoy the beauty and functionality they bring to your space.
Cutting And Fitting Tiles
Once you have measured and marked the tiles for cutting and fitting, it’s time to transform them into the desired shapes and sizes. This step is crucial to ensure a seamless installation and a polished finish. By using the right tools and techniques, you can easily cut and fit the hexagon tiles around obstacles or along walls.
Measuring and marking tiles for cutting and fitting
Before you begin cutting and fitting tiles, it is essential to measure and mark them accurately. This ensures that the tiles are cut precisely and fit perfectly into the desired spaces. Follow these simple steps to measure and mark the tiles:
- Place the tile in the desired position on the floor, leaving a small gap for grouting.
- Use a pencil or a marker to mark the areas where the tile needs to be cut or shaped.
- Double-check the markings to ensure accuracy before proceeding to cut the tiles.
Using a tile cutter or wet saw to cut tiles to the desired shape
Now that you have measured and marked the tiles, it’s time to cut them to the desired shape. There are two common tools used for cutting tiles: a tile cutter or a wet saw. Here’s how to use each of them:
A tile cutter works well for straight cuts. Follow these steps to cut tiles with a tile cutter:
- Place the tile in the tile cutter, aligning the mark with the cutting guide.
- Apply firm pressure while running the cutter along the marked line.
- Score the tile along the marked line, then snap it in two using the tile cutter’s breaking mechanism.
If you need to make curved or intricate cuts, a wet saw is the preferred tool. Here’s how to use a wet saw:
- Ensure the wet saw is set up and filled with water according to the manufacturer’s instructions.
- Position the tile on the wet saw table, aligning the marked line with the saw’s blade.
- Slowly feed the tile into the saw, letting the blade do the work.
- Continue cutting until you reach the desired shape or size.
Fitting the cut tiles around obstacles or along walls
Once the tiles are cut to the desired shape, fitting them around obstacles or along walls is the final step in achieving a professional-looking installation. Follow these steps to ensure a seamless fit:
- Place the cut tile into the desired position, making sure it fits snugly.
- Check for any gaps or uneven edges and adjust the tile accordingly.
- Use tile spacers if needed to maintain consistent spacing between the tiles.
- Apply adhesive or mortar to the back of the tile and press it firmly into place.
- Repeat the process for each cut tile, taking care to maintain a uniform appearance.
By following these steps, you can effectively cut and fit hexagon tiles, even around obstacles or along walls, to achieve a flawless and visually stunning floor. Remember to take your time and ensure each cut tile fits perfectly before moving on to the next one.
Grouting And Finishing
Once you have successfully laid out your hexagon tile floor and allowed it to set, it’s time to move on to the next crucial step: grouting and finishing. This step will not only fill in the gaps between the tiles but also provide a polished and seamless look to your newly installed floor.
Mixing the grout and applying it to the tile joints
To begin, you’ll need to mix the grout according to the manufacturer’s instructions. Typically, this involves combining the grout powder with water until you achieve a smooth and creamy consistency. It’s important to follow the instructions precisely to ensure the grout sets properly.
Once mixed, use a grout float or a rubber trowel to firmly press the grout into the tile joints. Work at a 45-degree angle to ensure the grout is evenly distributed. Be sure to apply enough pressure to fill all the gaps and ensure a strong bond between the tiles.
Cleaning off excess grout using a sponge
After applying the grout, you’ll need to clean off the excess before it dries. This step is crucial to achieving a professional and clean finish. Take a damp sponge or cloth and gently wipe the surface of the tiles, moving in a circular motion. This will remove the excess grout while also smoothing the lines between the tiles. Rinse the sponge frequently to avoid smearing the grout on the tiles.
Letting the grout dry and cure before applying sealant
Once you have cleaned off the excess grout, allow it to dry and cure according to the manufacturer’s instructions. This process usually takes anywhere from 24 to 72 hours, depending on the specific grout product you are using. It’s essential to give the grout enough time to fully set before moving on to the final step of applying sealant.
Applying a sealant to the grout will help protect it from stains, water damage, and discoloration, ensuring your hexagon tile floor remains in pristine condition for years to come. Follow the instructions on the sealant packaging to apply an even coat over the entire tiled surface. Allow the sealant to dry completely before walking on or placing furniture on the floor.
By following these steps, you’ll be able to beautifully grout and finish your hexagon tile floor, adding a touch of modern elegance to any space. Don’t rush this process, as proper grouting and finishing will greatly contribute to the overall durability and appearance of your new flooring.
Maintaining And Caring For Hexagon Tile Floors
Regular Cleaning and Maintenance Tips for Hexagon Tile Floors
Maintaining and caring for hexagon tile floors is essential to ensure their longevity and keep them looking pristine. By following some simple cleaning and maintenance tips, you can keep your hexagon tile floor in top shape for years to come.
Regular sweeping or vacuuming with a soft brush attachment is the first step in maintaining your hexagon tile floor. This helps remove loose dirt and debris that can potentially scratch the surface of the tiles. For deeper cleaning, a damp mop or microfiber cloth with a mild pH-neutral cleaner specially formulated for tiles can be used.
It is important to avoid using acidic cleaners or abrasive materials like steel wool, as they can damage the tile surface and grout lines. After cleaning, it’s recommended to mop again with clean water to remove any remaining cleaner residue that can leave a dull film on the tiles.
Preventing and Addressing Common Issues like Cracks or Loose Tiles
Prevention is key when it comes to dealing with cracks or loose tiles in your hexagon tile floor. One of the main culprits that can cause cracks is inadequate subfloor preparation. Ensure that your subfloor is properly leveled and free from any structural defects or unevenness before installing your hexagon tiles.
Additionally, using a flexible thin-set mortar specifically designed for tile installation can help minimize the risk of cracks. The flexibility of the mortar allows the tiles to expand and contract without putting excessive stress on the tile joints.
If you notice any loose tiles or cracks in your hexagon tile floor, it is important to address them promptly. Using a tile adhesive suitable for your specific tile material, carefully remove the loose tile and clean the area. Apply a thin layer of adhesive to the back of the tile and press it firmly into place. Wipe away any excess adhesive that may squeeze out from the edges of the tile.
Extending the Lifespan of the Tile Floor through Proper Care
Proper care and maintenance can significantly extend the lifespan of your hexagon tile floor. One effective way to protect the tiles is by using doormats at entryways to trap dirt and moisture, preventing them from being tracked onto the floor.
Additionally, installing furniture coasters or felt pads under heavy furniture can help prevent scratches or cracks, especially when moving or rearranging the furniture.
Regularly inspecting the grout lines is also crucial. Over time, grout can become discolored or cracked. By applying a grout sealer, you can protect the grout lines from staining and prevent water infiltration that can cause tile movement or potential damage.
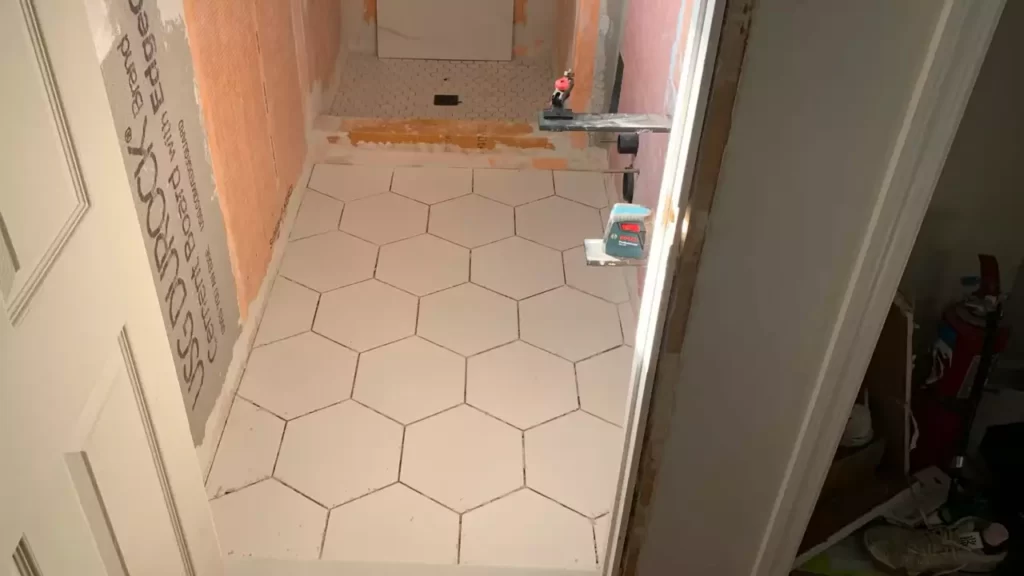
By following these cleaning tips, addressing issues promptly, and taking preventive measures, you can ensure that your hexagon tile floor remains beautiful and durable for years to come.
Troubleshooting And Faqs
Installing a hexagon tile floor can be a rewarding project that adds beauty and character to any space. However, like any home improvement task, it can come with its fair share of challenges. In this section, we will address common problems that may arise during hexagon tile floor installation, provide solutions to address issues like tile shifting, uneven spacing, and grout problems, and answer frequently asked questions related to this installation process.
Common problems encountered during hexagon tile floor installation
Despite careful planning and preparation, there are a few common issues that can crop up during hexagon tile floor installation. Here are some of the challenges you may encounter:
- Tiles shifting during installation
- Uneven spacing between tiles
- Issues with grout, such as uneven application or cracks
Solutions to address tile shifting, uneven spacing, or grout issues
Fortunately, there are solutions to these common problems. Let’s take a look at how you can address each issue:
Solving tile shifting:
To prevent tiles from shifting during installation, it’s essential to ensure a sturdy and well-prepared surface. Make sure you have followed the proper subfloor preparation steps, including thorough cleaning and removing any debris or loose materials. Additionally, using a high-quality tile adhesive and following the manufacturer’s instructions for proper application and drying time will help keep your tiles in place.
Fixing uneven spacing:
If you notice uneven spacing between your hexagon tiles, it can create an unattractive and inconsistent appearance. To address this issue, carefully remove the affected tiles and adjust the spacing as needed. Using tile spacers or a tile leveling system during installation can help maintain consistent spacing between tiles. It’s crucial to take your time and double-check the measurements to ensure a uniform and visually pleasing result.
Dealing with grout problems:
Grout issues can range from uneven application to cracks forming after the installation. To address uneven grout application, you can carefully remove the excess grout with a grout saw or a utility knife. Then, use a grout float to spread an even layer of grout over the tile surface. If cracks or gaps appear in the grout lines after the installation, you can carefully remove the damaged grout using a grout saw and reapply a fresh layer of grout to fill the gaps.
Frequently asked questions related to installing hexagon tile floors
Here are some commonly asked questions about installing hexagon tile floors:
- Can I install hexagon tiles on any flooring surface?
- Do I need to seal the tiles after installation?
- What tools and materials do I need for hexagon tile floor installation?
- How long does it take to install a hexagon tile floor?
Addressing these FAQs will provide you with valuable insights and help you make informed decisions as you embark on your hexagon tile floor installation journey.
Frequently Asked Questions For How To Install Hexagon Tile Floor
Can I Install Hexagon Tile Floor In My Bathroom?
Yes, hexagon tile floor is a great choice for bathrooms. Its unique shape adds visual interest, and the smaller size of the tiles allows for more intricate patterns and designs. Plus, the durability and water resistance of tile make it perfect for bathroom floors.
What Tools Do I Need To Install Hexagon Tile Floor?
To install hexagon tile floor, you will need a few basic tools including a tile cutter, notched trowel, grout float, and tile spacers. Additionally, you may need a level, tape measure, sponge, and a bucket for mixing and applying the adhesive and grout.
Can I Install Hexagon Tile Floor Over Existing Flooring?
In most cases, it is possible to install hexagon tile floor over existing flooring. However, it’s important to ensure that the existing floor is in good condition, level, and clean. You may need to use a leveling compound or make some repairs before installing the new tile.
It’s always best to consult with a professional if you are unsure.
Conclusion
Installing hexagon tile floors can be a challenging yet rewarding DIY project. By following the step-by-step instructions outlined in this blog post, you can transform any space into a stylish and modern area. Remember to take your time, measure accurately, and ensure the tiles are properly aligned.
With a little patience and attention to detail, you’ll have a beautiful hexagon tile floor that will enhance the aesthetic appeal of your home for years to come. So, why wait? Get started on your tile installation project today!

