How to Install a Tile Backsplash in Bathroom?
To install a tile backsplash in your bathroom, start by preparing the surface and gathering the necessary tools and materials.
Measuring And Calculating Materials
Determining the tile size and layout
Before you begin installing a tile backsplash in your bathroom, it is essential to determine the size and layout of the tiles you will be using. This step will help you calculate the quantity of materials needed accurately. Consider the overall design aesthetic of your bathroom and choose a tile size that complements it. Popular tile sizes for backsplashes range from 2×2 inches to 4×4 inches, but you can also opt for larger sizes like 6×6 inches or 8×8 inches for a more dramatic look.
Measuring the backsplash area
Now that you have decided on the tile size, it is time to measure the backsplash area in your bathroom. Start by determining the height and width of the area that you want to tile. It’s essential to measure accurately to avoid any miscalculations. For instance, if your backsplash area is 36 inches wide and 18 inches high, you will need to multiply these measurements to get the total square footage.
Example:
Width = 36 inches
Height = 18 inches
Total Square Footage = Width x Height = 36 inches x 18 inches = 648 square inches
Calculating the number of tiles needed
Now that you have the total square footage of your backsplash area, you can calculate the number of tiles needed. To do this, you will need to know the size of the tile you have chosen. Divide the total square footage by the area of one tile to get the number of tiles required.
Example:
Tile size = 4×4 inches = 16 square inches
Number of tiles required = Total Square Footage / Area of one tile = 648 square inches / 16 square inches = 40.5
Important Note: Since you cannot have half a tile, always round up to the nearest whole number. In this case, you will need 41 tiles.
Additional materials required
Aside from the tiles, there are additional materials you will need for the installation process. These may include:
- Tile adhesive or thin-set mortar
- Grout
- Tile spacers
- Trowel
- Notched trowel
- Tile cutter or wet saw
- Grout float
- Bucket
- Sponge
It is important to ensure you have all the necessary materials on hand before beginning the installation process to avoid any delays or interruptions.
By carefully measuring and calculating the materials required for your tile backsplash installation, you can efficiently plan and execute the project. Remember to always double-check your measurements and purchase a few extra tiles to account for any potential mistakes or future replacements. Armed with the right materials, you are well on your way to transforming your bathroom with a beautiful tile backsplash.
Cleaning And Removing Existing Backsplash
Removing any existing tiles or backsplash
To install a new tile backsplash in your bathroom, you need to start by removing any existing tiles or backsplash. This step is important to ensure a clean and smooth surface for the new installation. Here’s how you can remove the existing tiles or backsplash:
- Begin by carefully inspecting the surface to identify any loose or cracked tiles. Take note of these areas as they will need extra attention during the removal process.
- Use a putty knife or a grout saw to carefully chip away the grout surrounding the tiles. Make sure to work in a gentle and controlled manner to avoid damaging the wall surface.
- Once the grout is removed, gently tap on the tiles with a hammer and chisel to loosen them from the wall. Start from one corner and work your way towards the center, taking care not to apply excessive force.
- Continue removing the tiles by prying them away from the wall using a putty knife or a scraper. Be patient and work in small sections to prevent any accidental damage.
- Repeat the process until all the tiles or backsplash are completely removed from the wall.
Cleaning the wall surface thoroughly
After the existing tiles or backsplash are removed, it’s crucial to clean the wall surface thoroughly. This step ensures that there are no remnants of adhesive or grout left behind, and provides a clean canvas for the new tile installation. Here’s how you can clean the wall surface:
- Start by wiping down the wall with a damp cloth to remove any loose debris or dirt.
- Next, mix a solution of warm water and mild soap in a bucket.
- Dip a sponge or a soft brush into the soapy water and scrub the wall surface gently. Pay attention to any stubborn stains or adhesive residue, and apply a bit of extra pressure if needed.
- Rinse the wall thoroughly with clean water to remove any soap residue.
- Allow the wall to dry completely before proceeding with the next step.
Patching any holes or uneven areas
Before installing the new tile backsplash, it’s important to patch any holes or uneven areas on the wall surface. This helps ensure a smooth and even result, and provides a solid foundation for the new tiles. Here’s how you can patch any holes or uneven areas:
- Inspect the wall surface for any holes, cracks, or unevenness. Use a putty knife or a wall scraper to remove any loose or flaking material from these areas.
- Prepare the appropriate patching material according to the instructions provided. This could be a premixed spackling compound or a wall patching compound.
- Apply the patching material to the holes or uneven areas using the putty knife or scraper. Smooth the material evenly over the surface, ensuring it is level with the surrounding wall.
- Allow the patching material to dry completely, following the manufacturer’s recommended drying time.
- After the patching material is dry, lightly sand the patched areas to create a smooth finish. Wipe away any dust with a clean cloth.
By following these steps to remove any existing tiles or backsplash, clean the wall surface thoroughly, and patch any holes or uneven areas, you will be ready to move on to the next stage of installing a tile backsplash in your bathroom.
Applying A Tile Backer Board
Choosing the Right Backer Board for Your Needs
When it comes to installing a tile backsplash in your bathroom, one of the most crucial steps is choosing the right backer board. The backer board plays a vital role in ensuring the stability and longevity of your tile installation, providing a solid surface for the tiles to adhere to.
There are several types of backer boards available, each with its own set of advantages and disadvantages. Here are some popular options:
| Type of Backer Board | Advantages | Disadvantages |
|---|---|---|
| Cement Backer Board | Durable and moisture-resistant | Heavy and requires special tools to cut |
| Fiber Cement Board | Lighter than traditional cement board | Can be more expensive |
| Gypsum Board | Easy to cut and install | Not suitable for wet areas |
Consider the specific needs of your bathroom and choose a backer board that best suits your requirements. Once you have selected the right type of backer board, you are ready to move on to the next step.
Cutting and Fitting the Backer Board to Cover the Area
Before installing the backer board, you need to measure and cut it to fit the area where you will be installing the tile backsplash. Use a tape measure to determine the dimensions, and mark the backer board accordingly. You can then use a utility knife or a power saw with a carbide blade to make the necessary cuts. Be sure to wear the appropriate safety gear, such as goggles and gloves, when handling tools.
After cutting the backer board, double-check the fit by placing it against the wall. Make any necessary adjustments before proceeding to the next step.
Installing the Backer Board Securely to the Wall
Once you have cut and fitted the backer board, it’s time to install it securely to the wall. Start by applying a thin layer of construction adhesive to the backer board, ensuring complete coverage. Then, press the backer board firmly against the wall, making sure it is level and plumb.
Next, use a power drill and screws to secure the backer board in place. Ensure that the screws penetrate the studs or wall framing for maximum stability. Maintain a consistent spacing between the screws, typically around 6 to 8 inches apart along the edges.
Sealing the Joints and Corners of the Backer Board
To ensure the backer board provides adequate moisture resistance, it is essential to seal the joints and corners. Use a high-quality, waterproof sealant to fill in any gaps or seams between the backer board panels. Pay close attention to areas where two panels meet and corners where water could potentially penetrate.
Apply the sealant in a continuous, even bead, working it into the joints with a caulk gun. Smooth the sealant with a damp cloth or your finger to achieve a neat finish. Allow the sealant to dry completely before proceeding with the tile installation process.
By following these steps and choosing the right backer board, you can ensure a sturdy foundation for your tile backsplash in the bathroom. The backer board will provide the necessary support and water resistance to keep your tiles looking beautiful for years to come.
Setting Up Tile Layout
Before you start installing a tile backsplash in your bathroom, it is essential to carefully set up the tile layout. This step ensures that your backsplash will be properly aligned, visually appealing, and long-lasting. In this section, we will guide you through the process of establishing a horizontal and vertical reference line, dry laying the tiles to confirm the layout, and marking the start and end points of the backsplash area.
Establishing a Horizontal and Vertical Reference Line
The first step in setting up the tile layout is to establish a horizontal and vertical reference line. These lines will serve as a guide for properly aligning the tiles and maintaining a uniform look. To do this:
- Start by locating the center point of your bathroom wall where you want to install the backsplash. Measure the width of the wall and mark the center point with a pencil.
- Using a level, draw a horizontal line across the center point of the wall. This will be your horizontal reference line.
- Next, draw a vertical line from the top to the bottom of the wall, intersecting the horizontal reference line. This will be your vertical reference line.
- Double-check the accuracy of these lines with a level, making any necessary adjustments to ensure they are perfectly straight.
Dry Laying the Tiles to Confirm the Layout
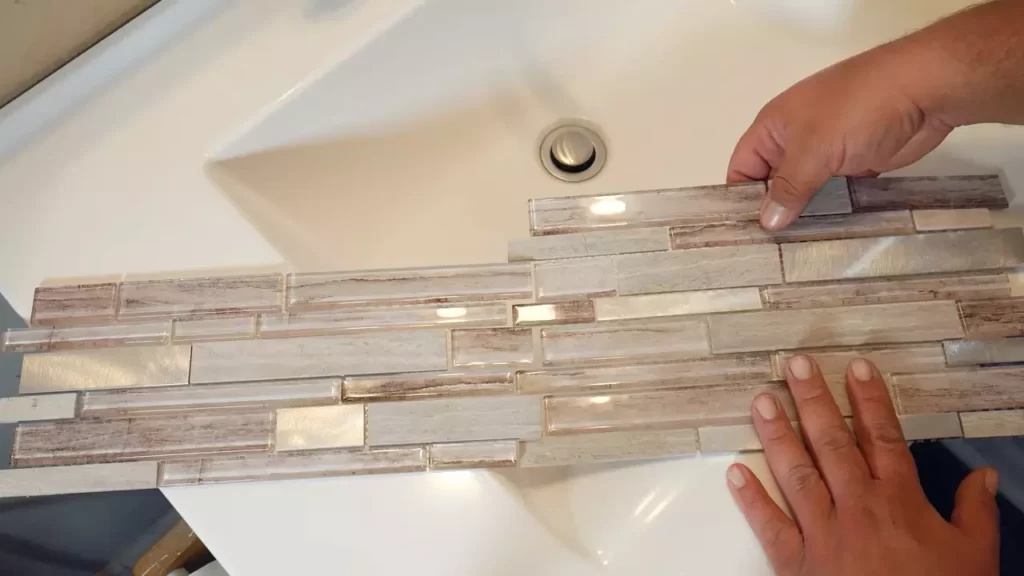
To ensure that you are satisfied with the tile layout before permanently installing them, it is recommended to do a dry lay. This involves placing the tiles on the wall without adhesive to confirm their placement. To dry lay the tiles:
- Start by placing the first tile at the intersection of the horizontal and vertical reference lines.
- Continue laying the tiles outward, following your desired pattern, while maintaining consistent spacing between them.
- Adjust the tiles as needed to achieve the desired look and ensure they fit within the backsplash area.
By dry laying the tiles, you can easily make adjustments and visualize the final result. This step is crucial for avoiding any surprises or mistakes during the actual installation.
Marking the Start and End Points of the Backsplash Area
Once you are satisfied with the tile layout, it’s time to mark the start and end points of the backsplash area. This will help you stay organized and ensure that you don’t accidentally install tiles beyond the intended area. To mark the start and end points:
- Measure and mark the height of the backsplash area from the horizontal reference line at both ends.
- Draw a horizontal line at this height, connecting the marks. This line will indicate the top edge of the backsplash.
By marking the start and end points, you can confidently proceed with the tile installation, knowing exactly where the backsplash should start and finish.
Applying Tile Adhesive
Choosing the Appropriate Tile Adhesive
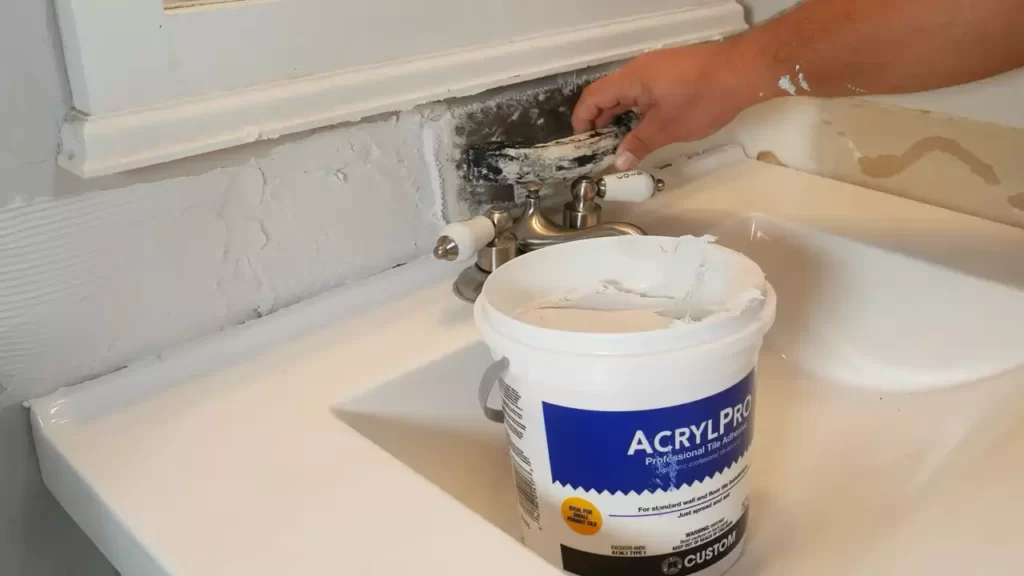
Choosing the right tile adhesive is crucial to ensure a successful and long-lasting tile backsplash in your bathroom. Different adhesives are designed for specific purposes, such as for ceramic or porcelain tiles, glass tiles, or natural stone tiles. Before heading to the store, make sure to determine the type of tile you’ll be using for your backsplash.
Once you know the type of tile, check the recommendations of the tile manufacturer. They usually provide suggestions for the type of adhesive that works best with their tiles. This will help you narrow down your options and find the most appropriate adhesive for your project.
Preparing the Adhesive According to the Manufacturer’s Instructions
When it comes to preparing the tile adhesive, it’s essential to read and follow the manufacturer’s instructions carefully. The instructions will provide you with important details such as the mixing ratio, curing time, and any necessary pre-application preparations. Following these instructions will ensure the adhesive performs optimally and provides a strong bond between the tiles and the wall.
Before you start mixing the adhesive, ensure that you have all the necessary tools and materials ready. This includes a clean bucket, a mixing paddle, water, the adhesive powder or pre-mixed adhesive, and a measuring device if required. Take your time to measure and mix the adhesive according to the instructions, paying close attention to the consistency recommended by the manufacturer.
Applying the Adhesive to the Wall in Small Sections
Once your adhesive is properly mixed and prepared, it’s time to start applying it to the wall. It’s crucial to work in small sections to ensure that the adhesive doesn’t dry out before you have a chance to place the tiles.
Start by using a notched trowel to apply the adhesive to the wall. Hold the trowel at a 45-degree angle and spread the adhesive evenly, creating ridges in the process. This will help with the adhesion and ensure a secure bond between the wall and the tiles.
Continue applying adhesive to small sections of the wall until you’ve covered the area where you’ll be installing the tiles. Avoid applying too much adhesive at once, as it can become difficult to manage and may start drying before you have a chance to complete the tiling process.
Remember to work efficiently, but also take your time to ensure proper application. Press the tiles firmly into the adhesive, using a twisting motion to make sure they bond securely with the wall. Repeat this process until all the tiles are in place and the adhesive is fully utilized.
Setting The Tiles
Placing the first tile at the marked starting point
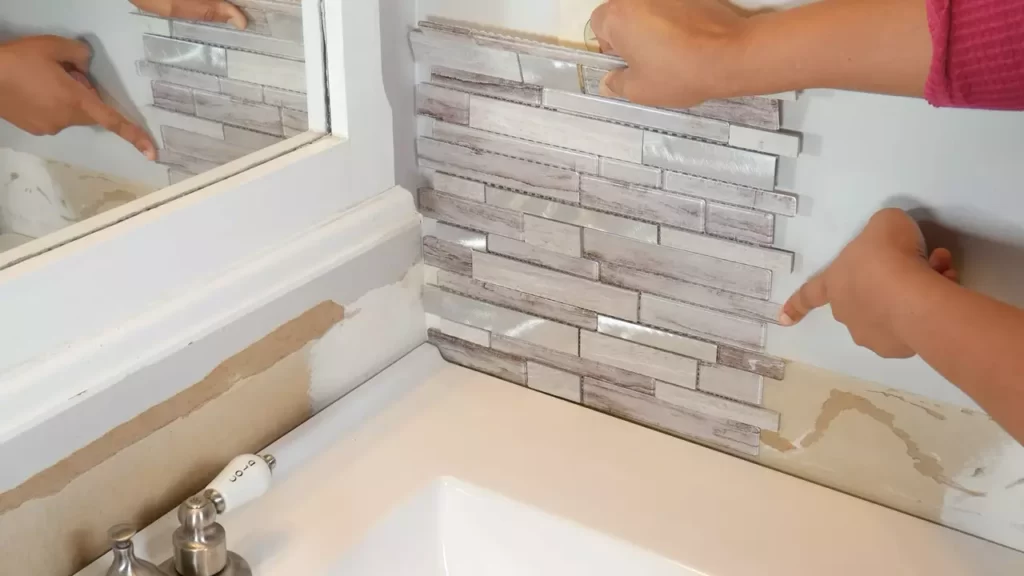
Now that you have prepared the surface and applied the adhesive, it’s time to start setting the tiles. To ensure an accurate installation, it’s crucial to begin with the first tile at the marked starting point. This will serve as a reference for the rest of the tiles.
Pressing the tile firmly into the adhesive
Once you have positioned the first tile in the designated starting point, press it firmly into the adhesive. This will help the tile adhere securely to the wall surface. Make sure to apply even pressure across the entire tile to ensure proper adhesion.
Using tile spacers to maintain consistent grout lines
To achieve a professional and polished look, it’s essential to use tile spacers. These small, plastic inserts allow you to maintain consistent grout lines between the tiles. Place the spacers at each corner of the tile, creating an equal gap between adjacent tiles. This will ensure that your grout lines are uniform and visually pleasing.
Continuing to lay the tiles along the reference lines
Now that you have placed the first tile and secured it with spacers, it’s time to continue laying the tiles along the reference lines. This will ensure that your tiles are aligned and positioned correctly. Repeat the process of pressing each tile firmly into the adhesive, using spacers as you go along.
Remember to periodically check the level and alignment of your tiles using a level or straightedge. This will help you catch any irregularities and make adjustments as needed.
Continue this process until you have covered the desired area with tiles. Make sure to pay attention to any cutouts that may be required around fixtures or corners. Adjust the size and shape of the tiles accordingly, using a tile cutter or wet saw.
Setting the tiles in a bathroom backsplash can be a comprehensive but rewarding task. Take your time, follow the proper techniques, and you’ll soon have a beautiful and durable tile backsplash that will enhance your bathroom’s aesthetic appeal.
Cutting And Fitting Tiles
Measuring and Marking Tiles for Cuts
Before you start cutting and fitting tiles for your bathroom backsplash installation, it is crucial to measure and mark the tiles accurately. This will help ensure that your cuts are precise and the tiles fit seamlessly.
To measure the tiles, use a tape measure and measure the wall area where you will be installing the tile. Take note of any outlets, corners, or edges that will require special cuts. Mark these areas on the tiles using a pencil or a tile marker. This will serve as a guide as you make your cuts.
Using a Tile Cutter or Wet Saw to Make Precise Cuts
Once you have measured and marked the tiles, it’s time to make the cuts. There are two main tools you can use for this task: a tile cutter or a wet saw.
If you prefer a more affordable and portable option, a tile cutter is your best bet. This tool works by scoring the surface of the tile and then breaking it along the scored line. It is perfect for straight cuts and smaller tiles.
On the other hand, if you are working with larger tiles or need to make intricate cuts, a wet saw is the way to go. A wet saw uses a water-cooled diamond blade that effortlessly cuts through ceramic, porcelain, or stone tiles. It provides a clean and precise cut, making it ideal for complex cuts and professional-style installations.
Fitting Cut Tiles Around Outlets, Corners, and Edges
When fitting cut tiles around outlets, corners, and edges, it is crucial to ensure a seamless and professional finish. Here are some steps to follow:
- For outlets: Start by measuring the position of the outlet and transferring the measurements onto the tile. Using a tile nipper or a tile saw, carefully make the necessary cuts to accommodate the outlet. Fit the cut tile around the outlet, ensuring a snug fit.
- For corners: Measure the distance between the last full tile and the corner. Transfer these measurements onto the tile and cut accordingly. Use a tile file or sandpaper to smooth the edges after cutting. Fit the cut tile into the corner, making sure it aligns perfectly with the adjacent tiles.
- For edges: Measure and mark the area where the tile needs to be cut to fit along the edge. Use a tile cutter or wet saw to make the cut, ensuring precision. Install the cut tile along the edge, allowing for any necessary spacing or grout lines.
By following these steps and taking your time to measure, mark, and make precise cuts, you can achieve a beautifully fitted tile backsplash in your bathroom. Remember to always prioritize safety when using cutting tools, wear protective gear, and work in a well-ventilated area.
Grouting The Tile Backsplash
Mixing the grout according to the manufacturer’s instructions
Before applying the grout to your newly installed tile backsplash, it is important to mix it properly. Start by reading and following the manufacturer’s instructions as the ratio of grout to water may vary depending on the brand and type of grout you have chosen.
Using a mixing container, add the grout powder and water in the specified amounts. Remember to wear protective gloves and a dust mask as the grout can be dusty and may irritate your skin and respiratory system. Use a grout mixing paddle or a drill with a mixing attachment to combine the grout and water until you achieve a smooth consistency. The grout should be thick enough to hold its shape but still be easy to spread.
Applying the grout to the tile surfaces
Once you have mixed the grout to the right consistency, it’s time to apply it to the tile surfaces. Begin by using a rubber grout float to scoop some grout onto its edge and apply it to the tile joints. Hold the float at a 45-degree angle and move it diagonally across the tiles, forcing the grout into the joints.
Work in small sections to ensure the grout doesn’t dry out before you can clean it off. Apply the grout evenly, ensuring that all the gaps between the tiles are filled. Use the edge of the grout float to scrape off any excess grout from the tile surfaces.
Cleaning off excess grout with a grout float and sponge
Once you have applied the grout and scraped off the excess, it’s time to clean off the remaining residue. Take a damp grout sponge and lightly wipe the tile surfaces in a circular motion. Rinse the sponge frequently to ensure you are removing the grout from the tiles without spreading it around.
Make sure to apply gentle pressure to avoid disturbing the freshly applied grout. Be thorough in your cleaning, ensuring all the grout haze is removed from the tile surfaces. Pay attention to the edges and corners, as these are areas where excess grout may accumulate.
Sealing the grout to protect against stains
Once the grout has dried completely, it is important to seal it to protect against future stains and discoloration. Choose a grout sealer that is suitable for the type of grout you have used.
Using a small brush or a foam applicator, apply the sealer to the grout lines. Be careful not to get any sealer on the tile surfaces, as it may cause a hazy or sticky residue. Allow the sealer to dry according to the manufacturer’s instructions.
Sealing the grout will help maintain its color and prevent dirt, grime, and moisture from penetrating the surface. Regular resealing is recommended to ensure the longevity and cleanliness of your tile backsplash.
Applying Caulk And Trim
When it comes to installing a tile backsplash in your bathroom, applying caulk and trim is an important step that adds the finishing touches to the project. Not only does it provide a clean and professional look, but it also helps to seal gaps and joints to prevent moisture from seeping behind the tiles. In this section, we will discuss how to use caulk effectively and install trim pieces to frame the backsplash, enhancing its overall appearance.
Using Caulk to Seal Gaps and Joints
To ensure a watertight seal and a seamless finish, caulking is essential when installing a tile backsplash in the bathroom. Here’s how you can do it:
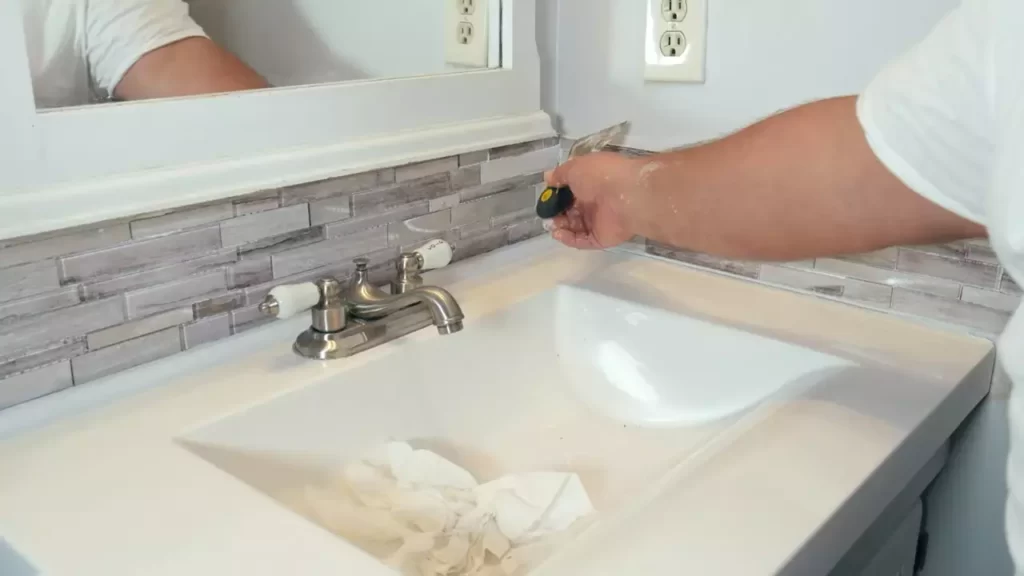
- Start by selecting a high-quality caulk that is specifically designed for bathroom use. Look for a product that is mold and mildew resistant to prevent future issues.
- Prepare the area by cleaning and thoroughly drying the gaps and joints where the tiles meet the countertop, sink, or any other surface. Remove any old caulk or debris to ensure a clean working surface.
- Using a caulk gun, apply a thin and even bead of caulk along the gaps and joints. Take care not to apply too much pressure, as this can result in excess caulk and a messy appearance.
- Smooth the caulk immediately after applying it using a caulk smoothing tool or your finger. Wipe away any excess caulk to create a neat and tidy finish. Remember to keep a damp cloth nearby to wipe off your finger or the tool as you go.
- Allow the caulk to dry completely according to the manufacturer’s instructions. This usually takes a few hours, but it’s best to wait for at least 24 hours before exposing the caulked area to moisture.
Installing Trim Pieces to Frame the Backsplash
Trim pieces not only provide a decorative element to your bathroom backsplash but also help to protect the edges of the tiles. Here’s how you can install trim pieces effectively:
- Measure and cut the trim pieces to the desired length using a miter saw or a tile cutter. Ensure that the corners are cut at 45-degree angles for a clean and professional look.
- Apply a thin layer of tile adhesive to the back of the trim pieces using a notched trowel. Press the trim firmly onto the edge of the tile, ensuring that it is aligned and level with the tiles.
- Secure the trim pieces in place using painter’s tape or clamps while the adhesive dries. This will help to prevent any movement or shifting during the drying process.
- After the adhesive has dried completely, remove the painter’s tape or clamps. Fill any gaps between the trim and the tiles with caulk, following the same caulking process mentioned earlier.
- Once the caulk has dried, clean the tiles and trim thoroughly to remove any excess adhesive or caulk residue. Use a damp cloth or sponge to wipe the surface gently.
By applying caulk and installing trim pieces, you can enhance the overall look and functionality of your bathroom tile backsplash. It’s important to take your time and ensure that these steps are completed properly to achieve a professional and long-lasting result.
Cleaning And Maintaining The Tile Backsplash
Cleaning and maintaining the tile backsplash in your bathroom is an essential part of keeping it looking beautiful and ensuring its longevity. Regular cleaning and addressing any stains or discoloration are key to preserving the appearance of the tile. In this section, we will discuss the recommended cleaning methods and products to use for your tile backsplash, as well as how to address any stains or discoloration that may occur.
Regular cleaning methods and products to use
To keep your tile backsplash in pristine condition, regular cleaning is necessary. Here are some recommended methods and products to use for cleaning:
1. Warm water and mild detergent: Start by mixing warm water with a gentle detergent. Dip a soft sponge or cloth into the solution and gently scrub the tile surface. This method is suitable for routine cleaning and can help remove surface dirt and grime.
2. Vinegar and water solution: For a natural and effective cleaning solution, mix equal parts of vinegar and water. This solution can cut through grease and grime on the tile backsplash. Use a sponge or cloth to apply the solution and wipe the tiles clean.
3. Tile cleaner: There are various tile cleaners available in the market specifically designed for cleaning tile surfaces. Ensure you read the instructions carefully and choose a cleaner that is suitable for your type of tile. Follow the manufacturer’s guidelines for application and always test the cleaner on a small, inconspicuous area before applying it to the entire backsplash.
4. Grout cleaner: The grout between the tiles can also accumulate dirt and require cleaning. Use a grout cleaner to remove any stains or discoloration. Apply the cleaner directly to the grout lines and scrub gently with a grout brush. Rinse thoroughly with water to remove any residue.
Addressing any stains or discoloration
Despite regular cleaning, stains or discoloration may still occur on your tile backsplash. Here are some steps to address them:
1. Grease stains: If you notice grease stains on your tile backsplash, create a paste using baking soda and water. Apply the paste to the stained area and let it sit for a few minutes. Scrub gently with a soft brush or cloth, then rinse with water.
2. Mold and mildew: If you observe mold or mildew on your tile backsplash, create a solution of equal parts water and bleach. Apply the solution to the affected area and let it sit for 15-20 minutes. Scrub gently with a brush, then rinse thoroughly to remove any traces of bleach.
3. Hard water stains: Hard water stains can be stubborn to remove. Use a mixture of equal parts vinegar and water to break down the mineral deposits. Apply the solution to the stains and let it sit for a few minutes before scrubbing gently. Rinse with water and dry the surface thoroughly.
Remember to wear protective gloves and ensure proper ventilation when using cleaning products. Regular maintenance and prompt attention to stains and discoloration can help preserve the beauty of your tile backsplash in the bathroom.
Enjoying Your New Tile Backsplash
After all the hard work you’ve put into installing a beautiful tile backsplash in your bathroom, it’s time to sit back, relax, and enjoy the fruits of your labor. Your new tile backsplash not only adds a stylish touch to your bathroom, but it also serves a practical purpose by protecting your walls from moisture and stains. Here are a few tips to help you fully enjoy your new tile backsplash.
Step back and admire your completed project
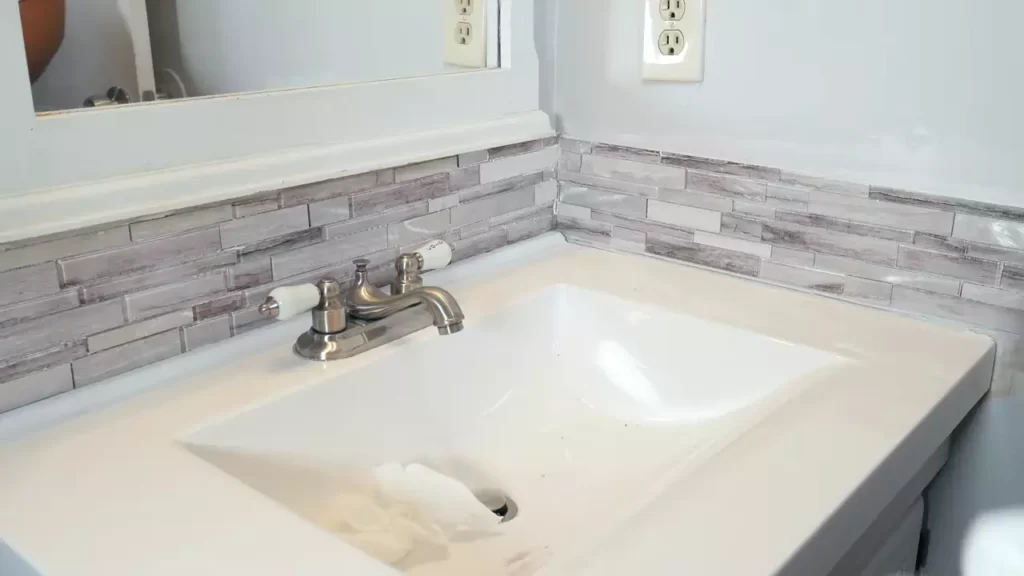
Now that your tile backsplash is fully installed, take a moment to step back and admire the transformation. Marvel at how the carefully chosen tile design and color scheme have completely transformed the look and feel of your bathroom. Take pride in the fact that you were able to achieve this stunning result with your own two hands.
Invite family and friends over to see your new backsplash. Let them appreciate the effort and attention to detail that went into creating such a beautiful addition to your bathroom. They’ll be impressed by your DIY skills and may even request your help with their own home improvement projects!
Tips for keeping your backsplash looking its best
To ensure that your tile backsplash continues to shine and maintain its pristine condition, there are a few key maintenance tips you should keep in mind:
- Regularly clean your tile backsplash with a mild detergent and warm water. Avoid using abrasive cleaners or harsh chemicals, as these can damage the tiles.
- Wipe up any spills or splatters immediately to prevent stains or discoloration.
- Use a soft brush or sponge to scrub away any grime or dirt that may accumulate over time.
- Consider applying a tile sealer to protect the grout and tiles from moisture and stains. Consult with a professional or read the product instructions carefully before applying.
- Avoid placing sharp or heavy objects directly on the tile surface, as they may chip or crack the tiles.
- Periodically inspect the grout lines and repair any cracks or gaps to prevent water from seeping behind the tiles.
By following these simple maintenance tips, you can ensure that your tile backsplash remains a beautiful and functional addition to your bathroom for years to come.
Frequently Asked Questions Of How To Install A Tile Backsplash In Bathroom
How Do You Prepare A Bathroom Wall For Tile Backsplash Installation?
To prepare a bathroom wall for tile backsplash installation, start by removing any existing wallpaper or loose paint. Clean the wall thoroughly to remove any dirt or grease. Fill in any holes or cracks with spackle and sand the surface smooth.
Finally, apply a coat of primer before installing the tile.
What Tools Do You Need To Install A Tile Backsplash In A Bathroom?
To install a tile backsplash in a bathroom, you will need a few essential tools. These include a tape measure, a level, a notched trowel, a tile cutter, a grout float, and a sponge. Additionally, you will need materials such as tiles, adhesive, grout, and caulk.
How Do You Install A Tile Backsplash In A Bathroom?
To install a tile backsplash in a bathroom, start by measuring and marking the area where the tiles will be installed. Apply adhesive to the wall using a notched trowel and press the tiles firmly into place. Allow the adhesive to dry, then grout the tiles and wipe away any excess.
Finally, seal the edges with caulk for a finished look.
Conclusion
Installing a tile backsplash in your bathroom is a manageable DIY project that can greatly enhance the overall look and functionality of your space. By following the step-by-step guide and tips provided in this blog post, you can confidently tackle this project and achieve professional-looking results.
So go ahead and give your bathroom a stunning makeover with a beautiful tile backsplash!

