How to Install Ceiling Fan Switch?
To install a ceiling fan switch, turn off the power, remove the old switch, connect the new switch’s wires, and secure the switch in place with screws. Installing a ceiling fan switch involves several steps, starting with turning off the power and removing the old switch.
Then, you connect the wires of the new switch and secure it in place with screws. This guide will provide you with the necessary instructions to successfully install a ceiling fan switch.
Understanding The Basics Of Ceiling Fan Switches
Different types of ceiling fan switches
A ceiling fan switch is an essential component of your ceiling fan that controls its speed, direction, and light. Understanding the different types of switches available can help you make an informed decision while installing or replacing a ceiling fan switch.
- Pull-chain switches: These switches are the most common type found in ceiling fans. They usually have a chain that hangs down from the fan body, allowing you to change the fan’s speed or turn the light on/off by pulling the chain. A single pull-chain switch controls the fan’s speed (high, medium, low) and another switch controls the light.
- Rotary switches: These switches have a dial or knob that allows you to select different fan speeds and control the light. They are often found in older ceiling fan models.
- Slide switches: These switches have sliding knobs or levers that let you adjust the fan’s speed. Some models may have separate sliders to control the fan speed and light.
- Remote control switches: These switches use a handheld remote to control the fan’s speed, direction, and light. They offer convenience and are popular among homeowners.
- Wall-mounted switches: These switches are installed on the wall and typically have buttons or switches to adjust the fan’s speed and control the light. They offer easy access and are a popular choice for households.
Importance of a properly functioning ceiling fan switch
A properly functioning ceiling fan switch is crucial for the efficient and convenient operation of your ceiling fan. It ensures that you can control the fan’s speed and light effortlessly, enhancing your comfort and maintaining a pleasant environment in your space. Additionally, a malfunctioning switch can lead to an inefficient fan motor, excessive energy consumption, or damage to the fan itself.
Common symptoms of a faulty switch
Identifying common symptoms of a faulty ceiling fan switch can help you troubleshoot and address the issue promptly:
- Fan not responding to switch actions
- Inconsistent or erratic fan speed
- Fan stuck on high speed
- Lights not turning on or off
- Switch getting hot during operation
If you notice any of these symptoms, it is advisable to check the switch and replace it if necessary to ensure your ceiling fan operates smoothly and efficiently.
Preparing For Installation
Before you start the installation process for your ceiling fan switch, it’s important to prepare properly. This includes gathering the necessary tools and materials, taking safety precautions, and turning off the power supply. By following these steps, you can ensure a smooth and successful installation.
Gathering the necessary tools and materials
Before you begin, make sure you have all the tools and materials you’ll need for the installation. Here are the items you should have on hand:
| Tools | Materials |
|---|---|
| Wire cutters | Ceiling fan switch |
| Screwdriver | Wire connectors |
| Voltage tester | Electrical tape |
| Wire strippers | Mounting bracket |
| Step ladder | Screws |
Having these tools and materials ready will ensure that you have everything you need to complete the installation without any interruptions.
Safety precautions to take before starting the installation process
When it comes to electrical work, safety should always be a top priority. Before you begin the installation process, make sure to take the following safety precautions:
- Ensure you are wearing appropriate protective gear, such as gloves and safety goggles.
- Turn off the power supply to the ceiling fan by switching off the relevant circuit breaker.
- Use a voltage tester to ensure that the power is off and that there is no electricity flowing to the fan.
- Keep any flammable materials away from the work area to prevent accidents.
- Avoid working on a wet surface or in wet conditions to minimize the risk of electrical shocks.
By taking these safety precautions, you can reduce the risk of accidents and ensure a safe working environment.
Turning off the power supply to the ceiling fan
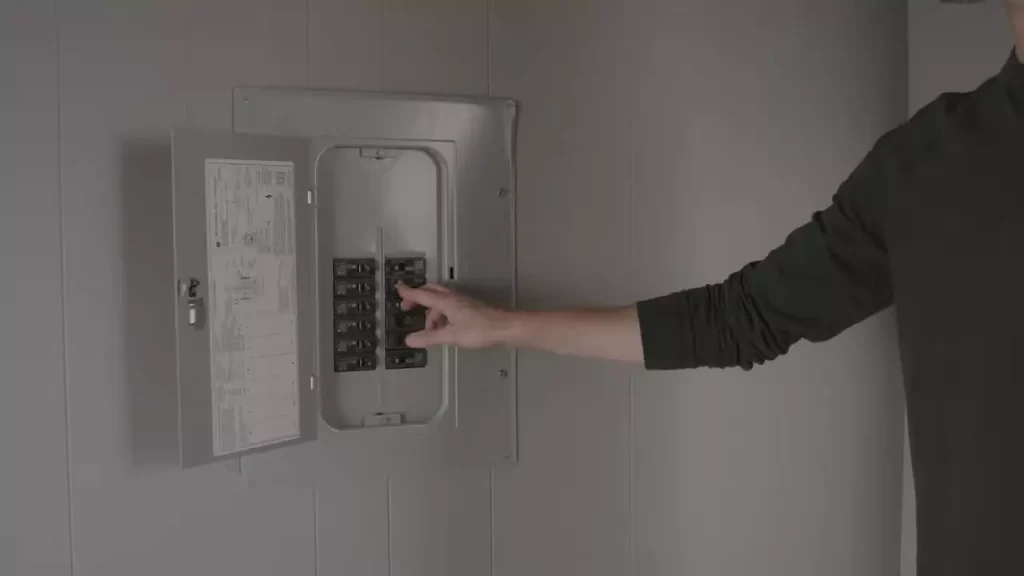
Before you can begin the installation process, it’s crucial to turn off the power supply to the ceiling fan. This step will ensure your safety while working on the electrical components of the switch. To turn off the power:
- Locate the circuit breaker that controls the ceiling fan.
- Flip the switch to the “off” position to disconnect the power supply.
- Use a voltage tester to double-check that the power is off before proceeding.
By following these steps, you can be confident that the power supply is turned off and it is safe to begin the installation process.
Now that you have gathered the necessary tools and materials, taken the necessary safety precautions, and turned off the power supply to the ceiling fan, you are ready to move on to the next step of the installation process. Stay tuned for our next blog post on how to proceed with installing the ceiling fan switch!
Step 1: Removing The Old Fan Switch
Replacing a ceiling fan switch is a relatively simple task that can be done by anyone with basic DIY skills. This step-by-step guide will walk you through the process, starting with removing the old fan switch. Before you begin, make sure you have turned off the power to the fan at the circuit breaker to ensure your safety. Now, let’s get started with step 1: removing the old fan switch.
Locating the housing and cover of the switch
The first thing you need to do is locate the housing and cover of the switch. Usually, the fan switch is housed in a small compartment on the side or bottom of the fan. It is often covered by a decorative plate or panel. Take a look at your fan and try to find the switch housing.
Removing the cover and exposing the wiring
Once you have located the switch housing, it’s time to remove the cover and expose the wiring. Using a screwdriver, carefully remove the screws or fasteners that are securing the cover in place. Set the screws aside in a safe place, as you will need them later. With the cover removed, you should now be able to see the wiring that connects the switch to the fan motor.
Disconnecting the old switch from the wiring
Now that you have exposed the wiring, it’s time to disconnect the old switch. Start by carefully examining the connection points between the switch and the wires. You should see a series of wires connected to small terminals on the switch. Using a pair of wire cutters or pliers, carefully disconnect the wires from the terminals. Take note of which wire is connected to which terminal for easier installation of the new switch later on.
Once the wires are disconnected, you can remove the old switch from the switch housing. Be gentle when removing the switch to avoid damaging any of the wiring or other components. With the old switch removed, you have successfully completed step 1 of replacing the ceiling fan switch.
>>
Summary:
- Start by locating the housing and cover of the switch.
- Remove the cover to expose the wiring.
- Disconnect the old switch from the wiring, making note of the wire connections.
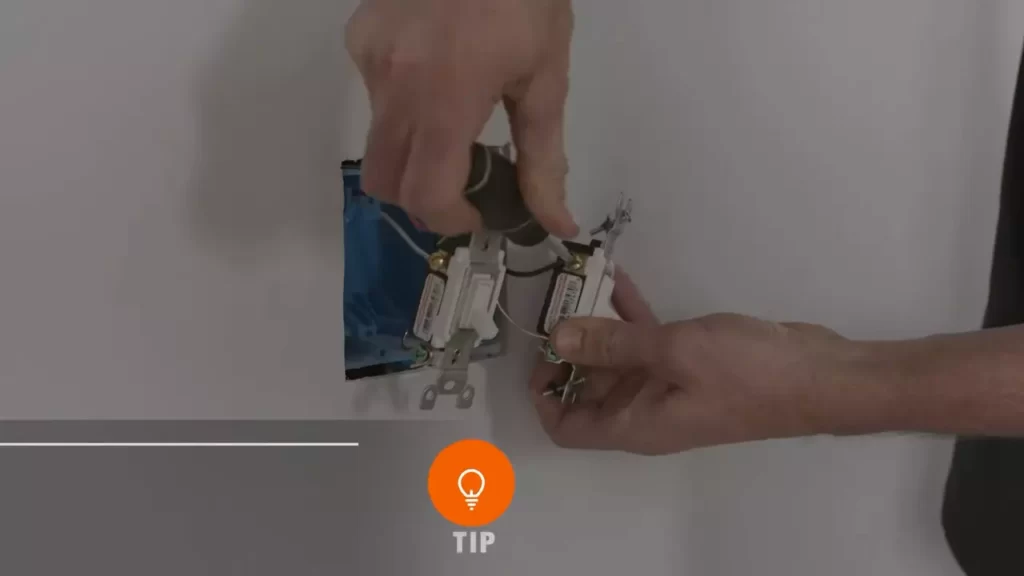
Step 2: Identifying The New Switch
Once you have gathered all the necessary tools mentioned in step 1, the next crucial step in installing a ceiling fan switch is identifying the new switch you will be using. In this step, we will explore different types of ceiling fan switches, choose the appropriate switch for your fan, and ensure compatibility with your existing setup.
Exploring different types of ceiling fan switches
When it comes to selecting a ceiling fan switch, you have several options to choose from. Each type of switch has its own unique features and functionalities. Let’s take a closer look at some of the most common types:
| Type | Description |
|---|---|
| Single-pole switch | This is the most basic type of switch, featuring an on/off function for controlling the fan’s operation. |
| Three-way switch | A three-way switch allows you to control the fan’s operation from two different locations. This is ideal for large rooms or areas where multiple access points are required. |
| Variable speed switch | If you prefer more control over the fan’s speed, a variable speed switch is a great option. It allows you to adjust the fan’s speed within a certain range to suit your comfort level. |
Choosing the appropriate switch for your fan
Choosing the right switch for your fan is crucial to ensure proper functionality and ease of use. Consider the following factors when selecting a switch:
- Fan type: Different fans may have specific switch requirements. Refer to your fan’s manual or consult a professional to determine the appropriate switch type.
- Wiring compatibility: Ensure the switch you choose is compatible with your existing wiring setup. If unsure, it’s wise to seek advice from an electrician to avoid any potential safety hazards.
- Personal preference: Take into account your preferences for functionality, such as having multiple control locations or variable speed options.
Ensuring compatibility with your existing setup
Compatibility with your existing setup is crucial to ensure a seamless installation process. Here are a few steps you can take to ensure compatibility:
- Check your current switch: Examine your current switch to determine its type and make note of any specific requirements or limitations.
- Match wiring configurations: Compare the wiring configurations of your existing switch and the new switch you are considering. Ensure they align to avoid any wiring issues.
- Refer to the manufacturer’s instructions: The manufacturer’s instructions for the new switch will often provide guidance on compatibility with different setups. Refer to these instructions for clarity.
By thoroughly exploring different types of ceiling fan switches, choosing the appropriate switch for your fan, and ensuring compatibility with your existing setup, you are well on your way to successfully identifying the new switch for your ceiling fan installation.
Step 3: Wiring The New Switch
With the new switch in hand and ready to be installed, it’s time to wire it properly and ensure a secure connection. Follow these steps to wire your new ceiling fan switch:
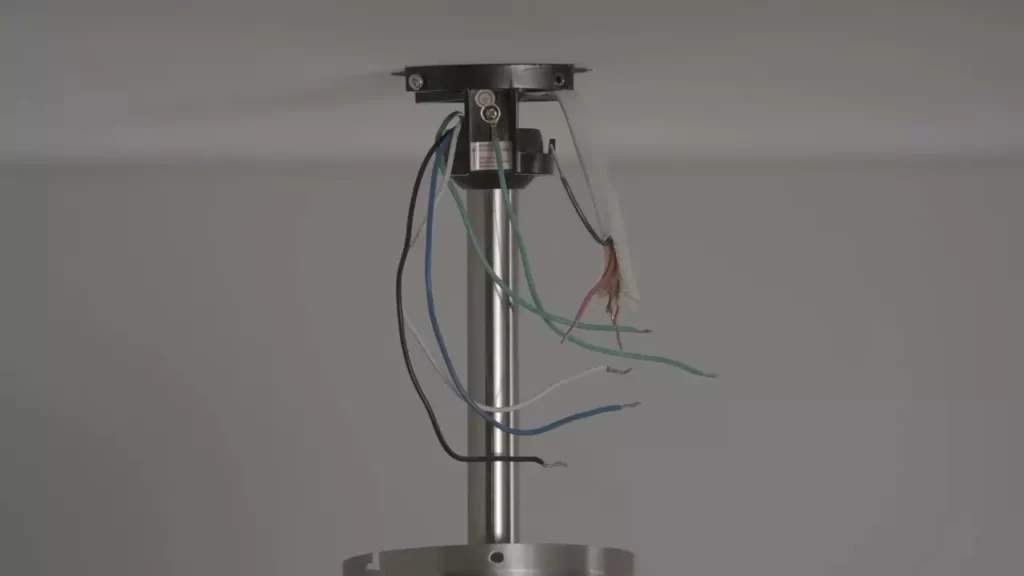
Identifying the different colored wires in your fan
The first step in wiring the new switch is to identify the different colored wires in your fan. Most fan manufacturers use standard wire colors, but it’s always a good idea to double-check to ensure accuracy. Typically, you’ll find three different colored wires: black, white, and blue.
Matching the wires to the corresponding terminals on the new switch
Once you have identified the different colored wires, it’s time to match them to the corresponding terminals on the new switch. This step is crucial for ensuring proper functionality of your ceiling fan. Refer to the manufacturer’s instructions or the wiring diagram provided with the new switch to determine which wires should be connected to each terminal.
To make the connection, follow these steps:
- Strip about 1/2 inch of insulation from the end of each wire using a wire stripper tool.
- Take the black wire from your fan and connect it to the black terminal on the new switch.
- Connect the white wire from your fan to the white terminal on the new switch.
- If your fan has a light kit, connect the blue wire from your fan to the blue terminal on the new switch.
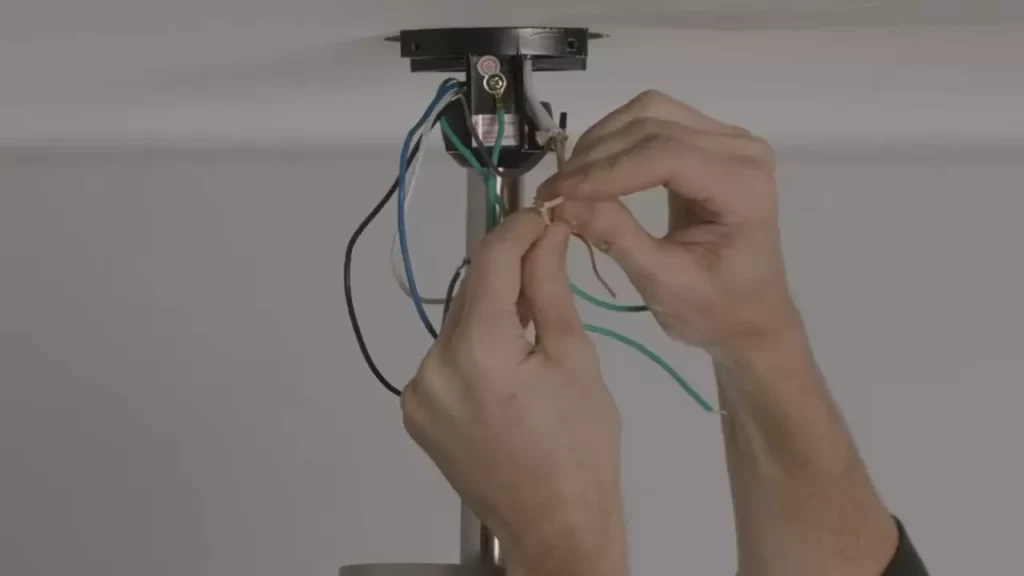
Properly securing the connections with wire nuts
Once you have matched the wires to the corresponding terminals, it’s important to properly secure the connections using wire nuts. Wire nuts are small, twist-on connectors that provide a secure and insulated connection.
Here’s what you need to do:
- Twist the stripped end of each wire clockwise.
- Place the wire nuts over the twisted ends of the wires.
- Twist the wire nuts in a clockwise direction until they are tightly secured.
- Gently tug on each wire to ensure it is firmly connected.
Remember to follow the manufacturer’s instructions and any applicable electrical codes during the installation process. If you are unsure about any step, it is always best to consult a professional electrician for assistance.
By following these steps, you will successfully wire your new ceiling fan switch, ensuring a safe and efficient operation of your fan.
Step 4: Installing The New Switch
Mounting the new switch into the fan housing
Once you have prepared the wiring connected to the new switch, it is time to mount it into the fan housing. This step involves securing the switch in place so that it remains stable and functional. To mount the new switch, follow these simple steps:
- Locate the appropriate slot in the fan housing where the switch will fit. Ensure that it aligns with the wiring and has enough space for operation.
- Gently insert the switch into the designated slot, making sure it is oriented correctly. Refer to the manufacturer’s instructions if needed.
- Apply a small amount of pressure to the switch, pushing it firmly towards the housing. You should feel it click into place or notice it becoming snug.
Ensuring the switch is securely attached
Once the switch is mounted, it is essential to ensure that it is securely attached to the fan housing. This step is crucial for the longevity and functionality of the switch. To ensure secure attachment, consider the following points:
- Inspect the switch to verify that it is flush against the housing without any gaps or loose areas.
- Give the switch a gentle wiggle to determine if it feels stable. It should not move or come loose easily.
- If you notice any instability or looseness, consider revisiting the mounting process. Double-check the installation and ensure that it is secure.
Double-checking the connections before proceeding
Before proceeding with the installation, it is crucial to double-check the connections and ensure everything is in order. Taking a few extra moments to verify the connections will help prevent potential issues down the line. Follow these steps to double-check the connections:
- Inspect each wire connection to ensure they are securely fastened. Look for any signs of loose or exposed wiring.
- Gently tug on each wire to check if it is firmly attached. If any of the wires come loose, reattach them properly before continuing.
- Use a voltage tester to ensure that power to the switch is turned off. Safety should always be a priority during installation.
By following these steps, you can effectively mount the new switch into the fan housing, ensure it is securely attached, and double-check all the connections. This careful approach will help guarantee the successful installation of your ceiling fan switch.
Step 5: Testing And Troubleshooting
Once you have successfully replaced the ceiling fan switch, it is important to test it to ensure that it functions properly. This crucial step ensures that you have installed the switch correctly, and allows you to troubleshoot any potential issues before completing the installation process. In this step, we will cover restoring power to the fan and testing the switch functionality, as well as common problems that may arise during testing and the appropriate solutions. Additionally, we will provide troubleshooting tips to assist you in identifying and resolving any issues that may occur with a malfunctioning switch.
Restoring Power to the Fan and Testing the Switch Functionality
Before testing the switch, it is essential to restore power to the ceiling fan. To do this, follow these steps:
- Locate the circuit breaker panel or the fuse box for your home.
- Identify the breaker or fuse that controls the power to the ceiling fan.
- Ensure that the breaker is in the “off” position or remove the fuse to cut off power to the fan.
- After a few minutes, flip the breaker to the “on” position or replace the fuse to restore power.
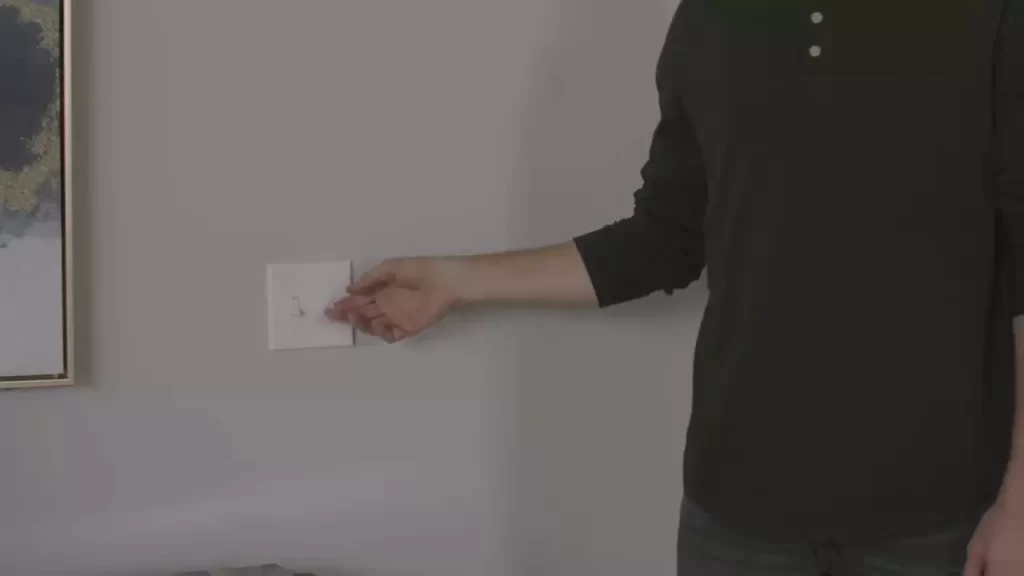
With the power restored, you can now proceed with testing the switch functionality. Follow these steps:
- Turn on the fan using the newly installed switch. Ensure that the fan blades start spinning.
- Test the different speed settings on the switch. Observe whether the fan speed adjusts accordingly.
- If your ceiling fan has a light, test the switch to ensure that the light turns on and off properly.
- Check if the reverse switch, if applicable, changes the direction of the fan blades.
Common Problems and Solutions During the Testing Phase
While testing the ceiling fan switch, you may encounter some common problems. Here are a few potential issues you may experience, along with their corresponding solutions:
| Problem | Solution |
|---|---|
| The fan is not turning on. |
|
| The fan is not changing speeds or the speed control is not functioning correctly. |
|
| The light is not turning on. |
|
Troubleshooting Tips for a Malfunctioning Switch
If you encounter a malfunctioning ceiling fan switch during testing, here are a few troubleshooting tips to help resolve the issue:
- Disconnect the power supply and recheck all wiring connections for loose or faulty connections.
- Inspect the switch for any visible damage, such as burnt or discolored areas, and replace if necessary.
- Consider using a multimeter to test the continuity of the switch and ensure that it is functioning as intended.
- If all else fails, consult a professional electrician for further assistance.
By following these testing and troubleshooting steps, you can ensure that your newly installed ceiling fan switch is working correctly and enjoy optimal functionality from your ceiling fan.

Additional Tips For Ceiling Fan Switch Installation
Properly installing a ceiling fan switch not only ensures the smooth operation of your fan, but also allows you to control the speed and direction of the fan blades according to your comfort. While the installation process itself may seem straightforward, there are a few additional tips that can enhance the overall experience and functionality of your ceiling fan switch. In this section, we’ll explore the importance of proper maintenance and care for your fan switch, how additional switches can enhance the functionality of your fan, and when it may be necessary to seek professional help for a successful installation.
Proper maintenance and care for your fan switch
Once your new ceiling fan switch is installed, it’s important to properly maintain and care for it to ensure its longevity and trouble-free operation. By following these simple tips, you can keep your fan switch in optimal condition:
- Regularly clean the fan switch using a soft cloth to remove any dust or debris that may accumulate over time.
- Avoid using harsh chemicals or abrasive materials, as these can damage the switch and affect its performance.
- Tighten any loose screws or connections to prevent any wobbling or instability.
- Check for any signs of wear or damage, such as frayed wires or cracks, and replace the switch if necessary.
By taking these simple steps, you can greatly extend the lifespan of your fan switch and ensure it continues to provide reliable performance for years to come.
Enhancing the functionality of your fan with additional switches
Did you know that you can enhance the functionality of your ceiling fan by incorporating additional switches? This allows you to have greater control over the fan’s features and customize your comfort level. Here are a few examples of how additional switches can enhance your fan’s functionality:
| Type of Switch | Functionality |
| Variable speed switch | Allows you to adjust the speed of the fan according to your preference, providing a gentle breeze for relaxation or a stronger airflow for cooling purposes. |
| Directional switch | Enables you to change the direction of the fan blades, which can be particularly useful during different seasons. In the summertime, setting the blades to rotate counterclockwise creates a cooling effect, while changing the direction to clockwise in the winter helps circulate warm air. |
| Light switch | If your ceiling fan comes with a built-in light fixture, installing a separate light switch allows you to control the light independently from the fan. This provides flexibility and convenience, especially in situations when you don’t need the fan running but still want the illumination. |
By adding these additional switches, you can tailor your ceiling fan to your specific needs and create a comfortable environment in any season.
Seeking professional help if unsure or uncomfortable with the process
If you’re uncertain or uncomfortable with the ceiling fan switch installation process, it’s always recommended to seek professional help. Electricians or experienced individuals can not only ensure a safe and proper installation, but they can also provide valuable advice and guidance on choosing the right type of switch for your specific fan model and needs. By enlisting professional help, you can have peace of mind knowing that your ceiling fan switch is installed correctly and functions flawlessly.
Remember, a successful ceiling fan switch installation is not only about the process itself but also about proper maintenance, enhancing functionality, and seeking help when needed. By following these additional tips, you can maximize the performance and enjoyment of your ceiling fan for years to come.
Frequently Asked Questions On How To Install Ceiling Fan Switch
How Do You Replace A Ceiling Fan Light Switch?
To replace a ceiling fan light switch, turn off the power supply. Unscrew and remove the switch cover. Disconnect the wires from the old switch and remove it. Connect the wires to the new switch, ensuring proper color coding. Screw the switch cover back on and restore the power supply.
How To Wire A Ceiling Fan With One Switch?
To wire a ceiling fan with one switch, first turn off the power at the breaker box. Attach the fan’s mounting bracket to the ceiling. Connect the fan’s wires to the corresponding ceiling wires using wire connectors. Securely fasten the fan blades and turn the power back on to test the fan.
Can You Install A Ceiling Fan With One Switch?
Yes, you can install a ceiling fan with one switch.
How Many Wires Does A Ceiling Fan Switch Have?
A ceiling fan switch usually has three wires. These wires are connected to the fan’s motor, power source, and the light fixture (if applicable).
Conclusion
Installing a ceiling fan switch may seem like a daunting task, but with the right guidance, it can be a breeze. By following the step-by-step instructions provided in this blog post, you can successfully install a ceiling fan switch in no time.
Remember to prioritize safety and take necessary precautions while working with electricity. With the right tools and knowledge, you can enjoy the benefits of a properly functioning ceiling fan. So, go ahead and give it a try!