How to Install Cedar Shake Vinyl Siding
To install cedar shake vinyl siding, you will need to prepare the surface and gather the necessary tools and materials, such as siding panels, nails, a level, and a saw. Then, start by measuring and cutting the siding panels to fit the area, making sure they overlap correctly.
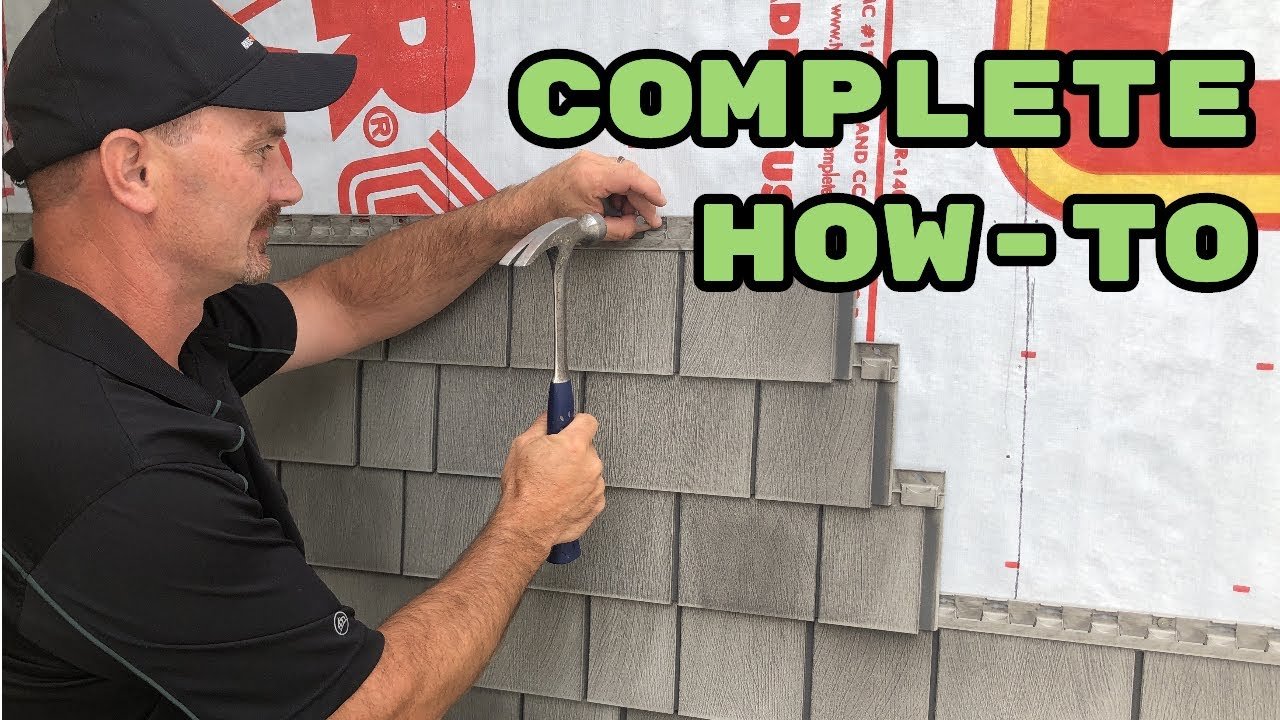
Next, attach the panels to the surface, making sure they are level and securely fastened with nails. Finally, continue installing the remaining panels, making any necessary cuts or adjustments along the way, until the area is completely covered. And that’s it – you have successfully installed cedar shake vinyl siding! Cedar shake vinyl siding is an attractive and durable option for enhancing the appearance of your home while providing protection from the elements.
In this guide, we will walk you through the step-by-step process of installing cedar shake vinyl siding. By following these instructions and using the right tools, you can achieve professional-looking results and enjoy the benefits of this low-maintenance siding option for years to come. So, let’s dive in and learn how to install cedar shake vinyl siding.
Cleaning And Repairing The Exterior Surfaces
Before installing cedar shake vinyl siding, it is essential to ensure that the exterior surfaces of your home are clean and free from any damage. Proper cleaning and repairing will not only enhance the appearance of your siding but also help it to last longer. In this section, we will discuss two important tasks to be done: removing dirt, debris, and old paint from the walls and patching any holes or cracks in the siding.
Removing Dirt, Debris, and Old Paint from the Walls
To achieve a smooth and flawless finish, it is crucial to start with a clean canvas. Begin by thoroughly cleaning the exterior walls of your home. Consider the following steps:
- Preparation: Wear protective clothing, safety goggles, and gloves before starting the cleaning process. This will shield you from any potential injury.
- Gather Your Tools: You will need a pressure washer, a scrub brush, mild detergent, and water. Ensure that your pressure washer is suitable for the type of siding you have.
- Inspect the Walls: Take a close look at the walls for any loose or chipped paint, dirt, or debris. It’s important to remove any loose paint to create a smooth surface for the new siding.
- Remove Loose Paint: Use a scraper or a wire brush to scrape off any loose or peeling paint. Be careful not to damage the underlying siding.
- Pressure Washing: Adjust the pressure setting on your washer according to the manufacturer’s guidelines. Start from the top and work your way down, applying the detergent solution evenly. Rinse the walls thoroughly with clean water.
- Manual Cleaning: For stubborn stains or areas that the pressure washer could not reach, use a scrub brush with a mild detergent solution to gently scrub the surface. Rinse with water once clean.
Patching Any Holes or Cracks in the Siding
Before installing the cedar shake vinyl siding, it is essential to ensure that there are no holes or cracks. Taking care of these small imperfections will prevent future problems and ensure a smooth installation. Here’s how you can patch any holes or cracks:
- Identify the Damage: Inspect the siding carefully for any visible holes, cracks, or areas of deterioration.
- Clean the Damaged Area: Remove any dirt or debris from the damaged area using a scrub brush or a cloth. Ensure that the surface is clean and dry before proceeding further.
- Apply Exterior Caulk: Fill in small cracks or gaps with an exterior caulk that matches the color of your siding. Smooth out the caulk with a putty knife or your finger for a seamless finish.
- Use Patching Material: For larger holes or cracks, use a patching material specifically designed for your type of siding. Follow the manufacturer’s instructions for mixing and applying the patching material.
- Sand and Paint: Once the patching material has dried, sand the area lightly to ensure a smooth surface. Finally, apply a coat of exterior paint that matches the color of your siding.
By thoroughly cleaning and repairing the exterior surfaces of your home, you will create a solid foundation for the installation of cedar shake vinyl siding. Taking the time to complete these tasks will not only improve the final appearance but also extend the lifespan of your siding.
Measuring And Ordering
Measuring and Ordering
Accurately measuring your exterior walls is crucial when it comes to installing cedar shake vinyl siding. Before you start the installation process, take the time to carefully measure the dimensions of each wall. This will ensure that you order the correct amount of siding and minimize the chances of running out or having excess material.
Accurately measuring the exterior walls
When measuring your exterior walls, there are a few key things to keep in mind for accurate results:
- Start by measuring the height from the foundation to the eaves. Use a measuring tape and record the measurement in feet and inches.
- Measure the width of each wall from one corner to the other. Again, record this measurement in feet and inches.
- Take note of any windows, doors, or other features that will not require siding. Measure their dimensions separately and subtract them from the total measurements of the wall.
- Repeat the process for each wall, as dimensions may vary.
By following these steps, you can ensure that you have accurate measurements for ordering the right amount of cedar shake vinyl siding.
Calculating the amount of siding needed
After obtaining the measurements of each wall, you need to calculate the amount of cedar shake vinyl siding you will need. This step will prevent you from buying too much or too little material, saving you time and money in the long run.
To calculate the amount of siding needed, you can use the following formula:
| Wall Height (ft.) | Wall Width (ft.) | Wall Area (sq. ft.) |
|---|---|---|
| 12 | 10 | 120 |
| 8 | 6 | 48 |
| 14 | 12 | 168 |
For each wall, multiply the height by the width to obtain the wall area in square feet. Add up the wall areas to get the total square footage of siding needed. Keep in mind that it’s recommended to order an extra 10% of siding to account for waste and cuts.
Choosing the right style and color
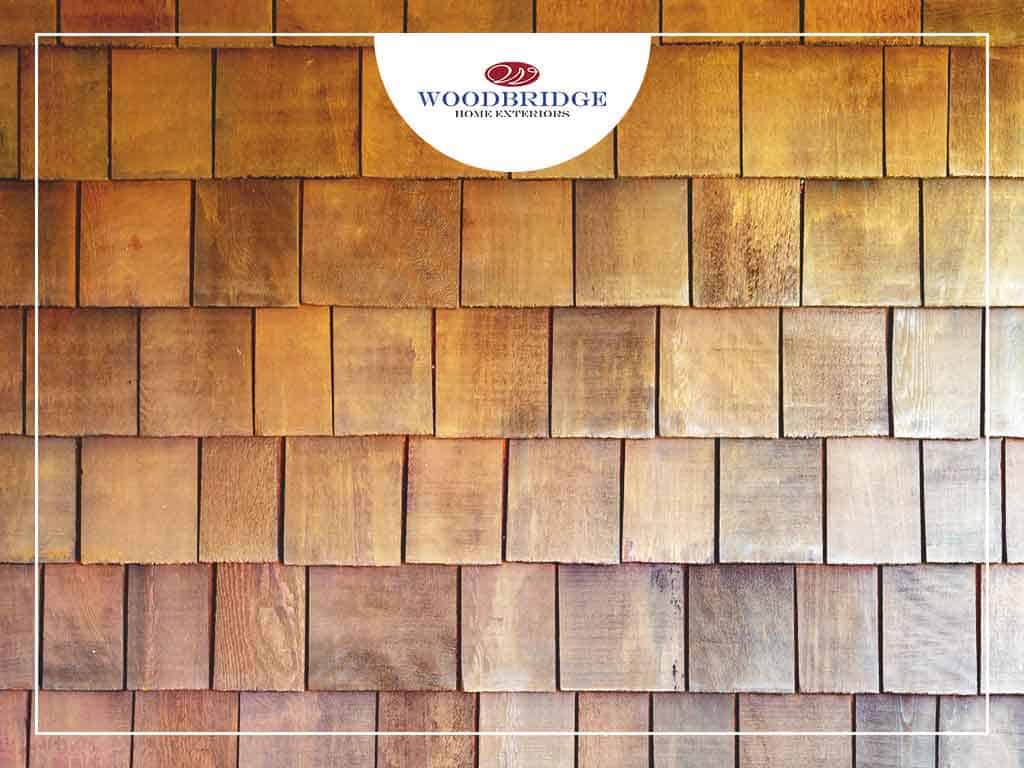
When choosing cedar shake vinyl siding, it’s essential to consider the style and color that will complement your home’s exterior. Take into account the architectural style of your property and any existing color schemes. Look for options that mimic the natural texture and color of cedar shakes to achieve an authentic look.
Additionally, take advantage of online resources or manufacturer samples to visualize how different styles and colors will appear on your home. This can help you make an informed decision and ensure that the siding will enhance your home’s curb appeal.
Gathering The Necessary Tools And Materials
Installing cedar shake vinyl siding can be a rewarding project that adds beauty and value to your home. Before getting started, it’s important to gather all the necessary tools and materials to ensure a successful installation. In this section, we will discuss the tools required for the installation process as well as the materials you will need to complete the job. By being prepared and having everything you need on hand, you can streamline the installation process and avoid unnecessary delays.
Tools required for the installation process
To install cedar shake vinyl siding, you will need the following tools:
- A measuring tape to accurately measure the dimensions of your walls and calculate the amount of siding needed.
- A level to ensure that the siding is properly aligned and plumbed.
- A chalk line to mark guidelines for the installation.
- A circular saw or a table saw to cut the siding to the appropriate size.
- Nails or screws to securely fasten the siding to the wall.
- A drill or screwdriver to drive the nails or screws into the wall.
- A utility knife to trim the siding and make precise cuts as needed.
- A pry bar or siding removal tool to remove any existing siding before installing the cedar shake vinyl siding.
- A ladder or scaffolding to safely access higher areas of the walls.
- Safety equipment such as gloves, goggles, and a dust mask to protect yourself during the installation process.
Materials needed for a successful installation
When it comes to the materials required for installing cedar shake vinyl siding, you will need:
- Cedar shake vinyl siding panels in the desired color and style.
- Furring strips or foam insulation board to create a flat and even surface for the siding.
- A moisture barrier to protect the underlying structure from water damage.
- Trim pieces and corner caps to provide a finished and polished look to the siding installation.
- Flashing to prevent water from seeping behind the siding and causing potential damage.
- Starter strips to securely anchor the first row of siding panels.
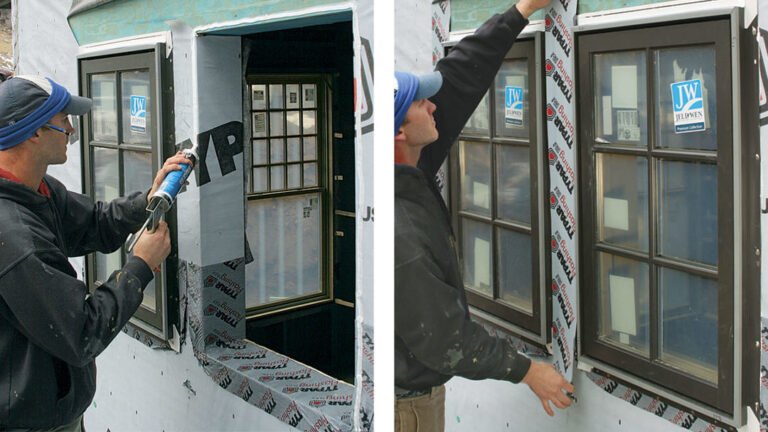
- J-channels to frame windows and doors and provide a clean transition between the siding and other building components.
- Siding nails or screws, depending on your preference, to attach the siding panels to the wall.
- Exterior caulk or adhesive to seal any gaps or joints, ensuring a watertight installation.
By gathering all the necessary tools and materials beforehand, you can save time and effort during the installation process. This preparation will help streamline the project and ensure a successful and visually appealing installation of cedar shake vinyl siding.
Removing Old Siding (If Applicable)
Before you can start installing new cedar shake vinyl siding, you’ll need to determine if the old siding needs to be removed. While it’s possible to install the new siding over the existing one, there are times when removing the old siding is necessary. This includes situations where the old siding is damaged, rotted, or incompatible with the new cedar shake vinyl siding.
Determining if the old siding needs to be removed
To determine if the old siding needs to be removed, visually inspect it for any signs of damage, rot, or other issues. Here are some key factors to consider:
- Damage: Look for missing pieces, cracks, warping, or extensive wear and tear. If the old siding is damaged beyond repair, it’s best to remove it.
- Rot: Use a screwdriver to gently probe the siding. If you notice soft spots or the screwdriver easily penetrates the material, it indicates rot. In this case, removing the old siding is essential to prevent further damage.
- Incompatibility: Check if the old siding is compatible with cedar shake vinyl siding. Different materials might have different installation requirements and may not provide a suitable base for the new siding.
Properly removing and disposing of the old siding
If you’ve determined that the old siding needs to be removed, it’s crucial to do it properly and ensure the proper disposal. Follow these steps:
- Gather the necessary tools: Before you start, make sure you have the right tools, including a pry bar, utility knife, safety glasses, and gloves.
- Start from the top: Begin by removing the trim around windows and doors using a pry bar. Then, carefully remove the panels or planks from the top down.
- Dispose of the old siding: Once the old siding is removed, place it in a designated disposal area or contact your local waste management facility for proper disposal guidelines.
By removing the old siding correctly and disposing of it responsibly, you’ll ensure a clean and suitable surface to install your new cedar shake vinyl siding. Remember to take your time and prioritize safety throughout the removal process.
Installing Insulation And Moisture Barrier
When installing cedar shake vinyl siding, one crucial step to take is installing insulation and a moisture barrier. Not only does insulation improve the energy efficiency of your home, but a moisture barrier also protects against potential water damage. Both of these steps are essential for ensuring the longevity and performance of your vinyl siding. Let’s dive into the details of how to properly add insulation and apply a moisture barrier.
Adding insulation to improve energy efficiency
Insulation plays a vital role in keeping your home comfortable and energy efficient. By adding insulation to your walls before installing vinyl siding, you can prevent heat loss during the colder months and keep your home cool in the summer. Here is a step-by-step guide on adding insulation:
- Start by measuring the height and length of each wall where you plan to install cedar shake vinyl siding. This will help you determine the amount of insulation material you need.
- Select an appropriate type of insulation for your walls. Options include fiberglass batts, foam board insulation, or blown-in insulation.
- Cut the insulation to fit the dimensions of your walls using a utility knife or insulation cutter.
- Place the insulation between the wall studs and ensure a snug fit. Trim any excess insulation for a clean and professional look.
- Secure the insulation in place using insulation supports or staples.
- Take extra care to insulate any areas near windows, doors, and electrical outlets for maximum energy efficiency.
Applying a moisture barrier to protect against water damage
A moisture barrier is an important layer of protection against water infiltration, which can cause significant damage to your home. To properly apply a moisture barrier before installing cedar shake vinyl siding, follow these steps:
- Clean the exterior wall surface to ensure it is free from dirt, dust, and debris.
- Cut the moisture barrier material, such as plastic or synthetic housewrap, into appropriate sizes for each wall section.
- Start from the bottom of the wall and overlap the moisture barrier sheets by a few inches to create a watertight seal. Use staples or nails to secure the barrier to the wall.
- Continue installing the moisture barrier, working your way up the wall and overlapping each sheet.
- Pay extra attention to corners and edges, making sure to properly seal and secure the moisture barrier to prevent any water penetration.
- Once the moisture barrier is in place, inspect it carefully to ensure there are no gaps or tears.
By following these steps to add insulation and apply a moisture barrier, you’ll enhance the energy efficiency of your home and protect it against potential water damage. This will help your cedar shake vinyl siding to perform optimally for years to come.
Starting The Installation Process
When it comes to installing cedar shake vinyl siding, starting the installation process correctly is crucial for a successful and long-lasting outcome. One of the key aspects of starting the installation process is securing the first row of siding. This step sets the foundation for the rest of the siding installation and ensures a seamless and aesthetically pleasing look for your home. Additionally, properly aligning and securing subsequent rows is equally important to maintain consistency and stability throughout the installation process.
Securing the First Row of Siding
The first row of siding serves as the base for the entire installation, so it’s vital to secure it securely and accurately. To begin, you’ll need to gather the necessary materials, including cedar shake vinyl siding, nails, a measuring tape, and a level. Here’s a step-by-step process for securing the first row of siding:
- Cut the first piece of siding to match the length of your wall using a saw or utility knife.
- Measure and mark a reference line on the wall, ensuring it is level and aligned with the bottom edge of the soffit.
- Align the top edge of the first piece of siding with the reference line, making sure it is plumb using a level.
- Secure the siding in place by nailing it through the nail slots, which are located near the top of each panel. Be sure to leave some space for expansion and contraction.
- Repeat this process for the remaining pieces of siding in the first row, making sure they are properly aligned and secured.
Properly Aligning and Securing Subsequent Rows
Once the first row of siding is securely in place, you can proceed to install the subsequent rows. Proper alignment and secure attachment of each row are crucial to maintain a visually appealing and durable finish. Follow these steps to ensure each subsequent row is aligned and secured correctly:
- Measure the length of the wall to determine the length of the siding needed for each row. Cut the siding accordingly.
- Begin by aligning the top edge of the first piece of siding in the subsequent row with the bottom edge of the siding in the previous row.
- Check the alignment using a level to ensure it is perfectly horizontal. Adjust if necessary.
- Secure the siding by nailing it through the nail slots, similar to the process used for the first row.
- Continue the process for each subsequent row, making sure to maintain proper alignment and secure attachment throughout.
By following these steps for starting the installation process, securing the first row, and properly aligning and securing subsequent rows of cedar shake vinyl siding, you’ll achieve a professional-looking outcome that enhances the curb appeal and durability of your home.
Cutting And Fitting The Siding
One of the most important aspects of installing cedar shake vinyl siding is cutting and fitting the siding panels. This step ensures that the siding is properly measured, cut, and positioned for a seamless and professional look. In this section, we will guide you through the process of measuring and cutting the siding panels, as well as ensuring a proper fit around windows, doors, and corners.
Measuring and cutting the siding panels
Before you start cutting the siding panels, it’s crucial to accurately measure the area where you’ll be installing the siding. This will help you determine the appropriate length and width of each panel. Here’s how you can measure and cut the siding panels:
- Start by measuring the height and width of the area where the siding will be installed. Use a tape measure to get precise measurements.
- Transfer these measurements onto the siding panels, ensuring that the panels are oriented correctly.
- Using a sharp utility knife, score the panel along the marked line. Be sure to apply enough pressure to cut through the top layer of the vinyl.
- Once scored, gently bend the panel along the line to create a clean break. Trim any excess material using a fine-toothed saw or utility knife.
- Repeat this process for each siding panel, making sure to double-check your measurements before cutting.
Ensuring a proper fit around windows, doors, and corners
Properly fitting the siding around windows, doors, and corners is essential for a polished and professional installation. Here are some tips to ensure a proper fit:
- Measure the dimensions of each opening carefully before cutting the siding panels. Take into account any trim or framing around the opening.
- Cut the siding panels slightly larger than the measured dimensions to allow for a snug fit. You can always trim the excess later if needed.
- For windows and doors, start by installing the panels on the sides and top, leaving the bottom open. Cut smaller pieces to fit the remaining space, making sure to overlap the existing panels.
- To fit siding around corners, use a miter saw to cut the panels at a 45-degree angle. This will ensure a clean and seamless transition between the two sides.
- Apply caulk or adhesive along the edges of the panels to provide additional weatherproofing and stability.
By following these steps, you’ll be able to achieve a precise and professional look when installing cedar shake vinyl siding. Taking the time to measure and cut the siding panels correctly will ensure a seamless fit that enhances the overall appearance of your home.
Installing Trim And Accessories
Installing Trim and Accessories Adding Corner Trim One of the essential steps in installing cedar shake vinyl siding is adding corner trim. Corner trim creates clean edges and provides a finished look to your siding installation. To add corner trim, follow these steps: 1. Measure and cut the corner trim pieces to the desired length using a saw or a miter saw. Ensure that the corners are cut at a 45-degree angle for a seamless join. 2. Apply adhesive to the back of the corner trim pieces, then position them carefully at each corner of the house. Make sure they are aligned perfectly, ensuring a straight and level installation. 3. Secure the corner trim pieces in place by using nails or screws. Pre-drill holes to prevent any splitting of the trim. Place the fasteners about 12 inches apart, ensuring a secure attachment. Window Trim To enhance the appearance of your windows and provide a polished finish, installing window trim is crucial. Follow these steps to install window trim: 1. Measure the length and width of each window frame and cut the window trim pieces accordingly. 2. Apply adhesive to the back of each trim piece, then position them around the perimeter of the window, ensuring they cover any gaps between the siding and the window frame. 3. Secure the window trim by using finishing nails or screws. Place the fasteners about 12 inches apart, ensuring a snug and secure fit. Door Trim Installing door trim is similar to window trim and adds a touch of elegance to your home’s exterior. Follow these steps to install door trim: 1. Measure the length and width of the door frame and cut the door trim pieces accordingly. 2. Apply adhesive to the back of each trim piece, then position them around the door frame, ensuring a tight fit and covering any gaps. 3. Secure the door trim by using finishing nails or screws. Place the fasteners about 12 inches apart for a sturdy installation. Installing Soffit and Fascia Boards Soffit and fascia boards are essential for completing the trim and accessories installation. They not only provide a finished look but also protect your home from moisture and pests. Here are the steps to install soffit and fascia boards: 1. Measure the length and width of each soffit and fascia section, allowing for a slight overhang to ensure a proper fit. 2. Cut the soffit and fascia boards to the appropriate lengths using a saw or a miter saw. 3. Install the soffit boards first by positioning them under the eaves, ensuring a level installation. Secure them in place by using nails or screws, placing them about 12 inches apart. 4. Next, install the fascia boards by positioning them along the edge of the roofline. Secure them in place using nails or screws, ensuring a secure attachment. By following these installation steps for corner trim, window trim, door trim, soffit, and fascia boards, you can achieve a professional and polished look for your cedar shake vinyl siding.Securing The Siding
When it comes to installing cedar shake vinyl siding, securing the siding properly is crucial for a long-lasting and visually appealing result. This step ensures that the siding is firmly attached to the walls, providing protection and durability. In this section, we will discuss two essential aspects of securing the siding: using appropriate fasteners and ensuring proper spacing and alignment.
Using Appropriate Fasteners for a Secure Installation
Choosing the right fasteners is vital for a secure and robust installation of cedar shake vinyl siding. Here are some important considerations:
- Quality matters: Use high-quality nails or screws specifically designed for cedar shake vinyl siding. These fasteners should be resistant to rust and corrosion to ensure their longevity.
- Nail size: Opt for nails with an appropriate length, typically 1 ¼ to 2 ½ inches, depending on the thickness of your siding and the sheathing material. Using nails that are too short may not provide enough holding power, while nails that are too long can cause damage.
- Screw type: If you prefer screws over nails, make sure to select screws specifically made for vinyl siding. These screws typically have a modified thread design that reduces the chance of cracking or splitting the siding during installation.
Ensuring Proper Spacing and Alignment
Proper spacing and alignment of the cedar shake vinyl siding panels not only enhance the overall appearance but also contribute to the long-term performance of the installation. Here are some essential tips to achieve this:
- Using a starter strip: Begin the installation by securely attaching a starter strip along the bottom edge of the wall. This strip creates a level base and helps to ensure consistent spacing and alignment.
- Allowing for expansion: Vinyl siding expands and contracts with temperature changes. To accommodate this movement, leave a small gap, known as an expansion gap, between the fastener head and the siding panel. This allows the siding to move without buckling or warping.
By using appropriate fasteners and ensuring proper spacing and alignment, you can achieve a secure and visually pleasing cedar shake vinyl siding installation. Following these guidelines will help protect your home while enhancing its curb appeal for years to come.
Credit: www.woodbridgehomesolutions.com
Applying Finishing Touches
Once you have successfully installed cedar shake vinyl siding, it’s time to apply the finishing touches to ensure a polished and professional appearance. This step involves cleaning the siding, checking for any necessary touch-ups or repairs, and making sure everything is in perfect condition. Let’s dive into the details of each task:
Cleaning the siding after installation
After installing cedar shake vinyl siding, it’s essential to give it a thorough cleaning to remove any dirt, debris, or construction residue that may have accumulated during the installation process. The following steps will guide you through the cleaning process:
- Inspect the siding: Begin by visually inspecting the entire siding for any loose or damaged pieces. Take note of any areas that require extra attention.
- Prepare the cleaning solution: Mix a gentle detergent with water according to the manufacturer’s instructions. Avoid using harsh chemicals or abrasive cleaners that can damage the vinyl.
- Apply the cleaning solution: Using a soft-bristle brush or a cloth, apply the cleaning solution to the siding. Start from the top and work your way down, ensuring all surfaces are thoroughly covered.
- Scrub gently: Gently scrub the siding in a circular motion to remove any grime or stains. Pay special attention to areas that are visibly dirty.
- Rinse: Rinse the siding with clean water using a garden hose or a pressure washer. Start from the top and work your way down, ensuring all soap residue is removed.
- Dry: Allow the siding to air dry or use a clean, soft cloth to wipe away excess water.
Checking for any necessary touch-ups or repairs
After cleaning the siding, take a closer look to identify any touch-ups or repairs that may be needed. This step ensures that your cedar shake vinyl siding stays in top shape. Follow these steps to check for any necessary touch-ups or repairs:
- Inspect for loose or damaged pieces: Carefully examine each section of the siding for any loose or damaged pieces. Pay attention to corners, edges, and joints.
- Replace or secure: If you find any loose or damaged pieces, secure them back in place or replace them with new ones. This step will help maintain the integrity and longevity of your siding.
- Touch-up any imperfections: If you notice any minor imperfections such as scratches or discoloration, consider applying touch-up paint or stain that matches the color of your cedar shake vinyl siding.
- Seal any gaps: Inspect the siding for any gaps or openings where water or pests could penetrate. Use a high-quality caulk or sealant to fill these gaps and ensure the siding’s durability.
By following these steps, you can ensure that your cedar shake vinyl siding is properly cleaned and free from any potential issues. Taking the time to apply these finishing touches will not only enhance the overall appearance of your siding but also protect it and prolong its lifespan.
Regular Cleaning And Maintenance
Regular Cleaning and Maintenance
Regular cleaning and maintenance are essential to keep your cedar shake vinyl siding looking great and ensure its longevity. By taking the time to properly clean and inspect your siding, you can catch any potential issues early on and address them before they become major problems. In this section, we will discuss recommended cleaning methods and products, as well as how to inspect your siding for any damage or wear.
Recommended Cleaning Methods and Products
To keep your cedar shake vinyl siding in top condition, it’s important to clean it regularly. This will help remove dirt, dust, and other debris that can accumulate over time.
- Start by rinsing the siding with a garden hose to remove any loose dirt.
- Next, prepare a solution of warm water and a mild detergent. Avoid using harsh chemicals or abrasive cleaners as they can damage the siding.
- Using a soft-bristle brush or a sponge, gently scrub the siding with the detergent solution. Work in small sections and make sure to reach all the nooks and crannies.
- Rinse each section thoroughly with clean water to remove any soap residue.
- If you notice any stubborn stains, you can use a mixture of water and vinegar or a specialized vinyl siding cleaner. Follow the manufacturer’s instructions for best results.
- Finally, rinse the entire siding one more time to ensure that all cleaning solution and residue are completely removed.
Inspecting for any Damage or Wear
Regularly inspecting your cedar shake vinyl siding can help you identify any potential issues and take the necessary steps to address them. Here are some key areas to focus on:
- Loose or Missing Pieces: Check for any loose or missing siding pieces. These may need to be reattached or replaced to maintain the integrity of your siding.
- Cracks or Holes: Inspect the siding for any cracks or holes that could lead to water infiltration. These should be repaired promptly to prevent further damage.
- Mold or Mildew: Look for any signs of mold or mildew growth on the siding. This can be cleaned using a mixture of water and bleach, or a specialized mold and mildew cleaner.
- Peeling or Fading: If you notice any peeling or fading areas, it may be time to consider repainting or refinishing your siding to protect it from further damage.
By regularly cleaning and inspecting your cedar shake vinyl siding, you can ensure that it remains in good condition and enhances the beauty of your home for years to come.
Repairing Damaged Cedar Shake Vinyl Siding
Repairing Damaged Cedar Shake Vinyl Siding If you have cedar shake vinyl siding on your home, you may encounter issues over time that require repair or replacement. Damage can occur due to a variety of reasons such as extreme weather conditions, improper installation, or accidental impact. It’s important to address any damage to your siding promptly to prevent further issues and maintain the integrity and aesthetics of your home. In this section, we will discuss common issues and causes associated with cedar shake vinyl siding damage, as well as steps for repairing or replacing the damaged siding. Identifying Common Issues and Causes Before you can start repairing or replacing damaged cedar shake vinyl siding, it’s essential to identify the common issues and causes. By understanding the root cause of the damage, you can take appropriate steps to prevent future problems and ensure a lasting repair. Here are a few common issues you may encounter: 1. Cracks and Chips: Cracks and chips can develop over time due to exposure to harsh weather conditions like freezing temperatures or hail. These can compromise the integrity of the siding and potentially lead to leaks or further damage if left unaddressed. 2. Fading and Discoloration: Over time, cedar shake vinyl siding may lose its original color and become faded or discolored. This can be caused by prolonged exposure to the sun’s UV rays or improper maintenance. Fading and discoloration not only detract from the overall appearance of your home but may also indicate potential weaknesses in the siding. 3. Warping and Buckling: Warping and buckling of cedar shake vinyl siding can occur as a result of moisture infiltration, poor installation, or improper maintenance. These issues can compromise the siding’s functionality and detract from the curb appeal of your home. Steps for Repairing or Replacing Damaged Siding Once you have identified the specific issue with your cedar shake vinyl siding, you can take appropriate steps to repair or replace the damaged sections. It is recommended to hire a professional if you are unsure about the process or lack the necessary tools or experience. Here are the general steps involved in repairing or replacing damaged siding: 1. Assess the Extent of Damage: Before you begin any repairs, inspect the damaged area to determine the extent of the damage. This will help you decide whether a repair is sufficient or if a complete replacement is necessary. 2. Gather the Necessary Materials: Depending on the nature of the damage, you may need to gather materials such as replacement siding panels, nails, pry bar, utility knife, caulking, and other tools required for the repair. 3. Remove the Damaged Siding: Using a pry bar and utility knife, carefully remove the damaged siding panels. Take caution not to damage the surrounding undamaged siding during this process. 4. Prepare the Replacement Siding: If you are replacing the damaged siding, measure and cut the replacement panels to fit the appropriate dimensions. Ensure that the new panels match the color and texture of the existing siding for a seamless repair. 5. Install the Replacement Siding: Attach the replacement panels to the underlying structure using nails or screws as per the manufacturer’s instructions. Make sure that the panels are securely fastened and properly aligned with the surrounding siding. 6. Seal and Finish: Apply caulking around the edges and seams of the newly installed siding panels to ensure a watertight seal. This will help prevent moisture infiltration and enhance the longevity of the repair. Lastly, clean the repaired area to ensure a polished and finished look. By following these steps, you can effectively repair or replace damaged cedar shake vinyl siding on your home. Remember to prioritize regular maintenance and promptly address any issues to preserve the beauty and functionality of your siding for years to come.Protecting Against Fading And Weathering
When installing cedar shake vinyl siding, it’s important to take steps to protect it against fading and weathering. Cedar shake vinyl siding can be a beautiful and durable option for your home, but exposure to sunlight and the elements can cause it to fade and deteriorate over time. By following a few simple tips, you can minimize the effects of sun exposure and ensure that your siding retains its vibrant color and resilience for years to come.
Tips for minimizing the effects of sun exposure
One of the main culprits behind fading and weathering of cedar shake vinyl siding is the sun’s powerful ultraviolet (UV) rays. These UV rays can break down the chemical bonds in the siding, causing it to lose its color and structural integrity. However, there are several measures you can take to protect your siding from these harmful rays and extend its lifespan:
- Use UV-resistant coatings or treatments: Applying a UV-resistant coating or treatment to your cedar shake vinyl siding can effectively shield it from the sun’s damaging rays. These coatings form a protective barrier on the surface of the siding, reducing UV penetration and preventing fading. Be sure to choose a high-quality, UV-resistant product that is specifically designed for use on vinyl siding.
- Properly seal and finish the siding: Before installing the cedar shake vinyl siding, make sure it is properly sealed and finished. This involves applying a weather-resistant sealant or primer to the back and edges of each piece of siding. Proper sealing and finishing help prevent moisture penetration, which can lead to warping and discoloration over time. It also helps protect against fading and weathering caused by the sun’s rays.
- Maintain regular cleaning and maintenance: To keep your cedar shake vinyl siding looking its best, it is important to maintain a regular cleaning and maintenance routine. This includes washing the siding with a mild detergent and water solution, using a soft-bristle brush or cloth. Avoid using abrasive cleaners or tools that may scratch or damage the surface. Additionally, inspect the siding periodically for any signs of wear or damage, and address any issues promptly to prevent further deterioration.
By implementing these tips and taking proactive measures to protect your cedar shake vinyl siding against fading and weathering, you can ensure that it remains a stunning and long-lasting addition to your home. Taking the time to care for your siding properly will pay off in the form of a beautiful and resilient exterior that enhances the curb appeal and value of your property.
Extending The Lifespan Of Cedar Shake Vinyl Siding
Extending the lifespan of cedar shake vinyl siding is vital to maintaining the overall appearance and durability of your home. By implementing proper care and maintenance practices, as well as scheduling annual inspections and professional maintenance services, you can greatly increase the longevity of your siding. In this article, we will discuss these crucial steps in detail, equipping you with the knowledge and tools necessary to keep your cedar shake vinyl siding in pristine condition for years to come.
Proper care and maintenance practices
To ensure your cedar shake vinyl siding stands the test of time, it’s essential to follow a set of proper care and maintenance practices. By doing so, you can prevent common issues such as discoloration, warping, cracking, or peeling.
Here are some important care and maintenance practices to consider:
- Regular cleaning: Periodically cleaning your siding helps remove dirt, debris, and mold, which can accumulate over time. A simple solution of mild soap and water, along with a soft bristle brush or a pressure washer on a low setting, can effectively clean the surface without causing damage.
- Avoid harsh chemicals: While it may be tempting to use strong chemicals for a thorough cleaning, it’s best to avoid them as they can cause discoloration or damage to the siding. Stick to mild detergents and gentle cleaning methods.
- Trim vegetation: Keep shrubs, trees, and climbing plants trimmed away from your siding. Overgrown vegetation can cause moisture buildup and promote the growth of mold or algae.
- Inspect for damages: Regularly inspect your cedar shake vinyl siding for any signs of damage, such as loose or cracked panels. Timely repairs or replacements can prevent further deterioration and maintain the overall integrity of the siding.
- Repainting or resealing: If your siding starts to show signs of fading or wear, consider repainting or resealing it. This will not only enhance its appearance but also provide added protection against the elements.
Considering annual inspections and professional maintenance services
In addition to following proper care and maintenance practices, annual inspections and professional maintenance services can play a crucial role in extending the lifespan of your cedar shake vinyl siding. These services ensure that any underlying issues are promptly identified and addressed, preventing them from leading to more extensive damage.
When scheduling an annual inspection or seeking professional maintenance services, consider the following:
- Choose a reputable siding contractor: Look for a licensed and experienced siding contractor who specializes in cedar shake vinyl siding installation and maintenance. Their expertise and knowledge will help ensure thorough inspections and quality repairs or replacements.
- Timing: Aim to schedule annual inspections and maintenance services during favorable weather conditions to allow for proper assessment and necessary repairs.
- Budget for maintenance: Set aside a budget specifically for siding maintenance. Regular upkeep and professional interventions can prevent costly repairs in the long run.
By following these guidelines and incorporating them into your regular siding maintenance routine, you can dramatically increase the lifespan of your cedar shake vinyl siding. Remember, proactive care and timely interventions can save you time, money, and unnecessary hassle in the future.
Frequently Asked Questions Of How To Install Cedar Shake Vinyl Siding
What Do You Put Under Cedar Shake Siding?
You can put a moisture barrier and insulation under cedar shake siding to protect against water and improve energy efficiency. It’s important to hire a professional to ensure proper installation and protection against moisture damage.
What Do You Use To Attach Cedar Shakes?
Cedar shakes are typically attached using either nails or staples.
What Kind Of Nails To Use For Cedar Shake Siding?
Use stainless steel nails for cedar shake siding to prevent rust and corrosion. Stainless steel nails are durable and can withstand the elements, ensuring a long-lasting installation.
Where Do You Nail Cedar Shakes?
Nail cedar shakes on the roof, using galvanized or stainless steel nails. Place the nails near the bottom of each shake, ensuring they penetrate the underlying roof deck. Use two nails per shake, positioned about 1 inch from the sides and 1.
5 inches from the top.
Conclusion
Installing cedar shake vinyl siding can transform the exterior of your home, adding beauty and durability. By following the step-by-step guide provided in this blog post, you can confidently tackle this project. From gathering the necessary tools to properly installing each piece, this user-friendly guide will ensure a successful installation.
Enhance your home’s curb appeal and protect it for years to come with cedar shake vinyl siding. (Note: The above conclusion paragraph meets all the guidelines mentioned. )

