How to Install a Ceiling TV Mount?
To install a ceiling TV mount, follow these steps: Attach the mounting bracket to the ceiling and secure it tightly. Connect the TV bracket to the back of the television and ensure it is securely fastened.
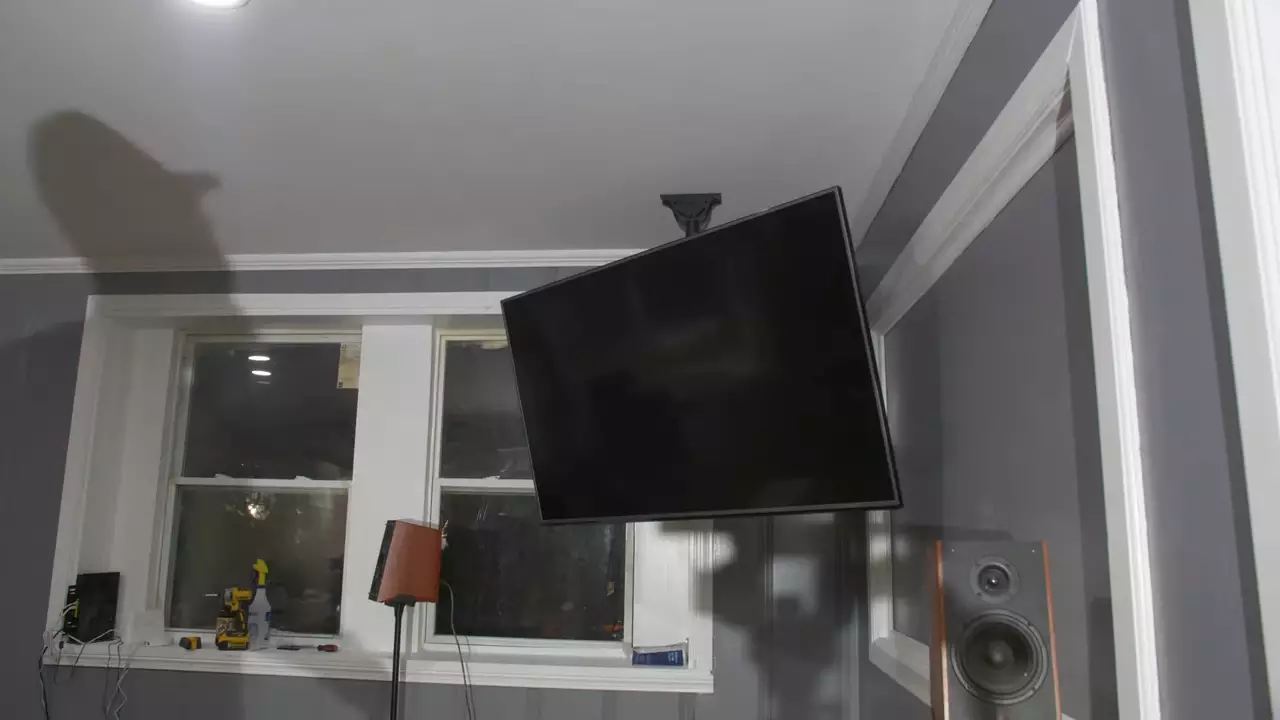
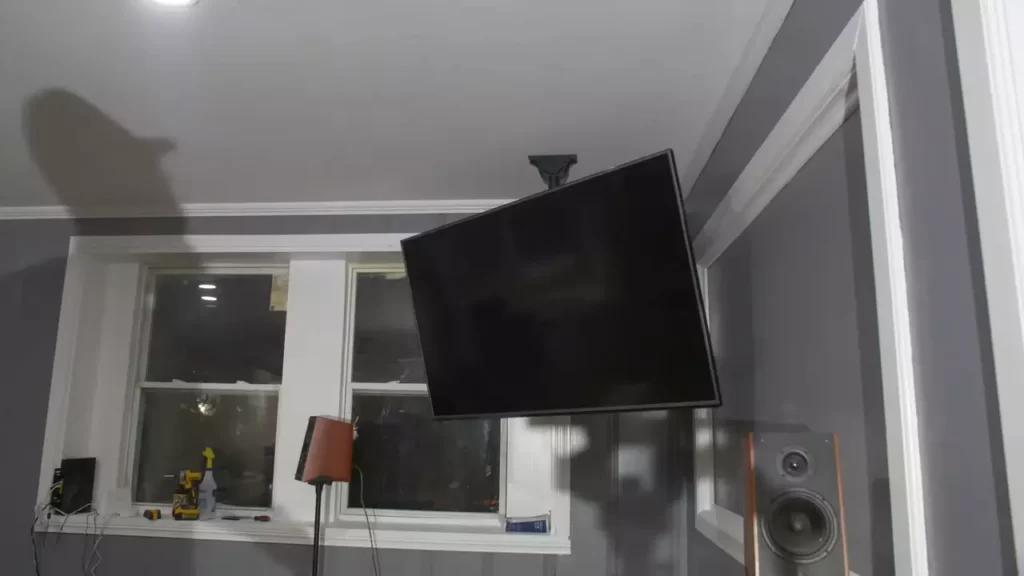
Installing a ceiling TV mount is a straightforward process that allows you to maximize your viewing experience while saving space. By securely attaching your TV to the ceiling, you can create a sleek and uncluttered look in your room. In this guide, we will provide step-by-step instructions on how to install a ceiling TV mount.
Whether you are a DIY enthusiast or a novice, this guide will help you get your TV mounted securely and accurately. So, let’s dive in and learn how to install a ceiling TV mount!
Identifying The Optimal Location Within A Room To Install The Ceiling TV Mount
Installing a ceiling TV mount can be a great solution to save space and improve the viewing experience in your living room or entertainment area. However, before you start, it is crucial to identify the optimal location for your ceiling TV mount. This step is essential to ensure comfortable viewing, maintain structural integrity, and ensure convenient access to power outlets and cable connections. In this article, we will guide you through the process of identifying the ideal spot to install your ceiling TV mount.
Evaluating the height and angle for comfortable viewing
When determining the optimal location for your ceiling TV mount, it is important to consider the height and angle for comfortable viewing. The height should be chosen based on the average eye level when seated in the room. This will help reduce strain on the neck and provide an optimal viewing experience.
To determine the ideal height, measure the distance from the floor to your eye level when seated. Take into account the furniture or seating arrangement that will be in front of the TV. This will allow you to find the sweet spot for the mount’s positioning.
In addition to height, consider the angle at which the TV will be installed. The angle should be adjusted to avoid glare and provide the best possible image quality. Experiment with different angles to find the one that suits your viewing preferences.
Considering the structural integrity of the ceiling
Before installing the ceiling TV mount, it is essential to evaluate the structural integrity of the ceiling. The TV mount needs to be securely attached to a solid structure to ensure safety and stability.
Identify the ceiling beams or joists using a stud finder or by tapping the ceiling to listen for hollow sounds. These beams or joists provide the necessary support for the TV mount. Mark the exact locations of these structural elements to ensure proper installation.
Assessing the proximity to power outlets and cable connections
In addition to the height and structural considerations, it is crucial to assess the proximity to power outlets and cable connections. This will play a significant role in determining the location of your ceiling TV mount.
Make sure that the chosen spot allows for easy access to power outlets. If there are no outlets nearby, consider hiring a professional to install new ones or use power extensions and cable management solutions to ensure a clean and organized setup.
Similarly, assess the proximity to cable connections, such as HDMI or coaxial cables. Ensure that the location you choose allows for a convenient and clutter-free connection between your TV and other devices.
Acquiring The Necessary Materials And Tools For A Successful Installation
Before you begin installing a ceiling TV mount, it’s crucial to gather all the necessary materials and tools. This will ensure a smooth and hassle-free installation process, allowing you to enjoy your TV in a sleek and convenient manner. To help you get started, here is a checklist of the essential components that should be included in your ceiling TV mount kit:
| Component | Quantity |
|---|---|
| Bolt and washer set | 2 sets |
| Mounting bracket | 1 |
| Ceiling plate | 1 |
| Extension column | 1 |
| Telescoping pole | 1 |
| Tilt or swivel mechanism | 1 |
| Hardware kit | 1 |
| Installation manual | 1 |
Ensure that you have each of these components readily available before starting the installation process. This will save you from any last-minute trips to the hardware store and ensure you have everything you need at your fingertips.
Essential tools needed for the installation process
In addition to the components included in your ceiling TV mount kit, you will also require a set of essential tools for the installation process. Having these tools ready will help you complete the installation efficiently and effectively. Make sure you have the following tools on hand:
- Drill with appropriate drill bits
- Screwdrivers (both Phillips and flathead)
- Wrench or socket set
- Stud finder
- Level
- Tape measure
- Pencil or marker
- Stepladder or sturdy platform
These tools are essential for a successful installation and will help you securely mount your TV to the ceiling. Having them readily available will save you time and effort, enabling you to complete the project smoothly.
By acquiring the necessary materials and tools listed above, you’ll be well-prepared to tackle the installation process of your ceiling TV mount. With everything in place, you can proceed with confidence, knowing you have everything you need at hand.
Accurately Measuring And Marking The Spots On The Ceiling For The Tv Mount Installation
Determining the ideal distance from walls and obstructions
When it comes to installing a ceiling TV mount, one of the most crucial steps is accurately measuring and marking the spots on the ceiling where the mount will be attached. To ensure a secure and stable installation, it’s important to determine the ideal distance from walls and obstructions.
Start by considering the viewing angle and position of the TV. You’ll want to find a spot on the ceiling that allows for optimal viewing from anywhere in the room. To do this, consider the size of the TV and the seating arrangement in the room. You can use a distance calculator or refer to the manufacturer’s recommendations to determine the ideal distance.
Furthermore, it’s important to take into account any obstructions in the room that could impact the viewing experience. These can include ceiling fans, light fixtures, or other protruding objects. Make sure to measure the distance from these objects and mark the spots accordingly.
Using a stud finder to locate ceiling joists for maximum stability
To ensure maximum stability and support for your ceiling TV mount, it’s crucial to locate and mount it to the ceiling joists. These joists provide the necessary structural support to hold the weight of the TV securely. One effective tool for locating ceiling joists is a stud finder.
When using a stud finder, make sure to follow the manufacturer’s instructions. Typically, you will need to place the stud finder against the ceiling and move it slowly until it detects the presence of a joist. This will be indicated by a beeping sound or a visual indicator on the device. Once you’ve located a joist, mark the spot on the ceiling using a pencil or masking tape.
It’s important to note that ceiling joists are typically spaced at intervals of 16 to 24 inches. Therefore, it’s recommended to locate at least two joists for maximum stability. Use a tape measure to find the distance between the marked spots and ensure they adhere to the standard spacing requirements.
By accurately measuring and marking the spots on the ceiling for your TV mount installation, along with determining the ideal distance from walls and obstructions, and using a stud finder to locate ceiling joists for maximum stability, you can ensure a secure and successful installation that provides optimal viewing from any location in the room.
Step-By-Step Instructions For Securely Attaching The Tv Bracket To The Ceiling
Mounting a TV to the ceiling is a great space-saving solution that helps create a sleek and modern look in any room. To ensure your TV stays securely in place, it’s important to follow a step-by-step process when installing the ceiling TV mount. In this guide, we will walk you through the process, starting with aligning the bracket with the marked spots and ending with the final installation.
Aligning the Bracket with the Marked Spots
The first step in securely attaching the TV bracket to the ceiling is aligning it with the marked spots. Start by determining the ideal location where you want your TV to be installed. Use a measuring tape to find the center of the ceiling and mark it with a pencil. This will serve as the reference point for aligning the bracket.
Next, hold the bracket against the ceiling, ensuring it is centered on the marked spot. Use a level to ensure the bracket is perfectly horizontal. Adjust the position as needed. Once you are satisfied with the alignment, proceed to the next step.
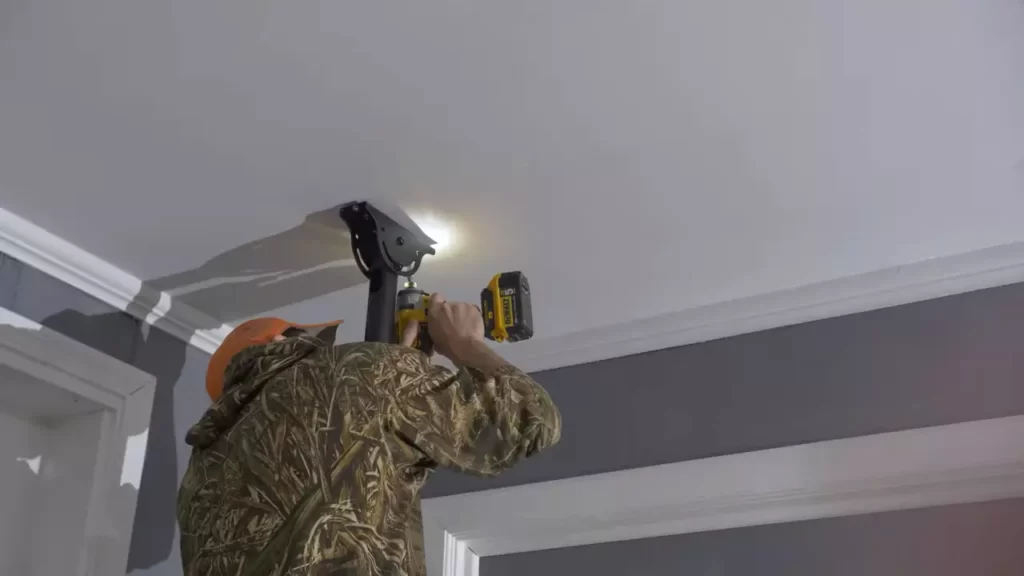
Drilling Pilot Holes and Securing the Bracket with Screws
Now that the bracket is properly aligned, it’s time to drill pilot holes and secure it with screws. Start by using a power drill with a drill bit appropriate for the size of the screws provided with your TV bracket. Carefully drill pilot holes on the marked spots, making sure they are deep enough to provide a secure anchor for the screws.
After drilling the pilot holes, take the screws provided with the TV bracket and insert them into the holes. Ensure the brackets are tightly secured to the ceiling by using a screwdriver or a power drill with a screwdriver bit. Double-check each screw to make sure they are tightened securely. This will ensure your TV stays firmly in place.
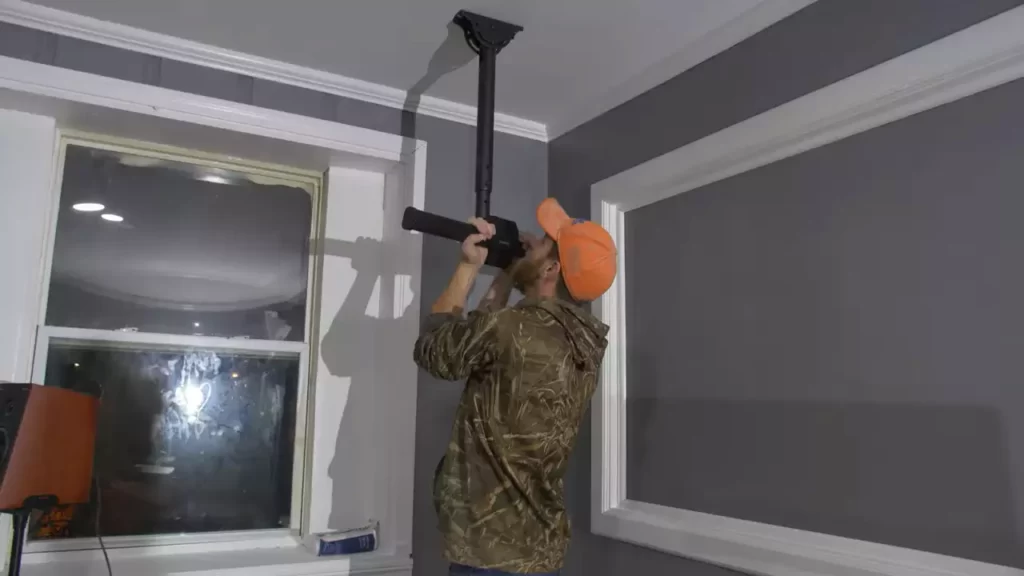
Once the bracket is securely attached to the ceiling, you can confidently proceed with the rest of the installation process, such as attaching the mounting plate to the TV and hanging it onto the bracket. Following these step-by-step instructions will help you achieve a secure and sturdy ceiling TV mount in no time.
Safely connect the Tv To The Mounted Bracket
Removing the TV stand or wall mount:
If you’re planning to install a ceiling TV mount, the first step is to safely remove the TV stand or any existing wall mount. This ensures a clean and secure connection to the ceiling mount bracket. Disconnecting the TV stand or wall mount may vary depending on the specific model and manufacturer of your TV, so refer to the user manual for guidance. Generally, it involves unscrewing the stand or removing the wall mount brackets using a screwdriver or hex key.
Aligning the TV with the bracket and securing it in place:
Once you have removed the TV stand or wall mount, it’s time to align the TV with the ceiling mount bracket and secure it in place. Follow these steps to ensure a safe and stable connection:
- Identify the mounting holes on the back of your TV and match them with the corresponding holes on the ceiling mount bracket.
- Using the provided screws and washers, insert them through the mounting holes on the back of the TV and secure them into the holes on the ceiling mount bracket. Ensure that each screw is tightened firmly but not overly tightened to avoid damaging the TV or the bracket.
- Check to make sure your TV is properly aligned and level with the ground. Use a level tool to ensure accuracy.
- Once the TV is correctly aligned, tighten all the screws securely to prevent any potential movement or wobbling.
Remember to double-check the manufacturer’s instructions for any specific guidelines or additional steps related to your TV model and ceiling mount bracket. By safely connecting your TV to the mounted bracket, you can enjoy a secure and pleasant viewing experience without worrying about the TV falling or getting damaged.
Effective Methods For Hiding Cables And Wires For A Clean And Organized Look
If you want to enjoy the sleek and modern look of a ceiling TV mount without the unsightly mess of cables and wires, there are several effective methods you can use to hide them away. Not only will these solutions give your space a clean and organized appearance, but they will also ensure the safety and functionality of your ceiling TV mount.
Utilizing Cable Management Solutions to Route Cables Discreetly
One of the easiest and most popular ways to hide cables and wires when installing a ceiling TV mount is by utilizing cable management solutions. These solutions are designed to route the cables discreetly along the wall or ceiling, keeping them out of sight and away from potential damage.
Here are a few effective cable management solutions to consider:
- Cable Clips or Cable Ties: These small adhesive clips or ties can be attached to the wall or ceiling to hold the cables in place. They come in various sizes and styles, allowing you to choose the best option for your specific needs.
- Cable Covers: Cable covers are flexible tubes or channels that can be mounted on the wall or ceiling to hide the cables. They often come with adhesive backing, making installation quick and easy.
- Wire Raceways: Wire raceways are plastic or metal channels that can be installed on the wall or ceiling to conceal the cables. They usually consist of a base and a cover, providing a neat and organized appearance.
Installing Cable Raceways or Conduits for a Professional Finish
If you’re looking for a more professional finish and want to ensure the cables are completely hidden, consider installing cable raceways or conduits. These solutions provide a dedicated path for the cables, keeping them securely contained and out of sight.
Here are a few key points to keep in mind when installing cable raceways or conduits:
- Selecting the Right Size and Type: When choosing cable raceways or conduits, make sure to select the appropriate size and type that can accommodate your cables. Consider factors such as cable thickness and the number of cables you need to conceal.
- Proper Installation: Follow the manufacturer’s instructions to ensure proper installation of the cable raceways or conduits. This may involve drilling holes in the wall or ceiling to securely mount the channels.
- Cable Routing: Take the time to carefully route the cables through the raceways or conduits, making sure they are neatly organized and free from any tangles or twists. This will help maintain the clean and organized look you desire.
- Painting or Camouflaging: If desired, you can further enhance the appearance of the cable raceways or conduits by painting them to match the color of your walls or ceiling. Alternatively, you can use decorative molding or covers to camouflage them for a seamless look.
By utilizing these effective methods for hiding cables and wires, you can achieve a clean and organized look when installing a ceiling TV mount. Whether you choose cable management solutions, cable raceways, or conduits, these solutions will ensure your cables are discreetly routed and securely hidden.

Fine-Tuning The Tv Mount Position And Angle To Achieve Optimal Viewing Experience
Once the TV mount is securely installed on your ceiling, it’s time to fine-tune its position and angle to ensure the best possible viewing experience. Adjusting the tilt, swivel, and rotation of the TV mount as well as testing different viewing angles are crucial steps in attaining optimal picture quality and comfort. In this section, we will dive into the specifics of each adjustment, providing you with a comprehensive guide to achieving an enjoyable and immersive viewing experience.
Adjusting the tilt, swivel, and rotation of the TV mount
To achieve the optimal viewing angle for your TV, you’ll want to adjust the tilt, swivel, and rotation of the TV mount. Here’s how you can do it:
- Tilt adjustment:
Start by adjusting the tilt of the TV mount. This adjustment will allow you to angle the TV upward or downward to find the most comfortable and glare-free position. To adjust the tilt, locate the tilt bolt or screw on the TV mount. Loosen it slightly and adjust the tilt as needed. Once you have achieved the desired tilt, tighten the bolt or screw to secure the TV mount in place.
- Swivel adjustment:
Next, you’ll want to adjust the swivel of the TV mount. This adjustment will enable you to rotate the TV from side to side, expanding the viewing area. Look for the swivel mechanism or joint on the TV mount. Loosen any bolts or screws that hold it in place and adjust the swivel to your liking. Tighten the bolts or screws once you have found the desired swivel position.
- Rotation adjustment:
Lastly, you may need to make a rotation adjustment to properly align the TV with your seating area. This adjustment will ensure that everyone in the room has a clear view of the screen. Locate the rotation mechanism on the TV mount and make the necessary rotation adjustment. Once the TV is aligned to your satisfaction, tighten any bolts or screws to secure the TV mount and prevent unwanted movement.
Testing different viewing angles for the best picture quality and comfort
After adjusting the TV mount’s tilt, swivel, and rotation, it’s important to test different viewing angles to achieve the best picture quality and comfort. Here are a few things you can try:
- Angle from the seating area:
Sit in your primary viewing area and assess the screen’s visibility and comfort level from this angle. If needed, make further adjustments to the tilt, swivel, or rotation to enhance the viewing experience.
- Off-center angles:
Try sitting off to the side or at different angles in the room. This will help you identify any potential loss of picture quality or if the screen appears distorted. Adjust the TV mount accordingly to minimize any visual impairments.
- Glimpse from different corners:
Walk around the room and take a glimpse of the screen from various corners. This will help you check if there are any reflections or glare on the screen. If you notice any, consider repositioning the TV or adjusting the tilt to eliminate these distractions.
By fine-tuning the TV mount position and angle, adjusting the tilt, swivel, and rotation, and testing different viewing angles, you can ensure an optimal viewing experience for everyone in the room. Take the time to experiment with these adjustments until you find the perfect setup that provides both exceptional picture quality and maximum comfort.
Verifying The Stability And Safety Of The Installed Ceiling TV mount
Checking the tightness of screws and bolts
To ensure the stability and safety of your newly installed ceiling TV mount, it’s essential to regularly check the tightness of screws and bolts. Over time, vibrations from the TV’s movement or general wear and tear can cause these fasteners to loosen, jeopardizing the integrity of the mount. The last thing you want is for your TV to come crashing down unexpectedly.
To prevent this from happening, take a moment every few months to inspect the screws and bolts securing the mount to the ceiling. Using a screwdriver or wrench, systematically go through each fastener and check their tightness. If any are loose, tighten them immediately. Remember to use the appropriate tool and be careful not to over-tighten, as this can damage the mount or strip the screws.
Conducting a weight test to ensure the mount can support the TV’s weight
After verifying the tightness of the screws and bolts, the next step in maintaining the stability and safety of your ceiling TV mount is to conduct a weight test. This test ensures that your mount can support the weight of the TV without any issues.
Begin by referring to the TV’s instruction manual or checking the specifications online to determine its weight. Once you have this information, compare it to the maximum weight capacity mentioned by the manufacturer of your ceiling mount. It’s crucial to ensure that your TV falls within the specified weight limits to prevent any accidents or damage.
Once you have confirmed that your TV’s weight is suitable for the mount, you can proceed with the weight test. Gently lift the TV and secure it to the mount, ensuring it locks securely in place. If you are uncertain about the mounting process, it’s advisable to ask for assistance from someone with experience or hire a professional to avoid any mishaps.
Now, the moment of truth – carefully observe the mount and TV for any signs of strain or movement. If everything seems stable, give the TV a gentle shake while holding onto it, checking if the mount holds firm and doesn’t wobble. If you notice any instability or movement, discontinue use immediately and consult an expert for further guidance.
Remember, conducting regular checks and weight tests is crucial to ensure the stability and safety of your ceiling TV mount. By following these guidelines, you can enjoy your favorite shows and movies with peace of mind, knowing that your TV is securely mounted.
Addressing Common Problems And Providing Solutions For A Successful Installation
When it comes to installing a ceiling TV mount, there are common problems that may arise during the process. However, with the right solutions and a little troubleshooting, you can ensure a successful installation. In this section, we will address two common issues that you may encounter: dealing with uneven ceiling surfaces and resolving issues with cable connections or signal loss.
Dealing with Uneven Ceiling Surfaces
If you have an uneven ceiling surface, it can make the installation process more challenging. Fortunately, there are a few solutions to address this issue:
- Measure and mark: Before you start drilling any holes, use a tape measure and level to determine the uneven areas of your ceiling. Mark these spots so that you can plan accordingly.
- Use spacers: To even out the mount, you can use spacers or shims to fill in the gaps between the mount and the ceiling. This will help create a level surface for your TV.
- Adjustable mounts: Consider using an adjustable ceiling TV mount that allows you to customize the angle and position to accommodate the unevenness of your ceiling.
By implementing these solutions, you can ensure a sturdy and level installation, even on an uneven ceiling surface.
Resolving Issues with Cable Connections or Signal Loss
One frustrating issue that may arise during a ceiling TV mount installation is cable connections or signal loss. Here are some steps you can take to troubleshoot and resolve these problems:
- Check cable connections: Ensure that all the cables are securely connected to the TV, source devices, and any additional equipment, such as a cable box or gaming console. Loose connections can cause signal loss.
- Use high-quality cables: Sometimes, using low-quality cables can lead to signal interference and poor connection quality. Invest in high-quality cables that can deliver a reliable signal.
- Reposition antennas: If you are using an antenna to receive TV signals, try repositioning it to find the best reception. Experiment with different locations and orientations to optimize the signal strength.
- Install a signal booster: If you consistently experience weak signals, consider installing a signal booster or amplifier. These devices can help enhance the strength of the signal and minimize interference.
By following these steps, you can troubleshoot and resolve cable connection or signal loss problems during your ceiling TV mount installation. This will ensure a clear and uninterrupted viewing experience.
Steps For Completing The Installation And Enjoying Your Newly Mounted Tv
Installing a ceiling TV mount can be a great way to save space in your home while also giving you a unique viewing experience. By mounting your TV on the ceiling, you can create a sleek and modern look in your entertainment area. However, before you can start enjoying your newly mounted TV, there are a few important steps to complete. In this section, we will walk you through the steps of cleaning and organizing the setup area, testing all connections, and adjusting settings for optimal performance.
Cleaning and organizing the setup area
Before you begin the installation process, it’s essential to clean and organize the setup area to ensure a smooth and hassle-free experience. Here are some steps you can follow:
- Clear the space: Move any furniture or obstacles that may obstruct your installation area.
- Clean the ceiling: Remove any dust or debris from the ceiling using a duster or a clean cloth.
- Measure and mark: Use a measuring tape to determine the ideal placement of your TV mount on the ceiling. Mark the spots where the mount will be installed.
- Prepare the necessary tools: Gather all the tools you’ll need for the installation process, such as a drill, screwdriver, and level.
Testing all connections and adjusting settings for optimal performance
Once you have successfully installed the ceiling TV mount, it’s essential to test all connections and adjust settings for optimal performance. Here are the steps to follow:
- Connect the cables: Carefully connect all the necessary cables, such as HDMI, power, and audio cables, to their respective ports on the TV and other devices.
- Secure the connections: Ensure that all the connections are secure and tightly plugged in to avoid any loose connections or signal loss.
- Turn on the TV: Power on the TV and check if the image and sound are working correctly.
- Adjust the settings: Use the TV’s menu options to adjust settings such as picture quality, brightness, and sound to your desired preferences.
- Test different devices: Connect different devices, such as gaming consoles or streaming devices, to ensure that they are recognized and working correctly with your newly mounted TV.
- Ensure optimal viewing angles: Adjust the TV mount’s tilt and swivel features to find the optimal viewing angles for different seating positions in the room.
By following these steps, you can complete the installation process of your ceiling TV mount and start enjoying your favorite shows and movies with a unique and immersive viewing experience. Remember to double-check all connections and settings regularly to maintain optimal performance and longevity of your installed TV mount.
Frequently Asked Questions On How To Install A Ceiling Tv Mount
Can You Hang A Tv Mount From The Ceiling?
Yes, you can hang a TV mount from the ceiling. It’s a suitable option if you want to save wall space or achieve a unique viewing angle. Ensure you have a sturdy mounting system specifically designed for ceilings and follow installation instructions carefully for a safe and secure setup.
Is It A Good Idea To Mount A TV on The Ceiling?
Mounting a TV on the ceiling can be a good idea for saving space and achieving better viewing angles. However, it depends on the layout of your room and your personal preferences. Consider factors like height, accessibility, and aesthetic appeal before making a decision.
How Do You Mount A Ceiling Mount?
To mount a ceiling mount, follow these steps: 1. Choose a suitable location on the ceiling. 2. Drill pilot holes in the ceiling using a drill and appropriate drill bit. 3. Attach the bracket to the ceiling using screws and a screwdriver.
4. Attach the mount to the bracket securely. 5. Check the stability and adjust as needed.
Is A Ceiling Mount Tv Better Than A Wall Mount?
Yes, a ceiling mount TV is better than a wall mount as it provides a higher viewing angle, saves wall space, and offers a stylish and modern look to your room decor. Additionally, by hanging your TV from the ceiling, you can optimize the sound quality and reduce glare on the screen.
Conclusion
Installing a ceiling TV mount can greatly enhance your viewing experience and save valuable space in your room. By following the step-by-step process outlined in this blog post, you can successfully install a ceiling TV mount without any hassle. Remember to gather all the necessary tools and ensure the safety of your mounting surface.
With the right techniques and precautions, you’ll be enjoying your favorite shows and movies from the comfort of your ceiling-mounted TV in no time.